
On this page
Start here
Quick answer
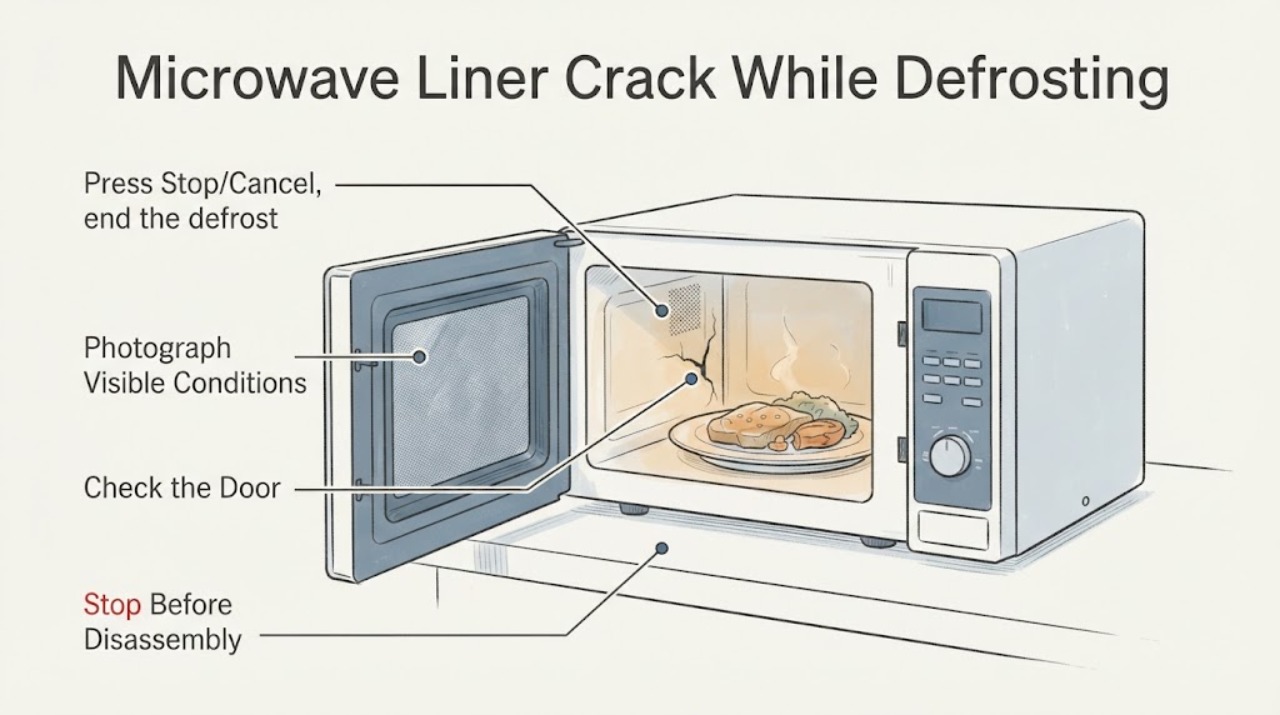
Stop using a microwave when the interior liner has a true crack, hole, open seam, exposed metal, active peeling, burn-through, or arcing. GE’s official cavity guidance says a hole in the cavity wall is non-repairable and calls for discontinuing use, while a Whirlpool microwave manual says not to operate a damaged oven, not to defeat safety interlocks, and to use qualified service. Because the task has no brand or model, do not sand, scrape, paint, seal, or test the area during defrosting. With power disconnected and the cavity cool, photograph the damage, note whether it is only a superficial finish mark or a through-wall/open defect, and use the exact owner manual or qualified microwave service to decide whether the appliance needs repair or replacement.
Work through in order
Diagnostic checks
Use only checks that match the exact appliance or system and its official guide.
-
Check 1
Press Stop/Cancel, end the defrost cycle, and do not start another cycle. Disconnect power only if the plug or breaker is safely accessible without touching hot food, smoke, sparks, or damaged wiring.
Expected result: The oven is stopped and cool, or there is active arcing, smoke, burning, exposed wiring, or another hazard.
Next step: For smoke, sparks, burning or electrical damage, leave the area safe and use the appropriate emergency/electrical response. Otherwise keep the microwave disconnected and proceed only with a cool, external visual inspection.
Why this matters
Why: A cavity crack cannot be cleared by finishing the defrost cycle, and operation of a damaged oven can worsen arcing or create an unsafe condition.
-
Check 2
With power disconnected and the cavity cool, photograph the liner and note whether the mark is a shallow surface chip, a lifted/peeling coating, a crack with an open gap or hole, exposed metal, burn/scorching, or arcing near it. Do not touch the mark with a tool.
Expected result: The damage is only a superficial-looking mark, or it opens through the liner/metal, exposes metal, peels, has a burn mark, or has produced sparks.
Next step: Keep the microwave out of service for any open defect, exposed metal, active peeling, burn-through or arcing. For a superficial-looking mark, use the exact owner manual or qualified service to confirm the model-specific boundary rather than powering it to find out.
Why this matters
Why: GE distinguishes minor surface coating chips from a hole in the cavity wall, but the public task has no model-specific coating specification. A hole, open defect, burn-through, active peeling or arcing is not a user repair.
-
Check 3
Check the location of the damage relative to the microwave inlet cover, cavity walls/ceiling/floor, turntable area, and the surface where the door closes. Do not remove the inlet cover, turntable support, panels, or door parts to inspect behind the liner.
Expected result: The crack is near the inlet-cover area, door-contact/sealing surface, a cavity wall/ceiling/floor, or its location cannot be determined.
Next step: Record the location and model label, then request qualified microwave service. Do not scrape the inlet cover, adjust the door, or defeat an interlock.
Why this matters
Why: These surfaces participate in the microwave cavity and door/sealing system; the opened guidance does not support a generic user repair or a safe powered test around a damaged area.
-
Check 4
If loose food soil surrounds an otherwise intact area, clean only with a soft cloth or sponge and mild soap/water after the cavity is cool and disconnected; avoid steel wool, abrasive pads, sharp scrapers, oven cleaner, bleach, paint and sealant.
Expected result: The soil wipes away without disturbing the cavity finish, or the coating lifts, flakes, catches the cloth, or the crack remains visible.
Next step: Stop cleaning if the finish lifts or the defect remains. Keep the microwave out of service and use the exact manual/service path; do not apply an improvised coating.
Why this matters
Why: Cleaning can remove residue that contributes to arcing, but it cannot restore a cracked or peeling liner and aggressive tools can cause additional cavity damage.
-
Check 5
Read the full model and serial label and provide it with the photos, crack location, defrost setting/food, and any spark, smoke, smell, or turntable event to qualified service.
Expected result: The model is identified and the damage can be reproduced in photos, or the model/manual remains unknown.
Next step: Request model-matched examination. Do not run a final “proof” cycle or open the microwave housing while waiting.
Why this matters
Why: Cavity coatings and repair/replacement policies vary by model; no opened source supports choosing a replacement cavity, paint, sealant, or part from a generic crack description.
Use your observations
Decision map
Find the observation that best matches what you see, then follow the next safe action.
-
PATH 01Next step
What you see
The liner has a through-hole, open seam, exposed metal, active peeling, burn-through, or the microwave produced arcing at the defect.
Do this next
Keep the microwave disconnected and arrange qualified service or replacement assessment. Do not patch, repaint, scrape, or power-test it.
Why this path and its safety boundary
Why it matters: This exceeds a superficial surface mark; GE’s manufacturer guidance treats a cavity-wall hole as non-repairable and directs discontinuing use.
-
PATH 02Next step
What you see
The damage appears to be a small superficial coating chip with no hole, peeling, scorch, or arcing.
Do this next
Do not assume it is safe from appearance alone. Photograph it, verify the exact model manual, and ask qualified service whether the model permits continued use; stop immediately if the mark grows, peels or sparks.
Why this path and its safety boundary
Why it matters: Some manufacturers distinguish minor coating chips from a cavity-wall hole, but this generic task has no model-specific coating or approved repair method.
-
PATH 03Next step
What you see
Only food soil is present and the cavity finish is intact, with no crack, exposed metal, peeling, scorch or arcing.
Do this next
Clean with power off and the cavity cool, dry completely, and continue using only the exact owner manual’s instructions. Do not use abrasive tools or harsh chemicals.
Why this path and its safety boundary
Why it matters: The problem may be residue rather than liner damage, and official cleaning guidance supports a soft cloth/sponge with mild soap and water.
-
PATH 04Next step
What you see
The damage is near the inlet cover or door-contact/sealing area, the door is damaged, or the source of the crack cannot be identified.
Do this next
Do not operate the microwave. Provide the model, photos and location to qualified service; do not remove the inlet cover, door, panels or interlock parts.
Why this path and its safety boundary
Why it matters: The cavity and safety boundary cannot be verified by a generic visual test, and the official manual reserves examination and repair for qualified service.
Helpful context
Understand the symptom
A cavity crack changes the safety decision
A liner crack can mean a superficial coating mark, a deeper coating failure, or a hole/opening in the metal cavity. Those conditions cannot be distinguished safely by scraping or by running another defrost cycle. GE’s official cavity guidance says a hole in the cavity wall is non-repairable and the microwave should be taken out of use; Whirlpool’s manual separately says not to operate a damaged microwave and to use qualified service. With no brand or model in the task, use the conservative stop-use boundary until the damage is identified.
Inspect without enlarging the damage
After stopping the cycle, disconnect power if safely accessible and let the cavity cool. Look at the crack under good light without pressing, scraping, sanding, poking, or trying to paint over it. Record its length and location, whether metal is visible, whether the surface is lifting or peeling, whether there are dark burn marks or repeated sparks, and whether it is near the microwave inlet cover or the door-contact area. A photo and the full model label are more useful to service than a guessed coating repair.
Cleaning cannot repair a cracked liner
KitchenAid and Whirlpool recommend a soft cloth or sponge with mild soap and water for cavity cleaning and warn against steel wool, abrasive pads, sharp tools and harsh cleaners. Use that guidance only for loose food soil around an otherwise intact surface after power is disconnected. Do not use a scraper to determine crack depth, commercial oven cleaner, touch-up paint, sealant, or metal patch; those actions are not an approved generic repair method.
Defrosting does not justify a powered test
The fact that the crack appeared while defrosting does not prove that defrosting caused it, and another cycle could create arcing or worsen cavity damage. Do not test with food, a cup of water, or an empty cavity while the liner condition is uncertain. Give service the model number, crack photos, location, whether sparks or smoke occurred, and whether the turntable and inlet cover were in place.
When checks do not resolve it
Need a professional?
Keep the microwave out of service and arrange qualified service when the liner has a hole, open crack, exposed metal, peeling, scorching, arcing, or damage near the inlet cover or door-contact area; when the model-specific manual cannot classify the mark; or when the oven has smoke, burning smell, a damaged cord, or other damage. Do not power-test, sand, scrape, repaint, seal, remove the inlet cover, open the housing, or defeat safety interlocks.
Common questions
FAQ
Can I keep using a microwave with a small crack in the liner?
Do not decide by size alone. A manufacturer may distinguish a superficial coating chip from a hole, but a true cavity-wall hole, open crack, peeling, exposed metal, scorch or arcing is a stop-use condition. Verify the exact model or have qualified service inspect it before use.
Can I paint or seal the crack?
No generic paint, sealant or patch is an approved fix in the opened sources. Do not scrape or enlarge the damage; photograph it and use the exact owner manual or qualified service.
Does defrosting food make the crack safe to ignore?
No. Defrosting does not establish the crack’s depth or cause. Stop the cycle, disconnect power when safe, and do not run another test with food, water or an empty cavity while the liner is uncertain.
What information should I give a technician?
Provide the full model/serial label, clear photos, crack location, whether metal is visible or the finish is peeling, and whether there was arcing, smoke, smell or a damaged turntable/inlet-cover area.
Read the exact guide
Official sources
- Whirlpool Microwave Oven Owner’s Manual W11083574Whirlpool Corporation · Opened official Whirlpool owner manual used only for general microwave safety: do not operate a damaged oven, do not defeat interlocks, do not operate with a damaged door/seal/latch, and use qualified service. It is not a model-specific liner repair manual for this task.
- Cleaning the Interior or Cavity - Countertop MicrowaveKitchenAid Product Help · Opened KitchenAid official cavity-cleaning guidance used for the nonabrasive, power-off/cool external cleaning boundary and keeping the inlet cover, rack supports and door-contact area clean. It is not used to authorize repair of a crack.
- Microwave - Cavity Repair Needed Due to Arcing, Chipping, Peeling or ScorchingGE Appliances Support · Opened GE official support guidance used for the general distinction between minor surface coating chips and a cavity-wall hole, and for the stop-use boundary when a hole, peeling or arcing is present. It is not treated as a brand-specific repair policy for an unidentified microwave.
Community feedback
Share a repair observation
Share a plain-text repair observation. Accepted observations are published automatically; this page may take a moment to update.