
On this page
Start here
Quick answer
Protect the floor first, then identify whether water is coming from the external supply, dispenser area, door, or inside the cabinet. Turn off the refrigerator's water supply if a valve or line is wet, and do not remove sealed panels to chase an internal leak. A continuously running leak, damaged line, or water near electrical parts needs Monogram service.
Before you begin
Safety first
- Do not open sealed refrigeration panels, probe wiring, scrape evaporator ice, or bypass a water shutoff. Keep water away from electrical connections.
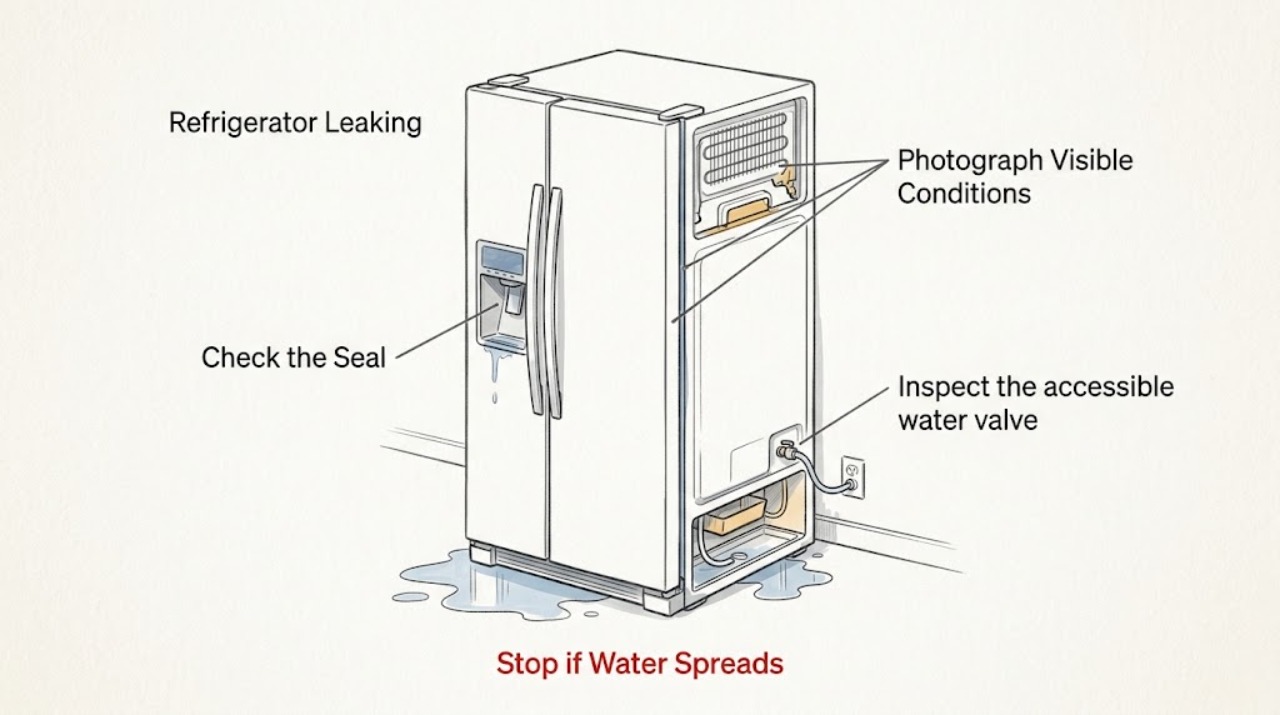
Work through in order
Diagnostic checks
Use only checks that match the exact appliance or system and its official guide.
-
Check 1
Unplug only if water is reaching the plug or electrical area; otherwise keep the refrigerator closed, dry the floor, and photograph where fresh water first appears.
Expected result: Water is near the power connection, or the first wet point is at the front, dispenser, door edge, or rear connection.
Next step: Keep clear of wet electrical parts and arrange service if affected; otherwise continue with the relevant external check.
Why this matters
Why: Water near electricity is an immediate safety boundary; the first wet point helps distinguish a supply/dispenser leak from condensation or an internal path.
-
Check 2
Inspect the accessible water valve and the house-to-refrigerator line without pulling hard on the cabinet.
Expected result: The valve is wet, a tube is loose or split, or the connection remains dry.
Next step: Close the household shutoff if the supply side is leaking and use a qualified plumber or appliance technician; do not improvise a tube repair.
Why this matters
Why: A wet valve or damaged supply tube can produce a continuous leak; a dry connection shifts attention to the dispenser, door, or internal cabinet.
-
Check 3
If the leak follows water dispensing, empty and clean the accessible dispenser drip tray and check that the door closes fully and its gasket is not folded or obstructed.
Expected result: Water is limited to the tray/nozzle area, or water is collecting along the door edge or inside the fresh-food compartment.
Next step: Clean and observe one normal dispense with a cup in place; if water continues without dispensing or the gasket is damaged, stop and arrange service.
Why this matters
Why: A small amount at the nozzle or tray can be spillover; water along a door edge or inside the cabinet suggests sealing, leveling, condensation, or a model-specific drain issue.
-
Check 4
Check for a blocked airflow path, excessive frost, or food touching the rear wall only as described in the exact Monogram manual; do not remove sealed covers or scrape ice.
Expected result: Frost or water is behind an interior panel, the cabinet is overloaded, or no accessible cause is visible.
Next step: Rearrange only loose items and arrange Monogram service for recurring water, heavy frost, or an unseen drain/defrost fault.
Why this matters
Why: Restricted circulation and defrost-related water can produce moisture, but an inaccessible or recurring leak cannot be safely diagnosed from outside.
Use your observations
Decision map
Find the observation that best matches what you see, then follow the next safe action.
-
PATH 01Next step
What you see
The valve or supply tube is wet and the leak continues
Do this next
Close the water shutoff and obtain plumbing/appliance service; keep the refrigerator off if water reached electrical parts.
-
PATH 02Next step
What you see
Water appears only after dispensing and remains at the tray or nozzle
Do this next
Clean the accessible tray, dispense into a cup once, and use the model manual; service continuous flow.
-
PATH 03Next step
What you see
Water returns with no dispensing or is behind a panel
Do this next
Do not open panels or repeatedly run the appliance; arrange Monogram service with photos and the model number.
Helpful context
Understand the symptom
Start with the source, not the puddle
Dry the visible water and place a towel under the suspected area. A puddle at the front can originate at a water valve, a supply line, the dispenser tray, a door seal, or an internal drain; the location alone does not identify the failed part.
Use the model manual for hidden paths
Monogram sells several refrigerator architectures and provides model-specific manuals and installation documents. Use the model number to confirm where the shutoff, filter, drain, and service points are before moving the cabinet or removing anything.
When checks do not resolve it
Need a professional?
Call for service when water runs continuously, a line or valve is damaged, water reaches electrical parts, the leak is behind a panel, or the source remains unclear after accessible checks.
Safety scope: Do not open sealed refrigeration panels, probe wiring, scrape evaporator ice, or bypass a water shutoff. Keep water away from electrical connections.
Have this ready
- Provide the Monogram model number, where the first water appeared, whether dispensing was occurring, photos, and whether closing the water shutoff stopped it.
Common questions
FAQ
Can I keep using a Monogram refrigerator that is leaking?
Only for a brief accessible check if water is away from electricity and the leak has stopped. Close the water shutoff and arrange service for a continuing leak, damaged line, or water near the plug.
Why is there water under the front even when the refrigerator is cooling?
Cooling can continue while a water valve, supply line, dispenser spill, gasket, or internal drain is leaking. Trace the first wet point and use the exact model manual rather than assuming the compressor is the cause.
Read the exact guide
Official sources
- Panasonic Refrigerator Operating InstructionsPanasonic · Panasonic models listed in the manual; use only as general refrigerator behavior guidance for other brands
- Monogram Refrigerator Product PageMonogram · Monogram refrigerators; exact dispenser, filter, drain, and installation details vary by model
- Refrigerator - Water Leaking Onto The FloorGE Appliances · Refrigerators with an external water connection; use the Monogram manual for model-specific layout
- Monogram Site MapMonogram · Monogram appliances; exact support path is model-specific
Community feedback
Share a repair observation
Share a plain-text repair observation. Accepted observations are published automatically; this page may take a moment to update.