
On this page
Start here
Quick answer
If an oven door will not close, first stop using the oven and let it cool completely. With the appliance cool, remove or reposition only an obvious rack, divider, pan, or other obstruction and check that the door sits evenly in its hinges. Look for a latch left in a locked position, a door that was recently removed and reattached unevenly, a torn gasket, or visible hinge, frame, glass, or latch damage. Do not force the door, put fingers near spring-loaded hinges, pry the latch, or remove the door unless the exact model manual gives a safe procedure. A door that remains crooked, loose, damaged, or unable to latch needs qualified appliance service.
Before you begin
Safety first
- A technician can safely assess hinge seating, latch and lock operation, gasket retention, frame alignment, door glass, rack guides, and the model-specific door assembly without the user forcing or disassembling spring-loaded hardware.
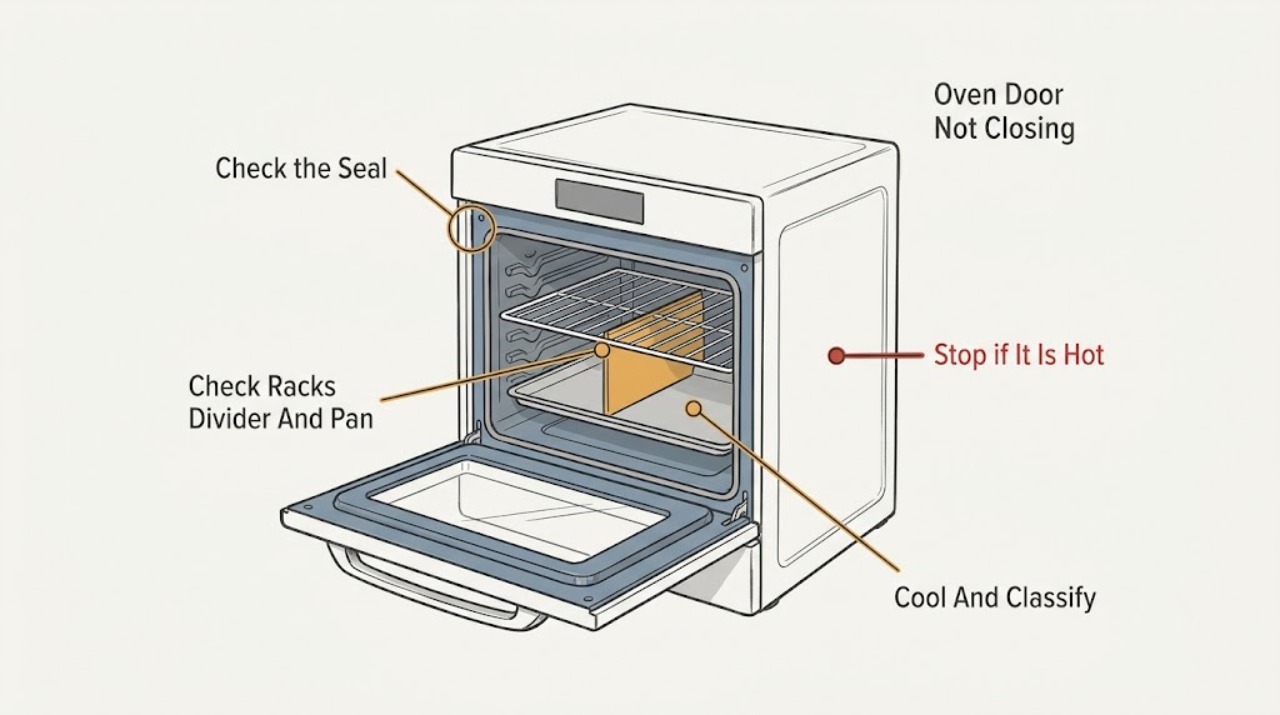
Work through in order
Diagnostic checks
Use only checks that match the exact appliance or system and its official guide.
-
Check 1
Turn the oven off and wait until the cavity, racks, glass, door, and surrounding surfaces are cool. From the front, note whether the door is open by a small even gap, crooked with one side lower, blocked at a specific point, or unable to move at all.
Expected result: Record the first contact point and whether the door is level, while keeping fingers away from hinges and not trying to overcome resistance.
Next step: Continue only with the cool, low-risk checks below if there is no damage or hazard. Otherwise keep the oven off and arrange service.
Why this matters
Why: A localized contact point suggests an obstruction; a one-sided gap or loose door points toward hinge, mounting, or frame alignment; a door that cannot move may have a latch or self-clean state.
-
Check 2
With the oven cool, look at every rack, roll-out rack, divider, roasting pan, and bakeware item. Without leaning on the door, slide a rack or divider only as far as its normal guides allow and remove an obviously oversized item if it can be lifted safely.
Expected result: The door closes normally after one item is fully seated or removed, or it still stops at the same point with the cavity clear.
Next step: Use the normal configuration only if the door closes without force and remains evenly aligned. If it still binds, do not repeat closing attempts; continue to the visual hinge and latch check.
Why this matters
Why: Recovery after reseating or removing an item identifies an obstruction or rack-position issue. No change with a clear cavity shifts suspicion to the door, latch, gasket, hinge, or frame.
-
Check 3
Inspect the visible gasket, door edges, frame, glass, and latch area from a safe distance with the oven cool. Look for folded or displaced gasket material, food or cleaner residue, a bent frame, cracked glass, a protruding latch, or a hinge that appears different on the two sides.
Expected result: A removable surface obstruction is visible, or there is torn gasket material, cracked glass, bent metal, a loose door, or a latch that does not sit in its normal position.
Next step: Do not bend metal, pull the gasket from its retainers, pry the latch, or attempt to straighten a hinge. Keep the appliance off and arrange qualified service for damage or abnormal hardware.
Why this matters
Why: Only loose residue or a plainly accessible obstruction is a low-risk cleaning or removal possibility under the model instructions. Deformation, glass damage, loose support, or abnormal latch position indicates service rather than adjustment.
-
Check 4
Determine whether the door was recently removed, cleaned, transported, or reattached. If yes, compare its position with the exact owner manual and observe only whether both hinge sides are seated evenly; do not remove the door again unless that manual explicitly authorizes the procedure and the appliance is cool and stable.
Expected result: The door is visibly uneven or one side hangs lower after recent handling, or both sides appear evenly seated and the problem began without door work.
Next step: Follow only the exact model's replacement instructions if they clearly cover this situation and no hazard is present; otherwise request service. Never place fingers between a spring hinge and the frame.
Why this matters
Why: An uneven door after handling is consistent with incomplete or incorrect hinge seating, while a new problem without handling keeps latch, gasket, obstruction, or hardware failure in consideration. Neither observation authorizes a generic hinge adjustment.
-
Check 5
Look at the latch or lock from the front without inserting tools or fingers into the hinge area. Ask whether the oven recently ran self-clean or whether the latch appears extended or locked while the door is open; do not force it toward the open or closed position.
Expected result: The oven is still in a hot or self-clean state, or the latch remains in an abnormal position after the oven is cool and the cycle is complete.
Next step: Wait for the documented cool-down and unlock state. If the latch remains stuck, do not pry, bypass, or repeatedly cycle power; request appliance service.
Why this matters
Why: A hot or active self-clean lock can be a normal safety state. A latch that remains abnormal after cooling can prevent the door from closing and requires the model-specific recovery procedure or service.
-
Check 6
After all visible checks, consult the owner manual for the exact model's door, hinge, latch, gasket, and soft-close guidance. Perform at most one explicitly permitted external correction, such as fully seating a rack or following a clearly illustrated door reattachment step, only when the oven is cool and the manual says it is user-serviceable.
Expected result: The manual identifies a matching user step and the door then closes evenly without force, or there is no matching step and the door remains open, crooked, loose, or damaged.
Next step: Stop using the oven and arrange qualified appliance service. Provide the model number, recent door or cleaning history, first contact point, latch state, visible damage, and whether the door is uneven.
Why this matters
Why: A normal, even closure after the model-approved step supports a resolved seating or obstruction issue. Failure, mismatch, or visible damage means the cause cannot be safely confirmed by a generic guide.
Use your observations
Decision map
Find the observation that best matches what you see, then follow the next safe action.
-
PATH 01Next step
What you see
There is broken glass, a loose or falling door, exposed or bent spring hardware, smoke, burning smell, gas smell, electrical arcing, a hot damaged area, or another immediate hazard.
Do this next
Stop using the oven and keep people away. Do not touch the damaged door, latch, hinge, wiring, or hot surfaces.
-
PATH 02Next step
What you see
A rack, roll-out rack, divider, pan, or bakeware item is the first clear contact point and the door closes after it is correctly seated or safely removed.
Do this next
Leave the item in the normal model-approved position and verify that the door closes evenly without force.
-
PATH 03Next step
What you see
The door was recently removed or reattached and now hangs unevenly, has an uneven gap, or will not seat.
Do this next
Keep the oven off and compare the hinge seating with the exact owner manual; do not bend, unlock, or handle spring-loaded hinges by guesswork.
-
PATH 04Next step
What you see
The oven recently ran self-clean, is still hot, or the latch is visibly extended or locked while the door is open.
Do this next
Allow the documented cool-down and check the exact model instructions; do not pry or force the latch.
-
PATH 05Next step
What you see
The cavity is clear but the door remains crooked, loose, resisted, unable to latch, or has a displaced gasket, damaged hinge, frame, or glass.
Do this next
Do not force the door, remove the gasket, adjust the hinge, or operate the oven with an unsealed door.
Helpful context
Understand the symptom
Start with a cool, unused oven
Turn the oven off and wait until the cavity, racks, glass, and door hardware are cool. Do not keep cooking with a door that is open, crooked, or held shut by force: heat can escape, nearby surfaces can become unusually hot, and the latch or glass can be damaged. If the door is hot, locked after a cleaning cycle, or under spring tension, leave it alone until the model instructions say it is safe to proceed.
A simple obstruction is different from an alignment fault
A rack that is not fully home, a roll-out rack that is not engaged, a divider sitting unevenly, or a pan that projects too far can stop the door before any hardware is at fault. Once the oven is cool, compare the two sides of the opening and look for the first contact point without pushing the door against it. If removing the visible obstruction does not change the gap, treat the result as a hinge, latch, gasket, or frame question rather than repeating the same forceful closing attempt.
Use the exact model procedure for the door
Door construction varies. Some ovens have removable doors, soft-close hinges, a self-clean latch, or a plunger switch; the positions and reset steps are not interchangeable. A recently removed door should be checked against its own manual, while a door that hangs lower on one side, has a bent hinge, or has damaged glass should be referred for service. Do not improvise by bending a hinge, moving a latch with a tool, or disassembling the door.
Know when to stop
Stop immediately for broken or loose glass, a door that drops or will not stay supported, a spring or hinge that moves unexpectedly, a hot surface caused by an unsealed door, smoke, a burning smell, a gas smell, electrical arcing, or a repeated trip. Keep people away from the appliance and arrange the appropriate appliance, electrical, fire, or gas professional response.
Safety boundary
Stop conditions
- Stop immediately for broken or loose glass, a door that drops or cannot be supported, a bent or spring-loaded hinge that moves unexpectedly, exposed hardware, smoke, burning smell, gas smell, electrical arcing, or a hot damaged area.
- Do not force, slam, pry, wedge, or tape the door closed. Do not bend a hinge, bypass a latch, pull out a gasket, or use a tool to move lock hardware.
- Keep fingers away from the gap between a hinge and the oven frame. Do not lift the door by its handle or operate the oven while the door is removed or improperly seated.
- Do not continue cooking or start self-cleaning when the door cannot close and seal normally. Do not perform checks while the oven is hot, wet, unstable, or surrounded by smoke or gas.
- Stop if the model manual does not match the appliance or does not authorize the proposed step; arrange qualified appliance service instead of improvising.
Only after diagnosis
Potential parts
- oven door hinge
Consider only when service confirms a bent, loose, mis-seated, or failed hinge after the cavity and rack path are clear.
Hinges are model-specific and spring-loaded; confirm the exact oven model and approved service procedure before any replacement. - oven door latch or lock assembly
Consider only when the latch remains extended or fails to engage after the oven is cool and the exact model's normal reset state has been confirmed.
Latch and lock geometry varies by model and self-clean design; qualified service should confirm fit and installation. - oven door gasket
Consider only when the gasket is torn, displaced, hardened, or confirmed by the model instructions as the cause of an otherwise aligned door gap.
Use the exact model's approved gasket and retention method; do not pull or reposition a gasket that is secured in a way the manual does not describe. - oven door or frame assembly
Consider only when service finds a damaged door, glass, frame, hinge receiver, or mounting point that prevents safe closure.
Door and frame assemblies require exact model matching and safe handling of glass and spring hardware.
When checks do not resolve it
Need a professional?
Request qualified appliance service when the cool obstruction, gasket, latch, and model-manual checks do not restore an even, unforced closure, or immediately for damage, heat, smoke, gas, or electrical danger.
Safety scope: A technician can safely assess hinge seating, latch and lock operation, gasket retention, frame alignment, door glass, rack guides, and the model-specific door assembly without the user forcing or disassembling spring-loaded hardware.
Have this ready
- Provide the oven make and model, fuel type if known, whether the door was recently removed or self-clean was used, the first contact point, latch position, rack or pan position, visible damage, and whether one side hangs lower.
Common questions
FAQ
What should I check first when my oven door will not close?
Let the oven cool, then check for a rack, roll-out rack, divider, pan, or other visible obstruction. If the cavity is clear, compare the door gap and hinge position without forcing the door or touching spring hardware.
Can an oven rack keep the door from closing?
Yes. A rack or roll-out rack that is not fully seated, or a divider that is not positioned correctly, can be the first contact point. Reseat only what the model instructions describe and stop if the door still binds.
What if my oven door was recently removed?
Use the exact model manual to check whether both hinge sides are seated evenly. A door that hangs lower on one side or has an uneven gap may be mis-seated; do not bend or handle spring-loaded hinges by guesswork.
Why is my oven door latch stuck?
A latch can remain in a locked position after a self-clean cycle or when a removable door is open, depending on the model. Let the oven cool, follow the exact model guidance, and request service if the latch does not return without force.
Can I use the oven if the door does not close completely?
No. Keep it off until the door closes and seals normally without force. Broken glass, a loose door, smoke, gas smell, burning odor, electrical arcing, or a hot damaged area requires immediate stop and appropriate professional help.
Read the exact guide
Official sources
- Door will not close on Samsung ovenSamsung · Oven rack seating, reattached door hinge position, latch position, physical damage, and service guidance
- Removing and Replacing the Oven DoorWhirlpool · Model-dependent oven door hinge seating, replacement alignment, even gap, and manual reference
- Oven Door Won't Close - Wall OvenWhirlpool · Oven soft-close behavior, rack seating, roll-out racks, bakeware clearance, and service escalation
- Frequently Asked Questions About GE Ranges and Wall OvensGE Appliances · Model-dependent oven latch cool-down, breaker reset guidance, door and rack clearance, and service conditions
- 8113P574-60R1Whirlpool · Oven door and hinge safety, cool-door handling, glass precautions, and operation after proper replacement
Community feedback
Share a repair observation
Share a plain-text repair observation. Accepted observations are published automatically; this page may take a moment to update.