
On this page
Start here
Quick answer
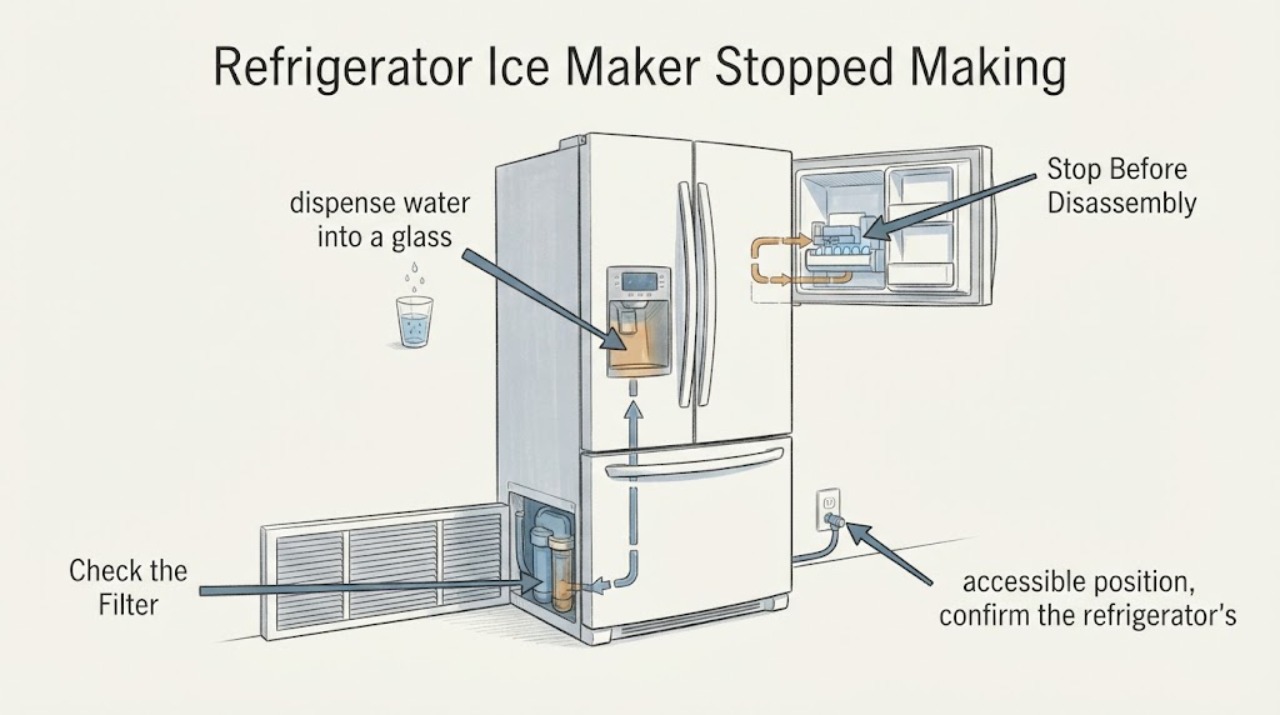
When the ice maker stops and the refrigerator dispenser is also slow, start with the shared water path: confirm the supply valve is open, inspect the accessible line for kinks, and check that the filter is correctly seated and not overdue. Then confirm the ice maker is enabled, the ice container is seated and not clumped, and the freezer is at the temperature specified by the refrigerator manual. A filter or supply restriction can affect both ice production and dispenser flow, while a freezer that is too warm can stop ice production without explaining slow water. If flow remains poor with the filter correctly bypassed only as the model allows, or the ice maker still does not fill after the external checks, stop guessing at an inlet valve or internal module and arrange model-matched service.
Work through in order
Diagnostic checks
Use only checks that match the exact appliance or system and its official guide.
-
Check 1
With the refrigerator operating normally, dispense water into a glass and compare the stream with its recent normal flow. Note whether water is slow from the start, pulses, or is normal while the ice maker alone remains inactive. Do not remove panels or disconnect tubing for this observation.
Expected result: Both dispenser flow and ice production are reduced, the dispenser is slow but ice production is normal, or the dispenser is normal while the ice maker produces no ice.
Next step: Continue with the filter and accessible supply checks for reduced flow; use the temperature and ice-bucket checks when only ice production is affected.
Why this matters
Why: Reduced flow in both functions makes the shared supply line, filter or household pressure the first area to check. Normal dispenser flow narrows attention toward freezer temperature, ice-maker enablement, bucket position or a model-specific ice-making fault.
-
Check 2
Check the filter indicator and the date or usage since replacement. If the filter was recently changed, confirm it is the exact type specified by the refrigerator manual, fully seated and sealed. If the model supplies a bypass plug, use that plug only according to its manual; do not improvise a bypass or leave an unsupported filter housing open.
Expected result: Flow improves with a correctly installed model-supplied bypass, the filter is overdue or visibly mis-seated, or flow stays slow with the approved bypass/test arrangement.
Next step: Reinstall or replace the filter using the model manual and check for leaks. If an approved bypass does not improve flow, proceed to the external line and supply check and arrange service if that check is normal.
Why this matters
Why: Improvement with the approved bypass points to the filter or its seating as a restriction. No improvement shifts attention to the household supply, line, pressure or a model-specific internal fault; it does not prove that an inlet valve has failed.
-
Check 3
From a dry, accessible position, confirm the refrigerator's water shutoff is open and inspect only the visible supply tubing and connections for a kink, crushing, damage or a visible leak. Do not pull the refrigerator out if doing so strains the line, and do not loosen a connection under pressure.
Expected result: The valve is partly closed, the visible line is kinked or crushed, a connection is wet, or the accessible supply appears open and undamaged.
Next step: Correct only a plainly accessible valve position or line routing without forcing fittings. If there is active leakage, close the water supply if safely reachable, keep water away from electrical areas and arrange plumbing/appliance service. If the line looks normal, use the model's approved pressure guidance or service rather than disconnecting it yourself.
Stop if: Stop immediately for active leaking, a damaged hose, wet electrical components or a line that cannot be isolated safely.
Why this matters
Why: A restricted or partly closed supply can reduce both dispenser flow and ice production. A wet connection requires water protection before any further use; an open-looking visible line does not rule out low household pressure or an internal restriction.
-
Check 4
Check the freezer display or an appliance-manual-approved temperature method, and confirm the freezer and refrigerator doors close fully without a package blocking the seal. Use the target in the manual; do not change settings repeatedly or cover vents to force cooling.
Expected result: The freezer is warmer than its documented target, a door or gasket is not sealing, or the freezer is at target and doors seal normally.
Next step: Remove only an obvious obstruction and allow the appliance time to stabilize at the manual's target. If temperature and door sealing are normal but no ice returns, continue to the bucket/enablement check and then service; do not infer a sealed-system or sensor failure.
Why this matters
Why: A freezer that is too warm can slow or stop ice formation. A door that remains open or fails to seal can let cold air escape and prevent the ice maker from reaching its operating condition. Normal temperature and sealing make a shared water restriction or ice-maker-specific issue more likely.
-
Check 5
Verify that the ice-maker control is enabled and that the ice bucket or container is fully seated. Inspect the accessible bucket for clumped ice blocking the outlet; clear only loose ice that the manual permits you to remove, using no tools or heat against the ice maker.
Expected result: The ice maker was off, the bucket was not seated, clumped ice blocks the outlet, or the setting and bucket are normal but no ice is made.
Next step: Restore the setting or reseat the bucket according to the manual and allow the documented production delay. If no ice returns, stop repeated test/reset attempts and arrange qualified refrigerator service.
Why this matters
Why: An off control, a mis-seated bucket or a clump can prevent dispensing or make the ice maker appear inactive without proving an internal component failure. If those external conditions are normal, the remaining fault requires model-specific instructions or service.
Use your observations
Decision map
Find the observation that best matches what you see, then follow the next safe action.
-
PATH 01Next step
What you see
The dispenser is slow and the ice maker also stopped, especially after a filter change or with a kinked/partly closed supply line.
Do this next
Check the filter using the model's approved procedure, then inspect the accessible valve and line. If flow does not improve with the approved filter test, arrange service instead of naming an internal valve.
Why this path and its safety boundary
Why it matters: The shared water path is the strongest first lead; a filter, seating problem, low pressure or visible restriction can affect both functions.
-
PATH 02Next step
What you see
Dispenser flow is normal, but the ice maker produces no ice and the freezer is warmer than the manual target or a door is not sealing.
Do this next
Correct only an obvious door obstruction and allow the freezer to stabilize at its documented target. If it remains warm or ice does not resume, arrange model-matched service.
Why this path and its safety boundary
Why it matters: Cooling or door-seal conditions can prevent ice formation even when dispenser water flow is normal.
-
PATH 03Next step
What you see
The filter is correctly installed or passes the model-approved bypass test, the visible water line is open and undamaged, doors seal, temperature is at target, and the ice maker is enabled but no ice returns.
Do this next
Keep the appliance in normal safe operation only if there is no leak or electrical hazard, and schedule qualified service with the exact model information and the observations recorded. Do not open the rear cover or force a harvest/test mechanism.
Why this path and its safety boundary
Why it matters: The safe external checks have not identified the cause. The symptom could involve a model-specific water path or ice-maker mechanism, but the evidence does not justify selecting a valve, sensor, motor or other part.
-
PATH 04Next step
What you see
Water is actively leaking, water reaches an electrical area, the cord or outlet is wet or damaged, or the appliance shows smoke, burning odor or arcing.
Do this next
Stop dispensing and ice-making use, close the water supply if safely reachable, keep clear of wet electrical equipment and seek qualified appliance or plumbing service. Do not test the appliance while wet or repeatedly restore power.
Why this path and its safety boundary
Why it matters: This is a water or electrical safety stop, not a routine ice-maker adjustment.
Helpful context
Understand the symptom
Use the shared symptom to choose the first check
The combination of no ice and slow dispenser flow points first to the refrigerator's shared water supply or filtration path, but it does not identify a failed valve or ice-maker module. If the dispenser is normal and only ice production is affected, temperature, the ice-maker setting, the bucket and the model-specific ice-maker path become more important. Record whether the dispenser is slow at all times or only after a filter change.
Keep checks external and model-aware
Use only the controls, filter procedure and temperature target in the refrigerator's own manual. Do not disconnect a pressurized water line, open the rear cover, probe an inlet valve, force an ice-maker mechanism or repeatedly run a hidden test cycle. A model without a dispenser or built-in filter will have a different decision path, so do not apply a filter-bypass result where that feature is not provided.
When checks do not resolve it
Need a professional?
Arrange qualified service when flow remains slow after the model-approved filter check and accessible supply check, when the freezer is at its documented target but the ice maker still does not produce, or when diagnosis would require disconnecting tubing, opening covers or testing internal components. Seek urgent help for active water near electrical equipment, damaged wiring, smoke, arcing or burning odor.
Common questions
FAQ
Can a clogged filter stop both ice and water?
Yes. Whirlpool says a clogged or improperly installed filter can reduce flow to the ice maker and dispenser, causing lower ice production and slower water flow. Confirm the exact filter and seating procedure in the refrigerator manual; use a bypass plug only when the model provides and permits one.
Should I replace the inlet valve first?
No. Slow flow can also come from the filter, shutoff valve, kinked line, household pressure or a door/temperature condition. The external checks do not prove an internal valve failure, so identify the exact model and arrange service if the approved checks do not restore flow.
How do I know whether the freezer is cold enough?
Use the temperature target and measurement method in the refrigerator's own manual. Official guidance from GE and Samsung explains that a freezer warmer than its operating target can slow or stop ice production; avoid applying a model-specific target to an unidentified refrigerator without checking its documentation.
What if the water line or electrical area is wet?
Stop using the dispenser and ice maker, close the water supply if it is safely accessible, keep away from wet electrical equipment and arrange qualified service. Do not pull the refrigerator or restore power while a leak or electrical hazard remains.
Read the exact guide
Official sources
- Not Dispensing Ice or Water - RefrigeratorWhirlpool Corporation · Brand-specific guidance used for general symptom logic only because the assigned topic has no brand or model; exact control locations and procedures remain model-dependent.
- Fridge freezer ice maker not working - how to test & resetSamsung Electronics · Used as a manufacturer example of safe external checks for an unidentified refrigerator; exact button sequences, pressure values and test-cycle behavior vary by model and are not generalized here.
- Refrigerator - Dispenser Water Flow TestGE Appliances · Manufacturer guidance for general refrigerator symptoms, not a model-specific instruction for an unidentified appliance; the measured-flow and bypass values must not be assumed to apply to every model.
Community feedback
Share a repair observation
Share a plain-text repair observation. Accepted observations are published automatically; this page may take a moment to update.