
On this page
Start here
Quick answer
When a Roper dryer leaves clothes damp, first identify whether it is electric or gas and whether the drum heats, tumbles, and exhausts air. Match the cycle and temperature to the fabric, do not pack the drum, and clean the lint screen before every load. Then inspect the vent hose and outside hood for kinks, crushing, lint, debris, or weak airflow; a heated dryer with warm damp clothes commonly has restricted exhaust. Sensor or automatic cycles can also end early or vary with load size, fabric mix, level, and moisture contact, so compare one suitable load with a timed heated cycle only when the manual permits it. If the dryer does not heat, has a Check Vent or airflow alert, overheats, smells of burning or gas, smokes, sparks, or trips electrical protection, stop using it. Arrange Roper or qualified appliance and vent service when the safe external checks do not restore drying.
Before you begin
Safety first
- This article supports normal controls, load sorting, lint-screen care, dry-position external vent observation, and model-approved accessible checks only. Do not open panels, test live circuits, work on gas parts, move the appliance, bypass safety devices, or continue after fire, gas, overheating, or electrical warnings.
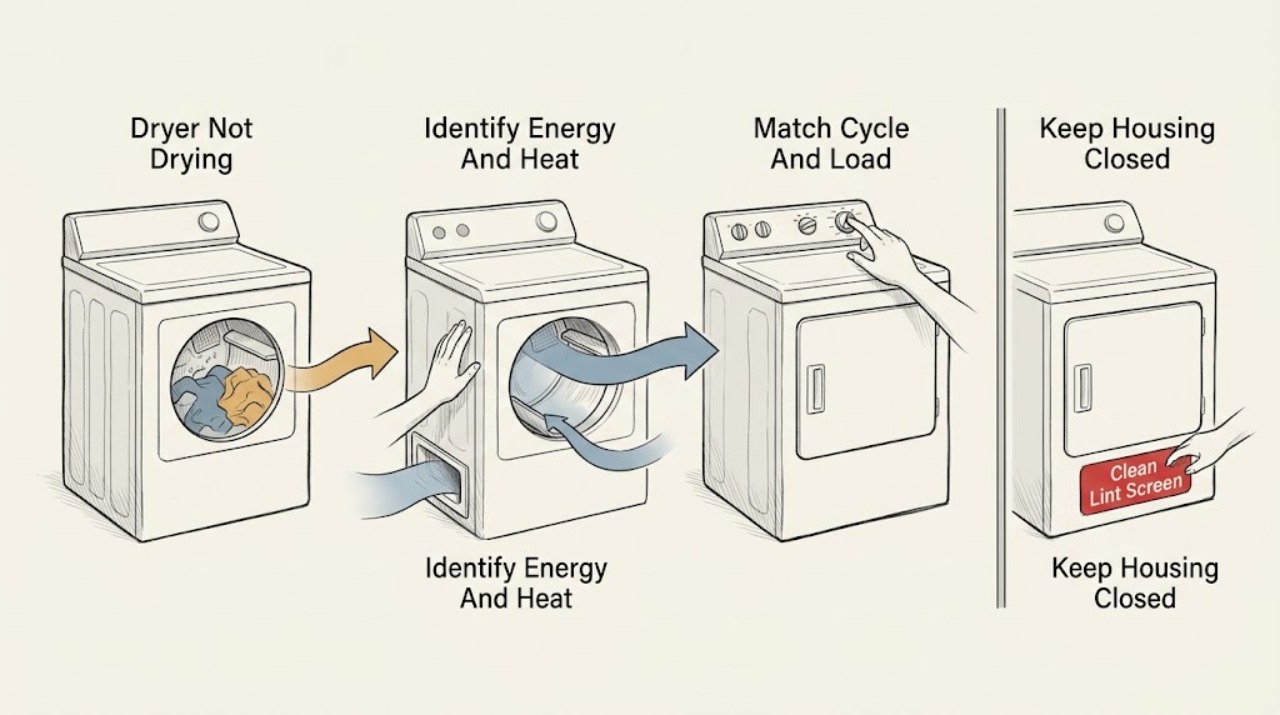
Work through in order
Diagnostic checks
Use only checks that match the exact appliance or system and its official guide.
-
Check 1
From a safe position, identify the Roper model and whether it is electric or gas, select a manual-approved heated cycle, and observe whether the drum tumbles, the load warms, and the display or controls show an error or Check Vent indication.
Expected result: The drum does not turn, the dryer tumbles without heat, the load warms but stays damp, the control is dark, or an airflow or fault indication appears.
Next step: Follow the no-heat, airflow, or cycle branch; arrange service for a dark or unresponsive control, no tumble, persistent fault, or a gas or electrical symptom.
Stop if: Do not open panels, test live circuits, inspect a gas burner, or continue after smoke, burning odor, gas odor, sparking, overheating, or a protection trip.
Why this matters
Why: No heat, no tumble, warm-damp clothes, and a restricted-airflow alert are different failure paths. The model manual controls the correct power, gas, cycle, and test procedure.
-
Check 2
Sort similar fabrics, check the care labels, select the Roper cycle and temperature intended for that load, and load the drum loosely enough for items to tumble; do not use a no-heat cycle when heat is required.
Expected result: The load is tightly packed, mixed heavy and light, a single small item, too large for the cycle, or correctly sorted and freely tumbling.
Next step: Run one suitable load with the manual-approved cycle; use a timed heated cycle only as the model guide permits for a small or still-damp load, then continue to the lint and vent checks if it fails.
Stop if: Do not overload, dry items against their care labels, or dry clothing contaminated with oil, solvent, gasoline, or another flammable substance.
Why this matters
Why: Roper and Whirlpool identify load size, fabric mix, cycle, and free tumbling as factors in drying performance. A correct load that still remains damp points toward lint, venting, heat, sensing, or a technical fault.
-
Check 3
Switch the dryer off, remove the accessible lint screen, and clean it using the Roper model guide; inspect that the screen seats fully and that softener residue, lint, or visible damage is not blocking the surface or housing.
Expected result: The screen is coated or blocked, does not seat correctly, is damaged, or is clean, intact, and seated while drying remains poor.
Next step: Clean and reinstall the screen as instructed, then run one normal test; arrange service for a damaged screen or persistent poor drying.
Stop if: Do not operate without the required screen, force a damaged screen, or reach into the blower or heater housing.
Why this matters
Why: A blocked or poorly seated screen reduces airflow and can lengthen drying. A clean screen with warm damp clothes keeps the exhaust vent, load, heat, sensing, or internal fault in scope.
-
Check 4
With the dryer off and unplugged before inspection, look behind it for a crushed or kinked hose and inspect the exterior vent hood for lint, debris, or a flap that cannot open; if a supervised manual-approved airflow check is used, stop at the first abnormal heat or smell.
Expected result: The hose is crushed or kinked, the hood or duct is blocked, outside airflow is weak, lint collects around the door, or airflow is strong and the path is clear.
Next step: Correct only an accessible hose position and clear loose exterior debris; arrange professional vent cleaning for the full home run, nests, heavy lint, or inaccessible ductwork, then retest once.
Stop if: Do not dismantle the vent through a wall, use a sharp tool inside the duct, run with a crushed hose, or continue with smoke, scorching, abnormal heat, or a gas or electrical warning.
Why this matters
Why: Whirlpool links weak exhaust airflow and restricted venting with long dry times, warm damp loads, heat or humidity in the laundry area, and possible water or moisture around the dryer. A clear path shifts attention to cycle, heat, sensing, or internal faults.
-
Check 5
For an electric Roper dryer, confirm the plug and dedicated supply appear intact and the breaker has not tripped; for a gas model, confirm only from a safe position that the appliance gas valve is in the normal open position and that there is no gas odor. Follow the exact manual for model-specific controls.
Expected result: The supply is absent, the breaker trips, the gas valve is closed, the dryer has a damaged cord or connection, or supply appears normal but heat is absent.
Next step: Restore a normal control or supply state only when safe and model-approved; arrange qualified electrical or gas-appliance service for a recurring trip, damaged connection, no heat, or any uncertainty about the fuel path.
Stop if: Do not access wiring, test voltage, move a gas dryer, loosen a gas connection, or operate if gas odor, smoke, sparking, burning odor, or abnormal heat is present.
Why this matters
Why: Whirlpool notes that power and gas supply are initial checks, but a normal supply does not prove that the heater, igniter, thermal protection, gas valve, or control is sound.
-
Check 6
After the load, lint screen, vent, and supply checks, observe an automatic or sensor cycle with a suitable load and note whether it ends early, leaves only a few pieces damp, or remains damp across compatible loads; check level only as the model manual permits.
Expected result: Only a very small or nearly dry load ends early, drying varies by fabric and load, the dryer is not level, or every suitable load stays damp.
Next step: Correct an accessible loading or leveling issue according to the manual and test once; arrange service for persistent sensor behavior, no heat, or damp loads after airflow and cycle checks.
Stop if: Do not bypass sensors, enter service mode, open the cabinet, or repeatedly restart a faulting dryer.
Why this matters
Why: Sensor cycles can vary with load and moisture contact, and Whirlpool notes that a non-level dryer may keep items from contacting moisture sensors. Repeated poor drying across suitable loads points beyond a simple load or sensor-contact issue.
-
Check 7
After one approved correction, dry a compatible supervised load and record whether clothes finish, airflow remains strong, the cycle completes normally, and the dryer stays free of smoke, scorching, burning odor, gas odor, or abnormal heat.
Expected result: The load dries normally, remains warm but damp, the cycle becomes unusually long, or a safety warning appears.
Next step: Leave the dryer off and arrange Roper or qualified appliance and vent service with the model, fuel type, load, cycle, airflow, and symptom history.
Stop if: Stop immediately for smoke, burning odor, gas odor, sparking, hot electrical parts, repeated trips, a scorched cabinet, or a blocked vent that cannot be safely corrected.
Why this matters
Why: A normal result supports a reversible cycle, load, lint, or vent cause. Warm damp clothes, repeated long cycles, no heat, or any safety warning means an unresolved airflow, heating, sensing, or electrical or gas fault remains.
Use your observations
Decision map
Find the observation that best matches what you see, then follow the next safe action.
-
PATH 01Safety boundary
What you see
The dryer heats and tumbles, but the load is mixed, tightly packed, oversized, or in a cycle that does not match its fabric.
Do this next
Sort and loosen the load, select the appropriate automatic or timed heated cycle, and test once within the manual's load limits.
Why this path and its safety boundary
Why it matters: The performance problem may be caused by load handling or cycle selection rather than a failed dryer part.
Safety stop: Do not overload, use prohibited heat, or dry flammable contamination.
-
PATH 02Safety boundary
What you see
Clothes are warm but damp, outside airflow is weak, a Check Vent or AF indication appears, or the hose or hood is blocked or kinked.
Do this next
Stop, clean the accessible lint screen and exterior hood, correct only an accessible hose position, and arrange professional cleaning for the entire home vent run.
Why this path and its safety boundary
Why it matters: Restricted exhaust is a leading explanation for long dry times and can create a heat and fire hazard.
Safety stop: Do not keep running against a blocked vent, dismantle a wall duct, or continue with excessive heat, smoke, or scorching.
-
PATH 03Safety boundary
What you see
The drum tumbles but does not warm, the supply is absent, a breaker trips, or a gas model has an abnormal fuel symptom.
Do this next
Use the exact manual for a normal supply check, then arrange qualified service for no heat or recurring supply problems.
Why this path and its safety boundary
Why it matters: Power, gas supply, thermal protection, igniter, heater, gas valve, or control causes remain possible.
Safety stop: Do not test live power, open the burner area, loosen gas fittings, or move the dryer to inspect the connector.
-
PATH 04Safety boundary
What you see
An automatic cycle ends early, dries unevenly, or varies between compatible loads, especially when the load is small or the dryer is not level.
Do this next
Use a suitable load, correct accessible leveling only as directed, and use a timed option only when the model guide supports it; service repeated sensing faults.
Why this path and its safety boundary
Why it matters: Moisture sensing depends on load contact, fabric, size, dryness selection, and model-specific sensor behavior.
Safety stop: Do not bypass the sensor, enter service mode, or repeatedly restart a faulting cycle.
-
PATH 05Safety boundary
What you see
Cycle, load, lint, vent, supply, and accessible sensor checks are normal, but drying remains poor or a fault repeats.
Do this next
Leave the dryer off and arrange qualified Roper or appliance service with the exact model, fuel type, error, and test history.
Why this path and its safety boundary
Why it matters: A heater, gas valve, igniter, thermal cutoff, motor, blower, sensor, control, or internal airflow fault remains possible.
Safety stop: Do not remove panels, probe wiring, bypass safety devices, or replace parts by symptom alone.
-
PATH 06Safety boundary
What you see
Smoke, burning odor, scorching, abnormal heat, sparking, a hot or damaged cord, repeated electrical trips, or gas odor is present.
Do this next
Stop the cycle, leave the appliance off, keep clear, and obtain qualified electrical, gas, fire, or appliance help as appropriate; for gas odor, leave the area and contact emergency help from outside.
Why this path and its safety boundary
Why it matters: Fire, electrical, or fuel safety takes priority over drying performance.
Safety stop: Do not restart, use switches near a gas odor, move the appliance, or attempt an internal repair.
Helpful context
Understand the symptom
Start by separating no heat from poor airflow
A dryer that tumbles but never warms needs a different path from one that produces heat but leaves clothes damp. Whirlpool recommends confirming the power supply and gas supply where applicable, then selecting a suitable heated cycle. If the load is warm but damp, weak outside airflow, lint, a crushed duct, or a blocked hood moves to the front of the list. Do not confuse a cool-down segment or a no-heat cycle with a failed heater.
Load size and sensor contact change automatic-cycle results
Roper says automatic or sensor cycles use moisture or air-temperature information and vary with fabric, load size, and dryness setting. A tightly packed drum, heavy items mixed with lightweight pieces, a single small item, or items that do not contact the sensors can produce uneven results or an early stop. Sort and loosen the load before concluding that an internal component has failed.
Venting is both a performance and fire-safety boundary
Restricted exhaust traps heat and humid air. Check only the accessible hose and exterior hood with the dryer off and unplugged as appropriate for your installation; professional vent cleaning is the right next step for a long concealed run, nest, heavy lint, or inaccessible obstruction. Keep the dryer area clear and never operate it with a missing screen or after drying an item contaminated with oil, solvent, or another flammable substance.
Safety boundary
Stop conditions
- Stop using the dryer for smoke, burning odor, scorching, abnormal heat, sparking, a hot or damaged cord or outlet, or repeated electrical protection trips.
- For a gas model, stop for gas odor or the sound of escaping gas; leave immediately, avoid flames and electrical switches, and get gas or emergency help from outside.
- Do not operate without the required lint screen, against a blocked or crushed exhaust, or after drying clothing contaminated with oil, solvent, gasoline, or another flammable substance.
- Do not open panels, test live circuits, inspect a burner or gas valve, bypass thermal or door safety devices, or move a gas dryer to inspect its connector.
- Stop for water near electrical equipment, a damaged vent or cabinet, a recurring fault, or a dryer that remains hot and damp after the accessible vent checks.
- Do not use a sensor or timed cycle to conceal a no-heat, overheating, gas, or electrical problem; arrange qualified service.
Only after diagnosis
Potential parts
- Roper dryer lint screen
Consider this category only when the exact model's screen is damaged, deformed, missing, or cannot be cleaned and seated correctly.
Confirm the exact Roper model and screen design before ordering; do not operate with a missing or ill-fitting screen. - Roper dryer vent or exhaust component
Consider this category only when a qualified vent assessment confirms damaged, crushed, or incompatible accessible venting after the full run is inspected.
Follow the exact installation instructions and local requirements; concealed vent cleaning or replacement may require a qualified vent specialist. - Roper dryer heating or ignition component
Consider this category only after service confirms a no-heat cause and identifies the correct electric heating or gas ignition component for the model.
Verify the exact model, fuel type, diagnosis, and safety checks; do not select a heater or igniter by symptom alone.
When checks do not resolve it
Need a professional?
Arrange Roper or qualified appliance and vent service when the dryer does not heat, a suitable load stays damp after the lint and vent checks, a Check Vent or airflow alert persists, the cycle repeatedly ends early or runs excessively long, the drum does not tumble, an error returns, or the gas or electrical supply is uncertain. Use urgent gas, fire, or electrical help for gas odor, smoke, burning odor, sparking, hot electrical parts, or repeated protection trips.
Safety scope: This article supports normal controls, load sorting, lint-screen care, dry-position external vent observation, and model-approved accessible checks only. Do not open panels, test live circuits, work on gas parts, move the appliance, bypass safety devices, or continue after fire, gas, overheating, or electrical warnings.
Have this ready
- Provide the exact Roper model, electric or gas type, selected cycle and temperature, load fabric and size, whether the drum tumbles and heats, lint-screen condition, vent-hose and outside-airflow observations, any Check Vent or error indication, cycle duration, and any smoke, odor, scorching, heat, leak, spark, or protection-trip event.
Common questions
FAQ
Why is my Roper dryer heating but not drying?
Check the load and cycle first, then clean the lint screen and inspect the vent hose and outside hood for weak airflow, crushing, kinks, lint, or debris. Warm damp clothes with weak exhaust strongly support a restricted vent; a clear vent shifts attention to sensing, heating, or an internal fault.
Can an overloaded Roper dryer stop clothes from drying?
Yes. Roper says clothes must tumble freely, and drying time varies with fabric and load size. Separate heavy and lightweight items, do not pack the drum, and test a suitable load before ordering a component.
Why does my Roper sensor cycle end early?
Automatic drying depends on moisture or temperature sensing and can vary with a small load, fabric mix, moisture contact, dryness setting, or level. Use a suitable load and the exact manual; repeated early stops with damp laundry need service rather than a bypass.
How do I check the Roper dryer vent?
With the dryer off and unplugged before inspection, look for a crushed or kinked hose and inspect the exterior hood for lint, debris, or weak airflow. Have the full vent run professionally cleaned when it is concealed, long, obstructed, or repeatedly triggers an airflow warning.
When should I stop using a Roper dryer that is not drying?
Stop for smoke, burning odor, scorching, abnormal heat, sparking, a hot or damaged cord, repeated protection trips, or gas odor on a gas model. Do not dry oil- or solvent-contaminated items, run against a blocked vent, open panels, or bypass safety devices.
Read the exact guide
Official sources
- Not DryingWhirlpool Product Help · Whirlpool-family dryer performance guidance; use the Roper manual for exact model features and settings.
- MANUALS & GUIDESRoper Appliances · Roper dryers and other appliances; use the exact model manual for fuel type, cycle, access, and installation requirements.
- Use and Care Guide – RGD4516FWRoper Appliances · The Roper RGD4516FW manual represented by this document; other models can differ in fuel type, controls, venting, and access.
- AF or "Check Vent" - DryerWhirlpool Product Help · Whirlpool-family dryers with AF or Check Vent indicators; comparable airflow principles apply, but Roper controls and alerts vary by model.
- Dryer Vent may be Blocked or RestrictedWhirlpool Product Help · Residential dryer vent systems serving Whirlpool-family dryers; installation and cleaning requirements vary by appliance and home.
- Dryer is not Drying or Experiencing Long Dry TimesWhirlpool Product Help · Whirlpool-family dryer guidance used for shared dryer mechanisms; Roper model instructions control exact buttons and limits.
Community feedback
Share a repair observation
Share a plain-text repair observation. Accepted observations are published automatically; this page may take a moment to update.