
On this page
Start here
Quick answer
A Roper washer that will not spin is often waiting for the tub to drain, protecting itself from an unbalanced load, using a low- or no-spin setting, or waiting for the lid to latch. First note whether the washer is top-load or front-load, whether water remains, and where the cycle stops. With the washer stationary and safe, redistribute the load, check the selected spin setting, inspect the visible drain hose, and close the lid or door firmly. Use the exact Roper model manual for any reset or filter procedure. Do not bypass a lid or door interlock, reach into a moving tub, open a hot or pressurized drain path, or run repeated tests after a leak, walking, metal scraping, burning odor, smoke, arcing, overheating, or repeated breaker trip.
Before you begin
Safety first
- Keep the washer off for smoke, burning or electrical odor, arcing, overheating, hot water exposure, leaks near electrics, violent walking, metal impact, or repeated breaker operation. Do not bypass the interlock, open the cabinet, or repeat unsafe tests.
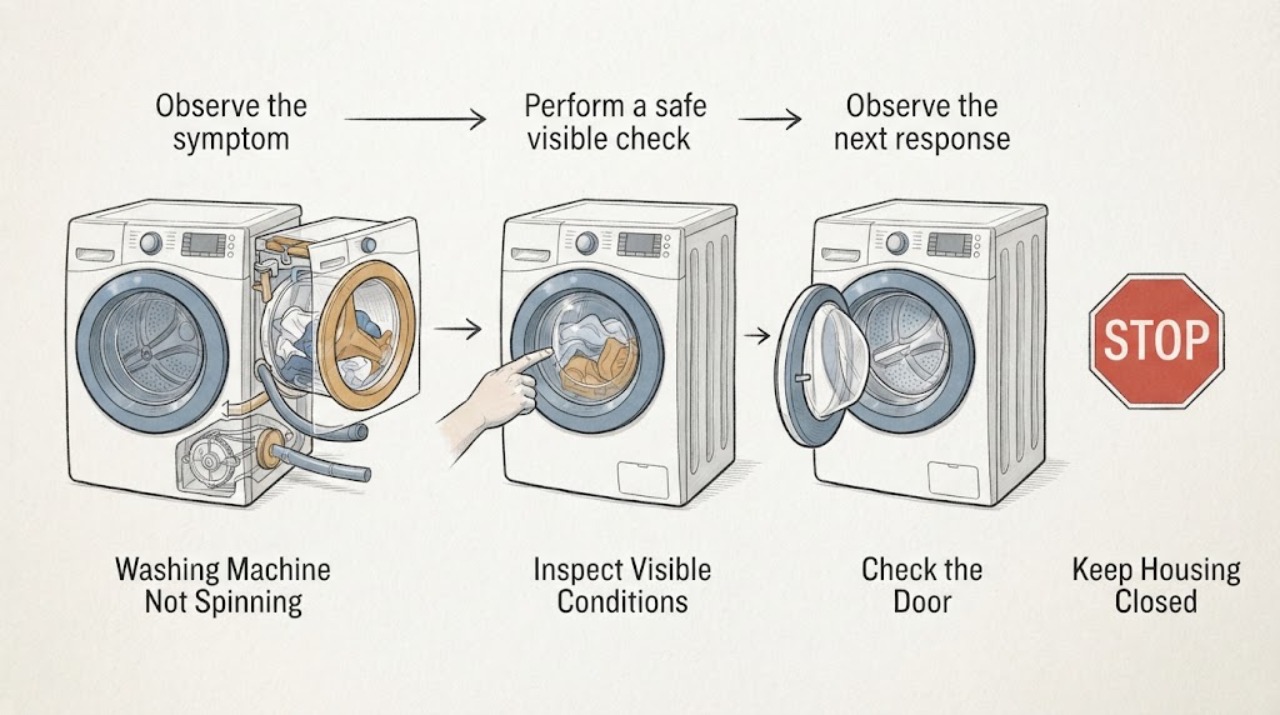
Work through in order
Diagnostic checks
Use only checks that match the exact appliance or system and its official guide.
-
Check 1
Stop the cycle and observe from a safe position. Record whether the Roper washer is top-load or front-load, the selected cycle and spin option, the stage where it stops, the complete light or display text, whether water remains, and whether the tub is moving. Look for a leak near electrics, violent walking, metal scraping, smoke, burning odor, arcing, an overheating connection, or a repeated breaker trip.
Expected result: The tub is moving, water is hot, the washer is walking or striking, a leak reaches electrics, smoke or burning odor is present, a connection is hot, arcing occurs, or the breaker trips again.
Next step: Stop immediately. Keep clear, close the water supply from a safe dry location if needed, and isolate power only from a safe dry location. Do not restart; obtain qualified or emergency help as appropriate.
Why this matters
Why: The washer may be in a normal interlocked phase, or continued operation presents motion, scald, shock, fire, or water-damage risk.
-
Check 2
With the washer paused, stationary, and cool enough to handle safely, inspect the load. Remove several items from a tightly packed basket, loosen and distribute the remaining items evenly, and remove a single bulky item if it is wrapped around the basket. Close the lid or door and run only the model-documented Drain & Spin or equivalent cycle.
Expected result: The washer spins after the load is redistributed, it repeatedly rocks or stops at spin, or the tub stays full of water.
Next step: Use the cycle recommended for bulky items and follow the load instructions in the exact manual. Stop for violent movement, a strike, a leak, or a tub that cannot drain; do not add water or bypass the lid or door interlock.
Why this matters
Why: Improvement supports an unbalanced or overloaded load. Repeated rocking suggests leveling, suspension, or another mechanical issue; standing water points first to drainage.
-
Check 3
Check the selected cycle and spin setting against the Roper manual and the garment care label. Look for Low Spin, No Spin, Delicate, Hand Wash, or a remembered setting. If the tub is empty and the washer is safe, choose the model-documented higher-spin or Drain & Spin option once; do not repeatedly run a high-speed test.
Expected result: A low or no-spin setting was selected, a gentle cycle intentionally retains more water, or a documented higher-spin cycle still does not accelerate.
Next step: Use the appropriate cycle for the load. If the correct setting still fails, continue with the drain, lid or door, and error-code checks; do not assume every Roper model uses the same controls as Whirlpool examples.
Why this matters
Why: The result may be an intentional cycle choice rather than a failed drive system. Failure on an appropriate spin cycle makes drainage, lid or door sensing, balance, or drive control more likely.
-
Check 4
Inspect only the visible drain route with the washer off and the area dry: look for a kinked or crushed hose, a hose pushed too far into the standpipe, a backed-up utility sink, or wastewater returning to the tub. Correct only an obvious hose-routing issue allowed by the Roper installation instructions; do not dismantle the pump or force a filter.
Expected result: Water drains normally after the visible routing issue is corrected, the pump hums but water does not leave, the household drain backs up, or the tub remains full.
Next step: Run the model-documented drain or Drain & Spin function only if the water path is safe. Stop for hot water, flooding, a stuck filter, wastewater backup, or a returning drain fault and arrange service or plumbing help.
Why this matters
Why: A restriction, incorrect drain installation, pump/filter issue, or household plumbing problem can prevent the washer from reaching spin. On the RTW4516FW guide, a spin indicator can mean the washer could not pump out water within its documented period.
-
Check 5
Check the lid or door without reaching into the tub. Confirm that clothing is not caught at the lid or door edge, the gasket or strike is not damaged, and the lid or door closes and latches fully. On a top-load model, do not insert a tool into the lid lock; on a front-load model, do not pull against the locked door.
Expected result: The latch engages and the washer spins, the lid or door remains open or obstructed, or the latch closes but the washer still refuses to spin.
Next step: Clear only a cool, visible obstruction and try one normal cycle if there is no hazard. Leave the washer off and arrange qualified service for damage, a latch that will not engage, or a lock that will not release.
Why this matters
Why: The interlock can prevent spin when closure is not confirmed. A damaged latch, strike, gasket, lock, or sensor needs model-specific service rather than a bypass.
-
Check 6
Read and record the complete error code or flashing-light pattern, the model number, and the cycle stage. Compare it with the exact Roper manual. Note whether the code appears while filling, draining, balancing, or starting spin; do not infer an actuator, motor, or sensor failure from a code that is not documented for this model.
Expected result: The code identifies a drain, lid or door, imbalance, water-level, control, or service condition, or the pattern is absent from the manual.
Next step: Perform only the matching visible check in the Roper manual. If the code returns, is undocumented, or is accompanied by a leak, odor, heat, or violent movement, leave the washer off and arrange service.
Why this matters
Why: A spin symptom can be secondary to an earlier fill, drain, or interlock fault. Roper model generations can use different lights, codes, and reset sequences.
-
Check 7
Only after the washer is cool, dry, stationary, empty or safely drained, and free of smoke, odor, leak, arcing, or abnormal heat, perform at most one reset explicitly authorized by the exact Roper manual. Disconnect power from a safe location for the manual-specified interval, reconnect once, and run one appropriate test cycle.
Expected result: The washer completes a safe spin, the same symptom returns, the control remains unresponsive, or a breaker trips again.
Next step: Leave the washer off and arrange qualified service for a returning fault, unresponsive control, or breaker problem. Do not repeat resets or perform energized electrical measurements.
Why this matters
Why: A reset can clear a temporary control state but cannot repair a restricted drain, failed lid or door interlock, worn suspension, or internal drive fault.
Use your observations
Decision map
Find the observation that best matches what you see, then follow the next safe action.
-
PATH 01Next step
What you see
Water remains in the tub or the washer stops before drain completes.
Do this next
Use the exact manual's safe drain path and inspect only visible hose routing. Stop for hot water, flooding, a stuck filter, or wastewater backup.
Why this path and its safety boundary
Why it matters: The washer may suppress spin until the water is removed; a kink, clog, pump or household drain issue is possible.
-
PATH 02Next step
What you see
The load is tightly packed, single and bulky, uneven, or the washer rocks during spin.
Do this next
Remove items, redistribute the load, and use the documented cycle for bulky items. Arrange service if the empty or balanced washer still walks, strikes, or stops.
Why this path and its safety boundary
Why it matters: The balance system may be reducing or stopping spin to limit movement and damage.
-
PATH 03Next step
What you see
Low Spin, No Spin, Delicate, Hand Wash, or another gentle setting is selected.
Do this next
Select the appropriate spin setting for the garment and use Drain & Spin only as the model allows. If a correct setting fails, continue diagnosis.
Why this path and its safety boundary
Why it matters: The selected program may intentionally use a slower spin and leave more moisture.
-
PATH 04Next step
What you see
The top-load lid or front-load door does not close, latch, or report a safe closed state.
Do this next
Clear only a visible obstruction and use the exact model manual. Do not pry, bridge, insert tools into, or bypass the interlock; arrange service for a damaged or persistent latch fault.
Why this path and its safety boundary
Why it matters: The lid or door interlock can inhibit spin even when the motor and drain are otherwise functional.
-
PATH 05Next step
What you see
The washer fills and agitates but never spins on a correct cycle after safe drainage and closure checks.
Do this next
Stop user testing and provide the technician with the model, cycle stage, code, water state, and sound or movement observations. Do not open the cabinet or test energized parts.
Why this path and its safety boundary
Why it matters: A lid or door sensor, shift or drive control, motor, coupling, suspension, or wiring fault is possible; the exact cause is model-specific.
-
PATH 06Next step
What you see
The model is front-load or cannot be matched to the RTW4516FW top-load manual.
Do this next
Locate the exact model manual through Roper owner support and follow only its instructions. Treat Whirlpool family pages as general decision guidance, not as a replacement procedure.
Why this path and its safety boundary
Why it matters: Door-lock, drain-filter access, balance behavior, and control labels may differ.
-
PATH 07Next step
What you see
Smoke, burning or electrical odor, arcing, an unusually hot plug or outlet, a leak near electrics, violent walking, metal impact, or repeated breaker operation occurs.
Do this next
Stop immediately, keep clear, close the water supply if safe, isolate power only from a dry safe location, and obtain qualified or emergency help. Do not restart.
Why this path and its safety boundary
Why it matters: Continued operation could cause fire, shock, injury, water damage, or further mechanical damage.
Helpful context
Understand the symptom
Define what not spinning means
Separate a basket that never accelerates from a cycle that spins slowly and leaves clothes wet. A washer that is still sensing, agitating, or pumping may not yet be at its final spin. A top-load Roper model can pause or change motor sound during normal phases, while a front-load model can keep its door locked until motion and water have ended. Record the full model number, the cycle, the exact light or display message, and whether water remains before changing settings.
Drainage comes before high-speed spinning
The washer may suppress or reduce spin when it cannot remove water. Look for a kinked or clogged visible drain hose, a backed-up standpipe or utility sink, or water that returns to the tub. Only follow the exact Roper manual for a pump-filter access procedure; not every Roper design has a user-accessible filter. Never handle hot water, force a stuck filter, or open a wet electrical area.
Roper model and washer style control the procedure
Roper owner support provides model-specific manuals, and the manual page says a washer model number is located above the rear of the wash basket. Roper models and generations differ: a top-load lid lock is not interchangeable with a front-load door lock, and a Whirlpool family help page is only a diagnostic cross-reference. Do not transfer a code, key sequence, drain access method, or part fit claim without the exact Roper manual.
Safety boundary
Stop conditions
- Do not reach into a moving tub, pry a locked lid or door, insert tools into an interlock, or bypass the lid or door sensor.
- Stop for hot water, flooding, a leak near electrics, wastewater backup, a stuck drain filter, violent walking or impact, metal scraping, smoke, burning or electrical odor, arcing, overheating, or a repeated breaker trip. Isolate power only from a safe dry location.
- Do not open the cabinet, remove the pump or suspension, disconnect hidden hoses, or perform energized electrical measurements as a household check.
- Do not transfer a code, reset sequence, drain access method, or part fit claim from another Roper or Whirlpool model without matching the exact Roper manual.
Only after diagnosis
Potential parts
- lid or door-lock assembly
Consider this only after qualified diagnosis confirms that the lid or door is aligned and intact but the model-specific interlock or sensor does not permit a safe spin.
Top-load lid locks and front-load door locks differ, and Roper assemblies vary by model. Confirm the exact model and diagnosis before selecting a part. - drain pump, filter, or drain hose
Consider this only when water remains or a drain fault returns and qualified diagnosis identifies a blocked or failed component after the visible hose check.
Access and components vary by model; not every Roper washer has a user-serviceable filter. Confirm the exact model and safe service procedure. - drive, shift, suspension, or motor assembly
Consider this only when a balanced load drains correctly, the lid or door interlock is confirmed, and qualified diagnosis identifies a mechanical or drive fault.
Do not infer a part from a no-spin symptom alone. Roper top-load and front-load systems differ; confirm model fit and the documented repair path.
When checks do not resolve it
Need a professional?
Request service for a persistent no-spin condition, a returning code, failed drainage, a damaged or unrecognized interlock, abnormal movement or metal noise, or any internal leak or electrical symptom.
Safety scope: Keep the washer off for smoke, burning or electrical odor, arcing, overheating, hot water exposure, leaks near electrics, violent walking, metal impact, or repeated breaker operation. Do not bypass the interlock, open the cabinet, or repeat unsafe tests.
Common questions
FAQ
Why is my Roper washer full of water and not spinning?
The washer may be withholding spin because it cannot drain. With the appliance off and the area safe, check the visible drain hose for a kink, incorrect routing, or a backed-up household drain. Use only the exact Roper manual's drain or Drain & Spin procedure, and stop for hot water, flooding, wastewater backup, or a stuck filter.
Can an unbalanced Roper load stop the spin cycle?
Yes. A tightly packed, single bulky, or uneven load can make the washer reduce or stop spin to limit movement, leaving clothes wet. Stop the cycle, redistribute the load only when the tub is stationary, and use the documented cycle for bulky items. Persistent walking, striking, or scraping needs service.
Could the spin setting be the reason my Roper clothes are wet?
Yes. Low Spin, No Spin, Delicate, and Hand Wash settings can intentionally remove less water. Match the cycle and spin option to the garment label and the exact Roper manual. If a correct spin setting still fails after safe drainage and load checks, arrange diagnosis rather than repeatedly testing.
What should I do if my Roper washer agitates but will not spin?
First confirm that the washer drains, the load is balanced, and the top-load lid or front-load door reports closed. Record the stage and any code. If it still will not spin on the correct cycle, a model-specific interlock, shift or drive system, suspension, motor, wiring, or control fault is possible; do not bypass the interlock or open the cabinet.
Read the exact guide
Official sources
- Owner SupportRoper Appliances · Roper brand owner-support hub for locating model-specific documentation and service.
- Not Starting - WasherWhirlpool Product Help · Whirlpool-family top-load reference only; Roper labels, timing, and reset sequence must be confirmed in the exact manual.
- Use and Care Guide – RTW4516FWRoper Appliances · Specific Roper top-load model used for documented examples; other Roper models and front-load designs require their own manual.
- Washer Not Draining or Spinning? Troubleshooting GuideWhirlpool Product Help · Whirlpool-family guide used for general drain-before-spin decision logic; exact Roper access and limits require its manual.
- Not Spinning - WasherWhirlpool Product Help · Whirlpool-family top-load reference used to organize observable branches; Roper model controls and procedures may differ.
- Manuals & GuidesRoper Appliances · Roper owner-support page for locating the exact washer manual.
Community feedback
Share a repair observation
Share a plain-text repair observation. Accepted observations are published automatically; this page may take a moment to update.