
On this page
Start here
Quick answer
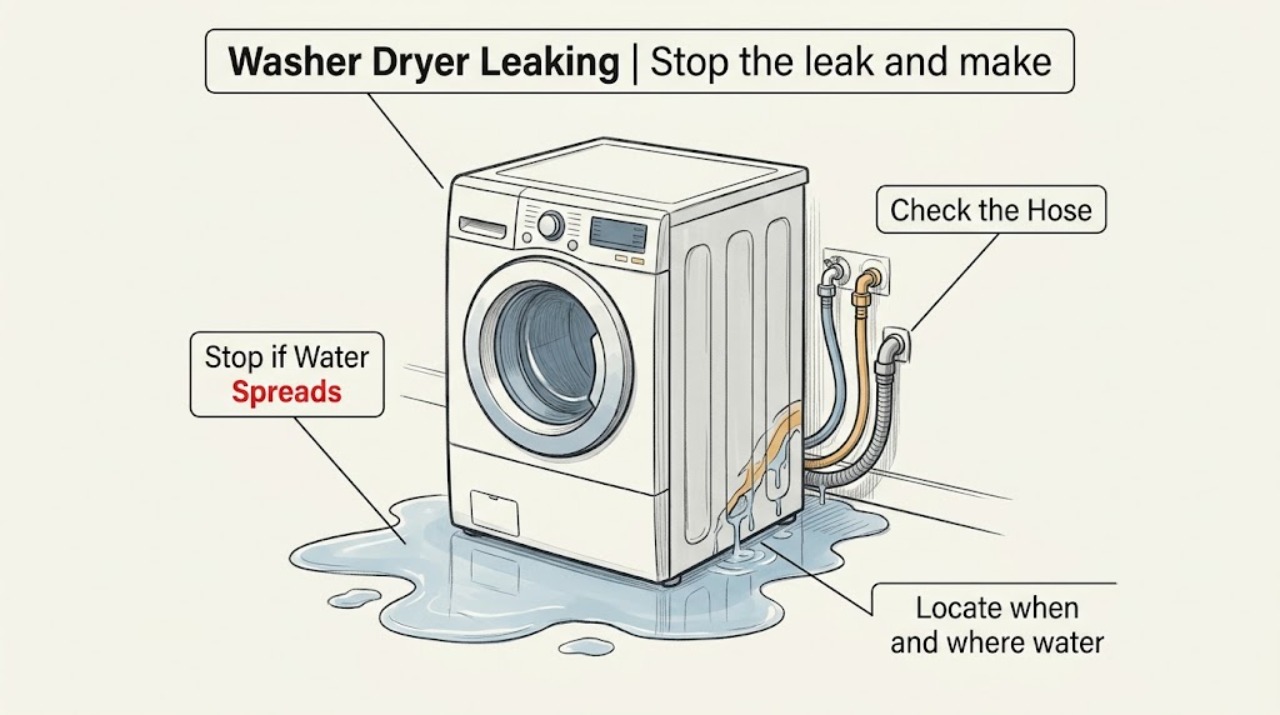
Stop the Speed Queen washer-dryer, keep water away from the electrical connection, and turn off the water taps if the leak continues. Dry the floor and identify whether water appears during filling, draining, or tumbling. Check the fill hoses and connections, drain hose and receptacle, visible door seal and glass, detergent and load size, and the laundry-room plumbing. Do not run another cycle if water reaches the cord, outlet, or control area, or if a hose, gasket, cabinet, or internal part is damaged.
Work through in order
Diagnostic checks
Use only checks that match the exact appliance or system and its official guide.
-
Stop the leak and make the area safe
Press Pause or the cycle cancel control, and do not reach behind the washer-dryer while water is moving. If the floor is wet, close the hot and cold supply taps. Disconnect power only from a dry, safe position; otherwise leave the circuit off at the breaker and keep clear of the wet outlet or cord.
Expected result: The water stops when the cycle and supply are stopped, or water continues to collect with the machine idle.
Next step: Dry the floor, keep the appliance off, and continue with an external inspection only when the area is safe. If water reached the outlet, plug, wiring, or control, stop and arrange qualified service.
Stop if: Stop immediately for a burning smell, sparks, a hot cord or outlet, damaged insulation, or water inside the control area. Leave power off and seek qualified appliance service.
Why this matters
Why: A leak that stops with the cycle may be tied to filling, draining, or drum movement. Continued water with the appliance idle suggests a pressurized hose, valve, plumbing, or residual-water problem and should not be tested by restarting the machine.
-
Locate when and where water first appears
After the floor and cabinet are dry, look from the front and sides without moving the appliance. Note whether the first drops appear at a faucet or hose end, at the front door, underneath the cabinet, at the rear drain hose, or at the standpipe or floor drain. Record whether it occurs during fill, wash, spin, or drain, rather than running a new cycle just to reproduce it.
Expected result: The source is visibly external at a connection or plumbing opening, or the water starts beneath the cabinet or behind a panel.
Next step: Use the source-specific checks below. If the origin cannot be seen without moving or dismantling the unit, stop and provide the timing and location to a technician.
Why this matters
Why: An external connection or drain receptacle can often be checked without opening the appliance. Water from underneath the cabinet or an unseen cabinet seam can indicate an internal hose, pump, tub, or seal issue.
-
Check the fill hoses and inlet connections
With both water taps closed, inspect the hot and cold fill hoses, their rubber washers, faucet ends, and the connections at the washer's water mixing valve. Look for a loose connection, cracked hose, bulge, corrosion, or a wet trail. Do not overtighten a fitting or operate the machine with a visibly damaged hose.
Expected result: Water is present at a hose end or the hose has damage, or all fill connections remain dry after the taps have been closed.
Next step: If a hose is damaged, keep the taps closed and have it replaced with a model-appropriate hose. If a connection only needs model-directed reseating, follow the exact manual and check for leaks without putting hands near a live electrical area; otherwise continue to the drain check.
Why this matters
Why: A wet or damaged fill hose or connection can leak under water pressure during filling. Dry connections shift attention to the drain path, door area, plumbing, or an internal leak.
-
Inspect the drain hose and drain receptacle
Check the visible drain hose for a kink, split, loose connection, or a hose end that has moved out of the drain receptacle. Look for overflow or slow drainage at the standpipe, sink, or floor drain. Do not pull the appliance out while it is connected to water or electricity, and do not reach into a pump or filter unless the exact model manual provides a safe procedure.
Expected result: The drain receptacle backs up, the hose is kinked or blocked, or the hose and receptacle are dry and correctly positioned.
Next step: Correct only a plainly visible, safe hose-routing issue according to the model manual and clear the household receptacle if it is the source. If water comes from the cabinet or pump area, leave the machine off and request service.
Why this matters
Why: A blocked or poorly installed drain path can make water escape at the receptacle even when the washer itself is not leaking. A clear, dry drain path makes an internal drain hose, pump, or tub leak more likely.
-
Check the door seal and glass on front-load models
If the washer-dryer has a front door, inspect the visible rubber door gasket for a tear, hole, fold, or trapped item. Wipe the outside perimeter of the door glass and the gasket contact area with a clean damp cloth, then let it dry. Do not stretch, remove, or replace the gasket while the unit is connected or wet.
Expected result: The gasket or glass contact area is dirty but intact, or the gasket is torn, displaced, or unable to seal against the glass.
Next step: After the area is dry, use the normal low-risk cycle only if no other safety issue exists and the manual permits it. If the gasket is damaged or the leak returns at the door, stop using the washer and arrange model-specific service.
Why this matters
Why: A dirty contact surface or trapped item can form a path for water at the front. A torn or displaced gasket is a component fault rather than a detergent or drain adjustment.
-
Rule out excess suds and an overloaded wash
Review the last load and detergent amount against the model's owner guide. Look for unusually thick suds, an overloaded drum or tub, or clothing caught near a door seal. Do not add extra detergent to compensate for a leak, and do not keep running cycles if suds or water are escaping onto the floor.
Expected result: The load was overloaded or produced excessive suds, or the load and detergent were within the model's instructions.
Next step: For a future test, use the detergent type and amount specified for the exact model and a properly sized load only after the source of the leak is safe. If the leak recurs with a correct load, stop and request service.
Why this matters
Why: Oversudsing or overloading can push water toward seals and can interfere with drainage, while a correctly sized load makes a hose, seal, drain, plumbing, or internal fault more likely.
-
Separate appliance leakage from room plumbing
With the appliance off and the supply taps closed, inspect the faucet bodies, supply shutoffs, standpipe or sink, floor drain, and nearby wall or cabinet for an independent wet trail. Do not move the washer-dryer or disconnect plumbing under tension just to inspect its rear.
Expected result: A wall, faucet, standpipe, sink, or floor drain is wet independently of the appliance, or only the appliance cabinet becomes wet during a cycle.
Next step: Keep the washer-dryer off until the plumbing issue is corrected or the appliance source is diagnosed. Give the technician the first wet location and the cycle stage when it appeared.
Why this matters
Why: A room-plumbing leak or drain backup needs plumbing attention, while a leak that follows the appliance cycle points back to the washer-dryer or its connected hoses.
Use your observations
Decision map
Find the observation that best matches what you see, then follow the next safe action.
-
PATH 01Next step
What you see
Water appears as soon as the washer fills and a fill hose or faucet connection is wet.
Do this next
Keep both supply taps closed, do not run the appliance, and replace or service the damaged connection using the exact model guidance. Recheck from a dry, safe position before normal use.
-
PATH 02Next step
What you see
Water appears during drain or spin and the standpipe, sink, or floor drain backs up.
Do this next
Treat the drain receptacle or household plumbing as the first suspect. Keep the washer off until the receptacle is cleared and the drain hose is routed as specified in the model manual.
-
PATH 03Next step
What you see
A front-load door leaks while tumbling and the gasket or glass contact area is visibly dirty but not damaged.
Do this next
Clean and dry the contact area, remove only a plainly visible trapped item, and use the correct load and detergent instructions. If water returns or the gasket is damaged, stop using the machine and request service.
-
PATH 04Next step
What you see
The load produced heavy suds or was overloaded, but no hose, drain, plumbing, or seal damage is visible.
Do this next
Do not run repeated test cycles while the floor is wet. Correct detergent type and load size on a later cycle only after the machine is dry and safe; a recurring leak needs service.
-
PATH 05Next step
What you see
Water comes from under the cabinet, from an unseen internal area, or continues while the machine is idle.
Do this next
Close the water taps, leave the appliance disconnected or switched off, and arrange qualified service. Do not remove panels or reach below the machine.
-
PATH 06Next step
What you see
Water reaches an outlet, plug, cord, controls, or any electrical component, or there is a burning smell or sparking.
Do this next
Stop immediately, keep clear of the wet electrical area, and disconnect power only from a dry safe location or at the breaker. Do not reuse the machine until a qualified technician has inspected it.
Helpful context
Understand the symptom
Start with the leak timing
A leak that starts as the washer fills points toward the taps, fill hoses, or inlet connection. Water that appears while the tub empties points toward the drain hose, drain receptacle, plumbing, or pump path. Water at the front of a front-load unit during tumbling can involve the door gasket or dirty glass contact area. These are clues, not a reason to run repeated cycles while the floor is wet.
Keep water and electricity separated
Stop the cycle before reaching behind the machine. If it is safe to do so, unplug the unit or switch off its circuit, close both water taps, and mop up standing water. Never handle a plug, outlet, or control with wet hands. Do not remove panels or reach under a wet appliance; an internal leak needs qualified service.
Only after diagnosis
Potential parts
- water inlet or fill hose
Consider this only if a dry inspection with the water taps open under controlled service conditions identifies seepage or visible damage at the supply hose or inlet connection.
Confirm the exact model and hose or inlet specification in the manufacturer's documentation before ordering; the brand alone does not establish fit. - front door gasket
Consider this only on a front-load model when the leak tracks from the door and the gasket is torn, displaced, or unable to contact the glass evenly.
Verify the exact model and installation procedure; do not treat a similar-looking seal as compatible. - drain hose or pump assembly
Consider this only after the household drain is clear and a qualified diagnosis locates the leak in the appliance drain path or pump area.
Use model-specific parts information and qualified diagnosis before any replacement; access can expose water and electrical hazards.
When checks do not resolve it
Need a professional?
Request qualified Speed Queen appliance service when a hose, gasket, cabinet, tub, pump, or internal connection is damaged; when water comes from under the cabinet; when the leak persists after the visible connection, drain, load, and seal checks; or when the machine has an electrical or control-area exposure. Have the exact model and serial information, the first wet location, the cycle stage, and any display message ready.
Common questions
FAQ
Why is my Speed Queen washer-dryer leaking from the front?
On a front-load model, check the visible door gasket, the glass contact area, trapped items, detergent level, and load size. A torn or displaced gasket, or a leak that returns after cleaning the contact area, needs service.
Why does the washer leak only during drain or spin?
Check the drain hose for a kink or obstruction and watch the standpipe, sink, or floor drain for backup. If the household drain is clear but water comes from the cabinet or pump area, leave the washer off and request service.
Can too much detergent make a Speed Queen washer leak?
Excess suds can delay draining and push water toward seals or the drain path. Use the detergent type and amount specified for the exact model, but do not keep running cycles if water is already escaping onto the floor.
Should I replace a Speed Queen fill hose that is wet?
Close both water taps and do not run the machine. A wet connection may need model-directed reseating, while a cracked, bulged, or damaged hose should be replaced with a correctly specified hose before use.
Is it safe to move a leaking washer-dryer to look underneath?
Not while it is connected to water or electricity or when the floor is wet. Leave the water off and power disconnected from a safe location, and have a qualified technician inspect an unseen cabinet or underside leak.
Read the exact guide
Official sources
- User's GuideSpeed Queen / Alliance Laundry Systems · Speed Queen front-load stacked washer-dryer user guide and water-leak troubleshooting
- Speed Queen | SupportSpeed Queen · Speed Queen product and service support routing
- Speed Queen | Manuals & DownloadsSpeed Queen · Speed Queen model-specific residential washer, dryer, and stacked washer-dryer manuals
- Tricks your washer or dryer might be playing on you (and how to solve them!)Speed Queen · Speed Queen consumer washer drainage and detergent troubleshooting tips
- User's GuideSpeed Queen / Alliance Laundry Systems · Speed Queen top-load washer installation, maintenance, and water-leak troubleshooting
Community feedback
Share a repair observation
Share a plain-text repair observation. Accepted observations are published automatically; this page may take a moment to update.