
On this page
Start here
Quick answer
Stop the cycle and identify the first wet point before moving or opening anything. Water that appears while filling points toward a faucet, fill hose, connection, inlet screen, or valve; water from the dispenser or front door can follow a detergent, oversudsing, gasket, or loading problem; water during draining points toward the drain hose, standpipe, pump, or model-specific trap. Water from the cabinet base, a hose crack, a damaged seal, or any water on the floor is a service trigger. Keep hands and the floor dry, close the water supply if safely accessible, and isolate power only from a dry safe position when water is near electricity. Speed Queen's manuals and quick guides differ by top-load and front-load model, so record the full model number before checking a filter, trap, gasket, or hose. Do not pull out a built-in or stacked unit, run another cycle to reproduce the leak, open a wet pump, or remove panels. Arrange qualified service for any continuing, concealed, or recurring leak.
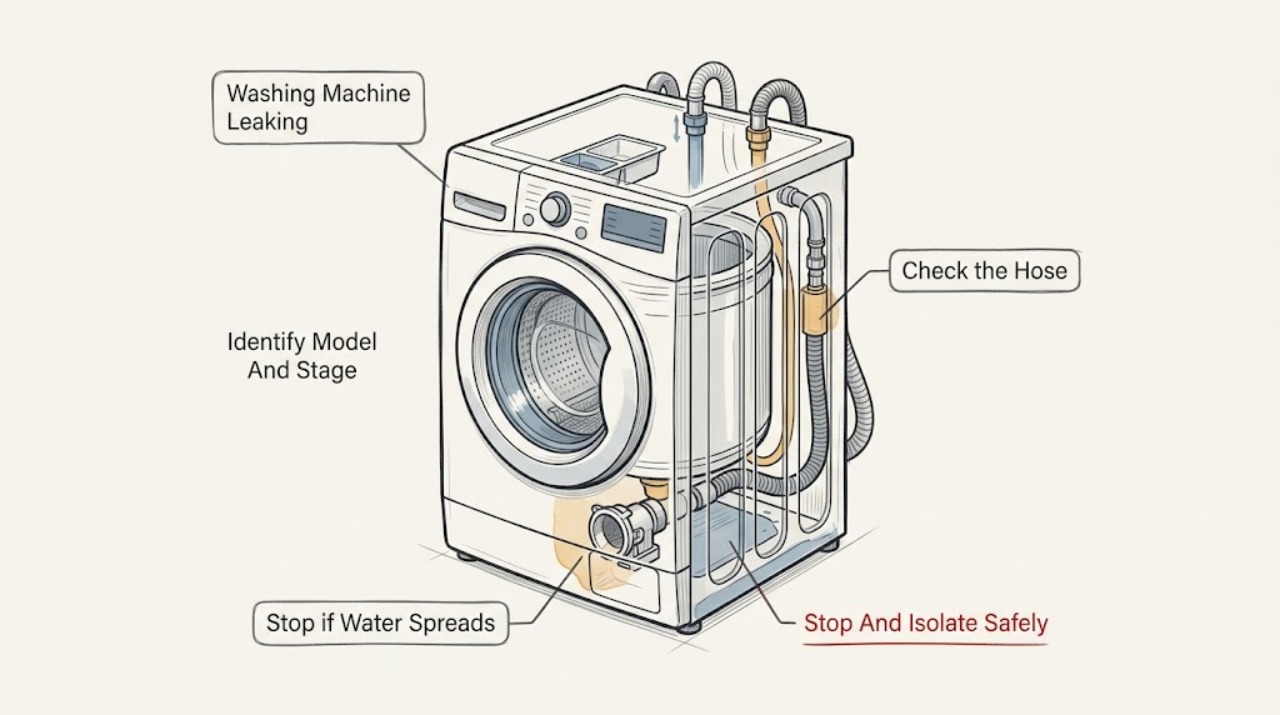
Work through in order
Diagnostic checks
Use only checks that match the exact appliance or system and its official guide.
-
Check 1
Stop the programme, keep clear of moving parts, and from a dry safe position close the water supply if it is safely accessible; isolate electrical power without touching a wet plug or outlet.
Expected result: Record whether water is still flowing, the floor or electrical connection is wet, the washer is hot, smoke or burning odor is present, a breaker or protection device has tripped, or the leak stopped when the cycle stopped.
Next step: Keep the appliance out of use for any water on the floor, electrical wetness, smoke, odor, heat, or repeated trip. Otherwise wait until the washer and surfaces are dry and cool before external inspection.
Stop if: Do not touch wet electrical parts, move the washer through water, restart a leaking cycle, or repeatedly restore power after a trip.
Why this matters
Why: Continuing water or water near electricity can create a flood or shock hazard. A leak that stops with the cycle may still involve a hose, door, dispenser, pump, or tub and should not be retested casually.
-
Check 2
Read the full Speed Queen model number and identify top-load or front-load configuration; note the selected programme, load, and stage at which water was first seen.
Expected result: Record whether the leak began before filling, during fill, during wash or agitation, during drain or spin, after the programme, or while the washer was idle.
Next step: Use the exact model manual and follow the matching fill, door, dispenser, drain, or pump branch; preserve the stage and model for service.
Stop if: Do not apply a front-load pump or gasket procedure to a top-load model, or a top-load hose instruction to a stacked or concealed installation, without confirming the manual.
Why this matters
Why: Timing narrows the path: fill connections and inlet components act during fill, door or dispenser paths can leak during wash, and drain or pump paths act during emptying. A leak while idle can indicate a supply-side valve, hose, or standing-water path.
-
Check 3
When the area is dry and power and water are safely isolated, inspect only the visible hot and cold fill hoses, rubber washers, faucet ends, machine connections, and nearby wall for a kink, crack, blister, wet joint, or fresh water trail.
Expected result: Record whether water begins at a faucet or hose end, a hose is deteriorated, a connection is visibly wet, one hose is kinked, or all accessible fill connections are dry.
Next step: Do not loosen a pressurized connection. Photograph and report a wet or damaged hose, close the supply, and arrange service; continue only if the visible fill path is dry and intact.
Stop if: Do not operate with a cracked or blistered hose, disconnect a pressurized hose, or reach behind a wet appliance.
Why this matters
Why: Speed Queen quick guides identify the fill hoses and their rubber or filter-screen washers as installation points that can leak if damaged or incorrectly seated. A dry external path moves suspicion toward another branch or a concealed inlet fault.
-
Check 4
For a front-load washer, inspect the cool door glass, gasket lip, and door edge for trapped laundry, residue, tears, or a displaced seal; for a top-load washer, inspect the lid closure and tub rim without forcing or removing the lid.
Expected result: Record whether the first wet point is at the door or lid, the gasket is damaged or folded, clothing was caught in the seal, the lid or door does not close evenly, or the seal area is dry.
Next step: Remove only a loose visible obstruction and wipe accessible residue as the exact manual permits. If the seal, lid, door, hinge, or frame is damaged or the leak returns, stop use and arrange service.
Stop if: Do not remove the gasket, force the door or lid, insert tools into the latch, or operate with a torn seal or damaged glass.
Why this matters
Why: A front-load door gasket or a top-load lid and tub interface can send water down the front. A damaged or unrecognized seal is a service issue, not an invitation to tighten or bypass the closure.
-
Check 5
After the washer is cool and off, inspect the accessible detergent or softener dispenser and the area below it for residue, blockage, overfilling, a cracked part, or excessive suds; do not pour more product or water into it.
Expected result: Record whether water spills from the dispenser during fill, detergent is caked or overflowing, foam reaches the dispenser or door, the dispenser is damaged, or the first wet point is elsewhere.
Next step: Clean only the removable or accessible dispenser parts using the exact manual's method, then stop if water or suds recur. Do not use a cleaning cycle while an active leak or electrical hazard remains.
Stop if: Do not force the drawer, dismantle the dispenser, mix cleaners, or run the washer with water reaching the controls or floor.
Why this matters
Why: Speed Queen guidance identifies dispenser residue and excess suds as causes of poor water handling; a dispenser leak can run down the front and mimic a door or base leak. A cracked dispenser or continued spill needs service.
-
Check 6
From a dry, safe position, inspect the visible drain hose, its connection to the drain receptacle or standpipe, and the nearby floor for a kink, displacement, crack, overflow, or fresh trail; do not pull the washer out.
Expected result: Record whether water appears only during draining or spinning, the hose has moved or is kinked, the drain receptacle overflows, water is coming from the hose end, or the drain path is dry.
Next step: Stop use for a displaced, damaged, overflowing, or wet drain path; arrange plumbing or appliance service as appropriate. Do not disconnect a wet hose to inspect inside it.
Stop if: Do not move the washer, remove a drain hose from a wet connection, reach into the pump, or run a drain cycle with water near electricity.
Why this matters
Why: Speed Queen installation guides identify the drain hose, receptacle, securing strap, and levelling as important installation points. A hose or household drain overflow can look like an appliance leak, while a dry external path leaves the pump, trap, or internal drain hose for model-specific service.
-
Check 7
Only if the exact Speed Queen front-load manual explicitly identifies a user-accessible foreign-object trap or pump procedure, confirm the washer is disconnected from electrical supply, place a suitable container and cloth, and follow that manual without opening any other panel.
Expected result: Record whether the model has the documented trap, residual water is present, the trap is blocked, the cap or seal is damaged, or the leak source is not the trap area.
Next step: If the model procedure is clear and the area is dry, perform only that documented external maintenance. If water is uncontrolled, the trap cannot seal, or the model does not document access, stop and arrange service.
Stop if: Do not open a pump with power connected, reach into an unknown opening, remove a panel not named by the manual, or continue if hot water or uncontrolled water is present.
Why this matters
Why: The front-load guide says a pump can retain water and that a trap may collect foreign objects; a blocked or damaged trap can affect drainage and leak. This is not a generic step for every top-load, stacked, or commercial configuration.
-
Check 8
Without moving the appliance, observe whether it rocks, walks, bangs, or shifts during a previously observed spin, and note whether the leak began with an overloaded or unbalanced load; do not run another cycle solely for this test.
Expected result: Record severe vibration, a displaced drain hose, water thrown from the door or tub, an unbalanced load indication, or no movement-related symptom.
Next step: Keep the washer out of use for severe movement, a displaced hose, or a returning leak; arrange qualified appliance service or installation assessment.
Stop if: Do not climb behind the washer, adjust concealed feet while water is present, run a full load to reproduce the leak, or ignore violent movement.
Why this matters
Why: Speed Queen quick guides require the washer to be positioned and level, and severe movement can shift a hose or disturb the door seal. A moving or banging washer needs its installation and mechanical condition assessed before operation continues.
-
Check 9
Only when all accessible areas are dry, no part is damaged, and the model manual permits operation, make one supervised empty or small-load cycle using the normal programme; remain nearby and stop immediately if water appears.
Expected result: Record the exact stage and first wet point if the leak returns, whether the water is clear or soapy, whether it appears during fill, wash, drain, or spin, and whether any noise, odor, heat, code, or protection trip occurs.
Next step: Stop the washer, isolate water and power safely, and provide the record to service. If no leak occurs, continue to monitor and follow the manual's maintenance guidance rather than assuming the fault is cured.
Stop if: Do not perform this recheck after a leak near electricity, a damaged hose or seal, smoke, burning odor, hot connection, or uncontrolled water, and do not repeat it after failure.
Why this matters
Why: A controlled observation can distinguish timing and direction, but a returning leak confirms that the issue is unresolved. It does not justify a panel-off repair or repeated cycles.
-
Check 10
Prepare the complete model, configuration, programme stage, first wet point, hose and drain observations, door or lid and dispenser condition, pump-trap status if applicable, amount of water, and any safety symptoms for qualified service.
Expected result: The leak is persistent, concealed, from the cabinet base, associated with a damaged seal or hose, returns after an accessible check, or is accompanied by standing water, heat, odor, noise, severe movement, a code, or a protection trip.
Next step: Keep the washer out of use and arrange Speed Queen appliance service; use plumbing service when the household drain or supply is the source, and electrical service when household wiring or protection is affected.
Stop if: Do not remove panels, tilt or pull out the appliance, access the tub or pump while energized, make internal measurements, or select a part from the symptom alone.
Why this matters
Why: A tub, pump, valve, internal hose, seal, bearing, cabinet, control, or installation fault remains possible and cannot be identified safely from the outside.
Use your observations
Decision map
Find the observation that best matches what you see, then follow the next safe action.
-
PATH 01Safety boundary
What you see
Water reaches the plug, receptacle, controls, cord, floor around electricity, or household protection trips.
Do this next
Keep clear, close the water supply if safely accessible, isolate power only from a dry safe position, and arrange qualified appliance or electrical service.
Why this path and its safety boundary
Why it matters: The leak is an electrical and flood safety issue.
Safety stop: Do not touch wet electrical parts, move the washer, restore power, or run another cycle.
-
PATH 02Safety boundary
What you see
The first wet point is a faucet, fill hose, rubber washer, screen, or machine-side fill connection and the leak begins during fill or while the washer is idle.
Do this next
Close the water supply, do not loosen the connection while pressurized, and arrange service for a wet or damaged hose or connection.
Why this path and its safety boundary
Why it matters: The supply connection or inlet path is more relevant than the drain or door.
Safety stop: Do not operate with a deteriorated hose or open a wet pressurized connection.
-
PATH 03Safety boundary
What you see
Water or suds emerge from the dispenser or front during fill or wash, and residue, overfilling, or a damaged dispenser is visible.
Do this next
When cool and off, clean only the accessible dispenser as the manual permits; stop if the leak recurs or the dispenser is damaged.
Why this path and its safety boundary
Why it matters: The dispenser path, product amount, or foam is likely redirecting water.
Safety stop: Do not force the drawer, add more product, mix cleaners, or run with water reaching the controls or floor.
-
PATH 04Safety boundary
What you see
The first wet point is the front door or lid edge, and trapped laundry, residue, a folded or torn gasket, or an uneven closure is observed.
Do this next
Remove only visible loose obstruction and wipe accessible surfaces when cool; stop and arrange service for a damaged seal, glass, hinge, frame, or returning leak.
Why this path and its safety boundary
Why it matters: The door or lid sealing interface may be allowing water out.
Safety stop: Do not remove or glue a gasket, force the closure, bypass a latch, or operate with damaged glass or seal.
-
PATH 05Safety boundary
What you see
Water first appears during drain or spin at the drain hose, standpipe, receptacle, or nearby floor, or the household drain overflows.
Do this next
Keep the washer off and arrange plumbing or appliance service based on the exact first wet point; do not disconnect a wet hose.
Why this path and its safety boundary
Why it matters: A displaced or blocked drain path, hose defect, or household plumbing problem may be involved.
Safety stop: Do not move the washer, run repeated drain cycles, or reach into the pump while water is present.
-
PATH 06Safety boundary
What you see
The model documents an accessible pump or foreign-object trap and the washer retains water, drains slowly, or leaks around that area.
Do this next
Only when dry and disconnected, follow the exact model manual's trap procedure once; otherwise arrange service.
Why this path and its safety boundary
Why it matters: A blockage, cap, seal, pump, or internal drain path may be involved.
Safety stop: Do not open an unknown pump, remove additional panels, or proceed with hot or uncontrolled water.
-
PATH 07Safety boundary
What you see
Water originates beneath or behind the cabinet, inside cabinetry, or from an inaccessible hose, tub, valve, pump, or seal.
Do this next
Keep the washer isolated and arrange qualified Speed Queen appliance service; protect nearby flooring and wiring without moving the appliance.
Why this path and its safety boundary
Why it matters: The fault is concealed and may worsen flooding or electrical risk.
Safety stop: Do not tilt, pull out, dismantle, or operate the washer to locate the source.
-
PATH 08Safety boundary
What you see
The washer rocks, walks, bangs, shifts a drain hose, or throws water from the door or tub during an observed spin.
Do this next
Stop use and arrange qualified installation or appliance assessment; do not run another full load to reproduce it.
Why this path and its safety boundary
Why it matters: Installation level, load movement, a seal, or a mechanical fault may be contributing to the leak.
Safety stop: Do not ignore violent movement or adjust concealed parts while the floor is wet.
Helpful context
Understand the symptom
The first wet point is more useful than the size of the puddle
Stop the washer, keep the floor and hands dry, and note where water first appears. A leak during fill is different from a leak during drain or spin. Water from the door or dispenser can run down the front and look like a base leak, while a drain hose or standpipe can spill behind the washer. Speed Queen's guide says to call for service for water of any amount on the floor, so do not continue cycles simply because the leak seems small.
Top-load and front-load checks are not interchangeable
Identify the complete Speed Queen model and configuration first. Top-load quick guides show fill-hose, drain-hose, levelling, lid, and tub checks; front-load manuals add a door gasket, dispenser drawer, and a model-specific pump or foreign-object trap. A front-load pump-trap instruction may require a lower access panel and a container for residual water, so it is not a safe generic step when the floor, outlet, or machine is wet.
Separate an accessible connection from an internal leak
After power and water are safely isolated and the washer is cool, inspect only visible hose ends, the door or lid edge, the dispenser, and the floor. A visibly loose or damaged external connection can be documented for service, but a leak from under the cabinet, tub, pump, valve, or concealed hose is not a panel-off diagnosis. Do not tilt or move the appliance to find the source.
What to record for service
Write down the model, top-load or front-load configuration, programme and stage, first wet point, water direction, whether the washer was filling, washing, draining, or spinning, hose and connection condition, amount of water on the floor, detergent or suds observations, and any noise, odor, heat, code, or electrical event. Photographs are useful only after the appliance is cool and safely isolated.
Safety boundary
Stop conditions
- Stop immediately for water near a plug, receptacle, cord, controls, or a wet floor around electricity; isolate power only from a dry safe position and do not touch wet electrical parts.
- Stop for smoke, burning odor, hot or discolored electrical connections, sparks, damaged wiring, a repeated protection trip, uncontrolled water, or a hose that is cracked, blistered, or splitting.
- Do not move, tilt, pull out, or dismantle a washer to find a leak; do not remove panels or access the tub, valve, pump, motor, or wiring as a first check.
- Do not run another cycle to reproduce a leak, open a wet or pressurized hose, reach into a pump, or operate with a damaged door, lid, glass, frame, or gasket.
- Do not bypass a lid or door safety device, mix cleaners, or choose a replacement part solely from the water location or symptom.
Only after diagnosis
Potential parts
- fill hose assembly
Consider only when the exact model has a visibly deteriorated or leaking fill hose and qualified diagnosis confirms it as the source.
Confirm the complete Speed Queen model and connection requirements; isolate water safely and do not use a damaged hose. - door gasket or lid seal
Consider only when the exact model's door or lid seal is damaged and the leak begins at that sealing interface.
Confirm the model and service procedure; do not glue, stretch, or bypass the seal. - dispenser assembly
Consider only when a cracked, blocked, or poorly seated model-specific dispenser is confirmed as the leak source.
Confirm top-load or front-load configuration and exact model before selecting a dispenser. - drain hose or pump assembly
Consider only when drain timing, retained water, a visible hose defect, or qualified diagnosis identifies the appliance drain path.
Verify the exact model and diagnosis; do not open a pump or disconnect a wet hose as a first check.
When checks do not resolve it
Need a professional?
Arrange Speed Queen appliance service for any water on the floor, a persistent or returning leak, water from the cabinet base or behind the appliance, a damaged hose, door, lid, gasket, dispenser, pump, or tub, retained water, a leak with vibration or abnormal noise, or any water near electricity. Arrange plumbing service when the household drain or supply is the first wet point, and electrical service when a receptacle, cord, breaker, or protection device is affected.
Common questions
FAQ
Where should I look first when my Speed Queen washer leaks?
Stop the cycle and identify the first wet point and programme stage. Check only visible fill hoses, the door or lid edge, dispenser, drain hose, and floor after safe isolation and cooling. Speed Queen treats any water on the floor as a reason to call for service.
Why does my Speed Queen washer leak from the front?
Water can run from a front-load door gasket, trapped laundry, dispenser, excessive suds, or a top-load lid or tub edge. Inspect only when cool and off; do not force the door or remove the seal. A damaged or returning leak needs service.
Could the fill hoses cause a Speed Queen washer leak?
Yes. A deteriorated hose, damaged washer, kink, or wet connection can leak during fill or while the machine is idle. Close the water supply safely, do not loosen a pressurized connection, and arrange service for a wet or damaged hose.
Why does my Speed Queen washer leak during draining?
Inspect the visible drain hose and receptacle for displacement, kinks, overflow, or damage without moving the washer. Retained water or a model-specific pump-trap issue may require the exact manual or qualified service. Do not open a wet pump or disconnect a wet hose.
Can I keep using a Speed Queen washer if the leak is small?
No. Speed Queen's front-load guide says to call for service for water of any amount on the floor. Stop use for a returning or concealed leak, a damaged hose or seal, water near electricity, unusual heat or odor, severe movement, or a repeated protection trip.
Read the exact guide
Official sources
- Spring Cleaning Your Washing MachineSpeed Queen · Speed Queen washers when checking accessible dispenser and gasket areas without opening the appliance
- SupportSpeed Queen · Speed Queen washers when the exact manual or qualified service path is needed
- How to Properly Care for Your Top Load WasherSpeed Queen · Top-load Speed Queen washers when checking visible hose deterioration, tub residue, and lid-area care
- User’s GuideSpeed Queen · Use as a model reference for front-load safety and leak checks while confirming the user's exact Speed Queen model
- Tricks your washer or dryer might be playing on you (and how to solve them!)Speed Queen · Speed Queen washers when water remains or a drain-stage leak points toward the visible drain path or pump; confirm the model manual
- Quick Consumer ManualSpeed Queen · Front-load Speed Queen washers when checking visible installation and water paths; confirm the exact model
- Quick Consumer ManualSpeed Queen · Top-load Speed Queen washers when checking visible installation and water paths; confirm the exact model
- How to Clean Your Washer So You’re Not Put in a SpinSpeed Queen · Speed Queen washers when distinguishing dispenser or residue symptoms from a mechanical leak
Community feedback
Share a repair observation
Share a plain-text repair observation. Accepted observations are published automatically; this page may take a moment to update.