
On this page
Start here
Quick answer
A Speed Queen washer that appears not to fill may have closed taps, kinked hoses, blocked inlet screens, an unlatched lid or door, a control state that was never started, a drain hose installed in a way that siphons water away, or a model-specific fill code. Some high-efficiency and automatic-fill cycles use less water than expected, so first watch whether the washer adds water and advances normally rather than judging the tub level alone. Check the hot and cold taps, hose routing, visible screens, controls, and lid or door without opening panels. If the washer is overfilling, leaking, repeatedly tripping power, or water reaches electrical parts, stop the cycle, close the water taps when safe, isolate power from a dry position, and arrange qualified service.
Before you begin
Safety first
- Do not bypass a lid or door interlock, open a pressurized fitting, work in standing water, open the cabinet, alter a pressure system, continue an overflow, or keep resetting after a leak, electrical fault, hot connection, smoke, or burning smell.
Work through in order
Diagnostic checks
Use only checks that match the exact appliance or system and its official guide.
-
Check 1
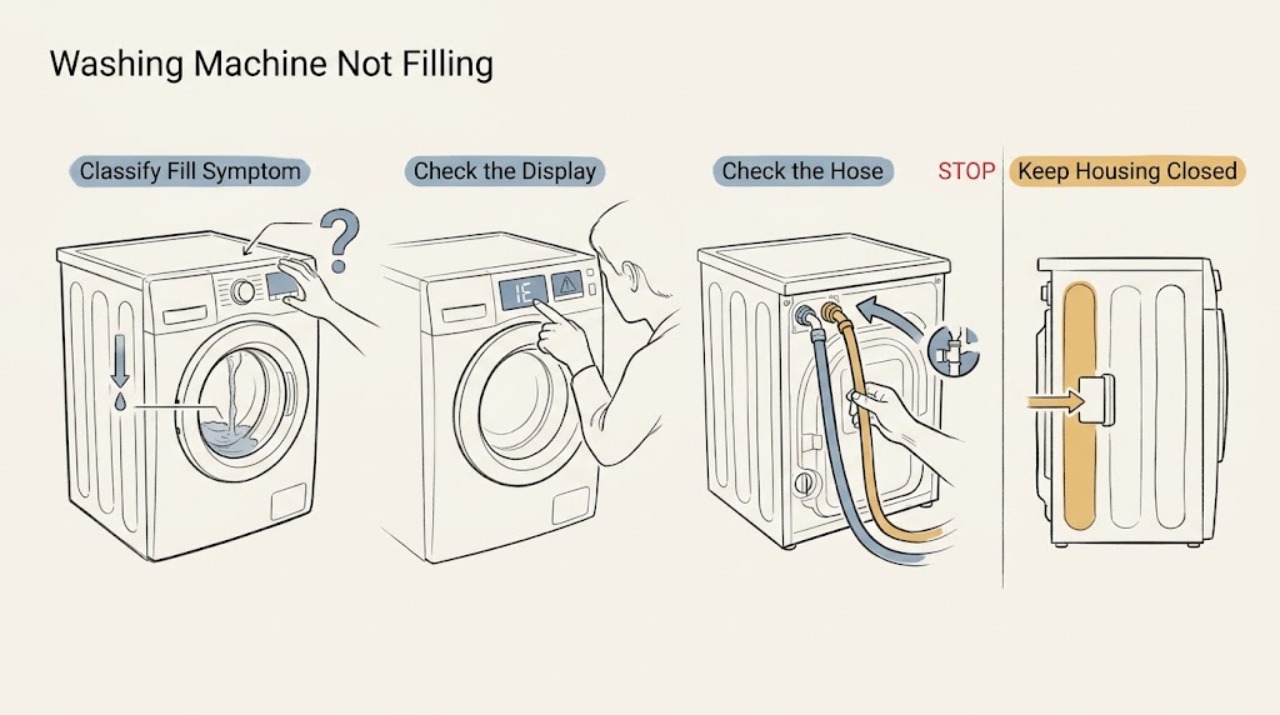
Record the washer model, top-load or front-load type, selected cycle, display code, whether the cycle starts, whether any water enters, and whether water later drains away; do not add water manually to test it.
Expected result: Classify the symptom as completely dry, a small but normal-looking amount, water entering and disappearing, one temperature side only, a fill or door code, or water entering continuously.
Next step: Use the matching Speed Queen manual and follow the branch that matches the observed behavior rather than the tub level alone.
Stop if: Stop for overflow, a leak, water near electrical parts, hot connections, smoke, burning smell, repeated breaker trips, or a machine that moves violently.
Why this matters
Why: A small amount may be normal for an automatic-fill or high-efficiency cycle. A dry tub, disappearing water, code, or uncontrolled inflow points to a supply, door, drain, sensor, valve, or control branch.
-
Check 2
Confirm the correct cycle and water-temperature setting, cancel delay or lock states if the manual allows it, close a top-load lid or front-load door fully, and press or hold Start/Pause exactly as the model guide describes.
Expected result: Record whether the control responds, the lid or door locks, the cycle begins, a lock or fill code appears, or the washer remains silent with no water.
Next step: Remove only a visible obstruction that prevents normal closure; if the latch does not work or the code returns, stop and arrange service without bypassing the interlock.
Stop if: Never defeat, tape, short, or bypass a lid or door switch, and do not force a door or lid against clothing or a damaged seal.
Why this matters
Why: An unstarted cycle or open interlock can prevent filling. A door or lid that will not latch, a returning code, or an unresponsive control points to an interlock or control fault rather than a water tap.
-
Check 3
From a dry position, confirm that both hot and cold supply taps are open, inspect the fill hoses for kinks, twists, cracks, bulges, or crushed sections, and verify that each hose is connected to the correct marked inlet without loosening a pressurized fitting.
Expected result: Record closed or weak taps, a kinked or damaged hose, reversed temperature connections, a wet fitting, or normal visible supply and hose routing.
Next step: Close the taps and arrange hose or plumbing service for damage or leakage; if the visible supply is normal, continue to the inlet-screen and siphoning checks.
Stop if: Stop for a spraying connection, burst hose, flooding, hot water that cannot be safely controlled, or water near electrical equipment.
Why this matters
Why: A closed tap, restricted hose, damaged fitting, or wrong connection can prevent one or both fill paths. A wet fitting or damaged hose is a leak risk and should not be corrected while the line is pressurized or the floor is wet.
-
Check 4
Only after the taps are closed and the washer is safely isolated, inspect the visible filter screens at the faucet ends and water-mixing valve as the model manual permits; clean or replace a screen only by the manual's method and without forcing the fittings.
Expected result: Record screens that are blocked with sediment, damaged, missing, clean, or inaccessible without opening the washer or disturbing a sealed valve.
Next step: Restore the parts and connections only as instructed, then make one normal fill attempt; arrange service if flow remains absent or a leak appears.
Stop if: Do not scrape a screen into the valve, use a sharp tool, force a hose, open a valve body, or work with water pressure still present.
Why this matters
Why: Sediment can restrict fill flow and create a slow or no-fill symptom. A clean screen with normal taps keeps the inlet valve, wiring, pressure sensing, or control in scope; damage or inaccessible parts need service.
-
Check 5
Observe the drain hose while a normal fill starts, without adding water or reaching behind a moving washer, and compare its height, insertion, and support with the exact Speed Queen installation instructions.
Expected result: Record water entering and immediately running away, a drain hose that is too low or inserted too far, a blocked drain receptacle, or an installation that cannot be safely viewed.
Next step: Stop the cycle and arrange qualified appliance or plumbing help when the hose position is wrong, the receptacle backs up, or the installation cannot be corrected without moving the machine.
Stop if: Do not pull a heavy washer across a wet floor, detach a drain hose under flow, reach behind moving parts, or continue when water is escaping.
Why this matters
Why: Water that leaves as it enters can make the washer appear not to fill and can trigger a fill complaint. A blocked or unsafe drain connection is a plumbing or installation issue, not a reason to change the inlet valve first.
-
Check 6
Photograph the complete display code and compare it with the matching Speed Queen manual, including the model and whether the code appeared during wash fill, rinse fill, start, or after an overflow; do not apply a code from another model.
Expected result: Record an Er, FL or Er, nF-type fill indication if the exact manual lists it, an Er, PS water-level sensing indication, an overflow indication, a door code, or no code.
Next step: Follow only the exact manual's low-risk instruction once, then arrange service for a returning code, overflow, no fill, or an unlisted code.
Stop if: Stop immediately for continuous filling, overflow, a leak, water near controls, smoke, burning smell, or an electrical fault; close the taps when safely reachable.
Why this matters
Why: Speed Queen guides describe fill codes as failure to reach or sense the expected water level and direct checks toward taps, hoses, screens, and a permitted reset; a pressure-sensing or overflow code requires service if it persists. Code names and responses vary by model.
-
Check 7
Only when there is no leak, overflow, hot connection, or electrical hazard, perform the exact manual's one permitted power reset, then run one normal fill attempt while observing the water entry and display.
Expected result: Record whether the code clears and stays clear, the washer fills and advances, the code returns, or the washer remains dry or begins to overfill.
Next step: Turn the washer off, close the water taps when safe, and arrange service with the model, code, supply checks, screen result, door state, and siphoning observation.
Stop if: Do not repeat resets, run an empty cycle for prolonged testing, or continue after overflow, leaking, smoke, burning smell, water near electrical parts, or a repeat breaker trip.
Why this matters
Why: A cleared code can be transient and does not prove a valve, sensor, or control is healthy. A returning code, persistent no-fill symptom, or uncontrolled fill requires professional diagnosis.
Use your observations
Decision map
Find the observation that best matches what you see, then follow the next safe action.
-
PATH 01Next step
What you see
Water is entering continuously, the tub overflows, a hose or fitting leaks, or water reaches electrical parts.
Do this next
Stop the cycle, close both water taps from a safe position, isolate power only from a dry position, keep away from standing water, and arrange qualified appliance or plumbing service.
-
PATH 02Next step
What you see
Water enters, the load becomes wet, the cycle advances, and the only concern is that the tub level looks lower than an older washer.
Do this next
Treat the level as potentially normal for the selected automatic-fill or high-efficiency cycle. Use the exact manual if the cycle does not advance or clothes remain dry.
-
PATH 03Next step
What you see
A top-load lid or front-load door does not close and latch normally, or a lock code remains.
Do this next
Do not bypass the interlock. Remove only a visible obstruction that needs no force, then arrange service if the latch, lock, seal, or code remains faulty.
-
PATH 04Next step
What you see
A hot or cold tap is closed, a fill hose is kinked or damaged, or a connection is wet.
Do this next
Close the taps when safe and arrange hose or plumbing service for damage or leakage. Do not loosen a pressurized fitting or continue a fill test on a wet floor.
-
PATH 05Next step
What you see
An accessible faucet or mixing-valve screen is blocked and no chemical or electrical hazard is present.
Do this next
Clean it only as the exact manual permits after closing the taps and isolating the washer safely. If flow stays absent or a leak appears, arrange service.
-
PATH 06Next step
What you see
Water enters but immediately drains away, or the drain hose installation does not match the model instructions.
Do this next
Stop the cycle and have the drain hose installation corrected by a qualified person when moving or accessing the washer is not clearly safe.
-
PATH 07Next step
What you see
The exact model displays a fill code or water-level sensing code.
Do this next
Record the full code and stage, perform only the manual's single permitted reset after safe checks, and arrange service if the code returns or the washer remains dry.
-
PATH 08Next step
What you see
The controls and door or lid work, taps and hoses are normal, screens are clear, and the washer still does not fill without a code.
Do this next
Stop repeated cycles and arrange qualified appliance service for the inlet valve, wiring, pressure system, or control diagnosis. Do not open the cabinet.
Helpful context
Understand the symptom
A low tub level is not always a no-fill fault
Some Speed Queen cycles use automatic fill or a spray rinse, and high-efficiency machines can use less water than an older washer. Judge the problem by whether water enters, the cycle advances, and the clothes become wet. A completely dry load, a fill code, or a cycle that stops is a different branch from a normal low-water cycle.
Top-load and front-load checks differ at the lid or door
A top-load washer may not fill with its lid open, while a front-load washer needs the loading door closed and latched. Do not bypass either interlock. Confirm the appliance type and use the matching manual before interpreting a lock or fill code.
Water can enter and still disappear by siphoning
If water starts but the level never rises or the cycle reports a fill problem, check the drain hose installation against the Speed Queen installation instructions. A drain hose placed too low or inserted too far can let incoming water run away. Do not pull the machine out or alter plumbing if the hose is trapped, the floor is wet, or a connection may be damaged.
Only after diagnosis
Potential parts
- water inlet valve or mixing valve
Consider only after qualified diagnosis shows normal taps, hoses, screens, door or lid interlock, and control signals but insufficient water entry for the exact model.
Match the exact Speed Queen model and inlet configuration; do not select a valve by appearance or by a code from another model. - water-level pressure sensor or switch
Consider only when the model-specific diagnosis links a returning water-level or fill-sensing symptom to the pressure system after supply and drain checks.
Confirm the exact model, control system, and approved fit information before any replacement; never alter a pressure tube as a test. - lid or door lock assembly
Consider only if qualified service confirms that the lid or door cannot provide the required interlock signal after the closure and visible-obstruction check.
Match the top-load or front-load model and exact revision; never bypass the interlock.
When checks do not resolve it
Need a professional?
Arrange qualified service for overflow, leaking hoses, repeated fill or water-level codes, a door or lid that will not latch, a returning breaker trip, no fill after safe tap, hose, screen, and siphoning checks, or any symptom that requires opening the cabinet. Contact a plumber for supply or drain installation problems.
Safety scope: Do not bypass a lid or door interlock, open a pressurized fitting, work in standing water, open the cabinet, alter a pressure system, continue an overflow, or keep resetting after a leak, electrical fault, hot connection, smoke, or burning smell.
Common questions
FAQ
Why does my Speed Queen washer use less water than expected?
Some automatic-fill and high-efficiency cycles use less water than older machines. If water enters, clothes become wet, and the cycle advances, the lower level may be normal. A dry load, fill code, or stalled cycle needs troubleshooting.
What should I check when a Speed Queen washer will not fill?
Check the exact cycle and Start control, close the lid or loading door, confirm hot and cold taps are open, inspect hoses for kinks, and check accessible inlet screens only after safe isolation. Also compare drain-hose installation with the model manual because siphoning can remove incoming water.
What do Speed Queen fill codes mean?
Code meanings vary by model. Some Speed Queen guides describe fill codes as failure to reach or sense the expected level and list taps, hoses, screens, and a permitted reset; an overflow or water-level sensing code that returns needs service. Record the complete code and use the matching manual.
When should I stop using a Speed Queen washer that is not filling?
Stop for overflow, continuous filling, leaks, water near electrical parts, repeated breaker trips, a hot connection, smoke, burning smell, or a lid or door that requires bypassing. Close the water taps when safe, isolate power from a dry position, and arrange qualified service.
Read the exact guide
Official sources
- How Much Water Does A Washing Machine Use? It Depends.Speed Queen · Speed Queen explanation of automatic fill, high-efficiency water levels, no-fill symptoms, and uncontrolled fill escalation
- User's GuideSpeed Queen / Alliance Laundry Systems · Speed Queen top-load washer fill troubleshooting, inlet screens, controls, lid, power, and drain-hose siphoning
- Manuals & DownloadsSpeed Queen · Speed Queen model-number-based owner and installation manual lookup
- User's GuideSpeed Queen / Alliance Laundry Systems · Speed Queen front-load washer fill troubleshooting, loading door, inlet screens, drain installation, and fill codes
Community feedback
Share a repair observation
Share a plain-text repair observation. Accepted observations are published automatically; this page may take a moment to update.