
On this page
Start here
Quick answer
If an AEG washing machine is not filling, first confirm that the water tap is open and the household supply is available, then inspect the visible inlet hose for kinks or leaks. If the tap and hose are sound, the inlet filters may be restricted; clean them only with the machine unplugged and the water tap closed, following the model manual. AEG identifies closed or faulty supply, blocked inlet filters, and a failed inlet valve as common causes. If water enters and immediately leaves, or the checks do not restore filling, stop and arrange qualified appliance service.
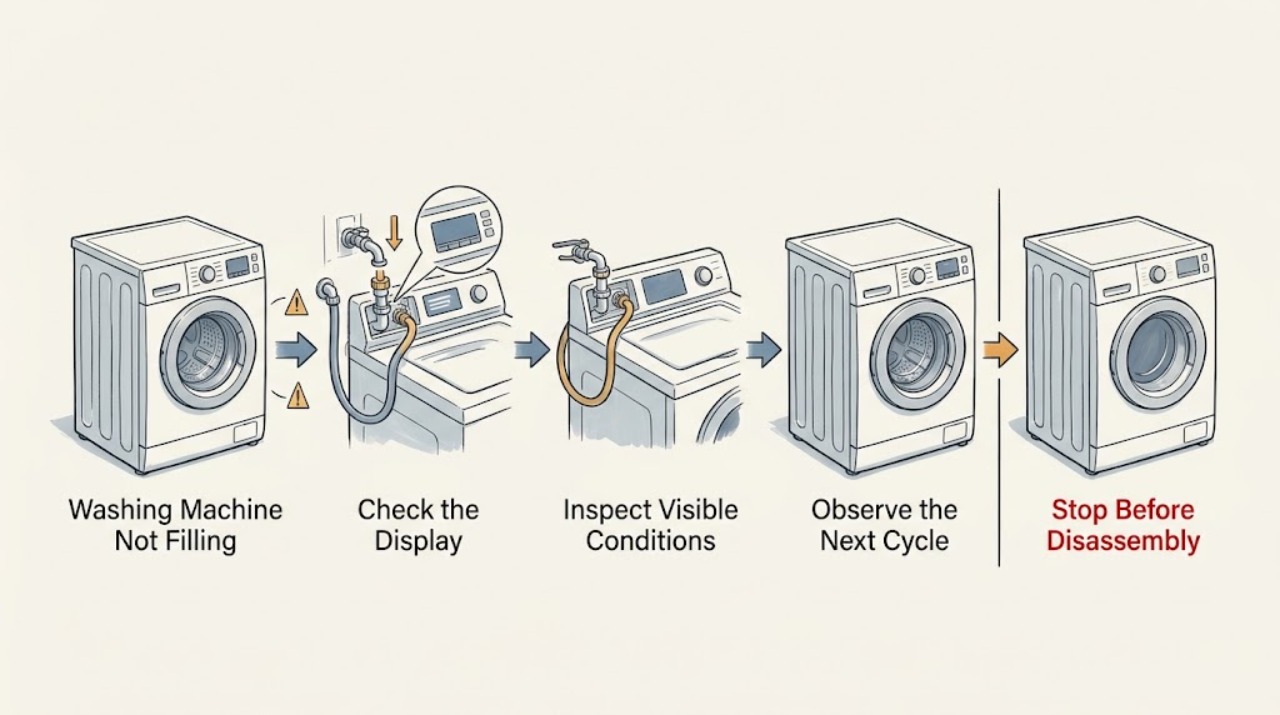
Work through in order
Diagnostic checks
Use only checks that match the exact appliance or system and its official guide.
-
Check 1
Start by noting whether the washer remains completely dry, whether it briefly takes in water and then empties, and whether the display shows E10, E11, C1, a door message, or another code. Make sure the door is fully closed without forcing it.
Expected result: A completely dry drum points toward supply, hose, filter, valve, or door-interlock checks. Water that enters and immediately leaves points toward the drain setup. AEG associates E10, E11, and C1 with water supply or drainage issues.
Next step: If there is a code, keep it with the model details and continue only with the matching external checks below. If the door will not close normally, stop and request service rather than forcing the latch.
Why this matters
Why: This separates a true no-fill condition from water being admitted but not retained, and it identifies information a technician will need.
-
Check 2
With the washer switched off, look at the dedicated water tap and confirm it is open. Check another nearby cold-water outlet to see whether the household supply is present; do not dismantle the washer to make this check.
Expected result: If the tap is closed or the other outlet also has no water, the washer cannot fill. If the tap is open and the household supply works, the fault is more likely in the washer's inlet path or controls.
Next step: Restore the household supply only if it is a simple, safe tap issue, then retry one cycle. If supply remains weak or absent, stop and have the plumbing or appliance issue assessed.
Why this matters
Why: AEG lists no or low water supply and a closed tap as first-line causes of a fill fault.
-
Check 3
From a safe, accessible position, inspect the visible inlet hose along its length and at its connections. Look for a sharp bend, crushing behind the washer, a loose connection, swelling, a split, or active dripping; do not pull the appliance out or open a panel to reach it.
Expected result: A kink or crushed section can restrict filling. A split hose, damaged connector, or active leak is not a fill adjustment; it is a stop condition.
Next step: If the hose is visibly kinked and can be repositioned without moving the washer, correct only that external obstruction and retry. If it is damaged or leaking, close the water tap if safely reachable, stop using the washer, and arrange service.
Stop if: Stop immediately for active leaking, a damaged hose, or water near electrical equipment.
Why this matters
Why: A restricted hose can mimic a failed valve, while a leaking hose creates a water and electrical hazard.
-
Check 4
If the tap and hose are sound and the model manual permits inlet-filter cleaning, unplug the washer, close the water tap, protect the floor with towels, and clean only the accessible inlet screens as described for that model. Do not force a fitting or work inside the cabinet.
Expected result: A screen covered with sediment or debris supports a restricted inlet path. A clean screen with no improvement makes a supply-valve, wiring, door-interlock, or control fault more likely.
Next step: Reassemble the external connection carefully, reopen the tap, and run one supervised test. If filling is still absent, stop troubleshooting and provide the code, leak history, and filter observation to a qualified appliance technician.
Why this matters
Why: AEG's maintenance guidance places inlet-filter cleaning after isolating power and water; filter condition is evidence, not proof that the inlet valve itself has failed.
-
Check 5
If water seems to enter and then disappears, inspect only the visible drain-hose route: check for a loose connection, a hose pulled unusually deep into the standpipe, or an obvious kink. Do not remove the rear panel or reach the pump.
Expected result: A drain hose that is visibly misplaced can let incoming water run away, while a correctly positioned hose with immediate draining points to an internal drain or anti-flood issue.
Next step: Correct only an obvious external hose-position problem according to the installation instructions and retry once. If it still drains immediately, or an anti-flood condition appears, close the water tap, disconnect power only if safely accessible, and call for professional service.
Why this matters
Why: The machine may be filling normally but failing to retain water; treating this as an inlet-valve fault can lead to an unnecessary part replacement.
Use your observations
Decision map
Find the observation that best matches what you see, then follow the next safe action.
-
PATH 01Safety boundary
What you see
The household water supply is absent or the dedicated tap is closed.
Do this next
Restore the safe external supply if it is a simple tap issue; otherwise stop and arrange plumbing or appliance service.
Why this path and its safety boundary
Safety stop: Continue to the visible inlet-hose inspection.
-
PATH 02Safety boundary
What you see
The inlet hose is kinked, crushed, leaking, split, or visibly damaged.
Do this next
Only reposition an accessible kink without moving the appliance. For a leak or damage, close the water tap if safe, stop using the washer, and call a qualified technician.
Why this path and its safety boundary
Safety stop: If the manual supports it, perform the isolated inlet-screen check, then retest once.
-
PATH 03Safety boundary
What you see
Water enters but immediately leaves, or the machine reports a drainage or anti-flood condition.
Do this next
Inspect the visible drain-hose arrangement only. If it is correct or the condition persists, close the tap and arrange professional service; do not access the pump or internal wiring.
Why this path and its safety boundary
Safety stop: Treat persistent complete no-fill as an unresolved inlet, door-interlock, valve, or control fault and escalate after the safe checks.
-
PATH 04Safety boundary
What you see
The tap, visible hose, and permitted inlet-screen check are all satisfactory, but the washer still does not fill.
Do this next
Stop replacing parts by guesswork and book qualified appliance service. Supply the model, displayed code, cycle used, and results of each check.
Why this path and its safety boundary
Safety stop: Run one supervised cycle after the simple external issue is corrected; if the symptom returns, escalate.
Helpful context
Understand the symptom
What the symptom tells you
A no-fill symptom can mean that water never reaches the appliance, that a restricted inlet path prevents enough flow, or that the machine is refusing or unable to open its inlet valve. First separate those possibilities from a drain-away symptom: if the drum briefly receives water and then empties, inspect the visible drain-hose setup rather than assuming the inlet valve is at fault. Record any displayed code, especially E10, E11, or C1, because AEG uses these codes for water supply or drain-related checks.
Before any hose or filter check
Keep the check external and low risk. Do not open the cabinet, bypass a door or water safety device, or perform live electrical testing. If there is an active leak, an anti-flood warning, a burning smell, or water near electrical equipment, stop using the washer and arrange professional help.
Only after diagnosis
Potential parts
- washing machine inlet hose
Consider this only when the visible hose is split, swollen, leaking, or otherwise damaged.
Confirm the complete AEG model identification and fitting specification before obtaining any replacement. - washing machine inlet valve
Consider this only after supply, hose, and permitted inlet-filter checks pass and a qualified technician confirms that the valve is not opening or is faulty.
Valve appearance is not enough to establish fit; a technician should verify the model-specific part and diagnosis. - washing machine door interlock
Consider this only when the door cannot latch normally or the appliance reports a door-lock condition while the supply path is sound.
Confirm the exact model and have the interlock diagnosed before replacement; do not bypass it.
Common questions
FAQ
Why does my AEG washing machine hum but not fill?
A hum does not prove that water is reaching the drum. Confirm the tap and household supply, inspect the visible hose, and check for a code. If those are sound, the inlet filter, inlet valve, door interlock, or control system needs qualified diagnosis.
Can a blocked inlet filter stop an AEG washing machine filling?
Yes. AEG lists a blocked inlet filter as a possible cause. Clean it only when the washer is unplugged and the water tap is closed, and only as described in the model manual; persistent no-fill needs service.
What should I do if water enters and then drains away?
Treat that as a possible drain setup or anti-flood problem rather than assuming the inlet valve failed. Inspect only the visible drain-hose route, then stop and call a technician if the hose is correctly positioned or the condition repeats.
Read the exact guide
Official sources
- Washing Machine Inlet Hose Leaking: Causes and Step-by-Step FixAEG · AEG washing machine inlet-hose inspection and leak stop guidance
- What are the most common washing machine faults and how do I fix them?AEG · AEG washing machine no-fill causes and repair safety guidance
- Washing Machine Error E10, E11 or C1? How to Fix Water Supply & Drain IssuesAEG · AEG washing machine water supply, inlet hose, inlet filter, and drainage checks
Community feedback
Share a repair observation
Share a plain-text repair observation. Accepted observations are published automatically; this page may take a moment to update.