
On this page
Start here
Quick answer
A toaster oven that appears dead should be checked at the wall outlet, plug, control or standby state, and dry seating of the crumb tray and removable parts. Unplug and cool it before cleaning; if the display and controls remain dead on a known-working outlet, stop before opening the case.
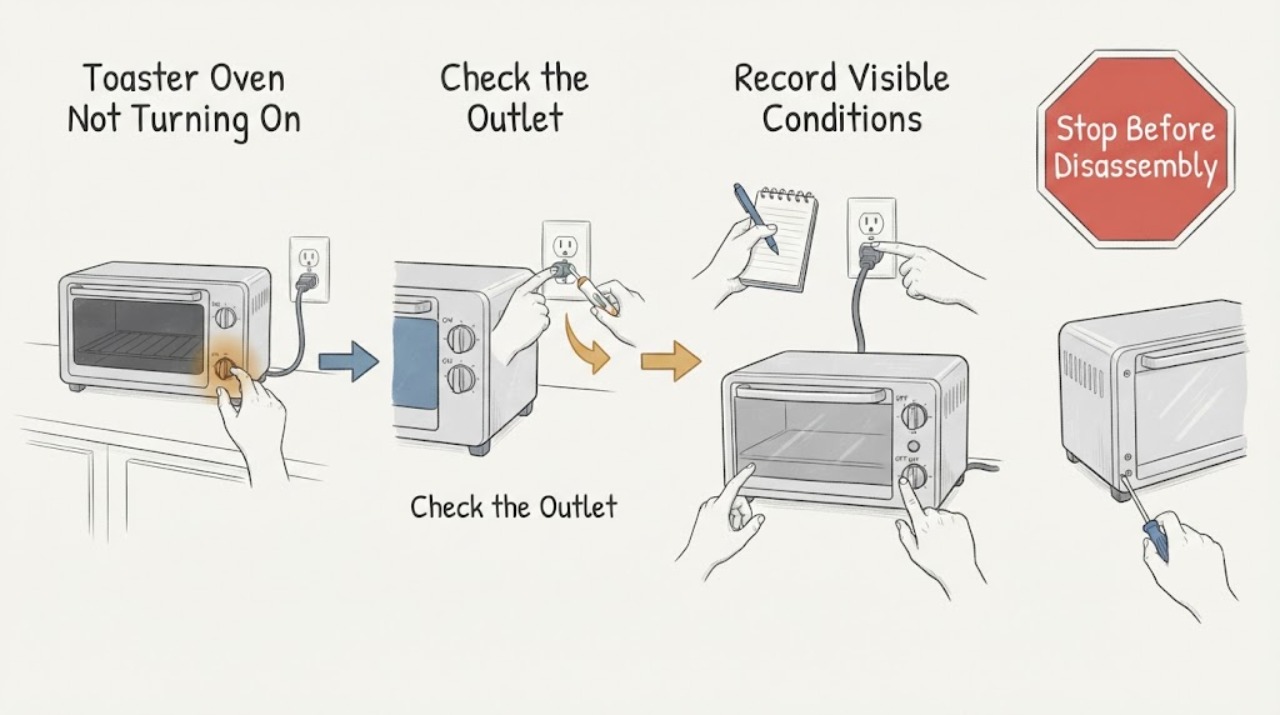
Work through in order
Diagnostic checks
Use only checks that match the exact appliance or system and its official guide.
-
Check 1
Check the wall power: verify the plug is fully seated in a working outlet and note whether the outlet’s breaker or protection device has tripped.
Expected result: Record the visible result of this check and whether the reported symptom changes.
Next step: If the result is normal, continue to the next check; if it is abnormal, correct only the documented condition or stop for service.
Why this matters
Why: This result separates an accessible operating condition from a fault that requires model-specific diagnosis.
-
Check 2
Check the control state: press the documented start or cancel control and turn a selector if the model has a standby mode; record whether the display, clock, or interior light responds.
Expected result: Record the visible result of this check and whether the reported symptom changes.
Next step: If the result is normal, continue to the next check; if it is abnormal, correct only the documented condition or stop for service.
Why this matters
Why: This result separates an accessible operating condition from a fault that requires model-specific diagnosis.
-
Check 3
Inspect the cooled, unplugged oven externally: empty the crumb tray, look for loose debris or moisture, and reinstall only removable parts that are fully dry and correctly seated.
Expected result: Record the visible result of this check and whether the reported symptom changes.
Next step: If the result is normal, continue to the next check; if it is abnormal, correct only the documented condition or stop for service.
Why this matters
Why: This result separates an accessible operating condition from a fault that requires model-specific diagnosis.
-
Check 4
Retest once on the independent outlet with no extension cord and observe whether the display returns, the cycle starts, or the breaker trips again.
Expected result: Record the visible result of this check and whether the reported symptom changes.
Next step: If the result is normal, continue to the next check; if it is abnormal, correct only the documented condition or stop for service.
Why this matters
Why: This result separates an accessible operating condition from a fault that requires model-specific diagnosis.
Use your observations
Decision map
Find the observation that best matches what you see, then follow the next safe action.
-
PATH 01Next step
What you see
The outlet works but the oven has no display, light, or response after the control wake-up check.
Do this next
Unplug the oven and arrange manufacturer or qualified appliance service.
Why this path and its safety boundary
Why it matters: The symptom points beyond standby and cleaning, possibly to the cord, switch, thermal protection, or control board.
-
PATH 02Next step
What you see
The display wakes after a button or dial movement but the heating cycle does not start.
Do this next
Follow the exact manual sequence and do not bypass door or control interlocks.
Why this path and its safety boundary
Why it matters: The oven was likely in standby or awaiting a valid function and start sequence; the control behavior is model-specific.
-
PATH 03Next step
What you see
The breaker trips again, there is a burning odor, or the cord or casing is hot or damaged.
Do this next
Leave it disconnected and obtain qualified service; do not continue retesting.
Why this path and its safety boundary
Why it matters: An electrical or heating fault may create shock or fire risk, and repeated resets are unsafe.
Helpful context
Understand the symptom
Use the ordered checks below to separate normal operating states from a fault for this appliance.
When checks do not resolve it
Need a professional?
Stop for a repeated breaker trip, smoke, sparks, burning odor, damaged cord, or abnormal heat. Keep the toaster oven unplugged and use qualified service.
Common questions
FAQ
Can I clean it while it is plugged in?
No. Breville’s care guidance says to unplug and cool the oven before removing the crumb tray or cleaning, then dry parts before reconnecting.
Why does the display look dead after sitting unused?
Some models enter standby. Try the documented wake control or selector movement; a completely unresponsive unit on a working outlet needs service.
Should I replace a fuse or heater myself?
No. The symptom does not establish which component failed, and opening a toaster oven exposes hazardous electrical and hot parts.
Read the exact guide
Official sources
- How to clean a toaster oven: Tips & tricksBreville · toaster oven unplugging, cooling, crumb-tray, and dry-reassembly care
Community feedback
Share a repair observation
Share a plain-text repair observation. Accepted observations are published automatically; this page may take a moment to update.