
On this page
Start here
Quick answer
If a Toshiba washing machine does not fill, first record the exact model, cycle stage, display code, and whether any water enters. Confirm the washer has power, the selected program is not preset or paused, the lid or door is fully closed, and the required water tap is open. Inspect hoses for kinks and, only after turning the tap off and making the area safe, clean an accessible inlet-valve screen as the model manual permits. Toshiba manuals associate E1 with abnormal filling, E2 with draining, E3 with an open lid, and some E7 or FXX messages with a fault requiring service; codes vary by model. Stop for leaks, overflow, water near electrical parts, smoke, burning smell, repeated tripping, or a valve that keeps admitting water when the machine is stopped.
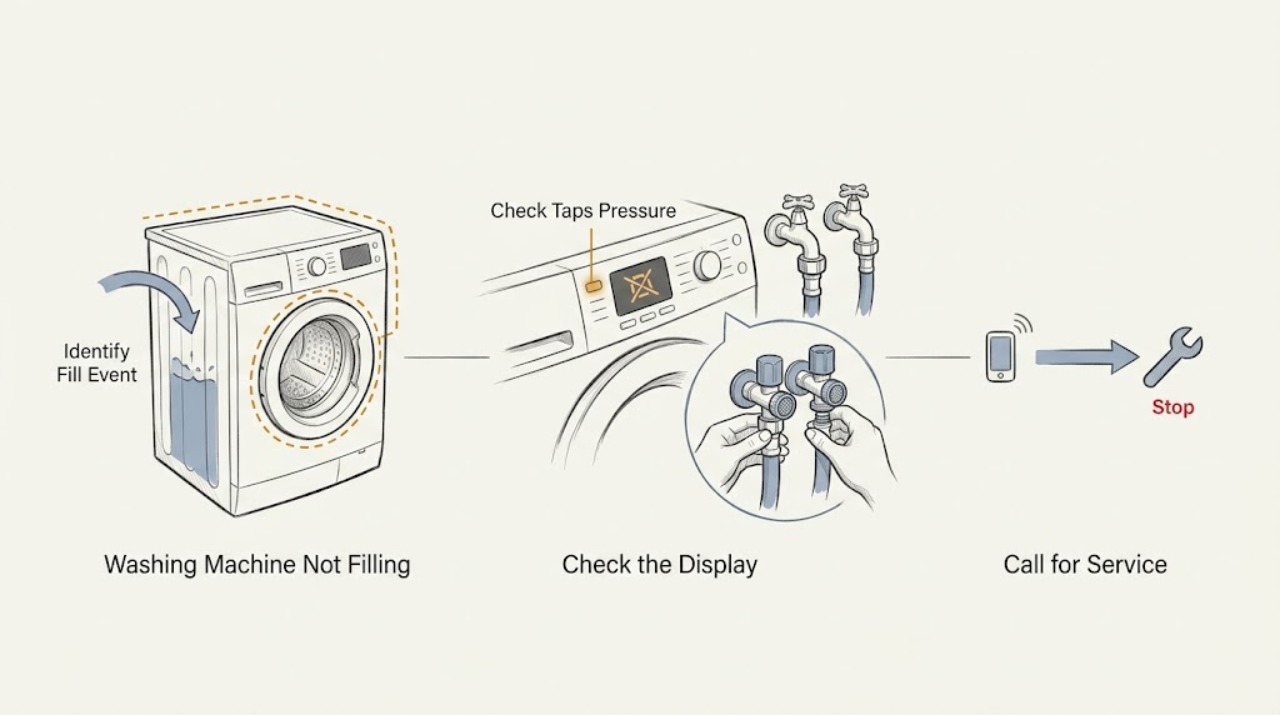
Work through in order
Diagnostic checks
Use only checks that match the exact appliance or system and its official guide.
-
Check 1
With the machine stopped and the floor dry, record the exact Toshiba model, top-load or front-load layout, selected cycle, water-temperature or level setting, display code, and the point at which filling stops; do not open a locked door or lid by force.
Expected result: Classify the symptom as no water at all, a small or slow flow, water that enters and then disappears, or a tub that keeps filling after the cycle is stopped.
Next step: Use the exact model manual and follow the matching branch below; if water continues to enter while stopped, close the water tap and arrange service before any further test.
Stop if: Stop immediately for overflow, uncontrolled filling, a wet electrical area, a damaged hose, or a door or lid that is hot, jammed, or unsafe to open.
Why this matters
Why: These observations separate a supply or inlet problem from a lid or door interlock, a draining or siphoning problem, a program state, or an unsafe inlet valve that does not close.
-
Check 2
Confirm the washer display or indicator has power, the circuit has not tripped, the desired program is selected, and Start or Hold was pressed as the model requires; cancel an unintended Preset or delay state using the documented control only.
Expected result: The display responds and the cycle begins, the controls respond but no fill starts, or the display is blank and the circuit or outlet is abnormal.
Next step: If controls respond, continue to the tap, hose, and lid or door checks. If power remains abnormal, leave the washer off and arrange qualified electrical or appliance service.
Stop if: Do not reset a repeatedly tripping circuit, use a damaged cord, remove covers, or probe live wiring.
Why this matters
Why: The Toshiba manual lists power, a selected Preset mode, and failure to press Start or Hold among conditions that can look like a no-fill complaint. A blank display, hot connection, or repeat trip is an electrical service boundary.
-
Check 3
Verify the required household water tap is fully open and that the home supply has normal pressure by using a nearby cold-water fixture; confirm each hose is connected to the correct washer inlet for the exact model and fuel-free appliance configuration.
Expected result: The nearby fixture also has weak or absent flow, the washer tap is closed or restricted, or household flow is normal but the washer remains dry.
Next step: Restore only a safe, compatible water supply and continue to the hose inspection. Follow the exact manual for hot and cold connections; do not add a hot-water line where the model instructions do not call for one.
Stop if: Stop for a leaking shutoff, burst hose, damaged fitting, scalding water, or water that cannot be controlled at the tap.
Why this matters
Why: A supply interruption or low pressure can prevent the inlet valve from opening usefully. Normal household flow with a dry washer shifts attention to the hose, inlet screen, control, or lock rather than the building supply.
-
Check 4
With the water tap closed and the machine safely isolated from power where the manual permits, inspect the inlet hoses for kinks, crushing, loose connections, or signs of leakage; do not pull the washer away from the wall if doing so strains a hose or cord.
Expected result: A hose is kinked or crushed, a connection drips, the hose is clear and secure, or water splashes when a connection is disturbed.
Next step: Correct only a simple routing issue with the tap closed and no force on fittings. Replace a damaged hose or investigate a leak through qualified service, then continue only when the floor and connections are dry.
Stop if: Do not remove a hose with the tap open, reuse a split hose, or run the machine while a connection leaks.
Why this matters
Why: A restricted hose can reduce fill flow, while a drip or damaged hose can make operation unsafe. A clear, dry connection points toward the inlet screen, lock, control, or water-level system.
-
Check 5
Only after the faucet is off, the hose is depressurized, and the exact manual permits access, check the inlet-valve screen for grit or scale and gently clean the accessible screen with a soft brush; keep debris from entering the valve and do not dismantle the cabinet.
Expected result: The screen is visibly blocked, the screen is clean, the screen or valve is damaged, or water leaks when the hose is restored.
Next step: Reassemble only as the manual directs, turn the tap on slowly, check for leaks, and run one supervised fill observation. If fill does not return, stop and arrange service rather than opening the valve or control.
Stop if: Do not use a sharp tool, chemical descaler, compressed air, force, or a screen that cannot be removed without damage.
Why this matters
Why: Toshiba installation material identifies foreign material at the inlet and recommends careful screen cleaning in the applicable installation. A clean screen with no fill, damage, or renewed leakage needs model-specific service diagnosis.
-
Check 6
Close the lid or door fully, remove any garment caught in the seal or rim, and confirm the latch indication or lock sound appears before Start; do not bypass or press a lock mechanism while the drum or tub can move.
Expected result: The machine reports an open-lid or door condition, the latch closes normally and the cycle advances, or the latch will not engage or releases unexpectedly.
Next step: Remove only an accessible obstruction and retry the documented start sequence once. If the lock indication is absent or the code returns, keep the washer off and request model-specific service.
Stop if: Never tape, wedge, short, or otherwise bypass a lid or door interlock; stop for broken glass, a damaged hinge, or a door that cannot be released safely.
Why this matters
Why: The cited Toshiba manual identifies E3 as a lid-not-closed condition and requires closing the lid and starting again. A failed or intermittent lock can prevent filling because the control withholds water for safety.
-
Check 7
If water enters briefly and then the tub becomes empty, observe the drain hose position without putting hands into the machine; compare it with the exact Toshiba installation instructions and check for a hose routed so low or deeply into the standpipe that water can siphon out.
Expected result: Water leaves as it enters, the drain hose is visibly misplaced, the drain backs up, or the water level remains stable but the wash action never begins.
Next step: Correct only an obvious hose-routing issue allowed by the manual and supervise one fill. For backup, concealed plumbing, or a recurring loss of water, use a qualified appliance or plumbing service.
Stop if: Stop for sewage backup, a drain hose that has come loose, flooding, contaminated water, or any water near electrical parts.
Why this matters
Why: Water disappearing is a drain or installation clue rather than proof that the inlet valve failed. A stable level with no wash action points back to a lock, control, motor, or model-specific fault.
-
Check 8
Record the complete display code, model, cycle stage, tap state, and whether water entered, then perform at most the single reset or code-clearing sequence explicitly allowed by that model manual; do not repeatedly restart the washer.
Expected result: The code clears and a supervised fill completes, an E1 or fill-related code returns, E2 or E3 appears, an E7-series or FXX fault remains, or the washer behaves unsafely.
Next step: Keep the washer off for a returning, unknown, or dangerous code and provide the exact model, code, event timing, and safe observations to qualified service. Close the water tap if the valve admits water while stopped.
Stop if: Stop immediately for E7-series or other dangerous-fault guidance, smoke, burning smell, arcing, overflow, a hot connection, or repeat breaker trips.
Why this matters
Why: The Toshiba manual maps E1 to abnormal filling, E2 to draining, E3 to an open lid, and some other fault messages to service. A recurring or dangerous code cannot be safely narrowed to a replacement part from the symptom alone.
Use your observations
Decision map
Find the observation that best matches what you see, then follow the next safe action.
-
PATH 01Next step
What you see
Water continues to enter after the cycle is stopped or the tub is close to overflowing.
Do this next
Close the water tap immediately if it is safely reachable, isolate the washer from power only from a dry safe position, keep people away from the water, and arrange appliance service. Do not test the inlet valve or restart the machine.
-
PATH 02Next step
What you see
A nearby fixture also has no flow or very weak flow.
Do this next
Treat the issue as a household supply or shutoff problem first; leave the washer off until safe pressure and a dry connection are restored.
-
PATH 03Next step
What you see
The tap works but a hose is kinked, a connection leaks, or the applicable inlet screen is blocked.
Do this next
Close the tap, correct only safe hose routing or clean the accessible screen as the exact Toshiba manual permits, restore water slowly, and supervise a single fill for leaks.
-
PATH 04Next step
What you see
The lid or door does not latch, the lock indication is absent, or E3 returns.
Do this next
Remove only an accessible obstruction and repeat the documented close-and-start sequence once. Keep the machine off and request model-specific service if the interlock or code persists.
-
PATH 05Next step
What you see
Water enters but immediately leaves, or E2 appears.
Do this next
Inspect only the visible drain-hose routing against the exact installation instructions. Correct an obvious routing issue if safe; use appliance or plumbing service for backup, a loose hose, or a recurring drain fault.
-
PATH 06Next step
What you see
E1 or a model-specific abnormal-filling message returns after tap, hose, screen, and lid or door checks.
Do this next
Stop repeated tests, close the water tap, and give qualified service the model, exact code, water-flow observations, and screen condition. Do not replace an inlet valve or control by guesswork.
-
PATH 07Next step
What you see
There is smoke, a burning smell, arcing, a hot cord or connection, water near electrical parts, or a repeat circuit trip.
Do this next
Stop use and isolate power only from a dry safe position; keep the water supply closed if a leak or uncontrolled fill is also present, and arrange qualified appliance or electrical service.
-
PATH 08Next step
What you see
Power, program, water supply, hoses, applicable screen, and lid or door are normal but the washer still does not fill.
Do this next
Keep the washer off and request model-specific service for the inlet valve, lock, water-level sensing, wiring, or control. Provide the exact model and all recorded observations rather than opening the cabinet.
Helpful context
Understand the symptom
Start by separating no fill from a water-level delay
Note whether the tub stays completely dry, receives a small amount of water, or fills and then loses water. A top-load washer may pause while a selected program senses the load or waits for a control input, while a front-load model may require a locked door before it opens the inlet valve. Use the exact Toshiba manual for the model and regional control labels; do not apply an error-code meaning from another model.
Inspect water connections only after making them safe
A hose screen can collect grit or scale, but removing a hose while the faucet is open can release pressurized water. Turn the faucet off, keep the floor dry, and follow the model manual before touching an accessible screen. Do not remove a cabinet, bypass a lid or door interlock, or perform energized electrical checks.
An E1, E2, E3, or persistent fault changes the path
Record the complete display message and the stage when it appears. E1 may point toward filling, E2 toward draining, and E3 toward the lid on the cited Toshiba manual, but exact meanings are model-specific. A recurring fault after the manual's permitted single reset is a service decision, not a reason to keep cycling the appliance.
Only after diagnosis
Potential parts
- water inlet valve or inlet screen
Consider only after the tap, pressure, hose path, and applicable screen are confirmed and qualified diagnosis shows the valve does not open or close correctly.
Confirm the exact Toshiba model, regional version, connector arrangement, and approved fit information before ordering; a no-fill symptom alone does not identify this part. - lid switch or door-lock assembly
Consider only when the lid or door will not report closed, E3 or a lock-related symptom returns, and qualified diagnosis links the interlock to the withheld fill.
Match the exact model and top-load or front-load design. Never bypass the interlock or assume a lock part is compatible across models. - water-level sensor or control
Consider only after supply and inlet checks pass and qualified diagnosis finds incorrect level sensing or control behavior.
Use exact model documentation and service diagnosis; do not open the control area or substitute a part from another Toshiba model.
When checks do not resolve it
Need a professional?
Call qualified appliance service when the exact model's supply, hose, accessible screen, program, and lid or door checks do not restore filling; when E1, E2, E3, E7-series, FXX, or an unknown code returns; or when the inlet valve, lock, wiring, sensor, or control needs diagnosis.
Have this ready
- Provide the exact model, top-load or front-load layout, full display code, selected cycle, whether any water enters, tap and hose observations, screen condition, and whether the problem began after installation or a supply interruption.
Common questions
FAQ
Why does my Toshiba washing machine have power but no water enters?
Check the selected program and Start or Hold state, the lid or door indication, the open tap, household pressure, hose routing, and the accessible inlet screen if the exact manual permits cleaning. A returning E1 or model-specific fill code needs service rather than repeated restarts.
Can a blocked inlet screen stop a Toshiba washer from filling?
Yes. Toshiba installation guidance describes foreign material at the inlet and a careful faucet-off brush-cleaning step for applicable models. Close the tap first, avoid force or sharp tools, check for leaks after reassembly, and use the exact model manual.
What should I do if water enters and then disappears?
That pattern can indicate drain-hose siphoning or a drain problem rather than a failed inlet. Observe the visible hose routing against the exact installation instructions, and use appliance or plumbing service for backup, a loose hose, flooding, or a recurring fault.
When should I stop troubleshooting a Toshiba washer that will not fill?
Stop for uncontrolled filling, overflow, leaks, water near electrical parts, smoke, burning smell, arcing, a hot connection, repeated circuit trips, or a recurring dangerous or unknown code. Close the tap when safe, isolate power only from a dry safe position, and arrange qualified service.
Read the exact guide
Official sources
- INSTALLATIONToshiba · Use as supporting installation evidence only when the reader verifies the exact model's hose and filter arrangement.
- INSTALLATIONToshiba · Installation and filter steps are model-specific; use them only where the physical design and exact Toshiba manual agree.
- T04 English User ManualToshiba · Use the cited causes and codes only for the documented T04 family or when the reader confirms the exact manual applies.
Community feedback
Share a repair observation
Share a plain-text repair observation. Accepted observations are published automatically; this page may take a moment to update.