
On this page
Start here
Quick answer
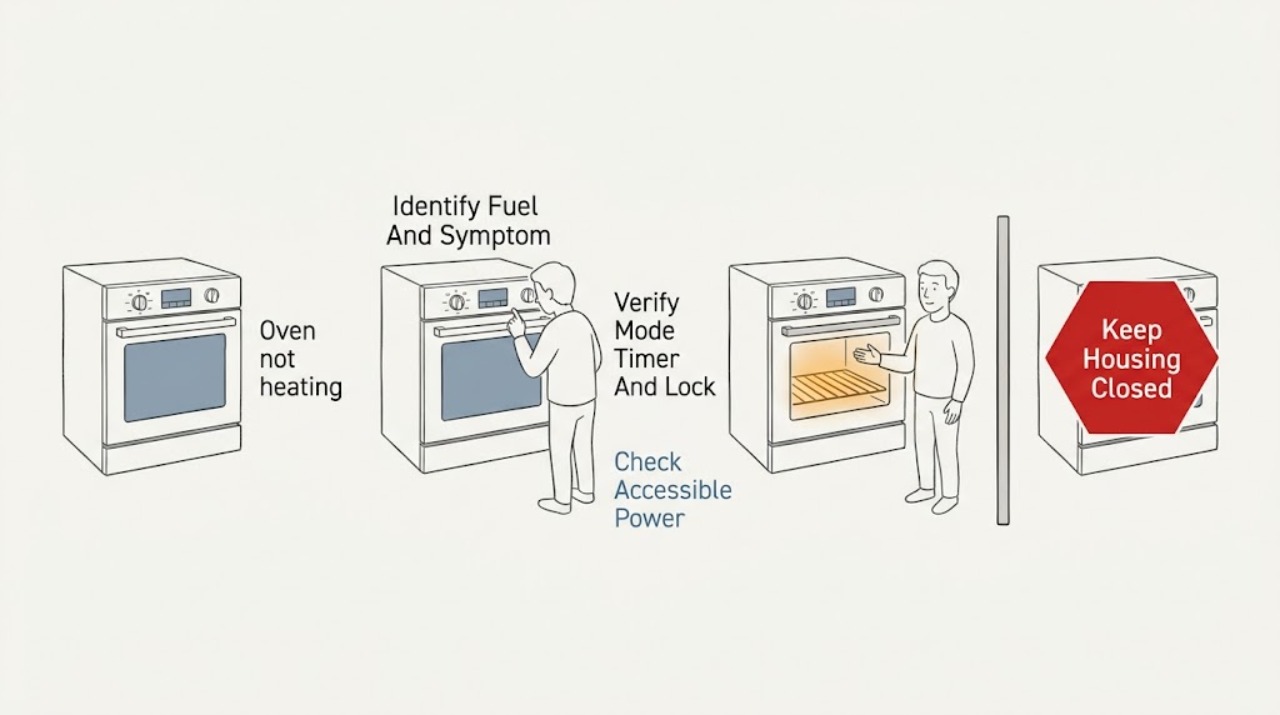
A Westinghouse oven that is not heating may be in the wrong timer or cooking mode, still be in a post-power-failure state, lack a supply phase, have a door or seal problem, or have a failed heating element, temperature sensor, control, igniter, or gas supply component. First identify whether the oven is electric, gas, or dual-fuel from its rating label and manual; do not apply gas-ignition checks to an electric model. With the oven cool, select a normal bake mode, set a temperature, confirm the clock or timer is in the required manual mode, and watch for a heat indicator or ignition sequence. Check only the accessible breaker or fuse once, without removing covers. Remove foil or trays from the oven floor, keep vents clear, and inspect the door seal without pulling it. If a gas smell, delayed ignition, abnormal flame, smoke, arcing, repeated breaker trip, or uncontrolled heating appears, stop using the oven and leave gas or electrical work to a qualified professional.
Before you begin
Safety first
- This article supports identification, control-setting checks, accessible protection observation, and visual checks on a cool oven only. Do not open panels, work on live circuits, disassemble heating or gas components, adjust valves, bypass protection, or repeat unsafe ignition tests.
Work through in order
Diagnostic checks
Use only checks that match the exact appliance or system and its official guide.
-
Check 1
With the oven cool and unused, record the model marking, fuel arrangement, display or clock state, selected function, and whether the light, fan, grill, or cooktop still operates; use the matching Westinghouse manual rather than assuming the oven is electric or gas.
Expected result: Classify the symptom as no display or no response, a display with no heat, heat that is weak or uneven, a gas burner that does not ignite, or heat that stops during a cycle.
Next step: Follow the matching electric, gas, or dual-fuel branch and record any displayed code exactly; do not substitute a procedure from a different Westinghouse model.
Stop if: Stop for a gas smell, smoke, abnormal flame, arcing, damaged glass, exposed wiring, or an appliance that has been wet or repeatedly trips protection.
Why this matters
Why: No display points first to supply or control. A working display with no heat can involve mode, timer, power phase, element, sensor, or gas ignition. Gas ignition and flame checks apply only when the confirmed model has a gas oven.
-
Check 2
Choose a normal bake function and temperature from the model manual, confirm the clock or timer is set and in the required manual mode, and check the display for demo mode, child lock, delayed start, or a code before pressing Start or the equivalent control.
Expected result: The oven begins a normal preheat, the heat indicator responds but the cavity stays cold, the timer or lock prevents operation, or the display remains unchanged.
Next step: Use only the documented model controls to clear a mode or lock and run one normal preheat; if the setting is correct but there is no heat, stop and continue with the supply and symptom branch.
Stop if: Do not repeatedly start the oven, enter undocumented service menus, or continue if the display shows a fault with smoke, smell, arcing, or uncontrolled heat.
Why this matters
Why: A timer, automatic mode, demo setting, child lock, or incomplete start can prevent heating without a failed heater. An active heat indicator with no temperature rise moves the diagnosis toward supply, heating, sensing, or gas ignition.
-
Check 3
If the oven is electric or has electric controls, inspect the accessible fuse or breaker once from a dry position and check whether other appliance functions lost power at the same time; do not remove panels or test live wiring.
Expected result: The breaker or fuse is open, resets and holds with no load, will not reset, trips again when the oven is selected, or the display works while the oven still does not heat.
Next step: For a single safe reset, follow the electrical panel instructions and then make one controlled mode check; for a repeat trip, hot outlet, burning odor, damaged cord, or no improvement, leave the oven off and call an electrician or qualified appliance technician.
Stop if: Do not repeatedly reset protection, use an extension lead, remove the oven cover, probe terminals, or touch the appliance when wet.
Why this matters
Why: A one-time open protective device can explain a dead oven, but a repeat trip indicates an electrical fault or overload. A stable display with no heat does not prove the element or sensor is safe to replace.
-
Check 4
When the oven is cold and isolated from use, remove foil, trays, and cookware from the oven floor, check that shelves are not blocking the door, inspect the visible gasket for detachment or damage, and confirm the vent is not covered.
Expected result: The oven floor was lined or obstructed, the door does not close or seal evenly, the gasket is damaged, the vent is blocked, or the cavity and door look normal.
Next step: Remove only the safe obstruction, close the door normally, and perform one documented preheat; if heat remains absent or weak, stop using the oven and arrange model-specific service.
Stop if: Do not pull or glue the gasket, operate without required door glass, use sharp tools, run self-cleaning with a damaged door, or continue with cracked glass, smoke, or excessive exterior heat.
Why this matters
Why: Foil or trays on the bottom can change heating and airflow, while a poor door seal can cause heat loss. A normal visible door does not rule out an element, sensor, igniter, or control fault.
-
Check 5
For a confirmed electric oven, run one normal bake preheat only after the settings and power checks are safe, observing the indicator, fan, and whether the cavity changes from cold to warming; do not touch or remove an element.
Expected result: The indicator and cavity warm normally, the fan runs but the cavity stays cold, heat is weak or uneven, or the oven heats and then stops with a fault or protection trip.
Next step: Turn the oven off and provide the model, function, display state, and warming result to a qualified appliance technician; do not open the rear or test an element yourself.
Stop if: Stop immediately for smoke, burning odor, arcing, a hot plug or outlet, damaged insulation, repeated tripping, or uncontrolled heating.
Why this matters
Why: Normal warming points to a setting or expectation issue. Fan-only or weak heat can involve an element, supply phase, sensor, or control; a trip or fault can indicate an electrical defect. These observations do not identify a part for replacement.
-
Check 6
For a confirmed gas or dual-fuel model only, use the manual to set the oven function and observe from the normal user position whether ignition occurs; do not remove a burner, inspect a gas valve, repeat failed ignition, or test for leaks.
Expected result: There is no ignition, delayed ignition or a bang, an unstable or abnormal flame, a persistent gas smell, smoke or soot, or normal ignition followed by loss of heat.
Next step: Turn the appliance off and arrange a qualified gas-appliance service assessment; if gas is smelled or combustion appears unsafe, leave the area and follow the local gas emergency procedure from a safe location.
Stop if: Do not relight repeatedly, use a match, adjust a gas valve or regulator, spray for leaks, operate electrical switches in a gas-smelling area, or continue using the oven with suspected unsafe combustion.
Why this matters
Why: No ignition can involve the control sequence, electric ignition supply, gas supply, igniter, flame sensing, or valve, but the observation cannot identify which component. Delayed ignition, abnormal flame, persistent gas smell, smoke, or soot is an unsafe-gas branch.
Use your observations
Decision map
Find the observation that best matches what you see, then follow the next safe action.
-
PATH 01Safety boundary
What you see
The display and oven functions are dead, or an accessible fuse or breaker is open after a power interruption.
Do this next
Check the accessible protection once and restore the clock or manual mode only as the model manual directs; call an electrician or qualified appliance technician for repeat trips or a dead supply.
Why this path and its safety boundary
Why it matters: The immediate branch is power supply, clock state, or control rather than a proven heater fault.
Safety stop: Stop for repeated trips, a hot outlet, burning odor, damaged cord, wet appliance, smoke, or arcing.
-
PATH 02Safety boundary
What you see
The display, light, or fan works but a normal bake function produces no warmth.
Do this next
Confirm the exact fuel type and one normal preheat result, then leave the oven off and arrange model-specific appliance service if the cavity stays cold.
Why this path and its safety boundary
Why it matters: A timer, mode, supply phase, element, sensor, control, igniter, or gas path may be involved; a working fan does not confirm the heater circuit.
Safety stop: Do not remove panels, test terminals, or keep running a cold oven after a fault, smell, smoke, or trip.
-
PATH 03Safety boundary
What you see
The oven warms but does not reach or hold the expected temperature, or cooking is uneven.
Do this next
Remove only safe obstructions, verify the door closes and the model's preheat procedure, then request service if the result remains weak or uneven; do not assume a calibration or part change applies to every model.
Why this path and its safety boundary
Why it matters: Preheat, foil or tray placement, blocked ventilation, door sealing, supply, sensing, or a heating component may be involved.
Safety stop: Stop for a damaged seal or glass, smoke, excessive exterior heat, burning odor, or uncontrolled temperature.
-
PATH 04Safety boundary
What you see
The confirmed model uses gas and ignition fails, is delayed, produces an abnormal flame, or produces a persistent gas or combustion concern.
Do this next
Turn the appliance off, leave the area if gas is smelled or CO is suspected, and contact the local gas emergency route or a qualified gas engineer from a safe location.
Why this path and its safety boundary
Why it matters: The gas control, igniter, flame sensing, burner, supply, ventilation, or flue needs qualified diagnosis; the appliance is not safe for repeated user testing.
Safety stop: Do not relight, use a match, adjust gas components, operate switches in a gas-smelling area, or use the oven until it is checked.
-
PATH 05Safety boundary
What you see
A code persists, the oven trips protection, smoke or arcing appears, the appliance overheats, or the cause cannot be confirmed safely.
Do this next
Leave the oven off, isolate gas or power only when safe and according to the local installation, and arrange qualified appliance service; use an electrician for supply or wiring concerns.
Why this path and its safety boundary
Why it matters: The issue exceeds a user setting check and may involve electrical, gas, thermal, or structural hazards.
Safety stop: Do not bypass protection, open covers, probe live parts, continue heating, or use a damaged oven.
Helpful context
Understand the symptom
Start by identifying the oven and the symptom
Westinghouse sells electric ovens and gas or dual-fuel cookers, and controls vary by model and region. Record the model marking, fuel type, display state, selected function, whether the fan or light works, and whether the oven is cold, lukewarm, or heats briefly. A completely dead display is a supply or control branch; a display with no heat is a mode, supply, heating, ignition, or temperature-control branch. Do not infer a gas igniter or an electric element without confirming the model.
Timer and preheat checks are low risk
After a power interruption, some Westinghouse timers flash or require the time to be reset before a cooking function will operate. Some models also require manual mode rather than an automatic delayed program. Use the exact manual to set the clock, choose a normal bake function, and allow the documented preheat period. Do not line the oven floor with foil or cookware, and do not block the vent.
Separate user checks from internal repair
A user can verify settings, an accessible fuse or breaker, visible door and seal condition, and whether the oven reaches any heat. Heating elements, sensors, igniters, gas valves, wiring, and controls require model-specific service. Westinghouse documentation directs authorised personnel to carry out servicing; a gas appliance with an unsafe smell or abnormal combustion must not be tested again.
Safety boundary
Stop conditions
- Stop using the oven for a persistent gas smell, delayed ignition or bang, abnormal flame, soot, smoke, suspected carbon monoxide, or any unsafe gas-appliance symptom.
- Do not repeatedly reset a breaker or fuse, operate an oven that trips protection, or touch a hot outlet, damaged cord, exposed conductor, or wet appliance.
- Do not remove panels, test live terminals, replace an element, igniter, sensor, gas valve, regulator, or control as a user check.
- Do not line the oven floor with foil or cookware, block required vents, operate without required door glass, or use a damaged door seal or cracked glass.
- Do not mix electric and gas troubleshooting steps; confirm the model and fuel type before following any ignition or heating procedure.
- Stop for uncontrolled heating, excessive exterior temperature, burning odor, arcing, repeated fault codes, or any uncertainty about the appliance's safe condition.
Only after diagnosis
Potential parts
- electric heating element
Consider this category only when a qualified diagnosis on the exact model confirms an electric element is not heating and the supply and controls are sound.
Confirm the exact model, element position, connector arrangement, rating, and manufacturer procedure; a visually similar element is not automatically compatible. - temperature sensor or control component
Consider this category only when model-specific testing links persistent temperature error or failure to reach temperature to the sensor or control path.
Confirm the model and authorized diagnostic result before selecting a component; do not infer a sensor or control fault from a cold cavity alone. - gas ignition or flame-sensing component
Consider this category only for a confirmed gas or dual-fuel model after a qualified technician identifies an ignition or flame-sensing fault.
Gas components require exact model and fuel configuration; do not order, adjust, or replace them as a user leak or ignition test.
When checks do not resolve it
Need a professional?
Call a qualified appliance technician when the oven remains cold after one model-correct mode, timer, preheat, accessible power, and door check; when heat is weak or uneven; when a fault code persists; or when an element, sensor, igniter, control, wiring, or gas component may be involved. Use a qualified electrician for a failed supply, repeated breaker trip, hot outlet, or wiring concern. For suspected unsafe gas, gas smell, delayed ignition, abnormal flame, smoke, or possible carbon monoxide, stop immediately, leave the area if needed, and follow the local gas emergency procedure from a safe location.
Safety scope: This article supports identification, control-setting checks, accessible protection observation, and visual checks on a cool oven only. Do not open panels, work on live circuits, disassemble heating or gas components, adjust valves, bypass protection, or repeat unsafe ignition tests.
Common questions
FAQ
Why is my Westinghouse oven on but not heating?
Confirm the fuel type, normal bake mode, clock or manual timer state, and one model-correct preheat. If the display or fan works but the cavity stays cold, a supply, element, sensor, control, igniter, or gas path may be involved and needs model-specific service.
Can a Westinghouse timer stop the oven from heating?
Yes. Westinghouse manuals list an unset clock, automatic timer mode, demo mode, child lock, and incorrect controls as possible reasons an oven does not operate. Use the exact manual to restore the clock or required manual mode once, then stop if heating does not begin.
What should I check after a power cut?
Look for a flashing or unset clock, check the selected mode, and inspect the accessible fuse or breaker once from a dry position. A repeat trip, hot outlet, burning odor, or no heat after a safe reset requires qualified service.
How can I tell whether a gas Westinghouse oven is unsafe?
Do not repeatedly try to ignite it. A persistent gas smell, delayed ignition or bang, abnormal flame, soot, smoke, or suspected carbon monoxide is an immediate stop condition. Turn the appliance off, leave if needed, and follow the local gas emergency procedure from a safe location.
Could the door or foil cause weak oven heat?
Yes. Westinghouse troubleshooting guidance identifies foil or trays on the oven floor and incomplete preheat as causes of insufficient heat, and a damaged or poorly closing door can lose heat. Remove only safe obstructions, do not pull the seal, and arrange service if the oven remains weak.
Read the exact guide
Official sources
- Gas safety - Home ownersHealth and Safety Executive · HSE domestic gas safety guidance used for the stop and professional-service boundary; local emergency procedures vary by country.
- Product SupportWestinghouse Appliances Australia · Official Westinghouse support page used to direct model identification and repair to the appropriate manual or qualified service path.
- Gas safety - Carbon monoxide awareness frequently asked questionsHealth and Safety Executive · HSE guidance used for gas-combustion warning signs and the stop boundary; it does not diagnose a particular Westinghouse model.
- W_MAN_WVE9515SD_A26918301_A4_Mar25Westinghouse Appliances Australia · Official Westinghouse user manual used as a model-specific example; settings, controls, and fuel details can differ across Westinghouse ovens.
- USER MANUAL — ELECTRIC BUILT-IN OVENSWestinghouse Appliances Australia · Official Westinghouse electric-oven manual used only for electric-model examples; it must not be applied to an unspecified gas model.
- USER MANUALWestinghouse Appliances Australia · Official Westinghouse gas-oven manual identified from its gas installation and operation sections; exact fuel arrangement and controls must be confirmed for the user's model.
Community feedback
Share a repair observation
Share a plain-text repair observation. Accepted observations are published automatically; this page may take a moment to update.