
On this page
Start here
Quick answer
An oven temperature sensor does not create heat; it reports oven temperature so the control can regulate the heating system. If the oven does not heat, first confirm the cooking mode, door, settings, power or gas symptoms, and whether a bake element or gas igniter visibly activates. If the oven heats but the temperature is wrong, a displaced or faulty sensor is one possibility, but calibration, the heating element or igniter, wiring, and control can produce similar symptoms. Inspect only the sensor's accessible position with the oven cool and the power or gas hazard undisturbed. Do not pull the sensor out, test live voltage, measure resistance without the model procedure, remove panels, adjust gas, or replace a part based on the sensor symptom alone.
Before you begin
Safety first
- This article covers settings, cool visual sensor position, door, and nonintrusive heating observations only. Do not open panels, handle wiring or gas components, test energized circuits, remove the sensor or heat source, or bypass safety controls.
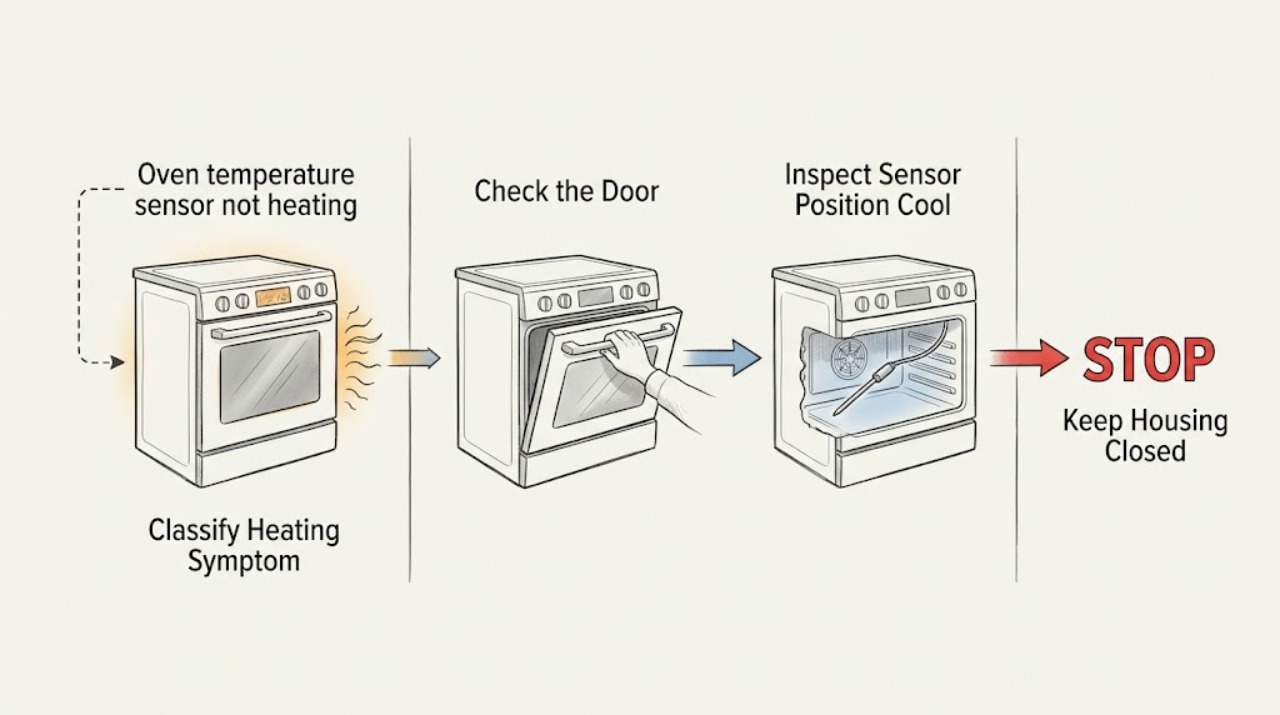
Work through in order
Diagnostic checks
Use only checks that match the exact appliance or system and its official guide.
-
Check 1
With the oven empty and cool, choose the normal bake mode described by the owner's manual, start a preheat, and record whether the display advances, the cavity warms at all, and the problem is no heat or temperature that is consistently wrong; do not open the door repeatedly.
Expected result: The oven stays cold, warms but never reaches the setting, reaches the setting but cooks inaccurately, or shows a diagnostic message or unusual display behavior.
Next step: Record the mode, set temperature, display behavior, preheat result, and any message, then continue with the cool sensor-position and settings checks only when no safety warning is present.
Stop if: Stop for gas odor, smoke, arcing, damaged wiring, a repeated breaker trip, or an oven that becomes dangerously hot outside the cavity.
Why this matters
Why: A cold cavity points first toward mode, power or gas, element or igniter, wiring, or control. Heating with a consistent offset makes calibration or sensor position more relevant; a diagnostic message may require model-specific instructions rather than a generic sensor replacement.
-
Check 2
Confirm the selected cooking mode is Bake rather than a timer, warming, delayed-start, lock, or demonstration mode, make sure the door closes fully, and check the owner's manual for the model's normal preheat indication.
Expected result: The oven was in a nonheating or demonstration mode, the door is not sealing or closing, the display shows a lock or delayed start, or the settings are correct but the cavity remains cold.
Next step: Correct only the obvious setting according to the manual and run one normal preheat; if it remains cold, document the result and move to safe external checks and service escalation.
Stop if: Do not defeat a door lock, force the door, enter service mode, or change wiring or gas settings to test the sensor.
Why this matters
Why: A mode, door, or demonstration setting can mimic a failed sensor or heating system. Correct settings with no heat keep power, heating, ignition, wiring, or control causes in consideration rather than proving a sensor fault.
-
Check 3
After the oven is fully cool and the control is off, inspect the visible temperature sensor from inside the cavity without removing it; compare its position with the owner's manual and look for obvious bending, contact with a rack or heating element, looseness, or damage.
Expected result: The sensor is in its documented position and undamaged, it is visibly displaced or touching another part, its mounting is loose, or its wiring or rear entry is inaccessible or damaged.
Next step: If the manual explicitly permits a gentle external repositioning and no force is needed, restore only that visible position; otherwise photograph it and request model-specific service. Do not pull, unplug, or probe it.
Stop if: Do not remove the sensor, open the rear panel, disconnect a harness, measure resistance or voltage, or touch a hot or energized component.
Why this matters
Why: A visibly displaced sensor can produce an inaccurate temperature reading, but an intact, correctly positioned sensor does not rule out an internal sensor, harness, control, element, igniter, or power fault.
-
Check 4
During one normal preheat, observe only through the closed or safely opened door as the manual permits whether the electric bake element becomes warm or the gas oven's igniter and burner sequence begins; do not touch, clean, or remove either component.
Expected result: The heating element or gas ignition appears to operate, neither heat source operates, heat starts and then stops unusually, or the observation cannot be made safely or clearly.
Next step: Add the observation and oven type to the service record; request qualified appliance diagnosis if the source does not operate, cycles abnormally, or the cavity remains cold.
Stop if: Do not remove the element or igniter, scrape deposits, test live terminals, open the gas path, or continue a cycle with smoke, odor, arcing, or an abnormal flame.
Why this matters
Why: A working heat source with wrong temperature makes sensor placement, calibration, airflow, door sealing, or control behavior more relevant. No heat-source response points toward power, element, igniter, gas, wiring, or control work and does not establish that the sensor is bad.
-
Check 5
If the oven does heat, repeat a familiar recipe or the model's approved temperature-check method under the same rack and door conditions, and note whether the result is consistently too hot, too cool, or inconsistent rather than relying on a single inexpensive oven thermometer reading.
Expected result: The result is consistently offset, changes from one identical run to another, or is normal after a setting or calibration adjustment allowed by the manual.
Next step: Use only the model's documented calibration range and procedure for a consistent offset; request service for inconsistency, no heat, a large unexplained error, or a result unchanged by permitted calibration.
Stop if: Do not compensate with unsafe temperatures, bypass sensor feedback, or use calibration to mask a sensor, element, gas, or control fault.
Why this matters
Why: A consistent offset can fit calibration or sensor-position concerns; inconsistent results can reflect a sensor, control, element cycling, door, or cooking-condition issue. Samsung cautions that ordinary oven thermometers may not track cycling accurately.
-
Check 6
Gather the oven brand and model, fuel type, selected mode, set temperature, display or error message, sensor position, heat-source response, calibration history, breaker or gas symptoms, and whether the problem began after cleaning, repair, or installation.
Expected result: The issue is unchanged since installation, started after a repair or self-clean cycle, affects only Bake or only Broil, affects all modes, or coincides with power, gas, odor, or error-code symptoms.
Next step: Request qualified appliance service and ask for model-specific testing of the sensor, harness, control, heating element or igniter, power or gas supply, and door or venting condition as applicable.
Stop if: Do not order a sensor, element, igniter, or control board from the symptom alone; ask for the measured cause and compatible repair path.
Why this matters
Why: A mode-specific pattern can focus the heating element or igniter path; an all-mode or post-repair pattern can involve sensor, harness, control, power, or assembly. A self-clean or temperature event can also leave a sensor or wiring issue that requires inspection.
Use your observations
Decision map
Find the observation that best matches what you see, then follow the next safe action.
-
PATH 01Next step
What you see
The oven heats, but the visible sensor is bent, loose, touching another component, or clearly outside the model's documented position.
Do this next
Follow only the owner's manual's permitted positioning instruction without pulling or disconnecting the sensor; otherwise request model-specific service and provide photos.
Why this path and its safety boundary
Why it matters: A sensor-position or mounting problem may be distorting temperature feedback, but the correct position and repair depend on the exact oven.
-
PATH 02Next step
What you see
The oven heats and cooks consistently too hot or too cool, the sensor appears correctly positioned, and there is no error or safety warning.
Do this next
Use the exact model's documented calibration procedure only within its allowed range; arrange service if the offset is large, calibration does not help, or results become inconsistent.
Why this path and its safety boundary
Why it matters: Calibration or a sensor-reading issue is more plausible than a completely failed heat source, but calibration cannot prove which component is at fault.
-
PATH 03Next step
What you see
The sensor is correctly positioned, but the oven remains cold and the bake element or gas ignition sequence does not respond during a normal call for heat.
Do this next
Stop at observation and request qualified appliance service; do not remove the heat source, test live voltage, or open gas components.
Why this path and its safety boundary
Why it matters: Power, heating element, igniter, gas supply, wiring, or control failure is more likely than a sensor-only fault.
-
PATH 04Next step
What you see
The oven was in Demo mode, a timer or delayed-start function, an incorrect cooking mode, or a door or lock condition that prevents normal heating.
Do this next
Correct only the documented setting, close the door normally, and run one approved preheat; request service if the cavity still does not heat or the setting returns.
Why this path and its safety boundary
Why it matters: A control or operating setting can mimic a temperature-sensor or heating failure.
-
PATH 05Next step
What you see
A sensor or communication error returns, every heating mode is affected, the issue began after repair or self-cleaning, or the display behavior is abnormal.
Do this next
Record the exact code and model, follow only the owner's manual reset or service instruction, and request qualified service if the code or no-heat condition returns.
Why this path and its safety boundary
Why it matters: A sensor harness, control, power, or model-specific safety condition is more likely than a simple calibration issue.
-
PATH 06Safety boundary
What you see
There is a gas odor, smoke, arcing, exposed or damaged wiring, a repeated breaker trip, abnormal flame, or heat outside the intended cavity.
Do this next
Stop using the oven, leave immediately for a strong gas odor or fire concern, avoid switches or flames where gas may be present, and obtain appropriate emergency, gas, electrical, or appliance help from a safe location.
Why this path and its safety boundary
Why it matters: The immediate concern is gas, combustion, electrical, or fire safety, not identifying a sensor or replacement part.
Safety stop: Do not restart the oven, adjust gas, touch wiring, or silence a safety alarm to collect another observation.
Helpful context
Understand the symptom
Separate a sensor-reading problem from a no-heat problem
The temperature sensor is a feedback component. A sensor that is out of position or faulty can contribute to incorrect readings, but it does not supply the heat. Whirlpool's oven guidance asks users to check the sensor position alongside the element or igniter, door seal, and power; Samsung also separates an oven that does not heat from one that heats but reads or cooks inaccurately. Start by deciding whether the cavity stays cold or heats to the wrong level.
Use only model-specific calibration and sensor guidance
Sensor appearance and location vary by oven. With the oven cool, compare its visible sensor position with the owner's manual and look only for an obvious bend, contact with a rack or element, loose mounting, or damage. Do not pull it through the rear wall or disconnect its harness. Calibration is a control adjustment for a consistent temperature offset; it cannot restore an oven that never heats and should follow the exact model instructions.
Heating and fuel safety stay outside ordinary troubleshooting
An electric oven may have a failed bake element, power connection, wiring, or control; a gas oven may have an igniter, burner, gas supply, or control issue. A visible failure to heat is useful information but is not permission to touch the element, clean or adjust the igniter, expose wiring, or change gas settings. Stop for gas odor, smoke, arcing, damaged insulation, or a breaker that trips again and obtain qualified service.
Safety boundary
Stop conditions
- Do not pull the temperature sensor through the rear wall, disconnect its harness, measure live voltage, or measure resistance without the exact model procedure and proper safety controls.
- Do not remove or replace a heating element, igniter, control board, fuse, or wiring as a first-line sensor check; these repairs require model-specific and often qualified service.
- Stop for gas odor, smoke, arcing, damaged insulation, abnormal flame, heat outside the oven cavity, or a breaker that trips again; leave for a strong gas odor or fire concern and seek appropriate emergency help.
- Do not bypass a door lock, sensor, thermal fuse, or safety control, and do not operate the oven with a damaged door, seal, wiring, or unexplained error condition.
- Do not use calibration to mask an oven that never heats or produces inconsistent results; request a measured diagnosis.
Only after diagnosis
Potential parts
- oven temperature sensor
Consider this category only after testing identifies a failed sensor or harness, or when the exact model procedure confirms the sensor is out of specification; a no-heat symptom alone does not prove it.
Confirm the exact oven model, sensor connector, mounting, and manufacturer fit information before ordering; installation may require qualified service. - electric bake heating element
Consider this category only when a qualified diagnosis identifies a failed bake element in an electric oven or the model instructions confirm the element is not heating.
Confirm exact model, element shape, terminals, electrical requirements, and installation procedure; do not remove or test an energized element. - gas oven igniter
Consider this category only when a qualified diagnosis identifies an igniter fault in a gas oven after the settings and gas-safety conditions are confirmed.
Confirm exact model, fuel system, connector, safety controls, and combustion setup with qualified service; do not clean or replace it by symptom alone. - oven control or sensor harness
Consider this category only when model-specific testing identifies a sensor harness, control, or communication fault after the sensor and heat source are assessed.
Confirm exact model, software or control revision, connectors, and safety testing requirements with the manufacturer or technician; do not substitute a generic control.
When checks do not resolve it
Need a professional?
Arrange qualified appliance service when the oven remains cold after confirming the mode, door, and model instructions, when the temperature sensor is damaged or its position is uncertain, when an element or gas igniter does not respond, when calibration does not correct a consistent offset, when results are inconsistent, or when an error returns. Stop immediately for gas odor, smoke, arcing, damaged wiring, abnormal flame, heat outside the cavity, or repeated breaker trips.
Safety scope: This article covers settings, cool visual sensor position, door, and nonintrusive heating observations only. Do not open panels, handle wiring or gas components, test energized circuits, remove the sensor or heat source, or bypass safety controls.
Common questions
FAQ
Can an oven temperature sensor cause the oven not to heat?
A faulty or displaced sensor can cause incorrect temperature feedback, but the sensor is not the heat source. If the oven stays cold, also consider the mode, power or gas, bake element or igniter, wiring, and control. Confirm the cool sensor position and request model-specific diagnosis before replacing it.
Where is the oven temperature sensor and what should I check?
Many ovens have a thin sensor at the rear of the cavity, but location varies. With the oven cool and off, look for obvious displacement, damage, looseness, or contact with a rack or element and compare it with the owner's manual. Do not pull it out, disconnect it, or open the rear panel.
How do I know whether the heating element or sensor is the problem?
If the oven heats but stays consistently too hot or cool, sensor position or calibration is more relevant. If the cavity stays cold and the bake element or gas ignition does not respond, power, element, igniter, wiring, or control causes are more likely. A visual observation cannot replace safe model-specific testing.
Can I calibrate the oven instead of replacing the temperature sensor?
Calibration is appropriate only for a consistent temperature offset and only through the exact model's documented procedure. It cannot fix an oven that never heats, an inconsistent result, a damaged sensor, or a failed element or igniter. Request service when calibration does not correct the issue.
Why does my oven show a temperature sensor error?
A sensor, harness, control, communication, or model-specific condition can produce an error. Record the exact code and model, follow only the owner's manual's reset guidance, and request service if the code returns. Do not disconnect the sensor or bypass the control.
When should I stop using an oven that is not heating?
Stop for gas odor, smoke, arcing, damaged wiring, abnormal flame, heat outside the cavity, a repeated breaker trip, or a safety alarm. Leave immediately for a strong gas odor or fire concern, avoid switches or flames where gas may be present, and obtain appropriate help from a safe location.
Read the exact guide
Official sources
- Samsung range or wall oven error codesSamsung · Samsung range and wall-oven error-code guidance; error codes and reset steps are model-specific.
- What to Do If Your Gas Oven Is Not HeatingWhirlpool · Whirlpool gas-oven troubleshooting guidance; gas connection and internal component work require the owner's manual or licensed professional.
- Why is My Oven Not Heating Up?Whirlpool · Whirlpool consumer guidance for gas and electric ovens; exact model instructions and qualified service govern a specific appliance.
- Samsung oven temperature issuesSamsung · Samsung oven troubleshooting guidance; settings and calibration steps vary by model and must follow the owner's manual.
Community feedback
Share a repair observation
Share a plain-text repair observation. Accepted observations are published automatically; this page may take a moment to update.