
On this page
Start here
Quick answer
A steady hum or buzz can be normal on Whirlpool countertop and over-the-range microwaves when the cooling fan runs or the power supply switches the magnetron. Popping with a flash, smoke, burning smell, damaged cavity or door, or a breaker trip is a stop-use symptom: end the cycle, disconnect power only if it is safe, and do not restart the oven to see whether it clears. When the model is unknown, remove the appliance from service until you can identify the microwave type and follow its Whirlpool Use & Care instructions or arrange authorized service. Metal or foil, metallic-trim cookware, food residue and cavity damage are possible arcing triggers, but a persistent noise without a visible external cause needs model-specific service rather than a guessed high-voltage repair.
Before you begin
Safety first
- Do not open the cabinet, operate with the door open or damaged, bypass an interlock, run the oven empty to reproduce the noise, or touch microwave high-voltage components. Whirlpool's technician sheet requires power disconnection before servicing.
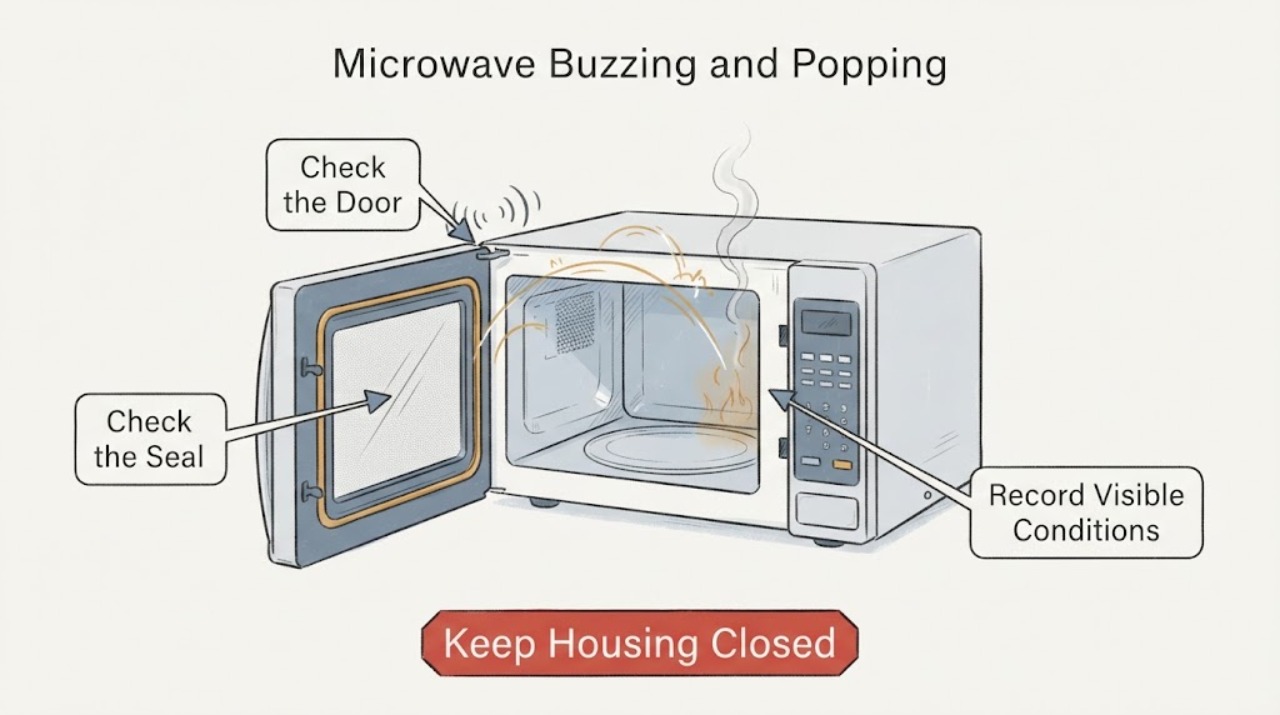
Work through in order
Diagnostic checks
Use only checks that match the exact appliance or system and its official guide.
-
Check 1
If there is a visible flash, repeated pop, smoke, burning smell, damaged door or a tripped breaker, stop the cycle immediately. Disconnect the microwave from power only if you can do so without approaching smoke, flame or damaged wiring; otherwise leave it alone and get emergency or qualified electrical help.
Expected result: The sound is accompanied by an arc/flash, smoke, odor, door damage or a power trip, or it is only a steady hum with none of those signs.
Next step: Keep the oven out of service after the first pattern and arrange authorized microwave service. For the second pattern, identify the exact model and installation type before any model-specific check; do not create a test run after an arc.
Why this matters
Why: The first pattern is a stop-use condition and may involve arcing or an electrical fault. The second pattern is compatible with the normal hum/buzz described for some Whirlpool microwave types, but it does not prove the appliance is safe if the sound is new or worsening.
-
Check 2
With power isolated and the cavity cool, inspect the cooking space for metal or foil, metallic-trim cookware, twist ties, skewers, foil liners, metallic glaze, spilled food or heavy soil. Remove only loose, accessible items; do not pry at an inlet cover, seal, interlock or other fixed part.
Expected result: A listed metal/foil item or food/soil mark is present, or the cavity, cover, door glass, seal or frame is burned, cracked, loose or otherwise damaged.
Next step: Discard or remove the offending loose item and follow the exact model's Use & Care cleaning instructions only if the cavity and door are undamaged. If fixed damage or a burned area is present, leave the microwave disconnected and request authorized service.
Why this matters
Why: Whirlpool identifies metal/foil and some cavity contamination as possible arcing contributors. Fixed cavity or door damage is not a user-level cause to experiment around and can make continued operation unsafe.
-
Check 3
Read the complete model label and record whether the unit is countertop, over-the-range, built-in or drawer style before applying a noise page or manual. Keep the model code, installation type and the exact time the buzzing/popping occurs with the service request.
Expected result: The model and type match a Whirlpool support page/manual, or the label is missing/unclear and the unit cannot be placed in one of those categories.
Next step: Use the exact model's Whirlpool Use & Care instructions or authorized support route. If the label cannot be recovered, provide photographs and the installation description to service rather than borrowing instructions from another Whirlpool microwave type.
Why this matters
Why: Whirlpool's normal-buzz explanations are installation-type-specific, and the opened arcing guidance is specifically a microwave-drawer page. An unknown type cannot support a definitive sound or part diagnosis.
-
Check 4
If the cavity and door appear intact and the only symptom was a steady hum, compare the sound with the exact model's normal-noise guidance without opening the cabinet or running the microwave empty. Note whether the sound starts with the fan, changes with heating, or continues after the cycle ends.
Expected result: The sound is a steady, repeatable hum during normal operation with no pop, flash, odor or damage, or it is harsh, intermittent, escalating or paired with a new symptom.
Next step: Use the normal-noise explanation only for the matching model/type and monitor without repeated experiments. For a new, escalating or unexplained sound, stop use and arrange authorized service.
Why this matters
Why: A steady hum can fit Whirlpool's described fan or power-supply switching behavior for the applicable microwave type. A harsh or changing noise is not established as normal by those pages and should not be assigned to a magnetron, fan or other component without model-specific diagnosis.
-
Check 5
Before contacting service, document the model, installation type, whether food was inside, any visible arc or smoke, the door/cavity condition, breaker behavior and whether the turntable was seated. Do not remove panels or attempt to measure, replace or bypass internal microwave parts.
Expected result: The symptom is reproducible only as a pop/arc or damage event, or the symptom remains an unexplained buzzing/popping sound after safe external checks.
Next step: Leave the microwave disconnected and give the documented observations to Whirlpool or an authorized microwave technician. Do not keep restarting it to capture a sound or confirm a suspected component.
Why this matters
Why: Either pattern exceeds a safe general-purpose user repair. Whirlpool's technician material treats microwave-energy, door/interlock and electrical service as qualified work with power disconnected before servicing.
Use your observations
Decision map
Find the observation that best matches what you see, then follow the next safe action.
-
PATH 01Next step
What you see
There is a visible flash, repeated popping, smoke, burning odor, a burned cavity/cover, door damage or a breaker trip.
Do this next
Stop and isolate power only when safe, keep the microwave out of service, and contact authorized microwave service; use emergency help for active smoke or fire.
Why this path and its safety boundary
Why it matters: This is consistent with an arcing or electrical safety event, not a normal-noise diagnosis. Continuing to operate can damage the oven or utensil and can expose a damaged door/interlock system.
-
PATH 02Next step
What you see
The sound is a steady hum during operation, with no popping, visible arc, smoke, odor, damage or breaker behavior, and the exact model/type matches Whirlpool's corresponding noise page.
Do this next
Follow the exact model's normal-noise guidance and stop using the unit if the sound changes, becomes intermittent or is joined by any arc, odor or damage.
Why this path and its safety boundary
Why it matters: For that matching type, Whirlpool describes humming/buzzing as a possible cooling-fan or power-supply/magnetron-switching sound. That is a conditional normal-noise explanation, not proof that every Whirlpool microwave with a buzz is healthy.
-
PATH 03Next step
What you see
The model/type is unknown, the popping persists after loose metal or foil is removed, the cavity or door is damaged, or the sound is harsh, new or escalating.
Do this next
Keep the appliance disconnected and provide the model label, installation type, sound timing and any photos of visible damage to Whirlpool or an authorized service provider. Do not open the cabinet or bypass a safety switch.
Why this path and its safety boundary
Why it matters: The opened public Whirlpool pages do not support a definitive internal component diagnosis across all microwave types. A technician must assess the appliance with microwave-energy, door/interlock and power-disconnection safeguards.
Helpful context
Understand the symptom
Separate a normal hum from a popping event
Whirlpool's countertop and over-the-range support pages describe a steady hum or buzz as a possible operating sound from the cooling fan or the power supply switching the magnetron on and off. That explanation is conditional on the appliance type and on the absence of arcing, smoke, odor, damage or an electrical trip. A sudden crackle, flash or pop is a different observation: end the cycle and treat it as a possible arcing or damage event instead of repeatedly testing it.
Safe external causes to check after the cavity is cool
Whirlpool lists metal cookware or bakeware, gold or silver trim, skewers, twist ties, foil liners, metallic glaze, some foods and soil inside the cavity as possible arcing contributors on its microwave-drawer guidance. Once the oven is unplugged or otherwise safely isolated and cool, remove any loose offending item and inspect only the accessible cavity and turntable area. Use the exact model's Use & Care cleaning instructions; do not scrape, bend or remove an internal cover, seal or interlock part.
Why a model-specific service decision matters
A Whirlpool microwave's installation type and model determine which noise explanation and user controls apply. The opened official pages do not establish one shared internal repair procedure for every Whirlpool microwave. The technician sheet reserves servicing for qualified work, requires disconnecting power before service and includes door/interlock and microwave-energy safety checks. Do not open the cabinet, bypass a door switch, run the oven with a damaged door or attempt high-voltage diagnosis from a general noise description.
When checks do not resolve it
Need a professional?
Contact Whirlpool or an authorized microwave technician when popping or arcing persists, when smoke/odor/damage or a breaker trip occurs, when the model-specific noise guidance does not fit, or whenever the model and installation type are unknown and the sound is unexplained.
Safety scope: Do not open the cabinet, operate with the door open or damaged, bypass an interlock, run the oven empty to reproduce the noise, or touch microwave high-voltage components. Whirlpool's technician sheet requires power disconnection before servicing.
Have this ready
- Provide the complete model label, installation type, when the sound occurs, whether food was inside, whether there was a flash or smoke, the condition of the cavity and door, and any breaker behavior. A short recording can help only if it can be made without restarting an unsafe appliance.
Common questions
FAQ
Is a buzzing microwave always failing?
No. Whirlpool's countertop and over-the-range support pages describe a steady hum or buzz as a possible normal sound from the cooling fan or power supply switching the magnetron. A new or changing buzz, or any buzz with popping, flash, smoke, odor, damage or a breaker trip, should be stopped and assessed instead of assumed normal.
What should I do if the microwave pops or flashes?
End the cycle and do not restart it to test. If safe, isolate power, let the cavity cool, and look only for a loose metal or foil item or visible cavity/door damage. Whirlpool lists metal, foil, metallic trim and cavity contamination as possible arcing contributors, but damaged fixed parts require authorized service.
Can I remove the microwave cover to find the source of the noise?
No. The Whirlpool technician sheet is marked for service technician use only and requires power disconnection before servicing. Do not open the cabinet, bypass a door interlock or diagnose microwave high-voltage components from a general sound description.
Why does the exact microwave model matter here?
Whirlpool's opened noise pages are separated by installation type: countertop and over-the-range. The opened arcing page is for a microwave drawer. Without the complete model and type, use only the shared stop-use boundary and arrange exact-model support rather than transferring a noise explanation from another microwave.
Read the exact guide
Official sources
- Buzzing Noise - Countertop MicrowaveWhirlpool Product Help · Opened Whirlpool's countertop microwave support page. It describes the normal buzzing/humming condition for that installation type and does not establish a universal rule for over-the-range, built-in or drawer models.
- Humming Noise - Over-the-Range MicrowaveWhirlpool Product Help · Opened Whirlpool's over-the-range microwave support page. It describes a possible normal hum/buzz from the cooling fan or power-supply switching and is limited to that installation type.
- Thumping or Rumbling Noises - Over-the-Range MicrowaveWhirlpool Product Help · Opened Whirlpool's over-the-range noise page. It supports only the conditional external turntable/support check for that type and is not used to identify a popping component.
- General Arcing and Sparking - Microwave DrawerWhirlpool Product Help · Opened Whirlpool's microwave-drawer arcing page. It is used conditionally for the listed arcing triggers and stop/service boundary; it is not treated as a model-specific diagnosis for every Whirlpool microwave.
- Tech SheetWhirlpool · Opened the Whirlpool technician document. It is used only to state the professional-service boundary and not to expose internal test or repair procedures to consumers.
Community feedback
Share a repair observation
Share a plain-text repair observation. Accepted observations are published automatically; this page may take a moment to update.