
On this page
Start here
Quick answer
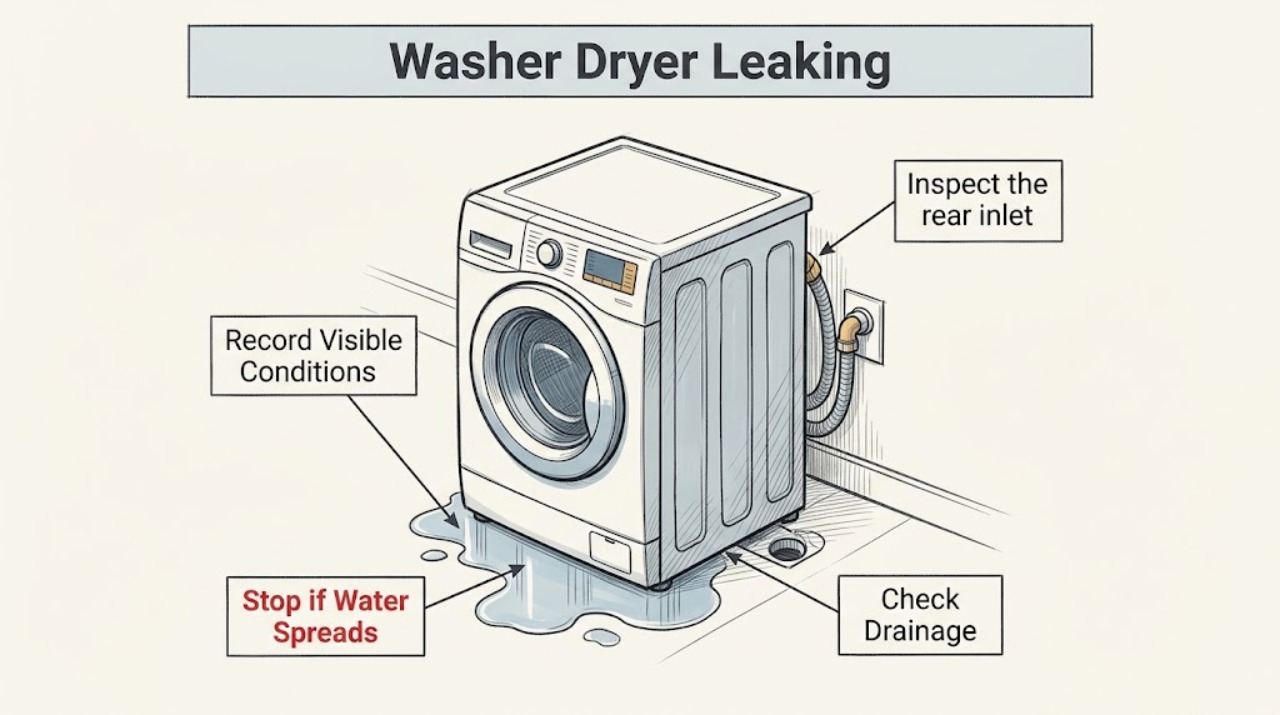
Stop the cycle, keep water away from the power connection, and identify whether the leak occurred during washing or drying and where it first appeared. A washer-side leak commonly tracks to an inlet hose, drain hose or household drain, door seal, dispenser, drain-pump filter, or excess suds. On an all-in-one model, drying condenses moisture and sends it through the same drain route; a dryer-side puddle can instead point to a kinked condensate drain hose, a wrongly seated filter, or an unlevel unit. If water is near electrical parts, the machine keeps filling, or you see smoke, sparks, or a burning smell, stop, shut off water and power only if safe, and get professional help. Do not run a test cycle until the source is corrected.
Work through in order
Diagnostic checks
Use only checks that match the exact appliance or system and its official guide.
-
Check 1
Stop the cycle and record when the leak appears: filling, washing, draining, spinning, or drying.
Expected result: Water may appear during washer fill, when the drain pump runs, at the front door, only after drying, or even while the machine is idle.
Next step: Keep the machine off while you locate the first wet point. If the tub continues filling while off, water is near electrical parts, or there is smoke, sparking, or a burning smell, stop and use the safety branch.
Stop if: Do not run another cycle merely to reproduce a leak that is already reaching the floor or electrical area.
Why this matters
Why: Timing separates an inlet or dispenser issue from a drain or suds issue and helps distinguish washer water from condensate produced during drying.
-
Check 2
Inspect the rear inlet and drain connections from the outside, without pulling the wet appliance or over-tightening fittings.
Expected result: An inlet hose connection may be wet or missing a washer, a hose may be cracked or loose, the drain hose may be loose or kinked, or the household drain may be slow or backing up.
Next step: Close the water supply if safe, correct only an obviously loose external connection according to the installation instructions, and clear a household drain blockage through normal plumbing service. Do not move a heavy wet unit alone or open cabinet panels.
Stop if: Stop if a hose is split, water continues under pressure, the drain backs up, or the wet connection is close to energized equipment.
Why this matters
Why: A wet inlet connection points to fill-side plumbing; a loose or restricted drain route can return water or overflow during draining. Whirlpool says the drain hose should be secure but not sealed into the drainpipe.
-
Check 3
For a front leak during washing, inspect the door glass, rubber seal, seal drainage openings, and dispenser drawer with the machine off.
Expected result: Lint, clothing, residue, or a blocked drainage opening may sit in or under the seal; the dispenser may contain buildup or not be fully closed; a load may be tightly packed or a piece may be outside the seal.
Next step: Remove only visible debris, wipe the seal and glass with a damp cloth, clean the removable dispenser as described for the model, close it fully, and use only the correct high-efficiency detergent at the label's recommended amount. If the seal is torn or the leak returns, call service.
Stop if: Do not reach into a moving drum, use the machine with a torn seal, or mix cleaning chemicals.
Why this matters
Why: Whirlpool identifies a dirty or obstructed door seal and a clogged or open dispenser as ways water can escape at the front. Excessive suds can also leak from the washer.
-
Check 4
If the leak is low at the front or underneath, check whether the drain-pump filter and its plug were recently cleaned or disturbed.
Expected result: The filter may not be fully seated, or a removable drain hose plug may be missing or not secured; water may collect only when the unit drains.
Next step: Do not open the filter while water is hot or the drum is full. If the model's manual permits user cleaning, drain into a suitable pan with the appliance isolated and refit the filter and plug exactly as instructed. Otherwise, request service.
Stop if: Stop if water cannot be contained, the filter is stuck, or the access area is wet near electrical components.
Why this matters
Why: Whirlpool says an incompletely seated filter or unsecured plug can allow a front or bottom leak after filter maintenance.
-
Check 5
If water appears after a drying cycle, trace the condensate route and inspect the filter, drain hose, and appliance level from the outside.
Expected result: On a ventless all-in-one, the condensate uses the same drain hose as the washer. On a HybridCare dryer, the filter may be incorrectly seated or the drain hose may be crushed, kinked, restricted, too long, or routed too high; the unit may also be visibly unlevel.
Next step: Turn the appliance off, reseat only an accessible filter and remove an obvious external kink without disassembling the dryer. Verify routing against the model installation instructions; if the hose, filter housing, or level cannot be corrected safely, call service.
Stop if: Do not open the sealed dryer or condenser system, reach behind a wet energized appliance, or substitute an unapproved drain hose.
Why this matters
Why: A drying-only puddle can be a condensate drainage problem rather than an inlet leak. A restricted drain prevents condensed water from leaving the appliance.
-
Check 6
After a safe external correction, run no more than one supervised short test only when the floor and electrical area are dry and no warning condition exists.
Expected result: The machine may remain dry, leak again from the same first point, produce excess foam, or back up at the household drain.
Next step: Stop immediately if water reappears. Photograph the first wet point and note the cycle stage, then arrange qualified appliance service instead of repeating tests.
Stop if: Do not supervise a test if water is near power, the machine keeps filling, or you notice burning odor, smoke, or sparks.
Why this matters
Why: A dry test supports the corrected external cause but does not prove a hidden seal, pump, valve, condenser, or hose fault is absent. A recurring leak identifies a service problem.
Use your observations
Decision map
Find the observation that best matches what you see, then follow the next safe action.
-
PATH 01Next step
What you see
The leak starts while filling and is at the rear inlet connection or dispenser.
Do this next
Keep the water supply off until safe, inspect external inlet washers and connections, and clean and fully close the dispenser. A cracked valve, hose, or persistent leak needs service.
-
PATH 02Next step
What you see
The leak starts while draining or spinning and appears at the drain hose, household drain, filter, or bottom.
Do this next
Check external drain routing and household backup, then verify a user-serviceable filter and plug are correctly seated only as the model manual permits. Stop if water cannot be contained or a component is damaged.
-
PATH 03Next step
What you see
The leak is at the front door or dispenser during a wash.
Do this next
Clean visible seal and glass residue, remove items from under the seal, clean and close the dispenser, avoid overloading, and use the correct detergent. A torn seal or repeated leak requires service.
-
PATH 04Next step
What you see
The puddle appears only after drying on an all-in-one or HybridCare-style unit.
Do this next
Inspect the condensate or drain route, filter seating, external hose restriction, and level from the outside. Follow the exact model installation instructions; persistent water on the floor needs service.
-
PATH 05Next step
What you see
Excess suds or foam accompany the leak.
Do this next
Stop the cycle, use only the detergent type and amount specified for the machine, and avoid adding more detergent to the test. If foam or leaking returns, call service.
-
PATH 06Next step
What you see
The machine keeps filling, water is near a socket or control area, or there is smoke, a burning smell, or sparking.
Do this next
Stop immediately. Close the water supply and isolate power only if it can be done without touching wet electrical areas; leave the appliance off and have a qualified professional inspect it.
Helpful context
Understand the symptom
First identify the side and the first wet point
Dry the floor only after stopping the appliance safely, then place a dry towel around—not under—accessible edges and note where it becomes wet first. Water at the rear during fill or drain points to hoses or plumbing; water at the front points to the door seal, dispenser, filter plug, or water spilled when the door was opened; a puddle after drying may be condensate drainage. A wet floor alone does not prove the leak started at the bottom of the cabinet.
Washer-side causes
Whirlpool's product-help guidance calls out secure inlet connections with their washers, a drain hose that is secure but not sealed, a blocked household drain, a dirty or obstructed door seal, a clogged dispenser, an incorrectly seated drain-pump filter or plug, and excess suds from the wrong detergent or too much detergent. Inspect these from the outside and follow the model manual for any filter access.
Dryer-side and condensate causes
In an all-in-one machine, heated air passes through a water-cooled condenser and the resulting water drains through the drain hose used by the washer. In a Whirlpool HybridCare dryer, water on the floor can result from an incorrectly seated filter, an unlevel dryer, or a crushed, kinked, too-long, or too-high drain hose. Do not assume every puddle after a drying cycle is a washer leak.
Stop and call for help
A machine that keeps filling, a blocked drain backing up, water reaching a socket or control area, smoke, sparks, or a burning smell is not a safe test condition. Stop the appliance, close the water supply if safe, isolate power without touching wet electrical areas, and have a qualified appliance professional inspect it.
Safety boundary
Stop conditions
- Stop immediately if the tub keeps filling, water reaches a socket or control area, or you see smoke, sparks, or smell burning. Close the water supply and isolate power only when safe; do not touch wet electrical parts.
- Do not run another cycle to reproduce a leak that is already active, recurring, or backing up through household plumbing.
- Do not open cabinet panels, sealed dryer or condenser areas, pumps, valves, or electrical connections as a leak test.
- Do not use a machine with a torn door seal, cracked pressurized hose, unstable drain route, or filter that will not seat correctly.
Only after diagnosis
Potential parts
- inlet or drain hose
Consider only if an external hose is visibly cracked, damaged, or cannot maintain a correct connection after the routing and washers are checked.
Confirm the exact model and installation requirements before replacing any hose. - door seal
Consider only when the door seal is torn or remains unable to seal after visible debris and residue are removed.
Door seals vary by model; confirm fit and have service install it if the model requires cabinet disassembly. - drain pump filter or plug
Consider only when the filter or plug is damaged or cannot seat correctly after the permitted cleaning procedure.
Use the model's service information to confirm the correct component and safe access method.
When checks do not resolve it
Need a professional?
Arrange qualified appliance or plumbing service when the leak returns after safe external corrections, a hose or seal is damaged, the drain pump or filter area cannot be safely serviced, condensate still reaches the floor, or the source is inside the cabinet. Treat water near electricity, continuous filling, smoke, sparks, or burning odor as an urgent stop condition.
Common questions
FAQ
How do I tell whether the washer side or dryer side is leaking?
Note the cycle stage and the first wet point. A leak during fill or wash points to inlet, dispenser, door seal, suds, or washer plumbing; a leak during drain points to the drain route or filter; a puddle only after drying can involve condensate drainage, the filter, level, or dryer drain hose.
Can too much detergent make a Whirlpool washer dryer leak?
Yes. Whirlpool says non-high-efficiency detergent or more detergent than recommended can create excess suds that lead to leaking and draining concerns. Stop the cycle, use the correct detergent and amount for the model, and call service if foam or leaking returns.
Why does water appear after drying in an all-in-one machine?
An all-in-one condensing dryer turns moisture into water and sends it through the same drain hose as the washer. A kinked or restricted route, a poorly seated filter, or another drain problem can leave water on the floor. Inspect only accessible external parts and follow the model installation instructions.
When should I stop using a leaking washer dryer immediately?
Stop when water is near electrical parts, the machine keeps filling, a drain backs up, or you see smoke, sparks, or smell burning. Close the water supply and isolate power only if safe without touching wet electrical areas, then arrange qualified help.
Read the exact guide
Official sources
- Dryer Not Drying or Long Dry Times- All-In-One Washer DryerWhirlpool Product Help · Whirlpool all-in-one washer dryers; condenser moisture and shared drain route
- Leaking from Back - All-In-One Washer DryerWhirlpool Product Help · Whirlpool all-in-one washer dryers; inlet hose, drain hose, household drain, and detergent causes
- Leaking from Underneath or Bottom - Product Help | WhirlpoolWhirlpool Product Help · Whirlpool all-in-one washer dryers; drain-pump filter and inlet hose checks for bottom leaks
- Leaking Inside - Front Load WasherWhirlpool Product Help · Whirlpool front-load washer side of a washer-dryer topic; inlet hoses, drain hose, household drain, and suds
- Leaking from Front - All-In-One Washer DryerWhirlpool Product Help · Whirlpool all-in-one washer dryers; front leaks, door seal, drain filter, and plug
- Water on Floor - HybridCare DryerWhirlpool Product Help · Whirlpool HybridCare dryer condensate drainage; filter seating, level, and drain hose routing
Community feedback
Share a repair observation
Share a plain-text repair observation. Accepted observations are published automatically; this page may take a moment to update.