
On this page
Start here
Quick answer
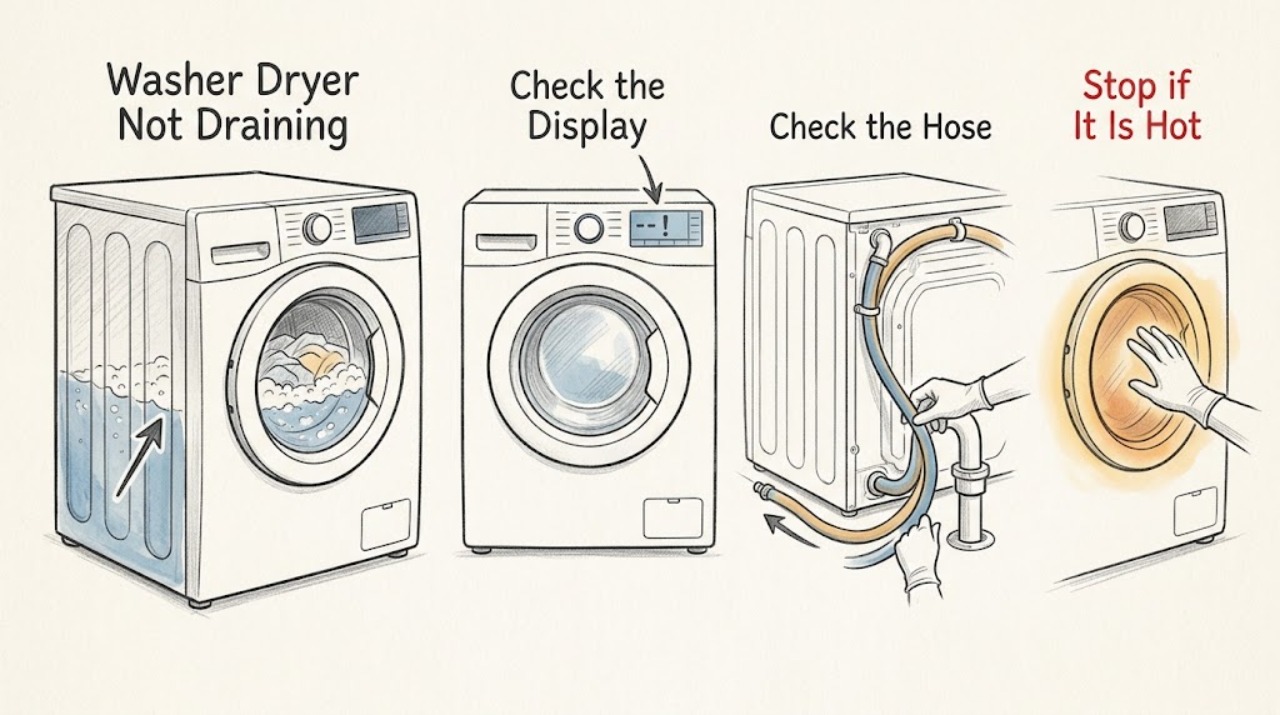
For a Whirlpool washer dryer that is not draining, stop the wash side and protect the floor first. If safe and supported by the exact manual, use Cancel or Drain, then check the visible drain hose for kinks, excessive insertion, tape that seals the standpipe, or a blocked sink. Whirlpool identifies a hose inserted too far or sealed to the pipe as a siphoning risk, and F9E1 as slow or absent draining. If the model has an accessible pump filter, drain residual water into a broad pan and clean the filter only after making the area safe. Reduce excess suds and avoid an overloaded or tightly packed load. If water is near electrical parts, the machine leaks continuously, the pump only hums, there is a burning smell or spark, or the breaker trips, stop and arrange qualified service.
Work through in order
Diagnostic checks
Use only checks that match the exact appliance or system and its official guide.
-
Check 1
Keep the door closed, stop the dryer side, and select Cancel or Drain once if the wash controls respond and there is no electrical or water hazard.
Expected result: The tub drains normally, drains only partially, remains full, or the control will not respond.
Next step: If the tub remains full, protect the floor and continue only with the safe external checks and the exact manual. Do not force the door or repeatedly restart the cycle.
Stop if: Stop if water is near electrical parts, the machine is leaking continuously, the pump area sparks or smells hot, or the breaker trips.
Why this matters
Why: A successful drain points to a transient cycle or load condition; partial or absent drainage leaves a hose, siphon, suds, filter, pump, or control path to check.
-
Check 2
Inspect the visible drain hose and its connection without moving a full machine: straighten kinks, check that it is not blocked, confirm it is not taped or sealed into the standpipe, and compare its insertion and height with the exact installation instructions.
Expected result: The hose is kinked or blocked, extends more than 4.5 inches into the standpipe or tub, is sealed with tape, sits outside the allowed height, or appears correctly routed with an air gap.
Next step: Correct only the visible routing issue using the supplied hose form and the exact manual, then run one appropriate drain test. If the hose is correctly routed and the problem remains, continue to the next check or arrange service.
Stop if: Do not pull on a hose connected to a full tub, seal the drain opening, alter the supplied hose form, or open plumbing that is backing up into the room.
Why this matters
Why: A kink or obstruction can restrict flow; excessive insertion or a sealed connection can cause siphoning and water to return or drain incorrectly. A normal visible setup makes a pump or internal path more likely.
-
Check 3
Look for excessive foam, an unusually tightly packed load, or a load that has balled up, and review the detergent type and amount against the exact Whirlpool manual before starting another wash.
Expected result: The tub contains substantial suds, the load is overfilled or compacted, the detergent was not intended for the machine, or the load and suds appear normal.
Next step: If suds are present, allow the documented routine to finish and use the specified detergent amount; do not add more detergent or run repeated cycles. Correct a safe load issue and make one controlled test.
Stop if: Stop if foam or water spills toward electrical parts, the tub continues filling, or the code returns after the documented routine.
Why this matters
Why: Whirlpool states that excess suds can initiate a suds-reduction routine and delay normal progress. A corrected load or detergent issue may resolve the symptom, while normal conditions point back to the drain path.
-
Check 4
If the exact model has an accessible drain-pump filter and the area is dry and safe, unplug the appliance from a dry, reachable outlet, place a broad flat pan and cloth below the access point, and follow the manual's residual-water and filter-cleaning procedure.
Expected result: The residual-water hose drains, the filter contains lint or debris, the filter is clear, or water cannot be contained and the filter will not move normally.
Next step: Clean and reinstall the filter only as the exact manual directs, with the filter fully seated, then run one drain test. If water cannot be contained, stop and arrange service.
Stop if: Do not reach into a powered appliance, force the filter, dismantle the pump, or continue if water approaches electrical parts or the cabinet leaks.
Why this matters
Why: A blocked filter or door-seal drain hole can restrict the pump path. A clear filter or an unsafe access condition means the problem is not proven solved and may require an internal pump, hose, or control diagnosis.
-
Check 5
With the appliance still unplugged and the door area accessible, inspect the lower door-seal drain holes and visible hose connections for lint or residue; do not remove the seal or panels.
Expected result: The bellows drain holes are visibly obstructed, the seal or hose connection leaks, or the visible path is clean and dry.
Next step: Clear only loose accessible residue as directed by the exact manual, dry the area, and make one controlled drain test. Arrange service for a damaged seal, persistent leak, or unchanged drain fault.
Stop if: Do not operate with a continuous leak, damaged seal, exposed wiring, or water near electrical components.
Why this matters
Why: Whirlpool identifies blocked bellows drain holes as a possible reason an all-in-one washer dryer does not drain well. A leak or clean visible path points to a service-level fault if draining remains poor.
-
Check 6
After one safe correction, run one short drain test while remaining nearby and note whether the pump moves water, only hums, makes a grinding sound, or leaves the tub full.
Expected result: Water exits freely and the code clears, or the code returns, drainage is weak or absent, the pump is noisy, or the tub remains full.
Next step: Stop the wash side and arrange qualified appliance service with the exact code, model, hose setup, filter result, and test observation.
Stop if: Stop immediately for leaking water, burning odor, sparks, smoke, abnormal heat, or a repeated breaker trip.
Why this matters
Why: A normal test supports the hose, suds, load, or filter correction. A returning code, weak flow, abnormal noise, or full tub indicates a pump, internal obstruction, control, or installation problem needing diagnosis.
Use your observations
Decision map
Find the observation that best matches what you see, then follow the next safe action.
-
PATH 01Next step
What you see
The tub is full and water is close to an outlet, cord, control, or other electrical part, or the appliance is leaking continuously.
Do this next
Do not open the door or filter. Isolate power only from a dry, safe location if possible, keep clear of the water, and arrange qualified appliance or electrical service.
-
PATH 02Next step
What you see
The visible hose is kinked, sealed into the standpipe, inserted too far, or installed outside the model's permitted routing.
Do this next
Correct the visible installation with the supplied hose form and an air gap, then make one drain test. If the problem remains, stop and arrange service.
-
PATH 03Next step
What you see
The drain hose is correctly routed but F9E1 or a long-drain symptom remains.
Do this next
Check the model's accessible pump filter and door-seal drain holes if safe. A clear path with poor drainage requires diagnosis of the pump, internal hose, or control.
-
PATH 04Next step
What you see
Heavy suds or a detergent/load problem is visible.
Do this next
Allow the documented suds-reduction routine to finish, correct detergent amount and load condition, and do not run repeated cycles or add more detergent. If the code returns, arrange service.
-
PATH 05Next step
What you see
The pump filter or bellows drain path is blocked and can be accessed safely under the exact manual.
Do this next
Drain residual water into a broad pan, clean and reinstall the filter or clear loose accessible residue, then make one controlled test. Do not force the access or filter.
-
PATH 06Next step
What you see
The pump only hums, grinds, remains silent with power present, the tub stays full after the checks, or the code returns.
Do this next
Stop using the wash side and arrange qualified appliance service. Provide the model, code, hose routing, filter result, and the pump sound or flow observation.
Helpful context
Understand the symptom
Make the wash-side safe first
A washer dryer that has stopped with water inside can spill when the door or filter is opened. Keep the dryer side off, keep the floor dry, and use Cancel or Drain only if the controls respond and the exact manual permits it. If water is close to an outlet, cord, or other electrical part, do not reach into the area; isolate power only from a dry, safe location and arrange qualified help.
Separate a hose setup problem from a blocked pump path
Whirlpool's all-in-one guidance says a drain hose extending too far into the standpipe or laundry tub can cause water to siphon back, and sealing the hose with tape can remove the air gap needed to prevent suction. A properly routed hose with slow or absent draining shifts attention to the pump filter, bellows drain holes, or an internal pump or control problem.
Suds and the load can delay draining
Excess suds can trigger a Whirlpool washer-dryer suds-reduction routine and make a cycle appear stuck. Let the documented routine finish, use the detergent type and amount specified for the machine, and do not add more detergent to force a drain. A tightly packed or badly distributed load can also leave water in the tub; correct the load only after the machine is safe to access.
Know when the filter is beyond a safe home check
Some Whirlpool all-in-one models provide a front drain-pump filter and residual-water hose. The exact access and procedure vary, so follow the model manual, use a broad pan and cloth, and stop if the water cannot be contained or the filter will not turn normally. A clean filter does not rule out a failed pump, blocked internal hose, control fault, or leak.
Common questions
FAQ
Why is my Whirlpool washer dryer not draining?
Common documented paths include a kinked or obstructed hose, siphoning from incorrect insertion or sealing, a blocked pump filter or door-seal drain hole, excess suds, or a pump/control fault. Check only the safe external or exact-manual steps, then arrange service if the fault remains.
Can a drain hose cause water to return to a Whirlpool washer dryer?
Yes. Whirlpool says a hose inserted too far or sealed to the standpipe can cause siphoning. Compare the hose insertion and height with the exact installation instructions and keep the required air gap.
Is it safe to clean the drain pump filter with water in the tub?
Only when the exact model provides that access and the area is safe. Unplug from a dry, reachable outlet, use a broad pan and cloth for residual water, and stop if water cannot be contained, the filter will not turn normally, or electrical parts are nearby.
Can too much detergent stop a Whirlpool washer dryer from draining?
Whirlpool documents excess suds as a condition that can trigger a suds-reduction routine and delay cycle progress. Let the routine finish, use the specified detergent amount, and arrange service if the drain fault or code returns.
Read the exact guide
Official sources
- F9E1 - Error Code - All-In-One Washer DryerWhirlpool Product Help · Specific F9E1 example: long or absent drain, pump and bellows checks, and drain-hose routing guidance.
- F0E2 - Error Code - All-In-One Washer DryerWhirlpool Product Help · Specific F0E2 example: excess suds can start a reduction routine; use the documented detergent type and amount.
- Not Draining - All-In-One Washer Dryer - Product HelpWhirlpool Product Help · Official Whirlpool all-in-one washer-dryer drain troubleshooting; apply access details only when supported by the exact model manual.
- Cleaning the Drain Pump Filter/Draining Residual WaterWhirlpool Product Help · Official Whirlpool filter procedure for applicable all-in-one models; exact model access and safety instructions control.
Community feedback
Share a repair observation
Share a plain-text repair observation. Accepted observations are published automatically; this page may take a moment to update.