
On this page
Start here
Quick answer
If the washer side of a Whirlpool washer-dryer is not filling, first confirm that the selected cycle has actually started, the lid or door is closed and latched, and the household water valves are fully open. Then inspect the inlet hoses for kinks and the inlet screens for sediment without disturbing the screens. If the washer fills and immediately loses water, inspect the visible drain-hose setup for siphoning or an incorrect position. A Fill light, LF, or F8 E1 message helps classify the fault but does not identify one universal failed part. Stop immediately for a leak, water near electrical equipment, uncontrolled filling, burning odor, smoke, sparks, or a tripped breaker; keep the appliance off and arrange qualified service.
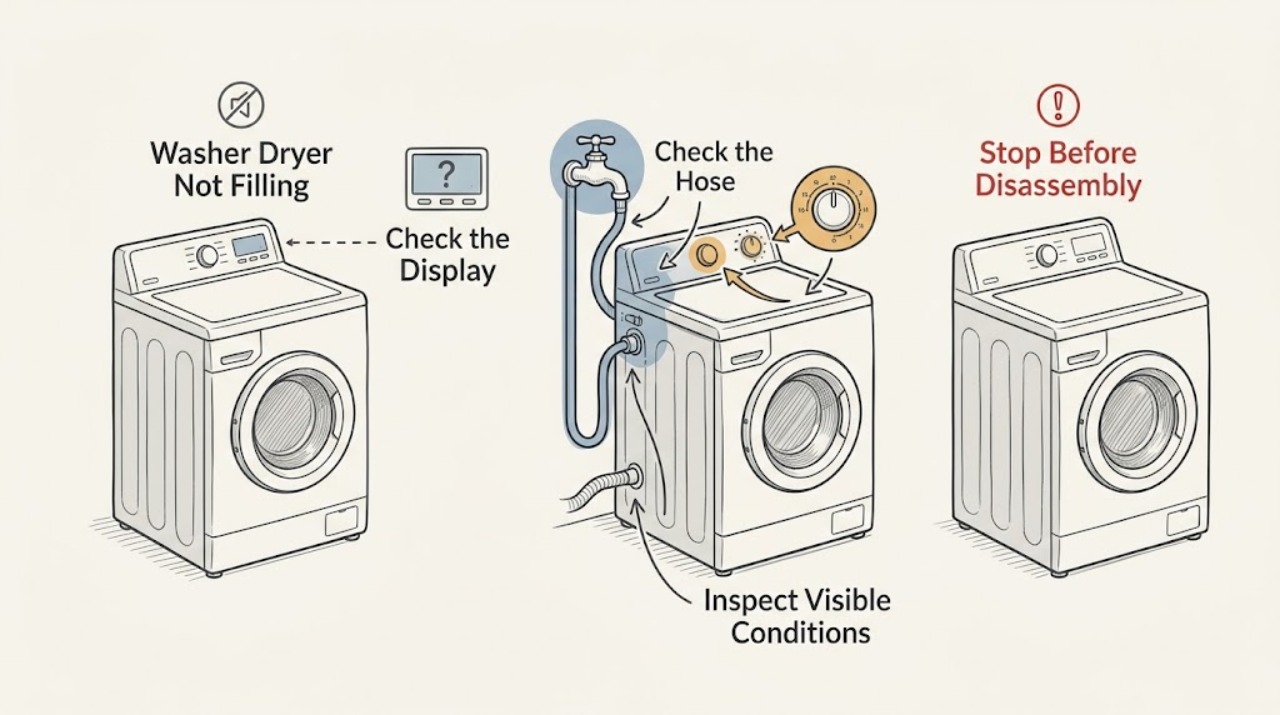
Work through in order
Diagnostic checks
Use only checks that match the exact appliance or system and its official guide.
-
Check 1
Confirm that the symptom is on the washer side: select the washer portion of the appliance, choose a normal cycle, close the lid or door fully, and press or hold Start as the model requires. Check for Control Lock, Delay Start, a paused state, or a Fill/Sensing light. Do not force the lid or door and do not bypass its lock.
Expected result: The cycle starts and the Fill/Sensing light behaves normally; the control stays locked or paused; the lid or door will not latch; or the display shows LF, F8 E1, another fill alert, or no display at all.
Next step: If the controls and latch are normal, continue to the household supply check. If the latch, control, or display remains abnormal after the model's normal reset procedure, stop and request service instead of defeating the lock or opening the control area.
Why this matters
Why: A setting, incomplete start, or lid or door interlock can prevent the washer from requesting water. Whirlpool notes that models differ in whether they fill before the lid locks, and that Fill/Sensing can be part of normal load detection. A fill alert points to a supply or drain-installation branch rather than proving a failed valve.
-
Check 2
With the washer idle, inspect the household hot and cold valves and the full length of each connected inlet hose. Both supplies should be open where the model uses two hoses, the connections should match the marked hot and cold sides, and neither hose should be kinked, crushed, bulged, cut, or visibly leaking. Turn the water supply off before touching a connection.
Expected result: A valve is closed, only one supply is connected on a model that requires both, a hose is kinked or damaged, an anti-flood device is restricting flow, or both supplies and hoses look open and intact.
Next step: Open the correct household valves or replace a visibly failed hose only using the model's installation guidance. If both supplies are present and the symptom remains, continue to the inlet-screen check; do not keep operating when a connection leaks.
Why this matters
Why: No or slow fill can result from the household supply, a restricted hose, or reduced flow through an added device. Whirlpool states that many washers require both hot and cold supplies to be connected and open, while compact models may use one cold supply; the model instructions control.
-
Check 3
After the water is off and residual water is controlled, inspect the inlet screens where the hoses connect at the rear of the washer. Look for mineral sediment or debris. Clean only the accessible face with a soft brush and mild soap and water as Whirlpool describes; do not pry out, puncture, or relocate the screen. Inspect the hose ends for an obstruction or restricted flow only if the model instructions permit hose removal.
Expected result: A screen or hose is visibly restricted; water flow through a removed hose is weak; or the screens and hoses are clear but the washer still does not fill.
Next step: Restore the connections, open the water supply, and make one supervised cycle check. If the valve does not open with normal controls, a code persists, or water flow remains absent despite clear supplies, stop and arrange service for model-specific diagnosis.
Why this matters
Why: Sediment or a restricted hose can reduce or stop water entry. Clear external restriction can explain the symptom; a clear path with no inlet response makes a control, lock, inlet-valve, pressure-sensing, or wiring fault possible, none of which should be diagnosed by opening the cabinet.
-
Check 4
If water enters briefly and then disappears, or the washer appears to fill and drain together, inspect the visible drain hose installation without pulling the washer apart. Confirm that the hose is held in the supplied form, is not sealed airtight into the standpipe, is not kinked, and follows the model's required standpipe or tub arrangement. Do not change plumbing dimensions unless the model installation instructions support the change.
Expected result: The drain hose is pushed too far into the standpipe, taped or sealed at the opening, low or unsecured, kinked, or the drain path is blocked; or the visible installation is correct and the washer simply never admits water.
Next step: Correct only an obvious installation issue using the model manual, then supervise one fill attempt. If the hose is correct but the washer still will not fill, stop repeating cycles and call a qualified technician.
Why this matters
Why: An incorrectly installed drain hose can siphon water away as it enters, making a fill alert look like a water-supply failure. A correct drain setup with no water entry keeps the diagnosis on the supply, lock, control, inlet valve, or pressure-sensing side.
-
Check 5
Record the exact display message and the point at which the washer stops, then compare it with the model manual. For LF or F8 E1, recheck both supply hoses and the drain-hose arrangement; for a lid or door alert, check only that the closure is clear and fully latched; for a general control fault, use the manual's normal pause or reset procedure once. Do not repeatedly reset a washer that leaks, smells hot, sparks, or trips its breaker.
Expected result: The code clears after the external correction; the code returns with normal supplies and closure; the washer remains silent; or the washer starts an uncontrolled fill or drain.
Next step: Keep the washer off and arrange qualified service when a code returns, the inlet does not respond, the lid or door cannot latch, or any electrical or water hazard appears. Provide the model, code, cycle, supply observations, and visible hose condition to the technician.
Why this matters
Why: A cleared code supports a correctable setup or flow problem, while a returning code after those checks needs service diagnosis. An uncontrolled fill, electrical symptom, or water escape is a safety fault rather than a troubleshooting invitation.
Use your observations
Decision map
Find the observation that best matches what you see, then follow the next safe action.
-
PATH 01Next step
What you see
The washer is paused, locked by a control setting, waiting for a proper Start action, or unable to latch its lid or door.
Do this next
Clear only the indicated control or closure issue using the model instructions; request service if the latch or control remains faulty.
Why this path and its safety boundary
Why it matters: The washer may not have reached the stage where it requests water.
-
PATH 02Next step
What you see
A supply valve is closed, a required hot or cold connection is missing, a hose is kinked or damaged, or an inlet screen is visibly restricted.
Do this next
Restore the supply or correct the visible hose or screen issue safely, then make one supervised fill check; arrange service if flow does not return.
Why this path and its safety boundary
Why it matters: The water path is restricted before or at the washer inlet.
-
PATH 03Next step
What you see
Water enters but immediately drains, or LF or F8 E1 appears while the visible drain hose is too deep, sealed, low, kinked, or blocked.
Do this next
Correct the visible installation according to the model manual; if the arrangement is correct or the alert returns, stop and request service.
Why this path and its safety boundary
Why it matters: Drain-hose installation or a drain restriction may be causing siphoning or a fill-time fault.
-
PATH 04Next step
What you see
Both supplies and hoses are open and clear, the closure is normal, the drain setup is correct, and no water enters.
Do this next
Do not open the cabinet or handle internal wiring; keep the washer off and arrange qualified appliance service.
Why this path and its safety boundary
Why it matters: An internal inlet valve, control, pressure-sensing, lock, or wiring fault is possible.
-
PATH 05Next step
What you see
There is a leak, uncontrolled fill, water near electrical equipment, burning odor, smoke, sparks, or a breaker trip.
Do this next
Stop the cycle, keep clear of wet electrical areas, and use the normal water shutoff only if it can be reached safely. Leave the appliance off and obtain qualified emergency or appliance service; do not reset a tripped breaker repeatedly or open the appliance.
Why this path and its safety boundary
Why it matters: This is an immediate safety stop.
Helpful context
Understand the symptom
Confirm what not filling means
A washer may be filling slowly, waiting for sensing, filling and draining at the same time, or never opening the inlet valve at all. Note whether the washer is silent, hums, clicks, displays a code, or moves into a drain phase. Dryer operation is separate; this page addresses the washer side of a washer-dryer appliance.
Keep the checks low risk
Use the controls normally, turn water valves off before handling a hose, and catch residual water in a container. Do not remove an inlet screen, bypass a lid or door lock, open an electrical panel, or work inside the appliance. Stop if water reaches an outlet, cord, control, or other electrical equipment.
Safety boundary
Stop conditions
- Stop immediately for a leak, uncontrolled water entry, standing water near an outlet or cord, burning odor, smoke, sparks, or a breaker that trips again.
- Do not bypass a lid or door lock, pry out an inlet screen, open the control panel, handle internal wiring, or work inside the washer as a homeowner check.
- Turn the water supply off before handling an inlet hose and keep the appliance off if a hose or connection is visibly damaged.
Only after diagnosis
Potential parts
- washer water inlet valve
Consider only after a technician confirms that household flow, hoses, screens, and normal control and closure signals are present but the valve does not admit water.
Confirm the complete washer model and manufacturer fit information before ordering. - washer lid or door lock assembly
Consider only when the closure is physically clear but the model-specific control or service diagnosis confirms that the lock signal prevents filling.
Lock assemblies vary by model; verify fitment from model-specific documentation. - washer water-level sensing or control component
Consider only when supply flow and drain installation are correct and a technician confirms a persistent sensing or control fault.
Do not infer compatibility from a code alone; confirm the exact model and approved part information. - washer inlet hose
Consider only when an external hose is visibly kinked, bulged, cut, worn, leaking, or restricted and replacement is allowed by the installation instructions.
Select a hose suitable for the installation and confirm the model and connection requirements before fitting it.
When checks do not resolve it
Need a professional?
Arrange qualified appliance service when the washer still does not fill after the external supply, hose, inlet-screen, closure, control, and visible drain-hose checks; when a fill alert returns; or when diagnosis would require an internal valve, sensor, lock, control, wiring, or panel inspection. Stop immediately for a leak, water near electrical equipment, uncontrolled filling, burning odor, smoke, sparks, or a tripped breaker.
Common questions
FAQ
Why does a Whirlpool washer show a Fill or Sensing light without much water?
The washer may be sensing the load or waiting for enough water from its supply. Check that the required water lines are fully open and that the lid is closed; then use the model manual if the light remains with little or no flow.
Can a drain hose make a washer look like it is not filling?
Yes. If the visible drain hose is installed so water siphons away as it enters, the washer may fill and drain at the same time or show a long-fill alert. Correct the installation only according to the model instructions.
When should I stop trying to fix a no-fill problem?
Stop for a leak, uncontrolled filling, water near electrical equipment, burning odor, smoke, sparks, or a breaker trip. Keep the washer off and obtain qualified service when external supply, hose, screen, closure, setting, and drain checks do not restore filling.
Read the exact guide
Official sources
- Checking the Fill Hoses if the Washer is not FillingWhirlpool Product Help · Whirlpool washer no-fill supply, hot and cold valves, inlet hoses, and inlet screens
- Fill or Sensing Light OnWhirlpool Product Help · Whirlpool top-load washer Fill or Sensing light, water supply, lid, and sensing behavior
- Not Filling or Long Fill - WasherWhirlpool Product Help · Whirlpool top-load washer fill, water level, drain-hose, cycle, and flow-device guidance
- Not Filling or Filling Slowly - Front Load WasherWhirlpool Product Help · Whirlpool front-load washer water supply, hose, inlet-screen, and drain-hose checks
- LF - Error CodeWhirlpool Product Help · Whirlpool top-load washer LF and F8 E1 fill alerts, water supply, lid lock, and drain-hose installation
- Not Starting - WasherWhirlpool Product Help · Whirlpool washer control lock, lid lock, Start action, and control reset guidance
Community feedback
Share a repair observation
Share a plain-text repair observation. Accepted observations are published automatically; this page may take a moment to update.