
On this page
Start here
Quick answer
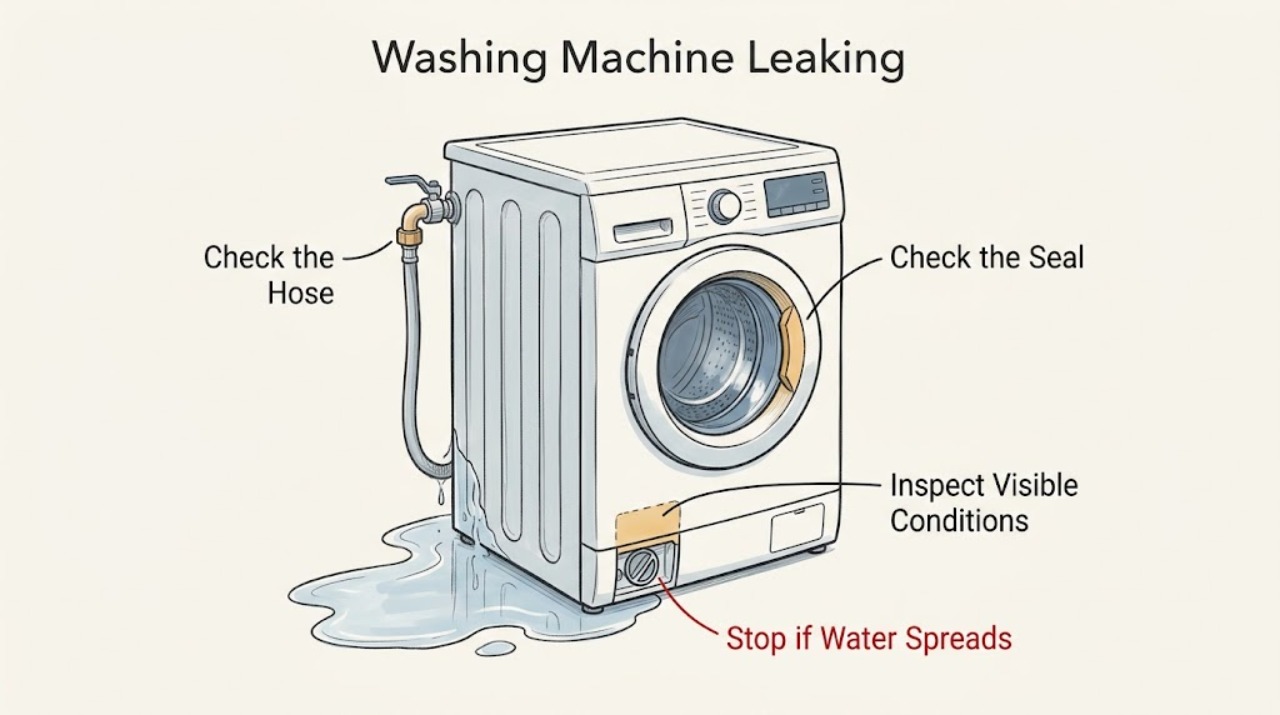
Stop the Zanussi washer and find the first wet point before guessing at a part. Water from the rear usually sends you to the inlet hose, tap, or connection; water from the front can involve the door seal, trapped laundry, detergent drawer, excess foam, or an overloaded drum; water from underneath can involve the drain filter, drain hose, pump, or an internal fault. Turn off the water supply if it is safely accessible, and disconnect power only from a dry, safe position. Do not use the machine with an active leak, damaged door seal, water near electrical parts, hot water, smoke, burning odor, or repeated tripping. Do not tilt the washer or open internal panels; use the model manual and an authorized technician for model-specific filter, pump, or internal checks.
Before you begin
Safety first
- An authorized technician should diagnose internal hoses, inlet valve, door seal, drain filter or pump, anti-flood protection, control, and cabinet leaks before selecting a component.
Work through in order
Diagnostic checks
Use only checks that match the exact appliance or system and its official guide.
-
Check 1
Stop the programme and identify the first wet point from a dry, safe position: rear hose or tap, detergent drawer, door and seal, lower filter area, drain hose, underside, wall, or floor away from the washer. Keep the machine out of use while water is escaping.
Expected result: Rear water during filling, front water during dispensing or washing, and underside water during draining point to different checks; water from a wall, floor, or ceiling may not come from the washer.
Next step: Photograph the source from a safe position. If water is near the plug, outlet, controls, or other electrical equipment, do not approach; isolate the area safely and arrange urgent service.
Why this matters
Why: The first wet point is more diagnostic than the largest puddle because water can travel along the cabinet or floor.
-
Check 2
If the water supply tap is safely reachable with dry hands and no electrical or hot-water hazard, close it. Visually inspect the inlet hose, tap connection, appliance connection, and rubber sealing ring for a split, missing seal, loose-looking connection, or water coming from the tap itself; do not use tools or reach behind a wet machine.
Expected result: A cracked hose, missing or damaged seal, loose connection, or leaking tap supports a fill-side leak; a dry inlet path sends the diagnosis to the front, drawer, drain, or internal branches.
Next step: Keep the water supply closed and arrange replacement or service for a damaged hose or connection. Do not use the washer while the hose is split or the connection continues to leak.
Why this matters
Why: Zanussi notes that an inlet leak can run toward the back panel and recommends checking hose seals and connections; a damaged hose should not remain in service.
-
Check 3
When the washer is stopped, the drum is stationary, the water is cool, and the door can be opened normally, inspect the visible door seal and glass area. Look for a tear, hole, crack, trapped garment, or object; do not force the door or pull on a damaged seal.
Expected result: Laundry trapped between the seal and glass, or a seal with a tear, hole, or crack, can let water run down the front. Water that begins at the door but the seal looks intact requires the next branch.
Next step: Do not run the washer if the seal is damaged or water is entering from the door area. Arrange an authorized repair rather than attempting seal replacement.
Why this matters
Why: The door seal is a water barrier, and Zanussi says a faulty seal should be replaced by a service engineer and the machine should not be used until repaired.
-
Check 4
Inspect the detergent drawer and the area below it only when the machine is stopped and dry enough to approach. Note detergent residue, limescale, overflow, excessive foam, an overloaded drum, or a pod used in a compartment not designed for it; follow the manual for drawer cleaning and detergent placement.
Expected result: A blocked drawer or sprinkler area can overflow from the front, while excess detergent foam can obstruct the water-level system and contribute to a leak. An empty clean drawer shifts attention to the hose, seal, filter, or internal path.
Next step: Clean only the removable drawer as the manual allows and correct the detergent amount or placement. Do not restart if water continues to escape, the drawer is damaged, or electrical parts are wet.
Why this matters
Why: Dispensing and foam problems can mimic a seal or drain failure and should be separated before a part is considered.
-
Check 5
Look for water around the lower fluff-filter or pump-cover area without tilting or moving the washer. A filter check is model-specific: use it only if the exact Zanussi manual identifies a safe access procedure, the water is cool, power is safely isolated, and the floor can be protected without reaching into wet electrical areas.
Expected result: Water at the filter cover, a damaged filter seal, or a filter that is not seated can explain an underside leak; water from inside the cabinet, a blocked hidden drain, or an inaccessible filter requires service.
Next step: Stop if the filter is hot, pressurized, inaccessible, damaged, or surrounded by electrical risk. Do not tilt the washer or dismantle the pump; arrange service for a persistent underside leak.
Why this matters
Why: Zanussi lists the filter area as a possible leak source but access and draining arrangements differ by model; a filter symptom does not prove a pump failure.
-
Check 6
Record when the leak starts and stops—filling, detergent dispensing, tumbling, rinsing, draining, spinning, or after shutdown—and write down every display code, beep pattern, and the complete model number. Do not start repeated cycles to reproduce the leak.
Expected result: EF0, EF3, or related leak indications can be associated with water leakage, excess foam, or an unbalanced load on applicable Zanussi models; other code families may indicate water supply, draining, door lock, motor, heating, or power issues.
Next step: Keep the water supply closed and the washer unused if the leak continues or a warning returns. Give the model, code, stage, wet point, and water status to an authorized technician.
Why this matters
Why: The code and programme stage narrow the branch, but Zanussi error meanings are model- and family-specific and should not be generalized across machines.
-
Check 7
From a safe position, check the surrounding floor, wall, cabinet, and drain outlet for water damage, mold, foul water, or a separate plumbing leak. Do not enter contaminated water, climb, move a wet appliance, or open the rear or bottom of the washer.
Expected result: Water that is foul, widespread, coming from the building, or damaging flooring or cabinets may need plumbing or building service in addition to appliance repair; a clean localized leak still needs the washer source identified.
Next step: Protect the area without touching energized equipment and arrange the appropriate qualified service. Keep the washer unused until the leak and any electrical exposure are cleared.
Why this matters
Why: The appliance may not be the only source, and structural or contamination risks can make routine checks unsafe.
Use your observations
Decision map
Find the observation that best matches what you see, then follow the next safe action.
-
PATH 01Next step
What you see
Water is near the plug, outlet, controls, or other electrical equipment, or the floor is too wet to approach safely.
Do this next
Keep people away, isolate the area only from a dry safe position, and arrange urgent appliance or electrical service. Do not touch wet equipment or reconnect power.
Why this path and its safety boundary
Why it matters: Treat the leak as an electrical stop condition rather than a routine hose check.
-
PATH 02Next step
What you see
The first wet point is the tap, inlet hose, hose seal, or rear appliance connection during filling.
Do this next
Do not use the machine with a split hose or continuing connection leak; arrange an authorized hose or appliance repair.
Why this path and its safety boundary
Why it matters: Close the water supply if safely reachable and treat the issue as a fill-side leak.
-
PATH 03Next step
What you see
Water starts at the door, and the seal is torn, cracked, holed, or has trapped laundry.
Do this next
Arrange service-engineer repair and do not force the door or test another programme.
Why this path and its safety boundary
Why it matters: Keep the washer out of use; the door seal is not a safe user repair when damaged.
-
PATH 04Next step
What you see
Water overflows from the detergent drawer or appears with heavy foam, an overloaded drum, or residue.
Do this next
Keep the washer off if water continues, the drawer is damaged, or wetness reaches electrical areas; arrange service if the leak returns.
Why this path and its safety boundary
Why it matters: Use only the manual-authorized drawer-cleaning and detergent correction when the area is safe and dry.
-
PATH 05Next step
What you see
Water is below the machine or near the fluff-filter area, or an EF0/EF3-style leak indication returns.
Do this next
Do not tilt the washer or open its cabinet. Use the model manual only for a safe cool-water external step; otherwise arrange authorized service.
Why this path and its safety boundary
Why it matters: A filter seal, drain path, pump, anti-flood response, or internal leak is possible, but access is model-specific.
-
PATH 06Next step
What you see
The leak continues after the hose, seal, drawer, detergent, and safe filter-area observations, or water appears to come from inside the cabinet.
Do this next
Keep water closed and the appliance unused and arrange an authorized technician visit with the complete model and incident record.
Why this path and its safety boundary
Why it matters: Treat the cause as an internal hose, valve, pump, drain, or other component fault.
Helpful context
Understand the symptom
A puddle is the endpoint, not necessarily the source. Water can run along the rear panel or cabinet and appear underneath, so note where it first appears and whether it starts during filling, washing, draining, or after the programme ends. A clean-water leak from the inlet side is different from sudsy water from the drawer, water around the door, or dirty water from a filter or drain path.
Use only dry, external observations. Keep hands away from wet electrical areas and moving parts. Do not tilt the appliance, force the door, open panels, or access a pump or filter unless the exact model manual provides a safe user procedure and the water is cool and controlled. A damaged door seal or internal leak is a service boundary.
Safety boundary
Stop conditions
- Stop using the washer for any active leak, damaged hose, damaged door seal, or water that appears to come from inside the cabinet.
- Stop and keep clear for hot water, standing water near the plug or outlet, an inaccessible wet area, or water contacting electrical parts.
- Stop immediately for smoke, burning odor, sparks, visible arcing, a hot plug or cord, or repeated electrical tripping; use emergency help when appropriate.
- Do not tilt or move the washer, open panels, force the door, reach into a pump or filter, or work near wet electrical equipment.
- Do not run repeated cycles to reproduce a leak, use tools on hose connections, or guess an error-code meaning across models.
- Stop for foul water, mold, widespread water damage, ceiling or cabinet damage, or a leak that may come from building plumbing rather than the washer.
Only after diagnosis
Potential parts
- inlet hose or hose sealing ring
Consider only when the visible fill-side inspection or service diagnosis confirms a split hose, missing seal, or failed connection.
Confirm the complete Zanussi model and the manufacturer's fit information; do not use tools or a guessed hose specification. - door seal or detergent drawer component
Consider only when service confirms a damaged door seal or drawer/dispensing component after locating the first wet point.
Seal and drawer designs vary by model; a damaged seal should be replaced by a service engineer. - drain pump, filter, valve, or anti-flood component
Consider only after an authorized technician confirms a drain, pump, valve, filter-seal, or anti-flood fault.
Pump-filter access and component fit are model-specific; do not tilt the washer or select a part from an underside puddle alone.
When checks do not resolve it
Need a professional?
Any persistent leak, damaged seal or hose, returning leak warning, inaccessible filter or drain fault, internal water path, or electrical or structural stop condition.
Safety scope: An authorized technician should diagnose internal hoses, inlet valve, door seal, drain filter or pump, anti-flood protection, control, and cabinet leaks before selecting a component.
Have this ready
- Complete Zanussi model number, first wet point, programme stage, water temperature if safely known, display code or beep pattern, hose and seal observations, drawer and foam condition, filter-area appearance, water amount and appearance, and any electrical or structural symptom.
Common questions
FAQ
Why is my Zanussi washing machine leaking from underneath?
Water can travel from a rear hose or connection, but an underside wet point can also involve the fluff filter, drain hose, pump, or an internal leak. Keep the water supply closed, do not tilt the washer, and use the model manual or an authorized technician for the applicable access procedure.
Can too much detergent make a Zanussi washer leak?
Yes. Zanussi says excess foam can interfere with the water-level system and contribute to leaks, while a blocked drawer can overflow. Correct the amount and clean only the removable drawer as the manual allows; stop if water continues or reaches electrical areas.
Can I use a Zanussi washer with a damaged door seal?
No. A tear, crack, or hole can let water escape at the door. Keep the washer out of use and arrange service-engineer repair rather than attempting to replace the seal yourself.
What does EF0 or EF3 mean on a Zanussi washing machine?
On applicable Zanussi models, EF0 or EF3-style warnings can be associated with water leakage, excess foam, imbalance, or Aqua Control. Record the exact display and model; do not generalize the code across machines, and arrange service if it returns.
When should I call a technician for a Zanussi washer leak?
Call when the leak persists, water comes from inside or underneath the cabinet, a hose or door seal is damaged, a leak warning returns, or a filter, pump, valve, drain, or internal path may be involved. Escalate urgently for water near electrical parts, hot water, smoke, burning odor, sparks, or repeated trips.
Read the exact guide
Official sources
- Washing Machine common error codes and troubleshooting tipsZanussi · Zanussi washing machine and washer-dryer error-code families and model-specific support routing
- Washing machine is leaking waterZanussi · Zanussi washing machine and washer-dryer leak paths, hose, door seal, filter, detergent, and safe service guidance
- Washing machine displays error message EF0, EFo, EF3 or emits 15 beeps / 15 flashesZanussi · Zanussi washer leak, excess-foam, imbalance, and Aqua Control warning context
- Zanussi Washing Machine Leaking Water – Causes and SolutionsZanussi · Zanussi washing machine leak causes, safe checks, model-specific filter access, internal-fault boundary, and repair escalation
Community feedback
Share a repair observation
Share a plain-text repair observation. Accepted observations are published automatically; this page may take a moment to update.