
On this page
Start here
Quick answer
A dryer that stops before the selected cycle ends may be ending normally because of an automatic moisture cycle, a door or load condition, or a timer/display behavior rather than a failed motor. First note whether the drum actually stops, whether the controls remain on, and whether the dryer restarts only after cooling. With power disconnected and the dryer cool, inspect the lint screen, accessible vent path, door latch, and drum movement without opening the cabinet. A drum that stops with heat, burning odor, unusual noise, weak airflow, a damaged cord, or a motor that only restarts after a rest period should not be repeatedly run; arrange qualified appliance service.
Before you begin
Safety first
- This article supports symptom classification and ordinary external, power-off, cool checks only. A qualified technician must handle cabinet access, motor, belt, rollers, thermal fuse/cutoff, sensors, control, wiring, gas components, and internal venting.
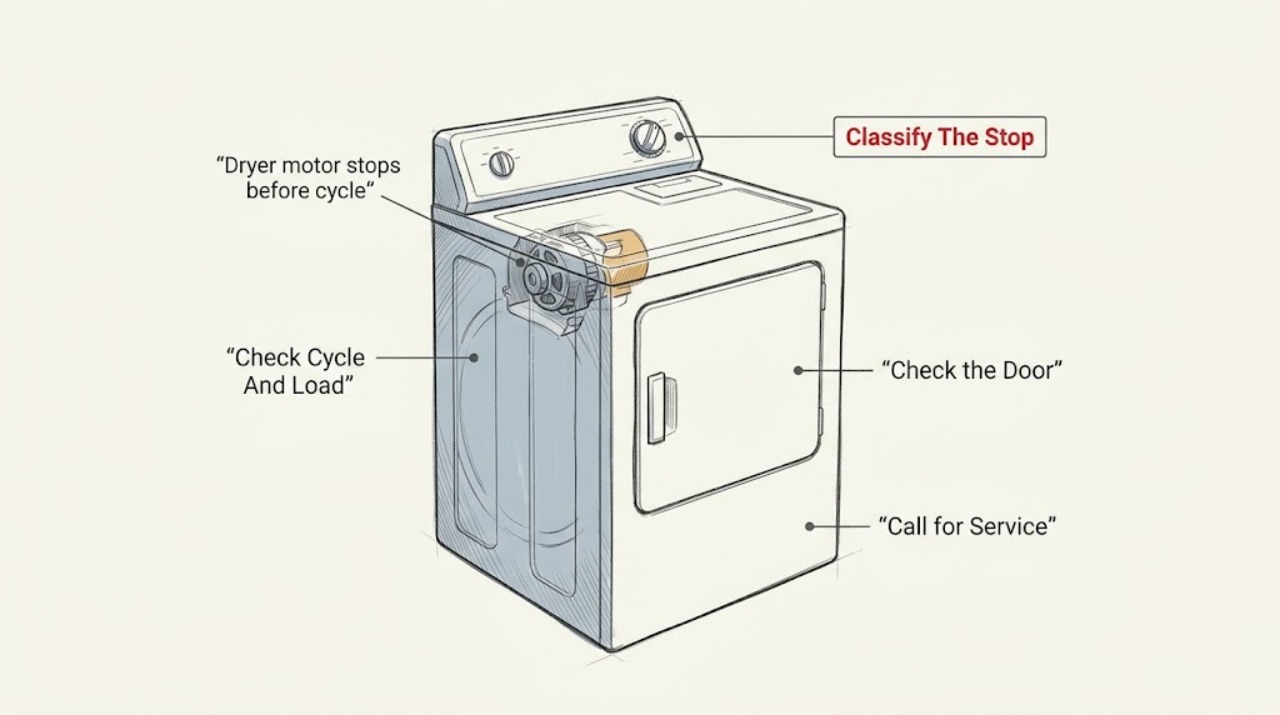
Work through in order
Diagnostic checks
Use only checks that match the exact appliance or system and its official guide.
-
Check 1
During one safe observation, note the exact stopping behavior: whether the drum stops while the display and controls remain active, whether the program ends normally, whether the door opens, and whether the load is dry or damp; do not open the cabinet or keep restarting a hot or abnormal dryer.
Expected result: The display ends normally on an automatic cycle, the timer/display remains active while the drum is stopped, the dryer stops after a door movement, or the load remains damp when the stop occurs.
Next step: Use the symptom pattern to choose the checks below and record the cycle type, load, time to stop, and whether the dryer was hot. Stop use for smoke, burning odor, sparking, abnormal heat, or a damaged cord.
Stop if: Do not continue a test cycle when the dryer smells burned, smokes, sparks, becomes unusually hot, or stops with a damaged power cord, plug, or outlet.
Why this matters
Why: A normal cycle ending makes moisture sensing or cycle selection more likely than a motor fault. A running display with a stopped drum makes a door, belt, motor, thermal, or control path more likely; a damp load keeps airflow and heating in the diagnosis.
-
Check 2
Check the selected cycle and load without changing any service settings: use the owner manual to identify whether the cycle is automatic, timed, air-only, or a model-specific no-load/sensor cycle, and confirm the load can tumble freely rather than being tightly packed.
Expected result: The dryer stops on an automatic cycle when items are sensed dry, stops with a nearly empty or poorly positioned load, stops only on one cycle, or stops with a freely tumbling load on both automatic and timed cycles.
Next step: Use the cycle recommended by the model manual and a balanced, freely tumbling load for one controlled comparison. If the stop repeats across suitable cycles or the clothes remain damp, stop treating it as a setting issue and continue to service-oriented checks.
Stop if: Do not overload the drum, run a gas or electric dryer with its door unable to latch, or keep testing when the dryer overheats or produces an unusual smell or noise.
Why this matters
Why: A cycle- or load-specific stop can be normal sensing, no-load detection, or a cycle selection issue. A repeatable stop with a freely tumbling load on a timed cycle is less consistent with normal moisture termination and warrants the mechanical and airflow checks.
-
Check 3
Switch the dryer off, disconnect power as the owner manual permits, and inspect only the external plug, cord, outlet area, door alignment, and latch for looseness, scorching, distortion, or lint; do not remove panels or probe the outlet.
Expected result: The plug and cord are intact and the door closes and latches securely, or there is visible damage, a loose connection, a door that can pop open, or a latch that does not engage consistently.
Next step: Leave the dryer disconnected and arrange qualified appliance or electrical service for any cord, outlet, plug, latch, or door alignment concern. If the exterior is intact, proceed only with the cool, power-off airflow and drum checks.
Stop if: Do not use a damaged cord or outlet, tape over a damaged latch, hold the door closed, remove panels, or test energized wiring.
Why this matters
Why: A secure door switch path and undamaged power connection make a latch or supply interruption less likely. Damage, intermittent latching, or a connection that becomes hot can interrupt the motor circuit and is a stop-use condition.
-
Check 4
With the dryer disconnected and cool, clean the lint screen as directed by the owner manual and inspect the accessible hose, wall connection, and outside vent hood for a crushed section, accumulated lint, debris, or weak airflow; do not dismantle the dryer or reach into a moving or heated vent.
Expected result: The lint screen is coated, the hose is kinked or crushed, the outside flap opens poorly or airflow is weak, the laundry area is unusually hot or humid, or the accessible path is clear and airflow appears normal.
Next step: Correct only loose, accessible lint or a clearly kinked hose in the manner allowed by the manual, then use one controlled cycle if no stop-use symptom is present. Arrange service for weak airflow that persists, internal restriction, overheating, or a recurring stop.
Stop if: Do not keep operating a dryer with weak airflow, excessive heat, visible lint at the housing or door seal, smoke, or a burning odor; do not use a plastic or improvised vent arrangement as a workaround.
Why this matters
Why: Restricted airflow can leave clothes warm but damp, raise heat around the dryer, and contribute to protective shutdowns or repeated stopping. A clear accessible path does not rule out a hidden restriction, failed fan, or motor/control problem.
-
Check 5
Only after the dryer is disconnected and fully cool, turn the empty drum gently by hand from the doorway without forcing it or reaching past the drum opening; note whether it turns smoothly, binds, scrapes, or will not move.
Expected result: The drum turns smoothly with modest hand effort, feels stiff or seized, scrapes or rumbles, or the drum turns but the belt appears unable to drive it during a later normal cycle.
Next step: Keep the dryer out of service for binding, scraping, or unusual resistance and request qualified repair. If the drum turns freely but the motor stops again, use the cool-down pattern and service branch rather than opening the cabinet.
Stop if: Do not force a seized drum, remove the drum, adjust the belt, or operate the dryer with rubbing, grinding, or structural damage.
Why this matters
Why: A stiff, seized, scraping, or rumbling drum can overload the motor or indicate a support, roller, bearing, or belt problem. Smooth hand movement does not prove that the motor, belt, controls, or thermal protection are healthy.
-
Check 6
If no immediate hazard is present, record whether the motor stops only after the dryer has been running and whether it will run again after the appliance has cooled; do not deliberately repeat the stop or bypass any thermal, door, or control safety device.
Expected result: The motor stops at a similar point and restarts after cooling, stops once with a normal cycle ending, stops with a hum or unusual noise, or does not restart at all.
Next step: Stop using the dryer when the pattern repeats, the motor hums, the housing is unusually hot, or the load remains damp. Give the technician the run time, cool-down behavior, sounds, airflow result, cycle, and load details.
Stop if: Do not repeatedly cycle a motor that stops and restarts, defeat thermal protection, run with panels removed, or test live motor wiring.
Why this matters
Why: A repeatable stop followed by a later restart makes heat-related motor protection, restricted airflow, mechanical drag, or a failing motor/control path more likely, but it is not proof of one failed part. A stop with hum or no restart increases the need for service.
Use your observations
Decision map
Find the observation that best matches what you see, then follow the next safe action.
-
PATH 01Next step
What you see
The display ends normally on an automatic cycle, clothes are at the selected dryness, and the dryer restarts normally on a suitable comparison load.
Do this next
Use the cycle and load guidance in the owner manual. Arrange service if the load stays damp, the controls end prematurely on suitable loads, or the same behavior appears on a timed cycle.
Why this path and its safety boundary
Why it matters: The motor may not be failing; moisture sensing or cycle selection is the more likely explanation for an apparent early stop.
-
PATH 02Next step
What you see
The dryer ends or appears to stop early with damp clothes, the symptom depends on cycle or load, and lint, weak outside airflow, hot laundry-area conditions, or a sensor-cycle behavior is present.
Do this next
Use a suitable cycle and freely tumbling load, clean only accessible lint and approved vent areas with power disconnected, and arrange service if airflow remains weak or the stop recurs.
Why this path and its safety boundary
Why it matters: Moisture sensing, an unsuitable load/cycle, or restricted airflow is more likely than an isolated motor failure, although persistent heat can damage components.
-
PATH 03Next step
What you see
The drum stops while controls remain active, the load is not dry, the dryer is unusually hot or noisy, and the motor runs again only after a cooling period or fails to restart.
Do this next
Stop operating the dryer and request qualified appliance service. Provide the run time, cooldown behavior, drum-resistance result, airflow observations, and any sound or odor.
Why this path and its safety boundary
Why it matters: A motor, mechanical drag, airflow, thermal-protection, or control fault is more likely than normal cycle termination. The cooldown pattern is a clue, not a safe motor diagnosis.
-
PATH 04Next step
What you see
The stop coincides with a door that does not latch, a door that can pop open, a loose or damaged plug/cord/outlet, or a control reset.
Do this next
Keep the dryer disconnected for visible electrical or latch damage and arrange qualified appliance/electrical service. Do not hold the door closed or repeatedly reset a breaker.
Why this path and its safety boundary
Why it matters: The door-switch or power path can interrupt the motor and cycle without proving the motor itself is defective.
-
PATH 05Next step
What you see
The empty drum is difficult to turn, scrapes or rumbles, or the motor can be heard while the drum does not rotate normally.
Do this next
Leave the dryer out of service and have a qualified technician inspect the motor, belt, drum supports, and controls with power safely isolated.
Why this path and its safety boundary
Why it matters: A seized support, roller, bearing, belt, or related mechanical load can stop or overload the motor; the exact failed part cannot be established from hand movement alone.
-
PATH 06Next step
What you see
A gas dryer has a gas odor, or any dryer has smoke, burning odor, sparking, scorched wiring, or rapidly increasing heat.
Do this next
Stop use, leave the area for a gas odor or fire risk, and contact the gas utility, emergency services, or a qualified technician from a safe location as appropriate. Do not relight, reset, or inspect inside the cabinet.
Why this path and its safety boundary
Why it matters: This is an immediate fire, electrical, or gas safety concern rather than a motor troubleshooting condition.
Helpful context
Understand the symptom
Separate a normal cycle decision from a motor stop
On an automatic or sensor cycle, the controls may end the program when the dryer senses the selected dryness, so a damp load and an actual motor failure are not the same symptom. A timer can also appear to pause while the dryer changes direction or advances according to the selected cycle. Confirm whether the drum stopped while the controls still showed time, whether the display ended normally, and whether the clothes were actually dry before diagnosing the motor.
Heat and airflow can change the decision
Lint at the screen, a crushed or kinked hose, or a restricted outside hood can reduce airflow and make a dryer run hot or dry poorly. A motor that stops and later runs again after cooling can also have a heat-related or mechanical problem, but that observation does not identify a failed motor by itself. Disconnect power before inspecting the vent path and never keep restarting a dryer that overheats.
The motor, belt, and safety parts are inside the service boundary
The drive motor turns the belt and drum, while the door switch, thermal protection, controls, and mechanical supports affect whether the cycle can continue. Manufacturer guidance treats a mid-cycle motor problem, belt access, moisture-sensor access, and thermal-fuse inspection as professional diagnosis or cabinet-level work. Do not bypass a fuse or switch, test energized wiring, or replace a part by symptom alone.
Safety boundary
Stop conditions
- Stop using the dryer for smoke, a burning odor, sparking, scorched wiring, a rapidly hot cabinet, or a gas odor; get appropriate emergency or gas help from a safe location.
- Do not bypass or jumper a thermal fuse, door switch, motor safety, or other protective control; do not test energized wiring or open the cabinet as a user diagnostic.
- Do not keep restarting a motor that stops and later runs after cooling, or continue running with weak airflow, excessive lint, unusual noise, or a damp load after repeated stops.
- Do not force a seized or scraping drum, hold a door closed, use a damaged cord or outlet, or continue operating after visible latch, vent, belt, or structural damage.
- Disconnect power before maintenance or cleaning and use only the model manual's procedures; gas-valve, motor, belt, thermal-fuse, sensor, and internal vent repairs belong to qualified service.
Only after diagnosis
Potential parts
- dryer drive motor
Consider this category only if qualified diagnosis finds that the motor fails under normal load, stops after heating, makes a motor-specific noise, or does not restart after power and mechanical causes are addressed.
Confirm the exact dryer model, fuel/electrical configuration, motor revision, and manufacturer fit information; do not order or install a motor from the symptom alone. - drive belt and drum support components
Consider these categories only if service inspection finds a broken, slipping, or damaged belt or mechanical drag from a roller, idler, bearing, or related drum support.
Confirm the exact model and the complete drive arrangement with the manufacturer or qualified technician; do not force a belt or continue using a rubbing or seized drum. - thermal fuse or thermal cutoff
Consider this category only after qualified diagnosis confirms an open protective device and the underlying airflow, overheating, wiring, and control causes have been investigated.
Use only the exact model-rated protective part and installation procedure; never bypass it or install a substitute with an unverified rating. - door switch or latch assembly
Consider this category only if the door cannot latch securely or the switch does not reliably register a closed door during qualified diagnosis.
Confirm the exact model, switch/latch orientation, and manufacturer fit information; do not hold the door closed or defeat the interlock.
When checks do not resolve it
Need a professional?
Arrange qualified appliance service when the dryer stops on a suitable timed or automatic cycle with a freely tumbling load, the motor only restarts after cooling, the drum binds or makes unusual noise, the door or power path is damaged, airflow remains weak, a thermal or control part is suspected, or the symptom recurs after accessible lint and cycle checks. For smoke, sparking, fire risk, or a gas odor on a gas dryer, stop immediately and use emergency or gas-utility procedures from a safe location.
Safety scope: This article supports symptom classification and ordinary external, power-off, cool checks only. A qualified technician must handle cabinet access, motor, belt, rollers, thermal fuse/cutoff, sensors, control, wiring, gas components, and internal venting.
Common questions
FAQ
Does a dryer stopping before the end always mean the motor is bad?
No. An automatic cycle may end when the load reaches the selected dryness, and a timer can pause during normal cycle behavior. If the drum stops while the controls remain active, the load stays damp, or the motor restarts only after cooling, motor, airflow, door, mechanical, thermal, or control service becomes more likely.
Why does my dryer stop and start again after it cools?
A repeatable stop followed by a later restart can point toward heat-related motor protection, restricted airflow, mechanical drag, or a failing motor/control path, but it does not identify one part. Stop repeatedly running it and arrange qualified diagnosis, especially if the cabinet is unusually hot or the load is damp.
Can a clogged dryer vent make the motor stop mid-cycle?
Restricted airflow can make a dryer run hot and dry poorly and may contribute to protective shutdowns. With power disconnected and the dryer cool, inspect the lint screen, accessible hose, wall connection, and outside hood. Weak airflow, excessive heat, or a recurring stop needs service; do not keep running the dryer to test it.
What can I safely check before calling for dryer service?
Record whether the display ends normally or remains active, check the cycle and load, disconnect power before inspecting the external cord and latch, clean accessible lint as directed, look for vent restriction, and gently check an empty cool drum for abnormal resistance. Do not open the cabinet, test live wiring, bypass safety parts, or replace the motor by guesswork.
Should I keep running the dryer if it stops but starts again later?
No. Repeated stopping and restarting after cooling is not a reliable repair and can worsen an airflow, mechanical, thermal, or motor fault. Stop use and arrange service; for smoke, sparking, burning odor, excessive heat, or gas odor, use the appropriate emergency response immediately.
Read the exact guide
Official sources
- Dryer Stops Mid-CycleMaytag Product Help · Manufacturer guidance for Maytag dryers; the installed dryer's own manual controls when cycle behavior differs.
- Why Does My Dryer Keep Stopping Mid-Cycle?Maytag · Manufacturer troubleshooting overview; access and part decisions remain model-specific.
- Dryer is not Drying or Experiencing Long Dry TimesMaytag Product Help · Manufacturer guidance for accessible dryer performance and airflow checks; exact vent limits and procedures are model-specific.
- How to Fix a Dryer That Won’t SpinMaytag · Manufacturer troubleshooting overview for dryers with spinning or mid-cycle motor symptoms; exact model service information controls.
- Dryer - Timer Stops During the CycleGE Appliances · GE appliance support guidance; model-specific features and electrical requirements must be taken from the installed dryer's manual.
Community feedback
Share a repair observation
Share a plain-text repair observation. Accepted observations are published automatically; this page may take a moment to update.