
On this page
Start here
Quick answer
A dryer that starts normally and stops before the displayed cycle ends may be completing an automatic cycle early, losing contact with the load sensors, detecting an open door, overheating from restricted airflow, losing part of its power supply, or developing an internal motor, thermal, or control fault. First record whether the clothes are dry or still damp and whether the display says the cycle is complete, then check the selected cycle, load size, door closure, lint screen, and visible vent condition. Some sensor cycles intentionally adjust time or stop when the load reaches the selected dryness, and some models stop when no load is detected. Clean the lint screen and inspect accessible venting only with the dryer off and unplugged when required by the model instructions. If the dryer stops while clothes are damp, stops after warming, repeats the problem, trips a breaker, smells hot, or will not restart until it cools, stop repeated use and arrange qualified appliance or electrical service. Do not bypass a door switch, thermal device, or control.
Before you begin
Safety first
- This article covers cycle and load observations, visible door and control checks, removable-screen cleaning, non-invasive vent inspection, one safe panel-level power observation, and documentation only. Do not open the chassis, bypass safety switches, test live parts, or repeatedly operate a dryer that stops abnormally.
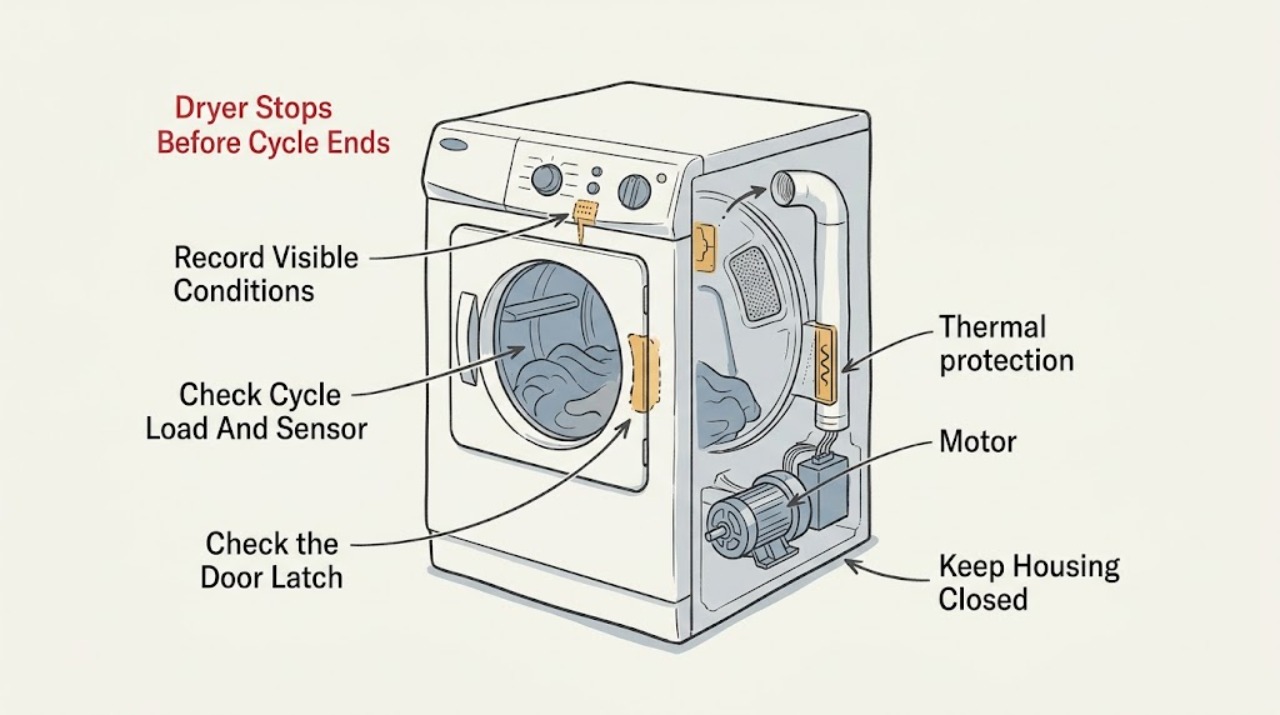
Work through in order
Diagnostic checks
Use only checks that match the exact appliance or system and its official guide.
-
Check 1
After the next stop, do not immediately restart the dryer. Note whether the display shows End or a completed cycle, whether the drum is stopped with the controls still lit, whether the load is dry or damp, how much time was left, and whether the stop occurs at the same point every time.
Expected result: The load is dry and the cycle reports completion; the load is damp and the dryer stopped early; the display is blank; or the dryer stops after a similar warm-up period.
Next step: Use the normal-completion branch only when the result is repeatable and safe. Keep the dryer off for damp-load stops, blank controls, heat, odor, noise, or repeated warm-up stops and continue with external checks only.
Stop if: Stop for smoke, burning odor, sparks, abnormal heat, a hot cord or receptacle, gas odor, water near electrical equipment, or any inability to control the appliance.
Why this matters
Why: Dry clothes with a completion indication can be normal automatic-cycle behavior. Damp clothes support a sensor, load, airflow, door, power, or internal fault. A blank display suggests power or control loss, while a repeat stop after warming makes airflow, thermal protection, motor, or electrical issues more likely.
-
Check 2
Compare the selected cycle with the load and check whether the drum was nearly empty, tightly packed, or filled with one small item. For automatic or sensor cycles, use a load that can tumble and contact the documented sensor area; do not change hidden service settings.
Expected result: The dryer stops only on an automatic cycle, the clothes are already dry, the load is too small to contact sensors, the load is overloaded, or the same stop occurs on a correctly sized timed cycle.
Next step: Follow the exact owner guide for cycle and load selection and make one controlled comparison only if there is no hazard. If a suitable timed cycle also stops with damp clothes, keep the dryer out of use and use the service branch.
Stop if: Do not run a dryer with a damaged door, missing lint screen, unusual heat, burning odor, or a load contaminated with flammable or volatile substances.
Why this matters
Why: Automatic cycles can end when the selected dryness is reached, and some models can stop when no load is detected. A small or poorly distributed load can produce an early sensor decision, while an overloaded load can restrict tumbling and airflow. A timed-cycle stop with a suitable load makes a control, door, airflow, power, or internal fault more likely.
-
Check 3
With the dryer off, inspect the visible door strike, latch area, and gasket for lint or an obstruction. Close the door normally and verify the control panel does not show a lock, pause, or error state. Do not tape, bypass, or defeat the door switch.
Expected result: The door can move during tumbling, the latch does not engage consistently, lint prevents full closure, the control indicates pause or lock, or the door and controls appear normal.
Next step: Remove only loose lint that is plainly accessible and correct a documented control state. If the latch is damaged, loose, intermittent, or the dryer stops with the door firmly closed, keep it out of use and arrange service.
Stop if: Do not operate with a damaged latch or switch, hold the door closed manually, remove the front panel, or probe the door circuit.
Why this matters
Why: A door that opens or loses its latch can stop the cycle even when startup was normal. A control-lock or pause state can look like a fault, while normal closure and controls shift suspicion toward sensors, airflow, power, or internal components.
-
Check 4
After the dryer is cool and disconnected from use, clean the removable lint screen and inspect the visible exhaust duct, outside hood, and area behind the dryer for lint, a crushed or kinked duct, a blocked hood, or a disconnected joint. Do not pull the machine out if that could damage the duct or connections.
Expected result: The lint screen is blocked, lint is around the door or screen housing, the duct is crushed or kinked, the outside hood is obstructed, or the visible vent path looks clear.
Next step: Clean only the removable screen and loose lint that is plainly reachable, and arrange qualified vent cleaning or repair for a restriction, disconnection, or heavy accumulation. Do not restart the dryer to test airflow after a heat-related stop.
Stop if: Do not reach into the cabinet, insert tools into the vent, use a crushed or damaged duct, or operate with a loose, blocked, or missing lint screen.
Why this matters
Why: Restricted airflow can make the dryer run hot, lengthen drying, and trigger protective shutdown or poor sensor performance. A clear outside hood does not prove the internal vent or chassis is clear, particularly when the dryer stops warm with damp clothes.
-
Check 5
With the dryer stopped and no hazard present, check whether the display and drum light have lost power and whether a dryer breaker or fuse has operated. Reset a breaker no more than once only if the panel instructions permit it and there is no heat, odor, damage, or moisture; do not keep restarting the dryer to see whether it runs again.
Expected result: The display is blank, a breaker or fuse is affected, the breaker trips again, the dryer restarts only after cooling, or power remains present but the cycle stops.
Next step: Leave the dryer off and arrange electrical or appliance service for a repeated breaker, damaged connection, blank display, or cool-down-dependent restart. If power is stable, continue only with documentation and service escalation for damp-load stops.
Stop if: Do not reset a breaker repeatedly, open an electrical panel beyond ordinary reset access, test live wiring, or operate a hot, noisy, smoking, or damaged dryer.
Why this matters
Why: A power interruption can stop a cycle and may leave the dryer unable to resume. A repeated breaker operation points toward an electrical or appliance fault. A cool-down-dependent restart suggests thermal or motor protection, while normal power with repeated stops shifts suspicion toward door, sensor, airflow, motor, or control causes.
-
Check 6
If the dryer still stops before the cycle ends with damp clothes after the safe cycle, door, lint, vent, and power observations, record the model and serial number, cycle and load, time remaining, temperature or odor, error text, and whether it restarts only after cooling. Keep the dryer out of use and do not open the cabinet.
Expected result: The issue is resolved after a documented external correction, the dryer stops again under normal conditions, an error appears, or unusual heat, noise, odor, or electrical behavior accompanies the stop.
Next step: Arrange qualified appliance service, with electrical or gas service when the supply indicates a problem. Provide the complete record and leave the dryer disconnected from use until the cause is evaluated.
Stop if: Do not bypass a thermal device, short a door switch, open panels, replace a control or motor from the symptom alone, or run repeated test loads.
Why this matters
Why: A repeat stop under normal conditions supports a sensor, motor, thermal, wiring, control, or other internal fault that cannot be identified safely from the symptom. A correction that lasts may explain the event, but recurrence or hazard signs require service.
Use your observations
Decision map
Find the observation that best matches what you see, then follow the next safe action.
-
PATH 01Next step
What you see
The dryer stops with dry clothes, the display indicates completion, and the same result occurs without heat, odor, noise, or power interruption.
Do this next
Use the cycle and dryness setting specified for the load and monitor normally. If clothes remain damp or the display stops before completion, use the sensor, airflow, or service paths.
Why this path and its safety boundary
Why it matters: Automatic moisture sensing or the selected dryness level is more likely than a premature stop.
-
PATH 02Next step
What you see
The dryer stops early mainly with an empty, very small, or poorly distributed load, while a suitable load completes normally.
Do this next
Use the model's documented load and leveling guidance and avoid using a sensor cycle for a load it cannot sense reliably. Arrange service if a normal load also stops early or the dryer is not level.
Why this path and its safety boundary
Why it matters: A model-specific no-load or moisture-sensor decision is more likely. GE notes that some sensor models shut off when they detect no load, and a rear tilt can move clothes away from sensor rods.
-
PATH 03Safety boundary
What you see
The door opens or loses its latch, lint interferes with closure, or the control shows pause, lock, or a door-related indication before the stop.
Do this next
Remove only accessible lint and correct a documented control state. Keep the dryer out of use for a damaged or intermittent latch and arrange appliance service; never bypass the switch.
Why this path and its safety boundary
Why it matters: A door or control interruption is more likely than a heater or vent fault.
Safety stop: Do not hold the door closed, tape the latch, remove panels, or probe the door circuit.
-
PATH 04Next step
What you see
The dryer stops after warming, clothes are damp, drying times increased, lint is around the housing or door, or the duct or hood is restricted.
Do this next
Keep the dryer off, clean only the removable screen and plainly accessible lint, and arrange vent cleaning or appliance inspection before reuse. Do not restart to test airflow.
Why this path and its safety boundary
Why it matters: Restricted airflow and heat-related protection are more likely, although the visible vent condition cannot identify whether an internal thermal component has operated.
-
PATH 05Safety boundary
What you see
The display goes blank, a breaker trips, the dryer restarts only after cooling, or it repeatedly stops with a suitable load, closed door, clear visible vent, and normal cycle.
Do this next
Leave the dryer out of use and arrange qualified appliance or electrical service. Provide the model, stop timing, load, temperature, power, and restart pattern; do not replace or bypass internal components as a user test.
Why this path and its safety boundary
Why it matters: An electrical supply, motor, thermal device, sensor, wiring, or control fault is more likely than normal automatic completion.
Safety stop: Do not reset repeatedly, open the cabinet, test live wiring, bypass thermal protection, or run repeated cycles.
Helpful context
Understand the symptom
First decide whether the dryer stopped or correctly finished
An automatic cycle does not always run for the initial time shown on the display. Maytag explains that sensor cycles use drum humidity and stop when the selected dryness is reached, while Whirlpool notes that automatic-cycle time can move up or down as load moisture changes. If the clothes are dry and the display indicates completion, the behavior may be normal. If the clothes are damp, the dryer becomes hot, or the controls go dead mid-cycle, the next checks change.
A normal start does not clear airflow, door, or power causes
Starting normally only proves that the initial control and drive sequence occurred. A door that opens or loses its latch, a load that cannot contact a sensor, restricted exhaust, or a power interruption can stop a cycle later. GE also notes that some models can turn off when a sensor cycle detects no load, including when a dryer is tilted and the clothes move away from the sensor rods.
Repeated restarting can hide an overheating or internal fault
If the dryer stops after warming and later restarts, that pattern can be consistent with a thermal or motor problem, but it cannot identify the failed part. Keep the dryer out of service for unusual heat, odor, noise, a tripped breaker, or damp clothes after a premature stop. Clean accessible lint and inspect the visible vent path, but leave cabinet, motor, thermal, wiring, and control work to qualified service.
Safety boundary
Stop conditions
- Do not keep restarting a dryer that stops with damp clothes, after warming, or when it produces unusual heat, odor, noise, or a blank display.
- Do not open the cabinet, bypass a door switch or thermal device, probe live wiring, or replace a motor, sensor, fuse, or control from the symptom alone.
- Stop for smoke, burning odor, sparks, a hot or damaged cord or receptacle, gas odor, water near electrical equipment, or an unsafe appliance area.
- Do not operate with a blocked, crushed, disconnected, or damaged vent, or with a loose, blocked, damaged, or missing lint screen.
- Do not run loads contaminated with gasoline, oils, solvents, or other volatile substances; follow the product and garment-care instructions and seek qualified advice.
Only after diagnosis
Potential parts
- dryer door latch or door switch
Consider this category only when qualified diagnosis confirms that the latch or door switch loses continuity or closure during a normal cycle.
Confirm the exact dryer model, latch or switch design, mounting, and safety requirements before ordering or replacing. - dryer moisture sensor or sensor harness
Consider this category only when the dryer ends suitable sensor-cycle loads early and qualified testing isolates the sensor or harness after load and leveling checks.
Confirm the exact model, sensor arrangement, harness routing, and manufacturer fit information before ordering; do not change service settings to mask the symptom. - dryer thermal fuse, limiter, or thermostat
Consider this category only when qualified testing identifies a failed thermal or temperature-control component after airflow and overheating causes are assessed.
Confirm the exact dryer model, temperature and electrical ratings, safety function, and manufacturer requirements; never bypass the component. - dryer motor or electronic control
Consider this category only when qualified diagnosis links repeated premature stops or cool-down-dependent restarts to the motor, motor switch, wiring, or electronic control.
Confirm the exact model, control revision, electrical ratings, and technician diagnosis before ordering or replacing.
When checks do not resolve it
Need a professional?
Arrange qualified appliance service when a dryer repeatedly stops before the cycle ends with damp clothes, stops after warming, restarts only after cooling, stops on a correctly sized timed cycle, or shows an error. Arrange vent service for restricted or damaged exhaust, electrical service for repeated breaker operation or a hot or damaged connection, and gas utility or emergency help for gas odor. A normal automatic completion with dry clothes is different from a premature stop and does not need repair unless the pattern changes.
Safety scope: This article covers cycle and load observations, visible door and control checks, removable-screen cleaning, non-invasive vent inspection, one safe panel-level power observation, and documentation only. Do not open the chassis, bypass safety switches, test live parts, or repeatedly operate a dryer that stops abnormally.
Common questions
FAQ
Why does my dryer stop before the cycle ends but start normally?
It may be completing an automatic cycle early, losing contact with the load sensors, detecting a door interruption, overheating from restricted airflow, losing power, or developing a motor, thermal, sensor, or control fault. First note whether the clothes are dry or damp and whether the display indicates completion.
Can an automatic dryer cycle stop early even when it is working normally?
Yes. Automatic cycles sense load moisture and can stop when the selected dryness is reached, so the initial displayed time is not always the actual run time. If clothes are still damp, the controls go blank, or the dryer stops repeatedly under normal conditions, it is not safe to assume the behavior is normal.
Can a small load make a dryer stop early?
On some sensor models, a very small or poorly distributed load may not contact the sensor area reliably, and GE notes that some dryers can shut off when they detect no load. Follow the exact owner guide for load size and leveling; service is needed if a normal load also stops early.
Can a blocked vent make a dryer stop before the cycle ends?
Restricted venting can reduce airflow, lengthen drying, and increase heat stress, which may contribute to protective shutdown or damp clothes. Clean the removable lint screen and inspect accessible venting with the dryer off. Do not keep restarting a dryer that stops warm or has an odor.
What if the dryer stops and only restarts after cooling?
A cool-down-dependent restart makes thermal protection, overheating, airflow, motor, or electrical problems more likely, but it does not identify the failed part. Keep the dryer out of use, check only safe external lint and vent conditions, and arrange qualified appliance service.
When should I call for service for a dryer that stops early?
Call when the dryer stops with damp clothes, repeats the problem on a suitable timed cycle, stops after warming, restarts only after cooling, goes blank, trips a breaker, or shows unusual heat, odor, noise, or an error. Stop immediately for smoke, sparks, gas odor, a damaged connection, or water near electrical equipment.
Read the exact guide
Official sources
- Dryer is not Drying or Experiencing Long Dry Times - Product HelpWhirlpool · Whirlpool consumer troubleshooting guidance across dryer types; exact model installation and owner instructions control.
- Dry Time Keeps Going Up - DryerWhirlpool · Whirlpool consumer support guidance; time behavior varies by model, cycle, load, and sensor system.
- Dryer - Timer Stops During the CycleGE Appliances · GE dryer support guidance with model-specific sensor behavior; not a universal timer or control procedure.
- Dryer Stops Mid-CycleMaytag · Maytag consumer support guidance; exact dryer model and owner manual control behavior.
Community feedback
Share a repair observation
Share a plain-text repair observation. Accepted observations are published automatically; this page may take a moment to update.