
On this page
Start here
Quick answer
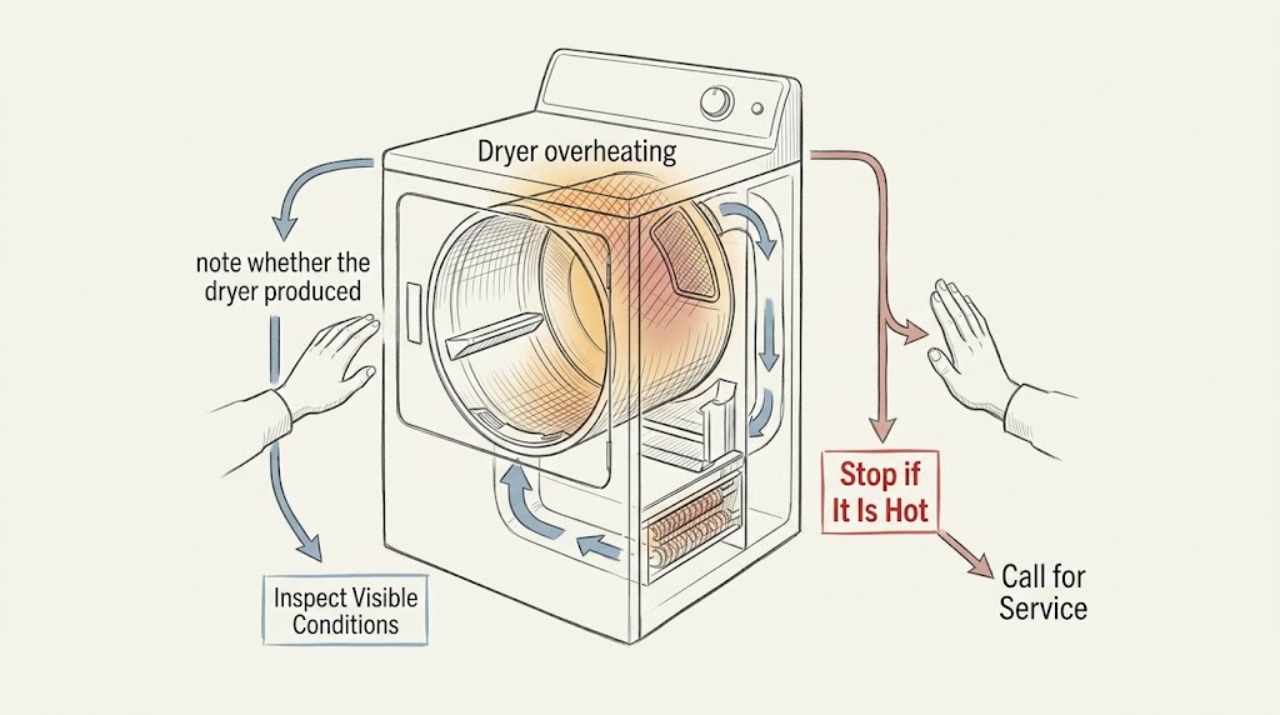
Stop using a dryer that is overheating, smells like burning, produces smoke, shows scorching, or shuts down abnormally. Do not run another test cycle or open the cabinet. Once it is safely off and cool, record the symptoms and inspect only the user-accessible lint screen, visible vent area, cycle history, and power connection. Restricted airflow is a common possibility, but a cycling thermostat, blower, heater, wiring, or gas-related fault can also overheat a dryer and needs professional diagnosis.
Work through in order
Diagnostic checks
Use only checks that match the exact appliance or system and its official guide.
-
Check 1
From a safe standing position, note whether the dryer produced smoke, a burning or electrical odor, visible scorching, sparks, an unusually hot cabinet or clothes, or an abnormal shutdown. If any of these occurred, stop using the dryer immediately and isolate power at a safely reachable plug or breaker only if doing so does not put you near heat, smoke, water, or damaged wiring.
Expected result: The presence of smoke, burning odor, scorching, sparks, or a repeated protective shutdown is a hazard signal; ordinary warmth with none of those signs is a lower-information observation, not a clearance to run the dryer.
Next step: Keep the dryer off, keep combustible items away, and arrange qualified appliance service. If there is active smoke or fire, leave the area and contact emergency services. If a gas odor is present, leave without operating switches and contact the gas utility or emergency services from a safe location.
Stop if: Stop all inspection and do not restart if there is smoke, flame, a strong burning or gas odor, sparking, a hot or damaged cord, or an electrical panel trip associated with the dryer.
Why this matters
Why: A hazard signal can indicate lint ignition, restricted airflow, an electrical fault, or a gas-related fault. The cause cannot be confirmed safely from the outside.
-
Check 2
After the dryer is off and completely cool, and after power is isolated only when the plug or breaker is safely accessible, remove the lint screen as normal user maintenance and look for heavy lint, a torn or missing screen, or lint packed around the opening. Clean the screen according to the owner's manual; do not reach into the cabinet or run the dryer without the screen.
Expected result: Heavy buildup, a damaged or missing screen, or lint around the opening is visible; a clean, intact screen does not rule out lint elsewhere in the appliance or exhaust path.
Next step: Record what you found and request professional cleaning or diagnosis, especially when overheating or long drying times accompanied the buildup. Do not open the cabinet to clean internal lint yourself.
Stop if: Stop if the screen is missing, torn, deformed, or cannot be seated correctly, or if lint is present near a hot, scorched, or damaged area.
Why this matters
Why: Lint at the user-accessible screen can reduce airflow and indicates that the lint-control routine needs attention. A clean screen does not prove that the hidden chassis or duct is clear.
-
Check 3
Without moving the dryer, climbing, opening a wall, or disconnecting concealed ducting, inspect the visible exhaust connection and the outdoor hood from a safe ground-level or otherwise readily accessible position. Look for a crushed, sharply bent, detached, visibly obstructed, or lint-covered section and note whether the hood has been blocked by debris or a nest.
Expected result: The visible path or hood is crushed, detached, obstructed, or its condition cannot be seen; an apparently clear visible section still does not establish that the full duct is clear.
Next step: Keep the dryer off and give the technician the location and photos of the visible restriction. Have the complete exhaust route cleaned or corrected by a qualified person using the dryer and building requirements.
Stop if: Stop if inspection would require a ladder, roof access, reaching behind a heavy appliance, sharp-edge contact, duct disassembly, or exposure to debris, animals, or weather hazards.
Why this matters
Why: Any visible restriction can reduce exhaust airflow and contribute to heat buildup. An inaccessible or uncertain path needs a qualified vent assessment rather than a guessed replacement or a test run.
-
Check 4
Review the last cycle without starting another one: record whether Timed Dry or an automatic cycle was selected, the heat option, load size, whether drying took longer than usual, whether clothes were still damp, and whether the dryer stopped and later restarted. Compare the notes with the owner's manual for that model.
Expected result: Longer-than-usual drying, damp clothes after a normal cycle, repeated shutdown, or overheating on more than one setting is present; a single unusual load or setting may have changed the result but does not make an overheating event safe to ignore.
Next step: Give the cycle and symptom history to the service technician. Do not run a confirmation cycle, switch to a lower heat setting, or continue using the dryer to see whether the symptom returns.
Stop if: Stop if the history includes burning odor, smoke, scorching, abnormal heat, repeated shutdown, or any symptom that worsened during operation.
Why this matters
Why: The pattern helps separate a cycle or load detail from a possible airflow or temperature-control fault, but it cannot identify a thermostat, blower, heater, or sensor failure without professional testing.
-
Check 5
With the dryer off and viewed from a dry, safe position, visually check the power cord, plug, and outlet face for fraying, looseness, scorching, melting, or discoloration, and check that the area around the dryer is free of lint and items that can burn. Note whether an extension cord or power strip is involved without touching a damaged connection.
Expected result: A damaged or hot-looking connection, loose outlet, extension cord, or combustible clutter is present; a visually normal connection does not rule out an internal electrical or gas fault.
Next step: Do not use a damaged connection or attempt outlet, cord, wiring, gas, or cabinet repair. Photograph the condition from a safe distance and tell the appliance technician or a qualified electrician what you observed.
Stop if: Stop immediately if the plug or outlet is hot, smoking, sparking, melted, wet, loose, or visibly damaged; do not touch it or restore power.
Why this matters
Why: Connection damage can add fire risk and requires electrical or appliance service. Major appliances should be connected as specified by the manufacturer and not through an extension cord.
Use your observations
Decision map
Find the observation that best matches what you see, then follow the next safe action.
-
PATH 01Next step
What you see
Smoke, flame, strong burning odor, gas odor, sparking, scorching, or a hot/damaged connection was observed.
Do this next
Do not operate or test the dryer. Leave the area for active fire or gas danger and contact the appropriate emergency or utility service from a safe location; otherwise arrange qualified appliance or electrical service.
-
PATH 02Next step
What you see
The lint screen, visible exhaust path, or outdoor hood shows buildup, damage, crushing, detachment, or obstruction.
Do this next
Keep the dryer off and request a qualified inspection and cleaning/correction of the complete exhaust path. Do not open the cabinet or improvise a vent repair.
-
PATH 03Next step
What you see
The visible vent and user-accessible screen look normal, but the dryer overheated, shut down, or dried abnormally.
Do this next
Treat the fault as unresolved and schedule appliance service; internal airflow, temperature-control, heater, blower, sensor, wiring, or gas components require model-specific professional diagnosis.
-
PATH 04Next step
What you see
The inspection would require live electrical work, gas work, cabinet disassembly, duct disassembly, ladder/roof access, or moving a heavy appliance.
Do this next
Stop at the safe observation boundary and give the technician the model, fuel type, symptom history, and photographs.
Helpful context
Understand the symptom
Why a dryer can get too hot
A dryer must move heated air through the load and exhaust it outdoors. Lint or a crushed or blocked exhaust path can reduce airflow and allow heat to build up. A selected cycle, damaged venting, a failing airflow component, a temperature-control fault, or an electrical or gas problem can produce similar symptoms. A warm cabinet alone is not enough to identify the cause, so treat unusual heat as a safety signal rather than a reason to keep testing.
What to have ready for service
Write down the dryer brand and model, electric or gas type, the cycle and heat setting last selected, whether the load was unusually damp or hot, the first time the symptom appeared, and any burning odor, smoke, discoloration, or shutdown. A photo of the control setting and the visible vent termination can help a technician without requiring the appliance to run.
Safe scope
These checks are limited to observation and normal user-accessible care. Do not remove the cabinet, reach toward the heater or burner, probe wiring, work on a live circuit, handle gas connections, or replace a thermal device based only on a symptom. If heat, odor, smoke, or an abnormal shutdown is present, leave diagnosis and repair to a qualified appliance professional.
Only after diagnosis
Potential parts
- dryer cycling thermostat
Consider this component only if a qualified diagnosis finds that temperature regulation is incorrect after airflow and safety concerns are addressed.
Confirm the complete dryer model and the manufacturer's fit information; do not infer compatibility from the symptom or appearance. - dryer blower wheel
Consider this component only if professional testing identifies inadequate internal air movement or a damaged blower wheel rather than an external vent restriction.
Blower-wheel fit varies by model and design. A qualified technician should identify the part and perform any cabinet work. - dryer vent cleaning kit
Consider a vent-cleaning accessory only after the complete exhaust route and safe access have been assessed; it is not a substitute for appliance diagnosis or a reason to keep operating an overheating dryer.
Verify the kit's intended duct access and the appliance/building requirements. Do not use it for concealed, elevated, damaged, or unsafe ductwork.
When checks do not resolve it
Need a professional?
Call a qualified appliance technician before using the dryer again whenever it overheats, smells of burning, produces smoke, shuts down abnormally, dries unusually slowly, or has an unexplained hot or damaged connection.
Have this ready
- Provide the brand and model, electric or gas type, selected cycle and heat setting, load history, timing of the overheating, odors or visible damage, shutdown behavior, lint-screen and vent observations, and safe photos.
Common questions
FAQ
Is it safe to keep using a dryer that feels very hot?
No. Stop using it if the cabinet or clothes are unusually hot, especially with a burning odor, smoke, scorching, sparks, or an abnormal shutdown. Isolate power only when safely accessible and arrange professional diagnosis.
Can a blocked vent make a dryer overheat?
Yes. Lint or a crushed, bent, detached, or obstructed exhaust path can reduce airflow and allow heat to build up. A clear-looking visible section does not prove that the entire duct or dryer chassis is clear.
Should I replace the cycling thermostat first?
Not based on the symptom alone. A cycling thermostat is only one possible cause; airflow, blower, heater, sensor, wiring, and gas-related faults can look similar. Have a qualified technician diagnose the model before selecting a part.
What information should I give the repair technician?
Give the brand and model, fuel type, cycle and heat setting, load history, when overheating began, any odor or visible damage, shutdown behavior, lint and vent observations, and safe photos.
Read the exact guide
Official sources
- Appliance and Electrical Fire SafetyU.S. Fire Administration · General household electrical and appliance fire-safety guidance.
- Overheated Clothes Dryers Can Cause FiresU.S. Consumer Product Safety Commission · General household electric and gas clothes-dryer safety guidance.
- Dryer Too Hot - Product HelpWhirlpool Product Help · Whirlpool guidance is used here for the general airflow and cycle concepts; exact controls and service procedures remain model-specific.
Community feedback
Share a repair observation
Share a plain-text repair observation. Accepted observations are published automatically; this page may take a moment to update.