
On this page
Start here
Quick answer
A dryer that stops before the selected cycle ends may be responding normally to a sensor cycle, or it may be stopping because of a door, airflow, power, control, motor, or heat-safety fault. First note the selected cycle, load condition, display state, and exact timing. Then, only with the dryer cool and disconnected when handling the lint filter or accessible sensor area, check user-level airflow and cleanliness items named in the owner's guide. If the dryer is unusually hot, smells burned, produces smoke, repeatedly loses power, trips a breaker, or stops again after a safe basic check, stop using it and arrange professional dryer repair; do not open the cabinet or test a thermal fuse, gas, or electrical component yourself.
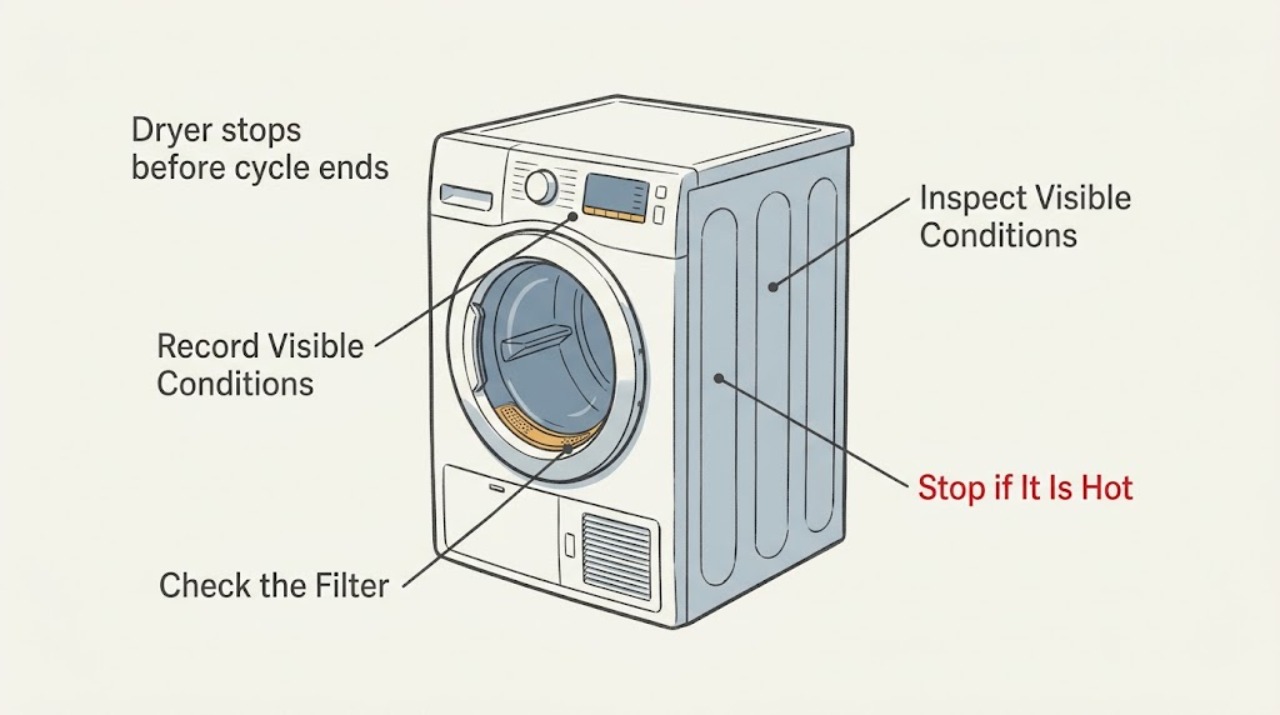
Work through in order
Diagnostic checks
Use only checks that match the exact appliance or system and its official guide.
-
Check 1
Read the selected cycle and options before the next use, and record whether the dryer displayed an end-of-cycle message, a moisture or filter reminder, an error, or went completely dark when it stopped.
Expected result: A sensor cycle may end with damp items if the load is small, mixed, or poorly exposed to the sensors; a timed cycle ending at its programmed time is different from an unexpected stop. A blank display or sudden loss of drum motion points to a power, control, door, or safety interruption rather than a normal dryness decision.
Next step: Write down the cycle, options, load type, moisture result, elapsed time, and whether the panel stayed lit. Do not repeatedly restart the dryer to reproduce the symptom.
Stop if: Stop using the dryer immediately for smoke, a burning or electrical odor, abnormal heat, sparking, a breaker trip, or a sudden loss of power that returns and fails again.
Why this matters
Why: If the machine clearly completed a sensor decision, first compare the load and setting with the model's manual. If it stopped with no completion indication, preserve the exact display state and timing for service instead of assuming the dryer needs a part.
-
Check 2
With the dryer off, unplugged, and fully cool, inspect the user-accessible lint filter and its visible seating area; clean only the filter as the owner's guide permits and reinstall it before any future use.
Expected result: Note heavy lint, a wet or damaged filter, lint around the opening, or a filter that does not sit correctly. Also record whether clothes were damp when the cycle stopped and whether the dryer felt hotter than usual.
Next step: If the filter or housing is damaged, airflow remains poor, or the dryer is hotter than normal, stop and request professional vent or appliance service. Do not reach inside the cabinet or continue operating to test the result.
Stop if: Stop if lint is packed inside an inaccessible area, the filter cannot seat, the appliance is hot, or any smoke, odor, or visible damage is present.
Why this matters
Why: Restricted lint flow can lengthen drying and increase heat, while a damaged or missing filter changes safe airflow. These observations can explain short or interrupted cycles but do not prove that an internal safety part has failed.
-
Check 3
From a safe position, observe the exterior exhaust outlet during one normal, supervised cycle only if the dryer has no warning signs; do not climb, dismantle the vent, or run additional cycles to compare airflow.
Expected result: Note whether air exits consistently, is unusually weak, or becomes associated with excess heat, a lint odor, or a stop before the cycle ends. Record the stop time and whether the display remains on.
Next step: If airflow is weak, the outside outlet is obstructed, or the dryer stops again, stop use and arrange professional vent/appliance evaluation. Provide the observed airflow and timing rather than guessing at a thermal-fuse replacement.
Stop if: Stop immediately for unusual heat, smoke, a burning smell, lint discharge, sparking, or any need to access a roof, wall, cabinet, or energized connection.
Why this matters
Why: Weak or changing exhaust can indicate a vent restriction that makes the dryer run hot and may trigger a protective shutdown. It does not identify the location of a blockage or justify opening the appliance or vent yourself.
-
Check 4
Without opening the dryer, observe the door and control behavior at the stop: note whether the door is fully closed, whether a door indicator appears, whether the drum stopped while the panel stayed lit, and whether the power cord and outlet look intact from a normal position.
Expected result: A door that pops open or a door indication at the stop suggests a latch or switch symptom; a lit panel with no drum movement suggests a drive or control symptom; a fully dark appliance suggests a power or protective interruption. Visible scorching or looseness at the cord or outlet is an emergency stop clue.
Next step: Record the result and model number, then contact an appliance repair professional if the dryer stops unexpectedly, will not stay running, or shows any damaged power connection. Do not remove panels or touch wiring.
Stop if: Stop immediately for a loose or burned connection, exposed wiring, breaker trips, smoke, burning odor, or a door that will not close safely.
Why this matters
Why: These observations separate user-control and door behavior from internal motor, control, heating, and power faults, but none identifies a part without model-specific professional testing.
-
Check 5
Compare the load description with the selected cycle and the owner's instructions without adding more items or changing several settings at once; record whether the load is small, mixed-weight, bulky, or still damp when the cycle ends.
Expected result: Light items can reach a sensor's dryness threshold before heavier items, while a bulky or tightly packed load can remain damp. A manual/timed cycle and a sensor cycle may intentionally behave differently.
Next step: Use the model's documented cycle guidance for a future load only if there are no heat, odor, power, or safety warnings. If the dryer still stops unexpectedly, stop testing and schedule repair.
Stop if: Stop if the dryer overheats, smells burned, smokes, loses power, trips a breaker, or leaves a fault indication.
Why this matters
Why: A load or cycle mismatch can look like an early stop without a hardware failure. If the same appropriate load and setting stop at an abnormal time, the pattern is more useful for a service diagnosis than a single mixed-load result.
Use your observations
Decision map
Find the observation that best matches what you see, then follow the next safe action.
-
PATH 01Next step
What you see
The selected sensor cycle ends with its normal completion indication and the load is light, mixed, or partly dry.
Do this next
Treat this first as a cycle/load interpretation issue and compare the load with the owner's guide. If an appropriate load still ends abnormally early or remains damp, document the pattern and seek service.
-
PATH 02Next step
What you see
The dryer stops mid-cycle while the panel remains on, or the door indicator appears.
Do this next
Record the door and drum behavior and stop repeated testing. A latch, door switch, drive, or control diagnosis may be needed; arrange professional appliance repair if the symptom recurs.
-
PATH 03Next step
What you see
The dryer becomes hotter than normal, airflow is weak, or lint is found around the accessible filter/outlet.
Do this next
Stop use and arrange professional vent and dryer evaluation. Do not open the cabinet or replace a heat-safety part based only on the symptom.
-
PATH 04Next step
What you see
The display goes dark, the power connection looks damaged, or the breaker trips.
Do this next
Stop using the dryer and have a qualified appliance professional or electrician assess the power path. Do not touch wiring, repeatedly reset a breaker, or continue operation.
-
PATH 05Next step
What you see
There is smoke, a burning odor, sparking, or immediate overheating.
Do this next
Stop the appliance if it can be done without contact with a hazard, keep people clear, and arrange emergency or professional help as appropriate. Do not run another cycle.
Helpful context
Understand the symptom
First decide whether it ended or failed
Sensor-controlled cycles can shorten or extend their run time as the load reaches the selected dryness, while a timed cycle is expected to follow its set time. Damp clothes, a dead display, a door-open indication, or a drum that stops while the controls remain powered are different clues. Record what the dryer showed and whether it stopped at roughly the same point each time; do not keep restarting it to reproduce a heat or power symptom.
Safe checks only
Before cleaning an accessible lint filter or sensor surface, turn the dryer off, unplug it, and let the drum cool. Never operate the dryer without its lint filter in place. Do not remove panels, reach into the cabinet, test a thermal fuse, work on wiring or gas parts, or use a running appliance as a repeated experiment.
Why a service diagnosis may be needed
A blocked exhaust path, door switch, moisture-sensing issue, drive motor, cycling thermostat, or thermal safety part can create similar mid-cycle symptoms. These parts are model-specific and some are behind panels. A repair professional can use the symptom timeline and model information to decide whether cleaning, alignment, testing, or a compatible replacement is appropriate.
Only after diagnosis
Potential parts
- dryer thermal fuse
Consider this category only if a qualified diagnosis confirms a failed thermal safety part and identifies the cause of the protective stop.
Confirm the exact dryer model, electrical or gas configuration, and manufacturer fitment before ordering; do not infer compatibility from appearance. - dryer drive motor
Consider this category only when professional testing links a stop with loss of drum drive to the motor or its related circuit.
Match the exact model and manufacturer-approved part information; a similar-looking motor is not proof of fit. - dryer cycling thermostat
Consider this category only after professional diagnosis finds abnormal temperature control rather than a load, sensor, airflow, or power cause.
Confirm the exact model and the required temperature/control specification with the manufacturer or repair professional before ordering.
When checks do not resolve it
Need a professional?
Request appliance repair when the dryer stops unexpectedly after safe user-level checks, repeats the same stop pattern, leaves clothes damp with no normal completion indication, shows a door or control symptom, or has weak airflow. Escalate immediately for smoke, burning odor, sparking, abnormal heat, damaged power connections, or repeated breaker trips.
Have this ready
- Provide the brand and model, selected cycle and options, load description, approximate time to stop, display state, whether the drum or panel stayed on, filter and airflow observations, and any odor or heat warning. Do not attempt to diagnose or order an internal part from symptoms alone.
Common questions
FAQ
Why does my dryer stop before the clothes are dry?
A sensor cycle may end early because of the load or sensor reading, but an unexpected stop can also involve airflow, the door or switch, power, drive motor, control, or a heat-safety part. Record the cycle, load, display state, and stop timing; stop using the appliance for heat, odor, smoke, or power warnings.
Can a clogged vent make a dryer stop mid-cycle?
Restricted airflow can make a dryer run hot and some models may stop as a protective response. Check only the user-accessible filter and observe the exterior outlet safely. If airflow is weak or the dryer is unusually hot, stop use and arrange professional vent or appliance service rather than opening the dryer.
Should I replace the thermal fuse when the dryer stops early?
Not from this symptom alone. A thermal safety part requires model-specific diagnosis, and the underlying heat or airflow condition also matters. Do not open the cabinet or test that part yourself; give a professional the stop timing, heat, airflow, and display observations.
What information should I give the repair professional?
Give the brand and model, cycle and options, load type, approximate time to stop, whether the panel and drum stayed on, the filter and exhaust observations, and any heat, odor, smoke, or breaker symptom. This is more useful than guessing which internal part failed.
Read the exact guide
Official sources
- How to clean and maintain your Samsung dryerSamsung · Samsung dryer lint-filter, moisture-sensor, cool/unplugged cleaning, and exhaust-airflow safety guidance
- Why Does My Dryer Keep Stopping Mid-Cycle?Maytag · Manufacturer overview of dryer mid-cycle stop clues including load, door, sensor, motor, and thermal-safety causes
- Samsung dryer loses power or won't turn onSamsung · Samsung dryer mid-cycle power-loss, visible power-connection warning, vent-blockage test, and service escalation
- Cycles, settings, and features on your Samsung dryerSamsung · Manufacturer explanation of sensor-dry versus manual-dry cycle behavior and load/setting effects
Community feedback
Share a repair observation
Share a plain-text repair observation. Accepted observations are published automatically; this page may take a moment to update.