
On this page
Start here
Quick answer
Excessive frost in a Kenmore freezer usually means too much warm humid air is entering, air cannot circulate, the control is set too cold, or an automatic defrost system is not clearing ice. Start by identifying the exact model and whether it is manual-defrost or frost-free. Check that packages do not hold the door or lid open, clean and test the gasket around the full perimeter, and keep vents clear. If the manual permits defrosting, disconnect power and let ice melt with the documented drain path; never chip frost with a knife or use flame or high heat. Frost that returns quickly, covers a hidden evaporator area, blocks the door, causes warming, or remains after the model-directed defrost needs qualified appliance service.
Before you begin
Safety first
- This article permits model lookup, ordinary-access inspection, gasket cleaning and paper testing, closure and vent checks, and only the exact manual's defrost procedure. A technician must handle hidden frost, panel removal, defrost parts, live electrical work, cabinet alignment, and cooling-system diagnosis.
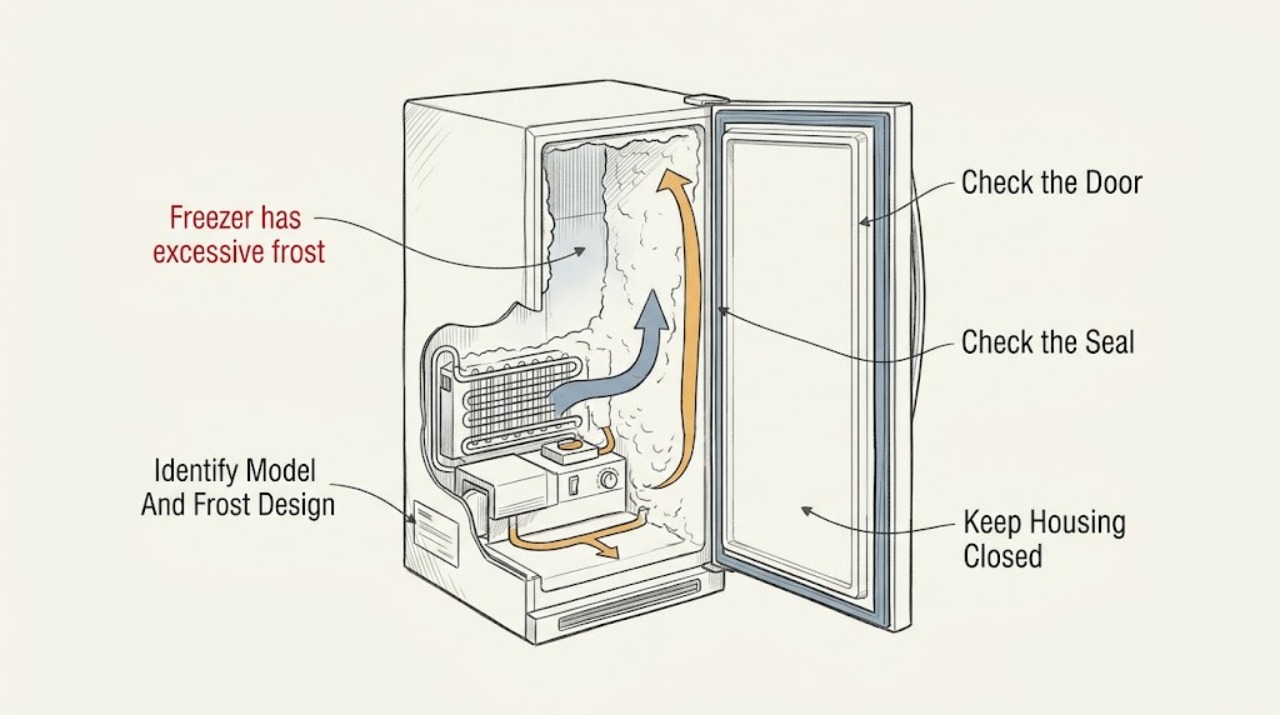
Work through in order
Diagnostic checks
Use only checks that match the exact appliance or system and its official guide.
-
Check 1
Record the exact Kenmore model number and use Kenmore's manual lookup to identify whether the freezer is manual-defrost, frost-free, chest, upright, or part of a refrigerator-freezer. Note whether the frost is on the door frame, floor, rear wall, vents, or a hidden cover.
Expected result: The manual gives a user defrost procedure and visible drain, or it directs panel removal, hidden evaporator access, or service for the frost area.
Next step: Follow only the manual's ordinary-access steps. If access requires a panel, wiring, fan, heater, timer, or sealed cooling area, stop and arrange service.
Stop if: Do not use a generic diagram, remove an evaporator cover, or start disassembly without the exact model procedure.
Why this matters
Why: Frost location and appliance design determine what a user can safely inspect. A frost-free cover or hidden drain is not user access simply because it is visible.
-
Check 2
Inspect the door or lid closing path for protruding packages, a displaced basket or shelf, frost on the frame, and packing material. Review whether the door has been left open or opened repeatedly, then remove only a loose obstruction.
Expected result: The door closes fully after an item is moved, or it still springs open, leaves a corner gap, or has been opened often during a period of frost growth.
Next step: Keep the load below the closing path and limit openings while the freezer recovers. Continue with the gasket test when the path is clear.
Stop if: Do not force the door or lid, push packages against the gasket, or move a loaded freezer alone.
Why this matters
Why: Packages and long or frequent openings admit warm moisture and can cause frost. A remaining gap makes the gasket, level, hinge, door, or cabinet more likely.
-
Check 3
Clean the gasket and matching cabinet surface with the model-approved method, dry them, and place paper or a bill at several points between the gasket and frame. Close the door normally and pull gently around the full perimeter.
Expected result: The gasket is clean and grips evenly, or paper slides out easily at one corner or along a section; also note any tear, twist, flattening, or frost on the seal.
Next step: Photograph any weak section and use the exact model manual before replacing the gasket. If contact remains poor after cleaning, arrange service or model-matched parts assessment.
Stop if: Do not cut, glue, stretch, heat, pry, or solvent-clean the gasket.
Why this matters
Why: An easy release or visible damage indicates a weak seal that can create warm-air frost. Even contact makes a major gasket leak less likely but does not rule out a warped door, level problem, or hidden frost.
-
Check 4
Read the temperature control and clear only loose items that cover the freezer's visible vents or press against an airflow path. Compare the setting with the exact Kenmore manual and note the room temperature and recent warm-food load.
Expected result: The control is set colder than the manual's normal guidance, vents are blocked, the room is unusually warm, or a large amount of warm food was recently added; or these factors are absent.
Next step: Make only the model-documented setting adjustment, keep vents clear, and allow the stated stabilization period. Do not keep turning the control colder when the freezer is warming.
Stop if: Do not remove an airflow cover, bypass a control, or block vents with liners or packages.
Why this matters
Why: A colder setting, blocked airflow, warm room, or warm load can extend cooling and contribute to frost. Their absence shifts attention toward the gasket, defrost system, drain, or hidden cooling fault.
-
Check 5
Only if the exact Kenmore manual permits user defrosting, protect or relocate the food, turn the control Off and disconnect power as directed, place towels or the specified pan at the drain, and let the frost melt naturally or by the documented method.
Expected result: Frost melts and water leaves through the intended drain, water remains trapped, the drain pan overflows, or the manual does not provide a user procedure.
Next step: Dry the interior, restore every cap, plug, and pan, and return power as the manual directs. If the drain path does not work or frost is behind a cover, arrange service.
Stop if: Never use a knife, ice pick, screwdriver, metal tool, heat gun, open flame, or electrical device inside a wet freezer.
Why this matters
Why: A complete documented defrost that restores airflow supports a temporary ice obstruction. Trapped water, overflow, a hidden drain, or no user procedure points to a deeper drain or defrost issue.
-
Check 6
After one model-directed defrost and clean closure, minimize door openings and monitor the next cooling period. Record whether frost stays light, the door seals, the freezer holds temperature, or ice returns rapidly on one wall or around the seal.
Expected result: The freezer stays cold with no rapid frost return, or frost quickly returns, the door remains leaky, the compressor runs excessively, or food is warming.
Next step: Arrange qualified appliance service for recurrence, hidden frost, a failed temperature recovery, or any condition that requires panel or electrical access. Provide the model, frost pattern, and before-and-after notes.
Stop if: Stop use when food is warming, frost prevents closure, water reaches electrical parts, smoke or burning odor appears, or a power-protection event occurs.
Why this matters
Why: A stable result supports an earlier opening, load, airflow, or temporary frost cause. Rapid recurrence or warming makes a gasket, defrost heater or control, fan or airflow, drain, or cooling-system issue more likely.
Use your observations
Decision map
Find the observation that best matches what you see, then follow the next safe action.
-
PATH 01Safety boundary
What you see
Frost is concentrated around the door or lid, a package or basket held it open, the gasket was dirty, or the freezer was opened repeatedly.
Do this next
Clear the closing path, clean and test the gasket, limit openings, and monitor the freezer after the documented recovery period.
Why this path and its safety boundary
Why it matters: Warm-air entry and closure are more likely than a failed defrost component.
Safety stop: Stop if a perimeter gap remains, frost returns quickly, or the freezer cannot hold cold.
-
PATH 02Safety boundary
What you see
The control is unusually cold, vents are blocked, the room is hot, or a large warm load was recently added, while the door can seal.
Do this next
Use the exact model's normal setting, clear loose vent obstructions, keep the door closed, and allow stabilization before judging the frost.
Why this path and its safety boundary
Why it matters: A heat load or airflow condition is more likely to be extending cooling and frost formation.
Safety stop: Do not lower the setting repeatedly or block vents when the freezer is warming.
-
PATH 03Safety boundary
What you see
The model permits defrosting, all visible ice melts, water is collected through the documented drain, airflow returns, and the freezer holds temperature afterward.
Do this next
Restore caps and power exactly as directed, keep the door sealed, and monitor one normal cycle for renewed frost.
Why this path and its safety boundary
Why it matters: A temporary frost obstruction is plausible, but the cause of excess moisture should still be watched if frost returns.
Safety stop: Stop if the drain backs up, the pan overflows, frost rapidly returns, or cooling does not recover.
-
PATH 04Safety boundary
What you see
Frost is behind an evaporator cover, returns quickly after a complete defrost, blocks airflow again, or the freezer remains warm.
Do this next
Stop disassembly and arrange qualified appliance service with the model, frost location, temperature trend, and defrost result.
Why this path and its safety boundary
Why it matters: A defrost heater, sensor, timer or control, fan, drain, gasket, or cooling-system issue is more likely than a one-time frost event.
Safety stop: Do not remove hidden panels, bypass a defrost component, test live wiring, or pierce an iced cooling surface.
-
PATH 05Safety boundary
What you see
The door path is clear and the gasket is clean, but the cabinet rocks, the door sags, a corner stays open, or the seal is loose in one area.
Do this next
Use only model-documented leveling guidance or arrange service for alignment and gasket assessment; do not force the door shut.
Why this path and its safety boundary
Why it matters: Leveling, hinge, door shape, cabinet alignment, or gasket damage is more likely and may keep causing frost.
Safety stop: Do not loosen hinge hardware, lift the door, tilt a loaded freezer, or operate an unstable cabinet.
Helpful context
Understand the symptom
Excess frost is an air and defrost clue, not just a cleaning task
Frost forms when warm, moist room air reaches cold freezer surfaces. A door or lid that is slightly open, a dirty or damaged gasket, a package in the closing path, or blocked vents can keep adding moisture. A frost-free unit that rapidly refreezes may also have a defrost component or hidden airflow problem. The exact Kenmore model determines whether the owner may defrost it and which panels or drains are accessible.
Read the frost pattern with the door and temperature result
Frost concentrated around the door edge points toward seal contact or closure. A thick layer on the rear wall or around vents can restrict airflow and cause poor cooling. Light, even frost after a long-open door may clear after the documented defrost cycle. If the freezer is warming, the compressor runs continuously, or the frost returns soon after a complete defrost, repeating the same cleaning is unlikely to solve the cause.
Defrost safely and preserve the model boundary
Official freezer manuals describe different procedures for drain-equipped and drainless designs, including food protection, power disconnection, water collection, and replacement of drain caps or plugs. Use the Kenmore manual for the installed model. Do not probe an evaporator, remove a hidden cover, bypass a heater or timer, or heat plastic and wiring.
Safety boundary
Stop conditions
- Stop for a freezer that is warming, food thawing, water near electrical parts, smoke, burning odor, a damaged cord, a tripped breaker, or a door or lid that cannot stay closed.
- Do not remove frost-free evaporator covers, bypass defrost controls, test live wiring, or work on heaters, timers, sensors, fans, or sealed cooling parts.
- Never chip frost with a knife, ice pick, screwdriver, wire, or metal tool; do not pierce cooling lines.
- Do not use a heat gun, open flame, boiling water, chemicals, compressed air, or an electrical device inside a wet freezer.
- Do not force the door, hinge, gasket, shelf, basket, drain cap, or pan, and do not move a loaded freezer alone.
- Stop after one exact-model defrost and recovery check when frost returns rapidly, water cannot drain, or the freezer remains warm; arrange qualified appliance service.
Only after diagnosis
Potential parts
- freezer door or lid gasket
Consider this category only when the exact model's gasket is damaged or permanently distorted and fails the perimeter seal test after cleaning and closure obstructions are removed.
Confirm the exact Kenmore model, seal profile, freezer type, mounting method, and manufacturer's fit information before ordering. - defrost heater, sensor, timer, or control
Consider this category only after a qualified technician confirms recurring frost is caused by a failed defrost component rather than a gasket, airflow, drain, or usage issue.
Confirm the exact model, defrost design, electrical rating, connectors, and manufacturer's fit information; do not bypass or live-test the component. - defrost drain tube or pan
Consider this category only when service confirms that the model's drain tube, cap, or pan is blocked, cracked, displaced, or unable to carry meltwater after safe defrosting.
Confirm the exact model, routing, dimensions, connections, and manufacturer's fit information before ordering.
When checks do not resolve it
Need a professional?
Arrange qualified appliance service when frost returns quickly after a complete model-directed defrost, blocks the door or vents, appears behind a hidden cover, the gasket fails its perimeter test, the cabinet or door is misaligned, the freezer is warming or running continuously, the drain or pan does not work, or the model procedure is unclear. Any panel removal, defrost-component test, electrical work, or sealed-system access belongs to a technician.
Safety scope: This article permits model lookup, ordinary-access inspection, gasket cleaning and paper testing, closure and vent checks, and only the exact manual's defrost procedure. A technician must handle hidden frost, panel removal, defrost parts, live electrical work, cabinet alignment, and cooling-system diagnosis.
Common questions
FAQ
Why does my Kenmore freezer have excessive frost?
Common branches are a door or lid gap, dirty or damaged gasket, frequent openings, blocked vents, a control set too cold, a warm load, or an automatic defrost fault. Read the frost location and the freezer temperature together; frost that rapidly returns or accompanies warming needs service.
How do I test a Kenmore freezer door gasket?
Clean the gasket and frame, place paper or a bill at several points, close the door normally, and pull gently. An easy release at a section suggests weak contact. If cleaning does not restore contact, a hinge, level, door, cabinet, or model-matched gasket assessment is needed.
Can I scrape thick frost from a Kenmore freezer?
Do not use a knife, ice pick, screwdriver, wire, or other sharp or rigid tool. If the exact manual permits defrosting, disconnect power and let ice melt using the documented drain and water-collection method. Do not use flame, a heat gun, boiling water, or an electrical device inside a wet freezer.
Does a low temperature setting cause frost in a Kenmore freezer?
It can contribute to frost or over-freezing on some designs, especially when airflow or door sealing is also poor. Compare the setting with the exact model manual, make one documented adjustment, and allow the stated stabilization period. Do not keep making the control colder when the freezer is warming.
When should I call for Kenmore freezer frost service?
Arrange service when frost returns quickly after a complete model-directed defrost, blocks a hidden evaporator or vents, the door will not seal, water cannot drain, the freezer remains warm or runs continuously, or the repair requires panel, electrical, defrost, or sealed-system access.
Read the exact guide
Official sources
- Door is Not Sealing - Forming Frost - Upright FreezerWhirlpool · Official freezer manufacturer reference for general seal and frost checks; the exact Kenmore model manual controls.
- 7 Freezer Problems & How to Help Fix ThemWhirlpool · Official manufacturer troubleshooting reference used for diagnostic branches; the exact Kenmore design and manual control.
- Cleaning the Interior - Convertible Chest Freezer - Product HelpWhirlpool · Official product-help reference for safe defrost concepts; not a claim that every Kenmore freezer has this drain design.
- Find Your Manual | Kenmore Appliance Manuals & GuidesKenmore · Direct Kenmore source establishing that the exact model manual controls the freezer's frost and defrost procedure.
- Owner's ManualWhirlpool · Official freezer manual used for general frost and safety logic; the exact Kenmore manual controls the assigned appliance.
Community feedback
Share a repair observation
Share a plain-text repair observation. Accepted observations are published automatically; this page may take a moment to update.