
On this page
Start here
Quick answer
Excessive frost at a freezer door gasket usually means warm, moist air is entering through a door that is blocked, misaligned, dirty, damaged, or not sealing evenly. First remove only an obvious package or drawer obstruction, clean and dry the gasket with a soft cloth, and check the seal around the entire perimeter with a sheet of paper; do not use a knife, heat gun, or hair dryer to remove ice. Confirm the door closes fully and that food is not blocking vents. If the gasket is torn, the door remains uneven, frost returns quickly after a model-approved defrost, or cooling is affected, arrange appliance service. A gasket replacement is model-specific and should not be ordered by appearance alone.
Before you begin
Safety first
- User checks are limited to gentle closure, cleaning, paper or flashlight observation, and the exact manual's safe defrost procedure. A qualified appliance technician must handle gasket replacement requiring disassembly, hinge or rail adjustment, interior panels, fans, heaters, sensors, controls, refrigerant, and electrical diagnosis.
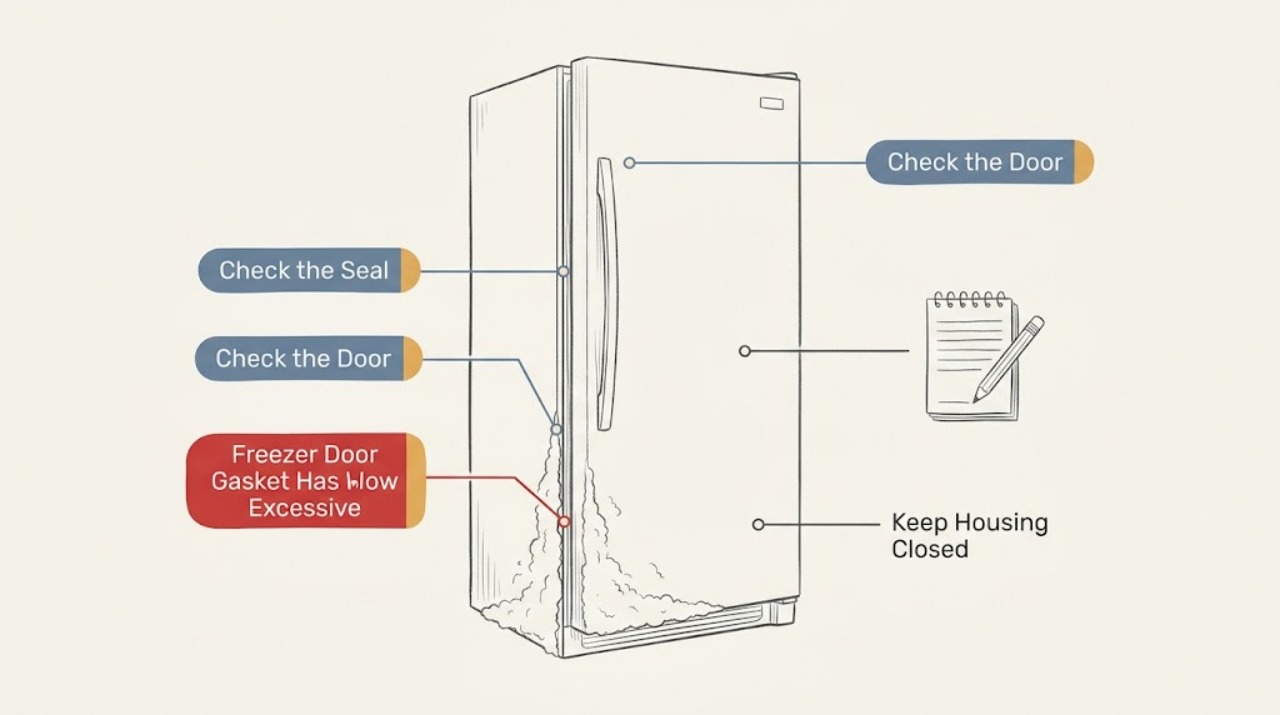
Work through in order
Diagnostic checks
Use only checks that match the exact appliance or system and its official guide.
-
Check 1
With the freezer door open only as long as needed, note where frost is concentrated—along the gasket, at one corner, across the frame, on vents, or deep inside—and whether the door or drawer closes fully without pressure.
Expected result: Frost follows one gasket section or corner, covers the frame, blocks a vent or track, or the door appears to close evenly with no visible gap.
Next step: Photograph the pattern, then continue with the obstruction and gasket checks. Do not pry the door or remove panels to find the source.
Stop if: Stop if the door is difficult to move, glass or trim is cracked, wiring is exposed, or frost removal would require force or a sharp tool.
Why this matters
Why: A localized edge pattern supports warm-air entry at that seal or alignment point. Frost on vents or tracks can itself prevent closure and airflow. A uniform buildup with an apparently closed door may require defrost-system or other appliance diagnosis.
-
Check 2
Check the shelves, baskets, drawer slides, packages, bags, and frost ridge near the door perimeter for anything preventing full closure; move only an obvious loose item without forcing the drawer or breaking ice.
Expected result: A package, bin, shipping material, shelf, rail, or frost buildup prevents the gasket from touching the cabinet, or nothing is blocking the closure.
Next step: Remove only the obvious obstruction, close the door gently, and observe whether the gap disappears. If it still will not close evenly, keep the freezer closed and arrange service rather than adjusting hinges or rails by guesswork.
Stop if: Stop for a jammed drawer, bent rail, heavy ice that resists gentle handling, a leaning appliance, or any need to dismantle the door.
Why this matters
Why: A closure obstruction can mimic a failed gasket and allow moist room air inside. If nothing blocks the door, an uneven seal, alignment issue, or another frost source remains possible.
-
Check 3
Wipe the rubber gasket and the mating cabinet surface with warm water and mild soap or a damp soft cloth, then dry both; inspect the full seal for dirt, a pulled-out section, compression, warping, split areas, or tears.
Expected result: Dirt or residue is present, the gasket is loose from its channel but intact, the rubber is deformed, or a tear, split, brittle section, or missing section is visible.
Next step: After cleaning, close the door gently and repeat the seal check. If the gasket is damaged or will not sit evenly, record the model and request service; do not glue, stretch, heat, or trim it.
Stop if: Stop for cracked plastic, a sharp edge, exposed wiring, a gasket fused to ice, or any attempt that would require heating or cutting the seal.
Why this matters
Why: Residue can interrupt contact, and a gasket that has pulled out may reseat according to the model design. A torn, split, brittle, or badly warped gasket cannot be restored by cleaning and may need model-specific replacement or service.
-
Check 4
After the gasket and contact surface are clean and dry, close a thin sheet of paper at several points around the perimeter and pull gently; use a flashlight inside the closed freezer only if the model and food arrangement make this safe.
Expected result: The paper has similar gentle resistance around the perimeter, pulls out easily at one section, or light is visible around the closed seal.
Next step: Mark or photograph the weak section and request model-specific service if it persists. Do not push the door harder, bend the gasket, or adjust hinges without the owner's manual.
Stop if: Stop if the paper tears, the door twists, ice must be broken to close it, or the check requires reaching behind moving drawers or shelves.
Why this matters
Why: Even resistance supports contact at the tested points. A loose paper section or light gap suggests an air leak at that location, but it does not distinguish gasket damage from door alignment or a blocked closure.
-
Check 5
Check that food is not pressed against the rear vents or door seal, note whether warm food was recently loaded, and observe whether the door is being left open for long or frequent periods; do not rearrange food while the door is obstructed by hard ice.
Expected result: Vents are blocked, warm food was added, the door is opened often, or these conditions are absent while frost continues.
Next step: Reorganize only enough to restore a clear closure and vent path, close the door promptly, and monitor according to the model manual. If frost returns despite a clean seal and clear path, request service.
Stop if: Stop if the freezer is excessively warm, food safety is uncertain, frost blocks the vents, or correction would require scraping or disassembling the interior.
Why this matters
Why: Warm items and humid air add moisture, while blocked vents can worsen cooling and frost. Persistent frost without these contributors makes a seal, alignment, defrost, or airflow fault more likely.
-
Check 6
If frost is heavy or prevents the door from sealing, use only the exact owner's manual's defrost procedure and protect food as the manual directs; never use a knife, open flame, heat gun, or hair dryer, and do not remove panels.
Expected result: Frost clears using the approved procedure and the door seals, frost is too hard or extensive to clear safely, or frost rapidly returns after a complete model-approved defrost.
Next step: Allow the freezer to return to its normal operation according to the manual and monitor the seal. If frost returns, cooling changes, or the procedure is not specified, arrange appliance service with the model and frost location.
Stop if: Stop for water near electrical parts, damaged insulation or wiring, a cracked liner, heavy ice that requires force, or any need to access the evaporator or defrost components.
Why this matters
Why: A successful defrost can remove an obstruction, but rapid recurrence suggests ongoing air entry, misalignment, airflow restriction, or a defrost-system fault. Frost that cannot be safely cleared is not a reason to apply more heat or force.
Use your observations
Decision map
Find the observation that best matches what you see, then follow the next safe action.
-
PATH 01Next step
What you see
Frost is concentrated along one section of the gasket, the paper pulls out easily there, or light is visible with the door closed.
Do this next
Clean and dry the contact surfaces, clear only an obvious obstruction, and repeat the gentle seal check. If the gap remains, request model-specific gasket or door service; do not glue or heat the seal.
Why this path and its safety boundary
Why it matters: Warm, moist air is likely entering at that section, but the cause may be dirt, a pulled-out or damaged gasket, an obstruction, or door alignment.
-
PATH 02Next step
What you see
The gasket is intact and seals evenly after an obstruction is removed, but frost returns after frequent openings or warm food was recently added.
Do this next
Limit door-open time, let warm items cool as the manual permits, keep vents clear, and monitor. If frost persists or cooling worsens, request service instead of assuming the gasket is sound.
Why this path and its safety boundary
Why it matters: Moisture load rather than a failed gasket may be driving the frost, especially if the door closes fully and the frost is not localized at a gap.
-
PATH 03Next step
What you see
Frost blocks the gasket, vents, or drawer track and the door cannot close fully.
Do this next
Follow only the exact manual's safe defrost guidance. Do not use a sharp scraper, hair dryer, heat gun, or flame. Arrange service if the frost is heavy, inaccessible, or returns quickly.
Why this path and its safety boundary
Why it matters: The frost has become part of the closure or airflow problem; continued operation can allow more warm air in and worsen accumulation.
-
PATH 04Next step
What you see
The door closes evenly and the gasket passes the gentle check, but frost builds uniformly or returns rapidly after a complete model-approved defrost.
Do this next
Record the frost location, cooling behavior, model, and defrost history and request appliance service. Do not remove interior panels or test fans, heaters, sensors, or refrigerant components.
Why this path and its safety boundary
Why it matters: A defrost, airflow, temperature, alignment, or concealed air-leak issue may remain; the gasket may not be the only component involved.
-
PATH 05Next step
What you see
The gasket is torn, split, brittle, warped, or pulled away and will not sit evenly after gentle cleaning.
Do this next
Keep the door closed as much as practical, protect food according to the appliance manual, and request service or an exact-model replacement assessment.
Why this path and its safety boundary
Why it matters: The seal cannot reliably prevent warm-air entry and may require model-specific replacement; a generic gasket or adhesive is not a safe assumption.
Helpful context
Understand the symptom
Frost at the gasket is an air-leak clue, not automatic proof the gasket is bad
A package, drawer, shelf, or frost ridge can hold the door open by a small amount. A dirty, compressed, pulled-out, warped, torn, or uneven gasket can do the same. Frequent or prolonged door opening and warm food can add moisture even when the rubber looks intact. Locate the frost and identify whether the door is closing evenly before treating the gasket as the failed part.
Use safe, low-force checks
Keep the freezer closed as much as practical while checking it. Remove only a clearly visible obstruction, wipe the gasket with warm soapy water or a damp soft cloth, and dry it. A paper test or a flashlight placed inside can reveal an uneven gap without prying on the seal. Do not force a drawer, scrape ice with metal, heat the cabinet, or remove panels.
Heavy frost can hide a second fault
If frost blocks the door, vents, or drawer tracks, the freezer may not close or circulate air correctly. Follow the exact owner's manual for defrosting; some freezers require manual defrosting while others use an automatic cycle. Samsung specifically warns not to use a hair dryer to speed defrosting. If frost returns after the door seals and the freezer is defrosted as instructed, service is needed to assess alignment, airflow, defrost operation, or a concealed seal problem.
Safety boundary
Stop conditions
- Do not use a knife, metal scraper, hair dryer, heat gun, open flame, or other direct heat to remove freezer frost.
- Do not pry the door, bend hinges or rails, stretch, glue, trim, or heat the gasket, or remove interior panels as a generic test.
- Stop for water near electrical components, exposed wiring, smoke, burning odor, a cracked liner, damaged insulation, or a door or drawer that is jammed.
- Do not reach behind drawers, vents, fans, heaters, or ice while moving or while frost requires force to clear.
- Keep the door closed as much as practical and arrange qualified service for repeated frost, cooling loss, food-safety uncertainty, or an unclear cause.
Only after diagnosis
Potential parts
- freezer door gasket
Consider only after inspection confirms a torn, split, brittle, warped, or persistently non-sealing gasket rather than an obstruction, dirt, or door-alignment issue.
Confirm the exact appliance model, door or drawer design, gasket channel, and manufacturer fit information; a similar-looking seal is not proof of compatibility. - door or drawer alignment hardware
Consider only if a qualified technician or exact model instructions identify hinge, rail, roller, or alignment hardware as the reason the gasket does not contact evenly.
Hardware and adjustment procedures vary by door style and model. Do not bend hinges, adjust rails, or order hardware from appearance alone. - defrost-system component
Consider only if frost returns with a clean, intact, evenly sealing gasket and a model-approved defrost, and a professional confirms an airflow or defrost fault.
Defrost heaters, sensors, controls, and fans are model-specific and require electrical and appliance diagnosis; do not access or test them as a user check.
When checks do not resolve it
Need a professional?
Arrange appliance service when the gasket is torn, split, brittle, warped, or persistently loose; the door will not close evenly; frost returns rapidly after a model-approved defrost; cooling or food temperature changes; or diagnosis would require panels, wiring, fans, heaters, sensors, or refrigerant access. Seek prompt help for water near electrical parts, a cracked liner, burning odor, smoke, exposed wiring, or food-safety concerns.
Safety scope: User checks are limited to gentle closure, cleaning, paper or flashlight observation, and the exact manual's safe defrost procedure. A qualified appliance technician must handle gasket replacement requiring disassembly, hinge or rail adjustment, interior panels, fans, heaters, sensors, controls, refrigerant, and electrical diagnosis.
Common questions
FAQ
Does frost around the freezer gasket always mean the gasket needs replacement?
No. A blocked door, dirty or pulled-out seal, frequent openings, warm food, or frost on a track can create the same symptom. Clean and inspect the seal, check closure gently, and replace it only when the exact model and diagnosis support that choice.
How can I check whether the freezer gasket is sealing?
Whirlpool describes closing a sheet of paper at points around the seal and gently pulling it; similar resistance is expected, while very easy removal suggests a weak seal. A flashlight inside the closed freezer can also reveal a gap. Do not force the door or use tools.
Can I push a freezer gasket back into its channel?
If the gasket has simply pulled away and the model design allows it, Samsung says it can be pushed back into the door channel. Do this gently only after cleaning; do not stretch, glue, heat, or trim a damaged seal.
Can I use a hair dryer or knife to remove heavy frost?
No. Samsung warns against using a hair dryer because it can damage the refrigerator. Do not use a knife, metal tool, flame, or heat gun. Follow the exact manual's defrost method or arrange service.
Why does frost come back after I clean the gasket?
Cleaning helps only when residue was preventing contact. Frost can return if the door is blocked or misaligned, warm moist air enters, vents are blocked, the gasket is damaged, or a defrost or cooling fault remains. Rapid recurrence after a proper defrost warrants service.
When should I call for freezer frost service?
Call when the gasket is torn or uneven, the door cannot close, frost rapidly returns, cooling changes, or safe checks do not resolve the issue. Stop immediately for electrical exposure, smoke, burning odor, a cracked liner, or food-safety uncertainty.
Read the exact guide
Official sources
- Freezer door is Sealing - Forming Frost - Upright FreezerWhirlpool Product Help · General upright-freezer guidance; the exact freezer model determines whether defrost is manual and how its door or gasket is serviced.
- Bottom Freezer Refrigerator - Freezer Drawer Not Sealing ProperlyGE Appliances · Specific to GE French-door or bottom-freezer drawer configurations; use it for general closure clues, not as a universal adjustment procedure.
- Frost forms in the Samsung freezer, refrigerator, or ice bucketSamsung · General Samsung refrigerator and freezer guidance; use the exact owner's manual for a particular door style, defrost method, and model.
Community feedback
Share a repair observation
Share a plain-text repair observation. Accepted observations are published automatically; this page may take a moment to update.