
On this page
Start here
Quick answer
A Kenmore freezer that leaks water most often has defrost water backing up because the drain is iced or obstructed, but a poor door seal, a shifted or damaged drain pan, an unlevel installation, or an optional ice-maker water connection can produce a similar puddle. First protect the floor and any nearby electrical area, identify whether water starts inside the freezer, underneath, at the door seal, or at a rear water connection, and check the visible gasket, closure path, frost pattern, and pan without removing panels. Use the exact Kenmore model manual for drain access and defrost instructions; do not use a knife, boiling water, hair dryer, or improvised tool. If water reaches wiring, the freezer warms, a water line or valve drips, the leak returns after a model-approved defrost, or the cause is behind a panel, stop and arrange qualified appliance service.
Before you begin
Safety first
- This article covers dry, ordinary-access observation and only model-approved closure or defrost steps. It does not authorize sharp tools or concentrated heat, panel removal, live electrical testing, water-line disconnection, sealed-system work, or improvised pan or tube repair.
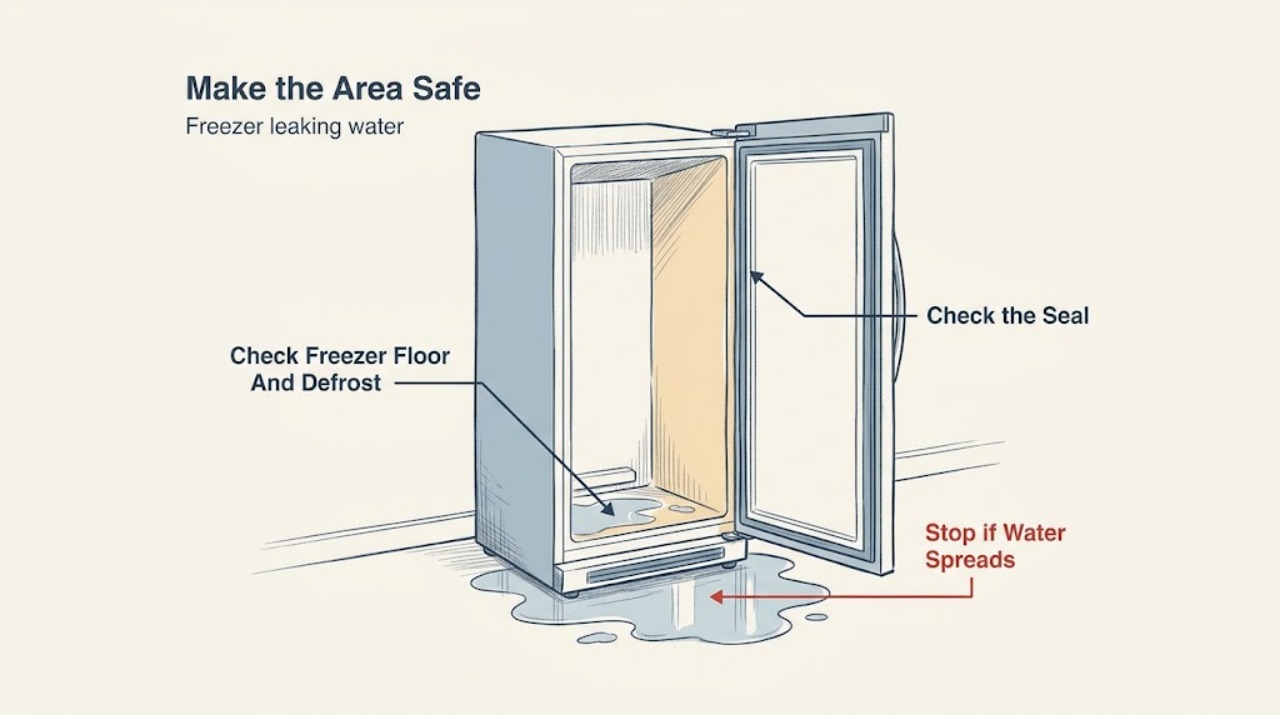
Work through in order
Diagnostic checks
Use only checks that match the exact appliance or system and its official guide.
-
Check 1
Protect the floor with absorbent towels and keep people and pets away. If water is approaching an outlet, cord, control, or other electrical area, stop using the freezer and disconnect power only from a dry, safe position; do not reach through water.
Expected result: Record whether the water is inside the compartment, at the front or door edge, beneath the cabinet, or at the rear, and whether the leak is a one-time puddle or actively continuing.
Next step: Photograph the trail and use the matching branch below. Keep the freezer closed and protect food if it is warming; arrange service immediately for water near electrical parts or an active uncontrolled leak.
Stop if: Do not touch wet electrical components, tip or move a loaded freezer, or continue testing when there is smoke, burning odor, sparking, repeated electrical tripping, or water entering the cabinet base.
Why this matters
Why: The first visible location is a routing clue: interior ice or water favors a defrost path, a perimeter trail favors closure or overflow, and rear or underside moisture raises drain-pan or water-connection possibilities. Water near electrical parts is a safety boundary, not a further diagnostic test.
-
Check 2
With the door open only briefly, inspect the visible freezer floor and rear area for a sheet of ice, pooled water, frost around a drain opening, or a trail from the rear wall. Do not remove an interior panel or poke at ice or a drain with a tool.
Expected result: Water or ice is concentrated on the freezer floor or rear drain area; the interior is dry but the underside is wet; or there is no visible freezer-side source.
Next step: Check the exact Kenmore manual for whether the drain is user-accessible and which defrost method is allowed. If access requires a cover, fastener, or internal component removal, stop at this observation and request service.
Stop if: Do not chip, drill, scrape, or pry ice; do not use a hair dryer, heat gun, open flame, boiling water, or a metal object to clear a drain.
Why this matters
Why: A freezer-floor or rear-wall pattern makes a frozen or obstructed defrost drain more likely. A dry interior shifts attention to the drain pan, a rear connection, door closure, or an external source; no visible source means the leak may be concealed.
-
Check 3
Inspect the visible freezer gasket and closure path around the entire opening. Look for torn or folded gasket material, residue, a package or basket holding the door open, or a hinge and frame that do not align; clean only by the model-approved method and do not pull the gasket off.
Expected result: The gasket contacts evenly and the door closes without force, or there is a gap, damaged section, obstruction, or frost concentrated around the perimeter.
Next step: Remove only accessible obstructions and restore the door's normal closure. Arrange service for a torn gasket, damaged frame or hinge, a persistent gap, or water that returns despite a sound closure path.
Stop if: Do not force the door, bend hinges, remove the gasket, or keep using the freezer if the door cannot seal or stored food is warming.
Why this matters
Why: An obstruction or failed seal lets warm humid air enter, which can create frost and excess meltwater that overwhelms the normal drain path. A clean, even seal makes a drain, pan, water-line, or internal defrost issue more likely.
-
Check 4
From a dry, ordinary-access position, look under or behind the freezer for a visible drain pan that is shifted, cracked, overflowing, or not receiving the drain tube. Check the appliance's visible installation angle and do not move a loaded unit or remove a lower cover unless the Kenmore manual explicitly describes that access.
Expected result: The pan is visibly cracked or out of place, water is overflowing it, the drain tube misses it, the cabinet is visibly out of the instructed position, or the area looks dry and correctly positioned.
Next step: Document the pan and tube position and follow the exact Kenmore installation instructions or request service. Do not attempt to seal a cracked pan, reshape tubing, or lift the freezer as a workaround.
Stop if: Stop if inspection requires moving the appliance, reaching behind wet electrical equipment, removing a panel, or handling an inaccessible or damaged drain assembly.
Why this matters
Why: A damaged or mispositioned pan can leak even when the drain is open, while an installation angle can let water spill at the pan edge. A sound, correctly positioned visible pan shifts the diagnosis toward an internal blockage or a water-supply path.
-
Check 5
Only if this Kenmore refrigerator-freezer has an ice maker, dispenser, filter, or supplied water line, observe the accessible rear connections, inlet-valve area, and fill-tube area for fresh moisture, a kink, a cracked tube, or a drip that follows ice-maker filling; do not disconnect tubing.
Expected result: The leak is tied to ice-maker or dispenser use, a fitting or tube is visibly wet or damaged, the water supply is not present on this model, or no connection is wet while the freezer continues to leak.
Next step: If the installation has a safe, labeled water shutoff, follow the model instructions to isolate it and arrange service for a leaking line, valve, filter housing, or fill tube. Do not operate a wet or damaged connection.
Stop if: Do not pull the freezer out against its cord or tubing, loosen compression fittings, remove a valve, or touch a wet connection while energized.
Why this matters
Why: A use-linked rear or fill-path drip makes the water system more likely than a defrost drain. A freezer without a water connection, or a dry water path with interior floor ice, keeps defrost drainage as the stronger branch; a concealed valve or line still needs service diagnosis.
-
Check 6
After only the ordinary-access checks allowed by the Kenmore manual, record whether an approved defrost or closure correction changed the leak, how quickly water returned, the frost pattern, freezer temperature or food condition, and whether the leak is tied to a defrost or ice-maker event.
Expected result: The water stops and does not return with a clear drain path and proper closure; it returns after a short interval; the freezer warms; or the source remains behind a cover or inside the cabinet.
Next step: Keep the leak area dry, protect food, and give the technician the model number, photos, timing, frost pattern, water-connection status, and checks already performed. Do not keep repeating a thaw or reset without identifying why the leak returns.
Stop if: Stop and arrange service for recurrence, warming food, exposed wiring, a damaged liner, an active rear leak, or any need to open panels or test internal electrical or sealed-system parts.
Why this matters
Why: A lasting improvement supports a corrected visible drain or closure issue, but recurrence makes a persistent obstruction, defrost-system fault, pan or tube damage, or water-line fault more likely. Warming or concealed access raises the need for qualified diagnosis.
Use your observations
Decision map
Find the observation that best matches what you see, then follow the next safe action.
-
PATH 01Next step
What you see
Water or a sheet of ice is on the freezer floor or near the rear drain area, especially after a defrost cycle, while the door otherwise closes normally.
Do this next
Use the exact Kenmore manual to determine whether the drain is accessible and whether a user defrost is permitted. Stop for any panel or internal access and arrange service if the leak returns.
Why this path and its safety boundary
Why it matters: Defrost water is more likely backing up at a frozen or obstructed drain than leaking from an optional supply line.
-
PATH 02Next step
What you see
Frost and moisture are concentrated around the opening, and the gasket has a fold, tear, residue, door obstruction, or a section that does not contact the frame.
Do this next
Clear the accessible obstruction and follow the model's gasket-care instructions. Request service for a damaged gasket, hinge, frame, or gap that remains.
Why this path and its safety boundary
Why it matters: Warm humid air entering through the closure path is more likely contributing to frost and meltwater; simply clearing water without correcting the seal will not be a durable answer.
-
PATH 03Next step
What you see
This is a water-supplied refrigerator-freezer, and moisture appears at a rear line, inlet valve, filter housing, or fill tube, or the leak follows ice-maker or dispenser use.
Do this next
Isolate the water supply only through the safe, labeled shutoff described by the installation instructions and arrange qualified appliance service. Do not loosen or replace a connection as a test.
Why this path and its safety boundary
Why it matters: A water-supply component is more likely than a defrost drain, particularly when the freezer floor is dry.
-
PATH 04Next step
What you see
The visible drain pan is cracked, shifted, overflowing, or not receiving the tube, or the freezer is installed at an angle inconsistent with its instructions.
Do this next
Document the pan and installation condition and arrange service or model-specific installation correction; do not seal, bend, lift, or reposition loaded equipment.
Why this path and its safety boundary
Why it matters: Water may be reaching the drain system but escaping at the collection or routing point rather than at the freezer drain opening.
-
PATH 05Next step
What you see
The leak returns after the model-approved defrost and visible closure checks, the freezer is warming, water is near electrical parts, or the source is behind a cover or inside the cabinet.
Do this next
Stop ordinary troubleshooting, protect food and flooring, and arrange qualified appliance service with the model number, leak timing, photos, frost pattern, and all observed results.
Why this path and its safety boundary
Why it matters: A persistent drain obstruction, defrost-system, fan or control issue, damaged pan or tube, or concealed water connection is more likely than a one-time spill.
Helpful context
Understand the symptom
The puddle location narrows the leak path
Water inside the freezer or a sheet of ice on its floor points toward defrost water that is not reaching the drain path. Water at the front edge can also be tracking from an internal backup or a door that is not sealing. A puddle under the cabinet can come from the drain pan, a drain tube, or a water connection if this Kenmore model has an ice maker or other supplied water. Dry the area and follow the trail rather than assuming the nearest wet spot is the source.
Kenmore model instructions control access
Kenmore models are built in more than one configuration, so drain openings, pans, plugs, water connections, and defrost procedures are not interchangeable. Kenmore's official support page provides product-help and manual routes; use the manual for the exact model before removing a drawer, panel, plug, or cover. A generic refrigerator diagram is useful for interpreting symptoms but cannot authorize disassembly of a particular freezer.
A defrost can remove water without fixing its cause
A frozen or obstructed defrost drain can let meltwater collect in the freezer and later reach the floor. If the door is leaking warm humid air, a vent or storage item is blocking the intended path, or the drain remains restricted behind the liner, the puddle can return. Keep any thawing method within the exact model instructions, never chip ice or apply concentrated heat, and treat recurrence as a service clue rather than repeating an improvised thaw.
Water-supplied models need a separate branch
If the Kenmore freezer is part of a refrigerator-freezer with an ice maker or water supply, a drip at the rear connection, inlet valve, fill tube, or filter area is a different problem from a defrost backup. Do not disconnect a water line as a casual test. If the leak continues while the ice maker or dispenser is not being used, isolate the water supply only if the installation instructions identify a safe accessible shutoff, then arrange service for the line or valve.
Safety boundary
Stop conditions
- Stop immediately for water near outlets, cords, controls, wiring, smoke, burning odor, sparking, repeated electrical trips, or an active leak that cannot be contained; do not reach through water.
- Do not use a knife, ice pick, wire, drill, heat gun, hair dryer, open flame, boiling water, or concentrated heat to clear freezer ice or a drain.
- Do not remove interior or rear panels, handle live electrical parts, disconnect water tubing, or work on a sealed cooling system unless the exact Kenmore manual and a qualified technician authorize the work.
- Stop and arrange service if the freezer warms, food is softening, the door cannot seal, the drain or pan is inaccessible, the leak returns after an approved defrost, or the water source is concealed.
- Do not move a loaded freezer, seal a cracked pan, bend a water line, or use repeated defrosting as a substitute for finding a recurring fault.
Only after diagnosis
Potential parts
- defrost drain pan or drain tube
Consider this category only if inspection or service diagnosis confirms that the drain pan is cracked or displaced, or the drain tube is damaged or remains restricted after the model-approved access procedure.
Confirm the exact Kenmore model and configuration before selecting a part; freezer and refrigerator-freezer layouts are not interchangeable by appearance. - freezer door gasket
Consider this category only when the gasket is torn, permanently deformed, or fails the model-appropriate closure check after accessible obstructions and residue are addressed.
Confirm the exact model, door style, and manufacturer's fit information; do not force or trim a gasket to compensate for frame or hinge damage. - defrost drain or defrost-system component
Consider this category only when a recurring freezer-floor ice or water pattern persists after the model-approved defrost and the technician identifies a restricted drain or failed defrost component.
Internal defrost parts require exact model identification and qualified diagnosis; do not infer a replacement from a generic freezer layout. - ice-maker water inlet valve or supply tubing
Consider this category only for a water-supplied Kenmore model when a leak is tied to ice-maker or dispenser use or a technician confirms a wet, cracked, or failed water-path component.
Confirm whether the model has the water feature and verify exact tubing, valve, fittings, and installation requirements before ordering or handling the water path.
When checks do not resolve it
Need a professional?
Arrange qualified Kenmore appliance service when the leak is active or recurring, the freezer warms, food is softening, the door or gasket cannot seal, the drain or pan requires panel access, a water line or valve is wet or damaged, the pan is cracked or shifted, or the source cannot be identified safely. Use Kenmore's official support and manual route for model-specific access instructions; this article does not authorize live electrical work, water-line disconnection, refrigerant work, or internal part replacement.
Safety scope: This article covers dry, ordinary-access observation and only model-approved closure or defrost steps. It does not authorize sharp tools or concentrated heat, panel removal, live electrical testing, water-line disconnection, sealed-system work, or improvised pan or tube repair.
Common questions
FAQ
Why is my Kenmore freezer leaking water onto the floor?
The most common possibilities are defrost water backing up at an iced or obstructed drain, a door gasket or closure problem that admits humid air, a shifted or damaged drain pan, or a water-line issue when the refrigerator-freezer has an ice maker or dispenser. Trace the water and check only the visible, model-approved areas before arranging service.
Can I melt the ice blocking a Kenmore freezer drain with a hair dryer or boiling water?
No. Do not use a hair dryer, heat gun, open flame, boiling water, or a sharp or metal tool. Check the exact Kenmore manual for an approved defrost method; if the drain is behind a panel or the leak returns, use qualified appliance service.
How can I tell whether the freezer door seal is causing the leak?
Inspect the visible gasket for folds, tears, residue, or a section that does not contact the frame, and check for packages or baskets holding the door open. Perimeter frost or moisture supports a closure problem. Clear only accessible obstructions and arrange service for a damaged gasket, frame, hinge, or persistent gap.
What if my Kenmore freezer has an ice maker or water dispenser?
Treat a wet rear line, inlet valve, filter area, or fill tube—especially a leak that follows ice-maker or dispenser use—as a separate water-path branch. Do not disconnect tubing as a test. Use the safe, labeled shutoff described by the installation instructions when appropriate and arrange service for a damaged or concealed connection.
When should I stop troubleshooting a leaking freezer?
Stop for water near electrical parts, an active uncontrolled leak, smoke, sparking, repeated electrical trips, a warming freezer, food that is softening, a door that will not seal, recurrence after an approved defrost, or any source behind a panel. Protect the floor and food and arrange qualified appliance service with the model number and leak history.
Read the exact guide
Official sources
- What should I do if I suspect my Samsung fridge/freezer is leaking water?Samsung Support · Manufacturer support guidance used for generic observation patterns; Samsung's model-specific access and repair directions do not replace the exact Kenmore manual.
- How to fix a refrigerator that is leaking waterWhirlpool · Manufacturer troubleshooting guidance used for generic refrigerator-freezer leak pathways; Whirlpool-specific instructions do not replace the exact Kenmore manual.
- Top Freezer Refrigerator - Drain TubeGE Appliances · Manufacturer support guidance used for the diagnostic pattern of water on the freezer/refrigerator path or floor; the page notes that some top-freezer drain access requires service.
- Contact UsKenmore Customer Support · Official Kenmore support entry point for product questions and model-specific manuals; used to establish the model-specific access boundary rather than a universal drain layout.
Community feedback
Share a repair observation
Share a plain-text repair observation. Accepted observations are published automatically; this page may take a moment to update.