
On this page
Start here
Quick answer
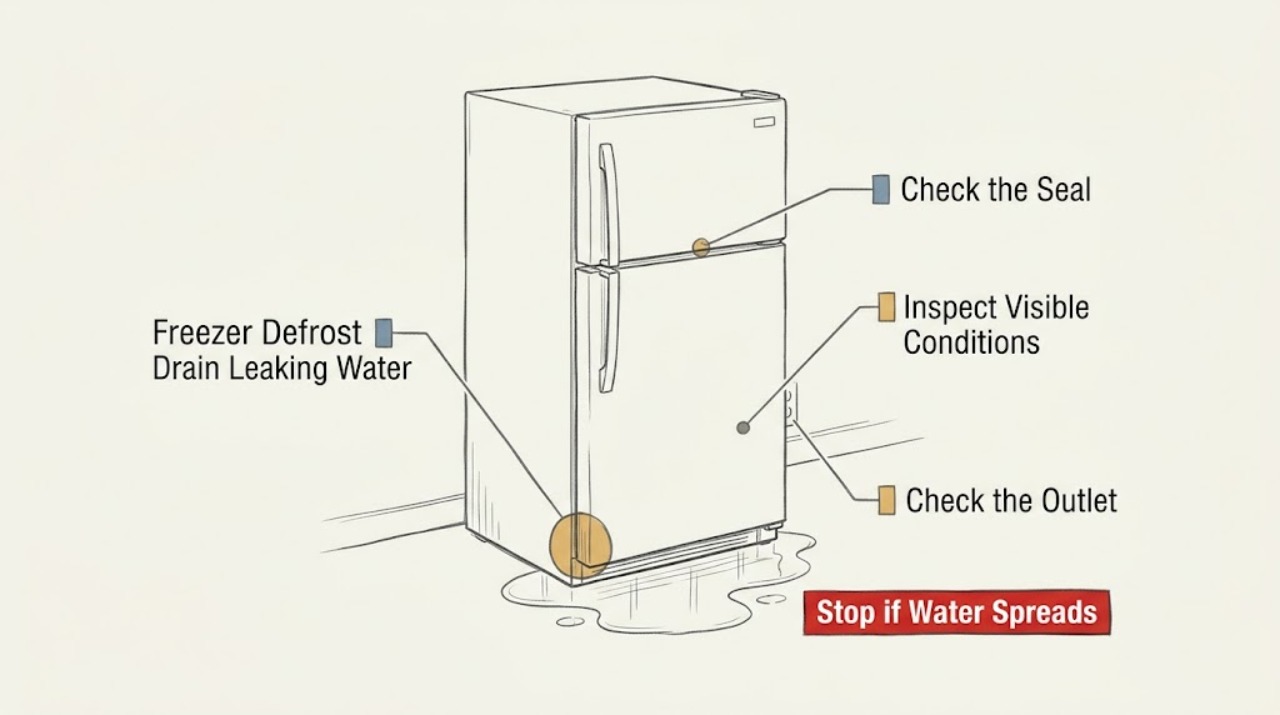
A freezer that leaks during or after defrost may have a blocked or frozen defrost drain, an overflowing drain pan, or a different water source such as an icemaker or supply line. First protect the floor, keep water away from electrical parts, and note whether the water is inside the freezer, under the unit, or coming from a connection. Confirm whether the appliance is a frost-free upright, a manual-defrost chest freezer, or a refrigerator-freezer combination: not every freezer has a defrost drain tube, and drain access varies by model. Check only the accessible drain opening, drain plug, door gasket, vents, and water connections described in the exact manual. Do not remove an internal panel, force ice out with a sharp tool, or keep operating a leaking appliance near electricity. If the drain cannot be accessed as documented, water returns after a model-approved clearing, the pan or tube is damaged, or the source is unclear, arrange appliance service.
Work through in order
Diagnostic checks
Use only checks that match the exact appliance or system and its official guide.
-
Check 1
Stop and contain the water. Move food and towels only as needed, keep hands and cords dry, and look from a safe position for water at the freezer floor, below the appliance, near an outlet, around a water connection, or under a refrigerator-freezer compartment. If water is reaching electrical parts, isolate power only from a safe, dry location and do not reach behind the appliance.
Expected result: Water is near an outlet or control, a cord or connection is wet or hot, the cabinet is arcing or smoking, or the leak is a small puddle limited to an interior drain area.
Next step: For a wet electrical area, arcing, smoke, or a hot connection, keep clear and use local emergency guidance as appropriate; do not restart the appliance. Otherwise dry the accessible area, keep the door closed as much as possible, and continue with non-invasive observations.
Stop if: Stop immediately for smoke, arcing, a hot or damaged cord, water entering controls or an outlet, or any need to pull a wet appliance across the floor.
Why this matters
Why: Water near electricity is a shock or fire hazard and takes priority over identifying a drain blockage. A contained interior puddle can be documented for the next design and source checks.
-
Check 2
Identify the appliance style and defrost design from the rating label and owner's manual: frost-free upright, manual-defrost chest, or refrigerator-freezer combination. Look only where the manual says to look for a drain tube, drain plug, drain opening, or external pan; do not assume every freezer has one.
Expected result: The manual identifies a visible drain opening or plug, identifies a pan beneath the unit, says access requires service, or the model and defrost design remain uncertain.
Next step: Follow only the exact manual branch. If access requires an internal panel, the opening is absent, or the model cannot be identified, keep the unit dry and arrange appliance service rather than dismantling it.
Stop if: Stop if locating the drain would require removing an interior liner, evaporator cover, rear panel, sealed tubing, or electrical cover.
Why this matters
Why: GE notes that current upright freezers can have self-defrost drain tubes, while manual-defrost chest freezers may have a drain plug and no tube or pan. A model without a documented accessible drain cannot be safely diagnosed with a generic method.
-
Check 3
Trace the water pattern without moving the appliance or touching hidden tubing. Check whether there is ice under the freezer basket or on the floor, water dripping during an active defrost cycle, a wet door gasket or package preventing a seal, an icemaker fill or supply connection leak, or water only below the cabinet.
Expected result: Ice sits over or near the drain opening, a puddle recurs on the floor, water is clearly from an icemaker or supply line, the door does not seal, or the source cannot be distinguished.
Next step: If the source is a water line or icemaker, close its accessible water shutoff if safe and arrange appliance or plumbing service. If the pattern points to the defrost drain, continue only with the model-documented accessible-drain check; if unclear, stop and request service.
Stop if: Stop for a split or pressurized water line, a leak behind the appliance, a heavy ice sheet, a damaged gasket, or any need to remove food panels or tubing to trace the source.
Why this matters
Why: Ice under the basket plus a floor puddle is consistent with a clogged defrost drain on applicable self-defrost designs. A supply-line or icemaker leak is a separate water path, and a poor door seal can admit moisture and create frost that later melts.
-
Check 4
If the exact manual identifies a visible, user-accessible defrost drain, follow that manual's cleaning method with the appliance safely powered down and the floor protected. Use only the stated tool or flush method; never insert a knife, ice pick, wire, or other sharp object, and do not pour chemicals into the drain.
Expected result: The manual's approved flush or clearing allows water to reach the drain pan, the opening remains blocked, water backs up, or the model says service is required.
Next step: Dry the interior and monitor one defrost event only if the manual permits normal operation and no electrical hazard remains. If water still leaks, the drain will not clear, or the manual requires service, leave the appliance off as appropriate and arrange qualified repair.
Stop if: Stop for resistance, cracked plastic, water near wiring, a blocked or hidden opening, or any need to remove panels or use a sharp or powered tool.
Why this matters
Why: A clear flow to the pan makes a simple accessible blockage more likely to have been removed. Backflow, an inaccessible opening, a damaged drain, or a pan that overflows suggests a hidden blockage, frozen section, poor routing, or another fault.
-
Check 5
After the accessible check, inspect the door gasket and freezer vents without tools, and verify that food is not covering the documented drain opening or vents. Note whether frost accumulates rapidly, the freezer runs continuously, water returns at each defrost cycle, or the floor stays dry.
Expected result: The gasket is split or does not seal, vents are blocked, frost quickly returns, the drain remains dry and the pan is intact, or the leak recurs despite a clear accessible drain.
Next step: Correct only a plainly misplaced package or accessible obstruction described by the manual. For a damaged gasket, rapid frost, recurring leak, concealed drain, or persistent temperature problem, stop repeated defrost attempts and arrange appliance service.
Stop if: Stop if frost covers the evaporator area, a gasket or liner is damaged, water reaches a fan or control, or diagnosis would require opening the cabinet or defrost system.
Why this matters
Why: A poor seal or blocked airflow can add frost and moisture; rapid recurrence or continued leaking after a clear drain points to a defrost, drain-pan, hidden-tube, temperature, or water-supply problem rather than a one-time spill.
Use your observations
Decision map
Find the observation that best matches what you see, then follow the next safe action.
-
PATH 01Safety boundary
What you see
Is water near an outlet, cord, control, hot connection, or other electrical part?
Do this next
Keep clear, do not touch the wet appliance or reach behind it, and isolate power only from a safe, dry location if possible; use local emergency guidance for smoke, arcing, or immediate danger.
Why this path and its safety boundary
Why it matters: Electrical exposure changes the problem from a drain diagnosis to an immediate shock or fire safety issue.
Safety stop: Contain the water and classify the freezer design and leak location before checking the drain.
-
PATH 02Next step
What you see
A self-defrost upright or combination freezer has ice under the basket or on the freezer floor plus a recurring floor puddle, and the manual identifies an accessible drain opening.
Do this next
Follow the exact manual's accessible-drain procedure with power and water safety controlled. Stop if the drain is hidden, resistant, damaged, or the leak continues after the documented clearing.
Why this path and its safety boundary
Why it matters: That pattern makes a clogged or frozen defrost drain more likely than a one-time spill, but the opening and clearing method remain model-specific.
-
PATH 03Next step
What you see
The freezer is a manual-defrost chest model, or the manual shows a drain plug rather than a drain tube or pan.
Do this next
Use the model manual to position a container and remove or open the drain plug only as instructed. If the plug is stuck, damaged, or the leak occurs during normal operation rather than defrost, request service.
Why this path and its safety boundary
Why it matters: A generic clogged-tube procedure does not apply. Defrost water may be intended to exit through the documented plug during a manual defrost.
-
PATH 04Next step
What you see
Water is clearly coming from an icemaker, supply line, damaged gasket, hidden drain, overflowing pan, or a drain that continues to leak after an approved clearing.
Do this next
Close an accessible water shutoff only if safe, keep the appliance and floor dry, and arrange qualified appliance or plumbing service. Do not pull the unit out, open panels, or keep restarting it to test the leak.
Why this path and its safety boundary
Why it matters: The evidence points away from a simple accessible drain blockage or shows a recurring underlying condition that a visual check cannot separate.
Helpful context
Understand the symptom
A defrost drain leak is not always a drain-tube problem
Frost-free upright freezers normally send meltwater through a defrost drain into a pan, and a dripping sound during the defrost cycle can be normal when the water stays in that pan. A puddle on the floor, ice under a basket, or water collecting inside suggests that the water path may be blocked, frozen, overflowing, or misdirected. A chest freezer may be manual-defrost and use a drain plug instead of a tube, so do not copy an upright-freezer procedure onto a different design.
Start with the leak location and appliance design
Water at the freezer floor, beneath the appliance, around the back, or at a door dispenser has different likely paths. Record the model and whether the unit is self-defrost or manual-defrost, then use the matching owner's manual to locate a drain hole, plug, pan, or water connection. Many built-in or freestanding designs require service to reach the internal drain; an absent drain opening is a reason to stop rather than pry off a panel.
Only clear an accessible drain when the manual allows it
Some specific side-by-side designs have a visible drain opening that the manufacturer documents for flushing, while other models require service. If the manual does not identify the opening and method, do not probe a hidden tube, pour chemicals into it, or dismantle the liner. A leak that continues after the documented clearing may involve a frozen or damaged tube, drain pan, defrost system, door seal, or a separate water supply and needs diagnosis.
Safety boundary
Stop conditions
- Stop and keep clear for water near electrical components, a hot connection, smoke, arcing, or a damaged cord; use local emergency guidance and isolate power only from a safe, dry location.
- Do not remove interior or rear panels, probe a hidden drain, pull the appliance across wet flooring, or touch sealed refrigeration tubing to reach the drain.
- Do not use knives, ice picks, wire, powered tools, drain chemicals, or force against a frozen or resistant drain opening.
- Stop repeated operation when water returns after an approved clearing, the drain pan or tube may be damaged, frost rapidly rebuilds, or the leak source is uncertain.
Common questions
FAQ
Why is my freezer's defrost drain leaking water onto the floor?
On an applicable self-defrost freezer, a blocked or frozen defrost drain can make meltwater collect inside or under the freezer and then leak onto the floor. Ice under the basket plus a recurring puddle supports that possibility. An icemaker, supply line, door seal, overflowing pan, or another source can look similar, so trace the location and use the exact model manual.
Does every freezer have a defrost drain tube?
No. GE explains that self-defrost upright freezers may have a drain tube and pan, while manual-defrost chest freezers may use a drain plug and have no tube or pan. Confirm the freezer's design and manual before looking for or clearing a drain.
Can I unclog the freezer defrost drain myself?
Only when the exact manual identifies an accessible drain and gives a clearing method for that model. Some specific designs document a flush, while built-in and many freestanding models require service. Do not remove panels, force a hidden drain, use sharp tools, or pour chemicals into the freezer drain.
Is water dripping during freezer defrost normal?
A dripping sound can be normal on a frost-free freezer when meltwater is flowing into the defrost pan. It is not normal for that water to pool on the freezer floor, overflow the pan, or leak onto the floor. If it does, stop and identify the drain, pan, door, icemaker, or supply-line path using the model guidance.
When should I call for freezer service instead of clearing the drain?
Call when the drain is hidden or inaccessible, the model requires a panel to be removed, water returns after the documented clearing, the pan or tube may be damaged, frost rapidly returns, the gasket is damaged, an icemaker or water line is leaking, or water is near electrical parts. Leave panels closed and keep the area dry while waiting.
Read the exact guide
Official sources
- 7 Freezer Problems & How to Help Fix ThemWhirlpool · Whirlpool freezer troubleshooting for leaking water, frozen evaporator areas, drain blockage, frost, door seals, vents, and professional boundaries
- Upright & Chest Freezer - Explanation of a Water Dripping SoundGE Appliances · GE explanation of normal defrost-cycle dripping into a drain pan on frost-free upright and chest freezers
- Side-by-Side Refrigerator - Water on Floor, Repairing a Clogged Defrost DrainGE Appliances · GE guidance on floor puddles, ice under a freezer basket, model-specific accessible drain clearing, and service boundaries
- Refrigerator & Freezer - Drain TubesGE Appliances · GE appliance guidance distinguishing self-defrost freezer drain tubes, manual-defrost chest-freezer drain plugs, and model-specific drain access
Community feedback
Share a repair observation
Share a plain-text repair observation. Accepted observations are published automatically; this page may take a moment to update.