
On this page
Start here
Quick answer
Water at a freezer door gasket is often condensation caused by warm, humid air entering through a dirty, obstructed, loose, torn, warped, or poorly aligned seal, but water can also be coming from a different defrost or drain path. Dry the area, keep the freezer door closed, clean and dry the gasket with mild soap, and check that containers are not preventing full closure. A paper test around the closed door can reveal sections with little resistance; condensation or frost concentrated along the seal supports an air-leak branch. If the gasket is damaged or remains loose, the door will not align, frost builds heavily, temperatures rise, or water appears from inside the cabinet or near electrical parts, arrange appliance service. Do not pry the liner, use a sharp tool to remove ice, heat the gasket or freezer, or replace a seal without confirming the exact model and door design.
Before you begin
Safety first
- This article supports drying visible moisture, cleaning and inspecting the visible gasket, checking door closure and obstructions, performing a paper test, and observing temperature and frost. It does not authorize liner or panel removal, electrical or sealed-system work, sharp-tool defrosting, forced drains, hinge or leveling adjustments, or generic gasket replacement.
Work through in order
Diagnostic checks
Use only checks that match the exact appliance or system and its official guide.
-
Check 1
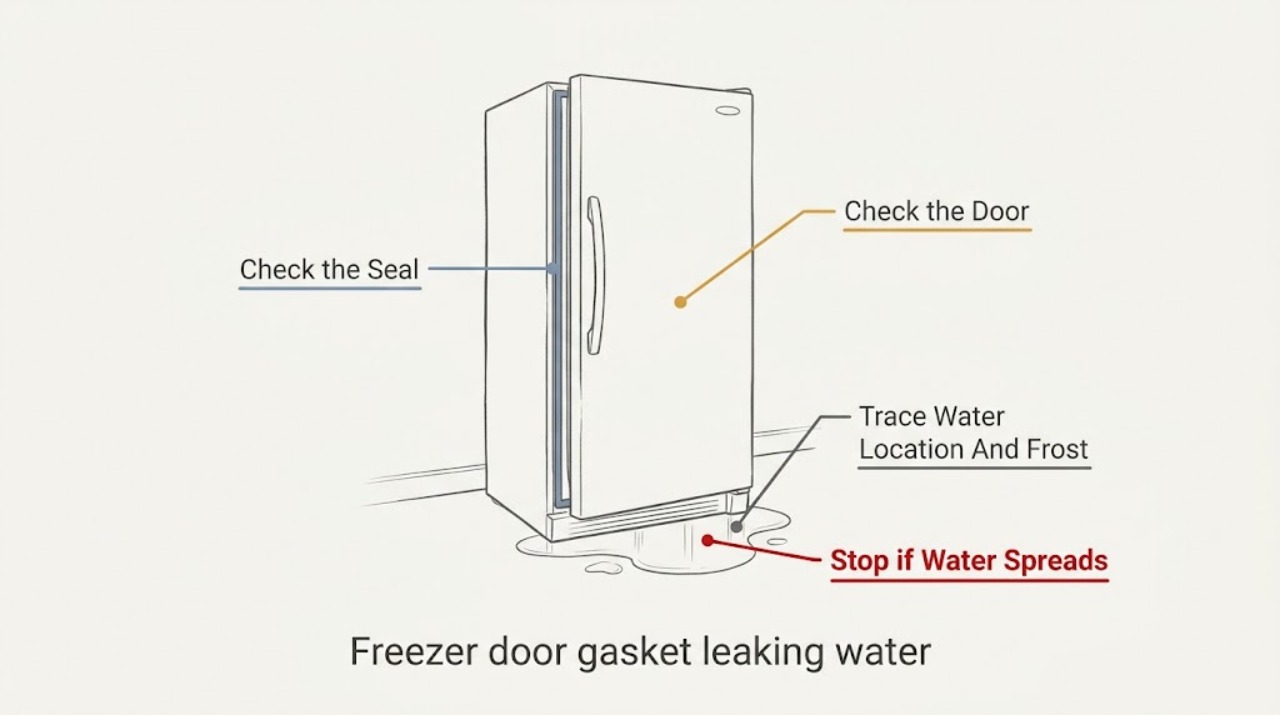
Dry the visible water and, without removing panels or bins that require tools, trace where it reappears: on the gasket face, cabinet flange, door edge, interior floor, rear wall, drain area, or outside near the appliance. Look for frost or condensation around the freezer-door perimeter.
Expected result: Record whether moisture is concentrated along one gasket section, evenly around the door, appearing only after door openings or humid weather, or originating from a different interior or rear location.
Next step: Use the location-based branch, then clean and test the gasket if the water is clearly at the door perimeter. Arrange service if the source is inside the liner, at the rear or drain area, near wiring, or cannot be traced safely.
Stop if: Do not remove the freezer liner, force a drain, pierce ice, use a knife or sharp tool, or move the appliance around wet flooring or exposed electrical connections.
Why this matters
Why: Moisture or frost concentrated at the seal makes warm-air entry through the gasket or door closure more likely. Water that starts elsewhere may involve defrost drainage, an internal leak, or another appliance path and should not be attributed to the gasket from location alone.
-
Check 2
Inspect the entire visible gasket perimeter for dirt, crumbs, packaging, ice, cuts, tears, loose areas, folds, or hardened deformation. Clean it with mild soap and water, dry it, then close a sheet of paper at several points around the door and pull gently.
Expected result: Record whether the gasket is intact and the paper has slight resistance all around, or whether paper slips out easily at one or more sections after cleaning.
Next step: If the gasket is merely dirty, dry it and observe whether the moisture returns. If it is loose, torn, or still fails the paper test, arrange service or follow only the exact model manual's gasket instructions; do not order a generic seal.
Stop if: Do not stretch, glue, cut, puncture, pry, or heat the gasket with an appliance or hair dryer unless the exact model instructions explicitly permit that procedure.
Why this matters
Why: A clean gasket with resistance around the perimeter supports a functioning seal, so recurring water may have another source or a door-alignment problem. Easy paper release, a loose retainer, a tear, or a warped section supports an air leak; the exact model determines whether it can be reseated or must be replaced.
-
Check 3
Check that shelves, bins, packages, ice buildup, or a mispositioned drawer are not holding the freezer door open. Observe the door from the front and hinge side as it closes, and check for an obvious gap or uneven alignment without loosening hinges or leveling hardware.
Expected result: Record whether the door closes and stays closed by itself, rebounds, rubs, sits unevenly, or leaves a gap at the same gasket section; note whether the leak stops when the obstruction is removed.
Next step: Reposition only an obvious package or bin obstruction, close the door, and monitor the gasket perimeter. Arrange appliance service for persistent misalignment, rubbing, a loose door, or a gasket that will not seat.
Stop if: Do not force the door, bend hinges, remove hinge covers, adjust leveling feet without the manual, or chip ice around the door with a tool.
Why this matters
Why: An obstruction or misalignment can prevent a sound gasket from sealing. A door that remains uneven or cannot close after the interior is cleared points toward hinge, roller, leveling, retainer, or door-structure service rather than a gasket-only fix.
-
Check 4
After the gasket and door are clean and unobstructed, note room humidity or recent warm-food loading, how often the door is opened, whether freezer vents are blocked or the compartment is overpacked, and the freezer temperature from an appliance thermometer or normal display.
Expected result: Record occasional light moisture after frequent openings, recurring condensation or frost despite a closed door, blocked vents or a packed compartment, a temperature that remains at the normal model setting, or a warming freezer with softening food.
Next step: Keep the door closed as much as practical, clear only obvious vent obstructions, and monitor without repeatedly opening the freezer. Arrange service if temperature does not recover, frost returns heavily, or the gasket test still fails.
Stop if: Do not alter sealed-system controls, force a defrost, use electrical heaters or sharp tools to melt ice, or rely on appearance or odor to decide whether temperature-sensitive food is safe.
Why this matters
Why: Frequent openings, warm foods, high humidity, blocked vents, or overpacking can create moisture and temperature pockets even when a gasket is intact. Persistent frost, warming, or food softening after closure and airflow are corrected points toward a cooling, defrost, sensor, or seal problem that needs service.
-
Check 5
Arrange appliance service when the gasket has a cut, tear, rip, loose retainer, or persistent paper-test gap; the door remains misaligned; water returns from another location; frost is heavy; or the freezer is not maintaining its normal temperature. Give the technician the water location, photos, paper-test sections, door behavior, and temperature trend.
Expected result: The technician should determine whether the correct repair is a model-specific door gasket, door or hinge alignment, defrost or drain work, fan or sensor diagnosis, or another cooling-system repair.
Next step: Use the documented findings to choose a confirmed repair and verify that the door closes, the gasket seals around its full perimeter, water no longer returns, and the freezer reaches its normal operating temperature.
Stop if: Do not open the sealed system, remove the evaporator cover, disconnect wiring, replace a fan or heater, or order a gasket by appearance or dimensions alone.
Why this matters
Why: A visibly damaged gasket supports replacement only after exact model fitment is confirmed. A sound gasket with water from the rear or interior, persistent warming, or heavy frost makes a separate appliance fault more likely and means a seal replacement alone may not solve the leak.
Use your observations
Decision map
Find the observation that best matches what you see, then follow the next safe action.
-
PATH 01Safety boundary
What you see
Water or frost is concentrated along the door perimeter, the paper slips easily at the same section, and cleaning or removing an obstruction does not restore resistance.
Do this next
Arrange model-specific appliance service; the technician should determine whether the gasket can be reseated, must be replaced, or is being held away by door or hinge alignment.
Why this path and its safety boundary
Why it matters: A gasket leak, loose retainer, door deformation, or alignment problem is more likely than normal brief condensation.
Safety stop: Do not glue, cut, stretch, heat, or pry the gasket or adjust hinges without the exact manual.
-
PATH 02Safety boundary
What you see
The gasket is clean and intact, the paper has slight resistance around the perimeter, the door closes fully, and moisture appears mainly after frequent openings, warm loading, or humid weather.
Do this next
Minimize door openings, let hot food cool before loading, keep the gasket dry, maintain clear vents, and monitor the temperature and water location. Arrange service if moisture becomes persistent, frost thickens, or cooling declines.
Why this path and its safety boundary
Why it matters: Temporary condensation from humid air is more likely than a torn door seal, although recurring water still needs monitoring.
Safety stop: Do not lower the temperature control repeatedly, overpack the freezer, or treat a normal-looking gasket as proof that an internal drain or cooling path is clear.
-
PATH 03Safety boundary
What you see
The gasket is intact but the door rebounds, rubs, sits unevenly, or leaves a repeatable gap after packages, bins, and visible ice are cleared.
Do this next
Arrange appliance service or follow only the exact installation manual for the model's alignment check; provide photos of the gap and door position.
Why this path and its safety boundary
Why it matters: Door alignment, hinges, rollers, leveling, retainer seating, or the door structure may be preventing a complete seal.
Safety stop: Do not force the door, bend hinges, remove covers, or adjust hardware by trial and error.
-
PATH 04Safety boundary
What you see
The gasket passes the paper test and the door closes, but water returns from the rear wall, interior floor, drain area, beneath a liner, or near the appliance base rather than the door perimeter.
Do this next
Keep the appliance and floor dry, avoid removing panels or forcing a drain, and arrange appliance service with the exact water location and photos.
Why this path and its safety boundary
Why it matters: The door gasket is less likely to be the primary source; defrost drainage, an internal leak, ice buildup, or another appliance path needs diagnosis.
Safety stop: Do not pour chemicals into a drain, pierce ice, remove the evaporator cover, tip the appliance, or access wiring near water.
-
PATH 05Safety boundary
What you see
The gasket fails at one or more sections and the freezer also has heavy frost, a rising temperature, softening food, or repeated water after the door is closed.
Do this next
Keep the door closed, arrange prompt appliance service, and provide the temperature trend and food condition. Follow the appliance manual or food-safety guidance for any food that has thawed.
Why this path and its safety boundary
Why it matters: Warm-air entry through the seal may be contributing to frost and loss of cooling, but a separate defrost, fan, sensor, or cooling fault cannot be ruled out from the door symptom alone.
Safety stop: Do not keep opening the freezer to inspect, use sharp or electrical heating devices to defrost, or continue operation if water reaches electrical components.
Helpful context
Understand the symptom
First prove the water is coming from the seal
A freezer can show a small amount of moisture after humid air enters during a door opening, but a recurring puddle at the gasket deserves a location check. Water on the gasket face or the cabinet edge, frost along the seal, and a door that does not close fully support a sealing problem. Water that starts at the rear, bottom, drain area, or inside the liner may have a different cause and should not be forced through a door-gasket repair.
A clean gasket and complete closure are the low-risk checks
Remove only dirt, crumbs, packaging, or ice that is plainly on the gasket or preventing the door from closing, then wipe the gasket with mild soap and water and dry it. Check the full perimeter for cuts, tears, loose sections, folds, or hard deformation. Samsung and Whirlpool describe a paper test: close a sheet of paper in several locations and look for slight resistance. A failed section is evidence of a sealing or alignment problem, not a reason to pry the door or change hinges without the model instructions.
Protect cooling and food while the seal is unresolved
Keep vents clear, avoid overpacking the freezer, minimize door openings, and use an appliance thermometer or the freezer's normal temperature display if available. If the freezer is warming, frost is spreading, or food is softening, keep the door shut as much as possible and arrange service rather than repeatedly opening it to inspect. A replacement gasket is conditional: the exact model, retainer, door alignment, and installation method must be confirmed first.
Safety boundary
Stop conditions
- Do not use knives, ice picks, screwdrivers, or electrical heaters to remove frost or reach the gasket, liner, drain, evaporator, or wiring.
- Do not open panels, disconnect wiring, handle sealed-system refrigerant, replace fans or heaters, or move a leaking appliance across wet flooring without qualified service.
- Do not force, cut, glue, stretch, or heat a door gasket, and do not adjust hinges, rollers, leveling, or retainers without the exact model instructions.
- Keep the door closed as much as practical when the freezer is warming; do not rely on smell or appearance alone to judge food that has thawed.
- Arrange appliance service when the gasket remains loose or torn, the door will not align, water comes from inside or the rear, heavy frost returns, temperature rises, or moisture reaches electrical parts.
Only after diagnosis
Potential parts
- freezer door gasket
Consider this part only when the visible gasket is torn, cut, warped, loose, or fails the paper test after cleaning and the technician confirms it is the cause of the water entry.
Confirm the exact appliance model, door style, gasket retainer, orientation, and installation instructions before ordering; do not select by appearance or dimensions alone. - freezer door alignment or hinge hardware
Consider this category only if the gasket is intact but the door remains uneven, rubs, rebounds, or cannot maintain compression after visible obstructions are removed.
The appliance model and door assembly must be confirmed, and alignment or hardware work should follow the manufacturer instructions or qualified service.
When checks do not resolve it
Need a professional?
Arrange appliance service when water repeatedly appears at the freezer door after cleaning and closure checks, the paper test fails at a section, the gasket is loose, torn, warped, or hardened, the door is misaligned, or water originates from the interior, rear, drain area, or near electrical parts. Seek prompt service for heavy frost, a warming freezer, softening food, or recurring leaks; do not remove panels, defrost with sharp or electrical tools, or handle sealed-system components.
Safety scope: This article supports drying visible moisture, cleaning and inspecting the visible gasket, checking door closure and obstructions, performing a paper test, and observing temperature and frost. It does not authorize liner or panel removal, electrical or sealed-system work, sharp-tool defrosting, forced drains, hinge or leveling adjustments, or generic gasket replacement.
Common questions
FAQ
Why is water leaking from my freezer door gasket?
Warm, humid air may be entering through a dirty, obstructed, loose, torn, warped, or misaligned gasket and then condensing or freezing. Water may also be coming from a defrost or drain path elsewhere. Trace the water location, clean and test the gasket, and arrange service if the source is not clearly the door perimeter.
How can I tell if the freezer door seal is leaking air?
Clean and dry the gasket, confirm nothing blocks closure, then close a sheet of paper at several points around the door. Slight resistance suggests contact; easy release at the same section supports a seal or alignment problem. The paper test does not identify the correct replacement gasket or prove that another drain problem is absent.
Can I push a loose freezer gasket back into place?
Some models allow a gasket that has pulled loose from its retainer to be gently reseated, but the exact owner's manual controls. A cut, tear, rip, persistent gap, or warped gasket may need replacement or door-alignment service. Do not glue, stretch, cut, or heat it by guesswork.
What if the gasket is intact but water is coming from the freezer floor or rear wall?
The gasket is less likely to be the primary source when the paper test passes and the door closes, but water from the rear, drain area, liner, or base can indicate defrost drainage or another internal problem. Do not remove panels or force the drain; arrange appliance service with the exact source location.
Should I keep using the freezer if the door gasket leaks water?
Keep the door closed as much as possible while you document the symptom, but arrange prompt service if the freezer is warming, frost is spreading, food is softening, water reaches electrical parts, or the leak continues. Do not chip ice, use electrical heaters, or repeatedly open the door to inspect.
Read the exact guide
Official sources
- Cooling issues with Samsung refrigerator or freezerSamsung Support · Samsung refrigerator and freezer support guidance; paper testing and controls are general observations, while settings and parts remain model-specific.
- What's Normal Condensation or FrostWhirlpool Product Help · Whirlpool refrigerator and freezer product guidance; exact door designs, temperatures, and permitted adjustments vary by model.
- Top Freezer Refrigerator - Adjusting or Replacing the Door GasketsGE Appliances · GE top-freezer refrigerator guidance; it is not a universal instruction for every freezer and requires the exact owner's manual.
Community feedback
Share a repair observation
Share a plain-text repair observation. Accepted observations are published automatically; this page may take a moment to update.