
On this page
Start here
Quick answer
If a KitchenAid oven door will not close, first stop using the oven and let it cool if it was recently heated. Remove only an obviously oversized dish, loose packing material, or a rack that is not fully seated, then inspect the gasket and the latch area for food or soil buildup, a bent latch arm, or a hinge that is not seated. KitchenAid says some wall ovens use a soft-close hinge that needs a gentle nudge after resistance, while racks and bakeware must be fully inside and not block the door. If the door was removed, its hinges may need to be reset; a range that is out of level can also keep the door from aligning. Do not force the door, bend the latch, pry the gasket, or work on spring-loaded hinges. Keep the oven off if the door remains open, the glass or hinge is damaged, the latch is bent, the door is off-center, or heat can escape, and arrange qualified KitchenAid appliance service.
Before you begin
Safety first
- Do not operate an oven with an unsealed door or work on spring-loaded hinges, latches, wiring, or a tipping appliance.
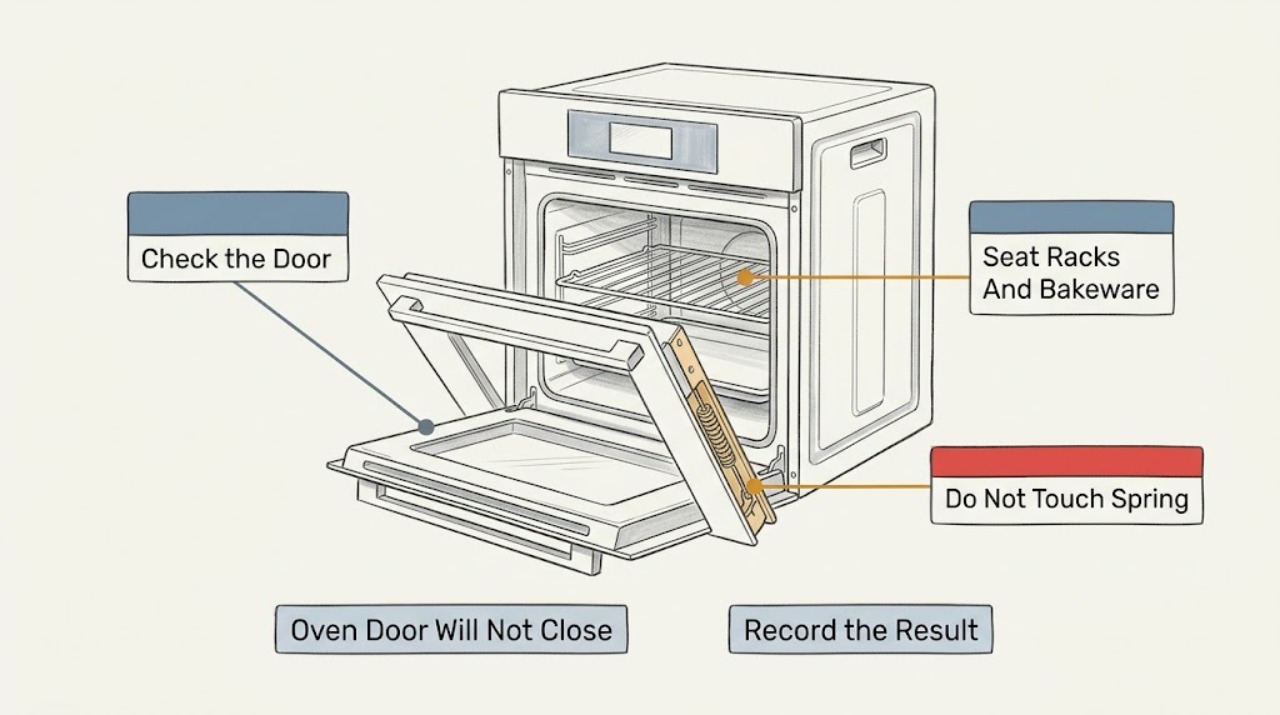
Work through in order
Diagnostic checks
Use only checks that match the exact appliance or system and its official guide.
-
Check 1
Turn the oven off and wait until the door, racks, and nearby surfaces are safe to approach. From the front, inspect the sill, gasket edge, latch opening, and the space immediately behind the door for loose packaging, foil, food, soil, or a large pan that could block closure; remove only loose items without prying.
Expected result: A loose item or buildup is in the closing path, the path is clear, or the oven is still too hot to inspect safely.
Next step: After the oven is cool, remove the loose obstruction or clean accessible soil with a soft cloth, then close the door normally once. If the path is clear or the door still will not close, continue with the next check and leave the oven off.
Stop if: Stop for hot surfaces, broken glass, a sharp metal edge, a cracked gasket, or an obstruction that is fixed in place or requires force to remove.
Why this matters
Why: A loose obstruction can prevent the door from reaching its latch position and is a more likely first cause than a failed hinge. A clear path shifts attention to rack seating, latch alignment, hinges, level, or door damage. Heat makes further checking unsafe.
-
Check 2
With the oven cool, push each ordinary rack fully to the rear and verify that any roll-out rack or sliding shelf is fully seated. Remove or reposition only bakeware that clearly extends into the door path; do not force a rack past a bent guide.
Expected result: A rack or sliding shelf is not fully inserted, a pan is too large or protrudes, a rack guide is bent, or all racks and cookware are clear of the door.
Next step: Seat the rack or remove the oversized pan and try the door once without pushing hard. If the rack cannot seat normally or the door still stops, leave the oven unused and continue to latch or hinge checks.
Stop if: Do not bend rack rails, force a roll-out mechanism, reach into a hot cavity, or use the door as leverage against a rack or pan.
Why this matters
Why: KitchenAid identifies an incompletely inserted rack, roll-out rack, or oversized bakeware as a direct door-blocking possibility. A bent guide or a clear rack path makes a latch, hinge, frame, or door alignment issue more likely.
-
Check 3
Look at the upper front of the oven frame above the gasket and compare the latch arm with the surrounding frame without touching or bending it. Inspect the gasket and door contact area for a section pulled out, folded, dirty, or damaged; clean only accessible soil with a soft damp cloth when the oven is cool.
Expected result: The latch arm appears bent or bowed, the gasket is displaced or damaged, soil is present, the latch and gasket look aligned, or the area cannot be safely viewed.
Next step: If soil was the only issue, clean it and try one normal closure. If the latch or gasket is bent, torn, loose, or still misaligned, keep the oven off and arrange model-specific service rather than reshaping or replacing it by appearance.
Stop if: Do not bend the latch, remove the gasket, insert tools into the latch, or work near a hot cavity or broken glass.
Why this matters
Why: KitchenAid says a latch arm that is bent or bowed can prevent the door from closing. A displaced or damaged gasket can also interfere with contact and sealing. An aligned latch and gasket shift the diagnosis toward a rack, hinge, frame, or leveling issue.
-
Check 4
Try one gentle closing motion with the oven cool and empty. If the door meets resistance near the closed position, give it only the light nudge described for a model with soft-close or smooth-close behavior; observe whether it closes itself, remains partly open, or sits visibly off-center. Do not slam or hold it shut.
Expected result: The door closes with the model's soft-close action, stops before the latch, remains partly open, or closes unevenly or off-center.
Next step: Use the exact model manual to confirm whether soft-close is fitted. If the door does not close smoothly and evenly, stop using the oven and schedule qualified service.
Stop if: Do not slam, lift the door by one corner, defeat the latch, or repeat the test if the door scrapes, drops, binds, or shows damaged glass or hinges.
Why this matters
Why: A soft-close model may require a small final nudge, but that feature is model-dependent. A door that remains open or closes off-center is more consistent with obstruction, hinge seating, latch alignment, frame damage, or another fault than normal soft-close behavior.
-
Check 5
Without removing anything, note whether the door was recently removed, the oven or range was installed or moved, the unit rocks, or the door is visibly lower on one side. Do not adjust leveling legs, remove hinge pins, or reseat spring-loaded hinges as a trial repair.
Expected result: The door was recently removed, the appliance was moved or is unstable, the door is off-center, or there is no removal or leveling history.
Next step: Keep the appliance out of use and provide this history to qualified service. Use the exact installation manual for any owner-permitted leveling check; do not access hinges or anti-tip hardware unless the manual and safe conditions clearly support it.
Stop if: Do not pull the appliance out, handle hinge springs or pins, adjust hardware while the door is attached, or continue if the unit can tip or the frame is damaged.
Why this matters
Why: KitchenAid says a removed door needs its hinges reset before reinstalling, and its range guidance includes leveling and anti-tip engagement as alignment factors. An off-center or unstable appliance needs model-specific inspection; no history does not rule out hinge or frame damage.
-
Check 6
Read the KitchenAid model information from an ordinary-access label or paperwork and record whether the oven is a wall oven or range, the door's first stopping point, rack and bakeware results, latch and gasket appearance, soft-close behavior, recent door removal or movement, and any visible damage. Do not run a heating cycle to test a door that will not seal.
Expected result: The door remains open, the latch or hinge is damaged, the door is off-center, heat could escape, or the model and cause remain uncertain.
Next step: Leave the oven off and arrange qualified KitchenAid appliance service. Provide the model, photos from a safe distance, and the exact stopping behavior so the technician can inspect latch, hinges, gasket, frame, rack guides, or leveling.
Stop if: Stop immediately for broken glass, exposed hinge springs, a loose door, smoke, scorching, electrical damage, or an oven that cannot be kept safely closed.
Why this matters
Why: A persistent failure after safe obstruction checks needs model-specific service. Continuing to heat with an unsealed door can affect cooking and may expose the area to abnormal heat; the observations do not identify a safe replacement part by themselves.
Use your observations
Decision map
Find the observation that best matches what you see, then follow the next safe action.
-
PATH 01Next step
What you see
A rack, roll-out shelf, oversized pan, food, soil, or loose packing material occupies the closing path.
Do this next
Clear only the loose obstruction, seat the rack normally, and make one gentle closure test after the oven is cool. Escalate if the rack or item cannot be removed without force.
Why this path and its safety boundary
Why it matters: The obstruction is the leading explanation, especially when the door closes normally after it is removed and no latch or hinge damage is visible.
-
PATH 02Next step
What you see
The path is clear but the latch arm is bent, the gasket is displaced or damaged, or the door stops at the latch area.
Do this next
Keep the oven off and arrange model-specific service for latch, gasket, door-frame, or related inspection.
Why this path and its safety boundary
Why it matters: Latch or gasket alignment is more likely than cookware interference. The observation does not justify bending the latch or replacing a gasket without model confirmation.
-
PATH 03Next step
What you see
The model may have soft-close, but a gentle final nudge does not let the door close or the door closes unevenly.
Do this next
Confirm the feature in the model manual and schedule service rather than applying more force or slamming the door.
Why this path and its safety boundary
Why it matters: Normal soft-close behavior is not enough to explain a door that remains open, scrapes, binds, or sits off-center; hinge, latch, frame, or obstruction problems remain likely.
-
PATH 04Next step
What you see
The door was recently removed, the appliance was moved, the unit rocks, or the door is visibly off-center.
Do this next
Do not handle hinge springs or pull the appliance forward; provide the history to qualified service and use only the exact installation guidance for any permitted check.
Why this path and its safety boundary
Why it matters: Hinge seating, leveling, frame alignment, or anti-tip installation becomes more likely than a simple door-path obstruction.
-
PATH 05Safety boundary
What you see
Glass, hinges, latch, gasket, or frame is damaged, or heat, smoke, scorching, or electrical damage is present.
Do this next
Stop using the oven, keep people away from the damaged area, and obtain qualified appliance service; use emergency help for smoke, fire, or immediate electrical danger.
Why this path and its safety boundary
Why it matters: This is an unsafe appliance condition, not a routine rack or door-close adjustment.
Safety stop: Do not operate a damaged oven, hold the door closed, defeat a latch or switch, or touch exposed hinge springs or wiring.
Helpful context
Understand the symptom
Start with a cool, empty door path
A rack, roasting pan, casserole dish, packaging piece, food, or soil can stop the door before the latch engages. KitchenAid recommends confirming that racks are pushed fully in and that cookware is not too large for the cavity. Make this inspection only when the oven is cool enough to touch safely, and remove loose items without forcing the door.
A latch or hinge changes the service boundary
The latch arm at the top of the oven frame and the hinge seating determine whether the door can align and seal. KitchenAid's latch guidance calls for checking whether the lock arm is bent or bowed; its range guidance says a removed door must have its hinges reset. These are observations, not permission to bend a latch or handle a spring-loaded hinge.
Do not operate an oven that cannot seal
An oven door that remains open can let heat escape and prevent normal operation. Do not hold the door shut, defeat a latch or door switch, or keep cooking while the glass, gasket, hinge, latch, or frame is damaged. Record the model and the visible symptom for qualified service.
Only after diagnosis
Potential parts
- KitchenAid oven door latch assembly
Consider only when the path is clear and the latch arm is bent, does not align, or fails to engage according to the model-specific diagnosis.
Latch designs vary by KitchenAid oven and range model; confirm the model and repair documentation before ordering. - KitchenAid oven door hinge or hinge hardware
Consider only when the door is off-center, was recently removed, binds, or a technician confirms hinge seating or damage.
Spring-loaded hinge parts require model-specific fit and safe handling; do not select by appearance. - KitchenAid oven door gasket
Consider only when the gasket is torn, displaced, or confirmed to interfere with closure or sealing after the door path is clear.
Gasket shape and attachment differ by model; verify the exact model and installation instructions. - KitchenAid oven door or frame assembly
Consider only when glass, frame, or alignment damage is confirmed and a technician determines that a smaller hinge or latch repair is insufficient.
Door assemblies are model-specific and should be matched by the full appliance model, not by dimensions or finish alone.
When checks do not resolve it
Need a professional?
Call qualified KitchenAid appliance service when the door remains open after the cool, accessible obstruction checks, or when the latch, hinge, gasket, frame, rack guide, leveling, or door alignment is abnormal.
Safety scope: Do not operate an oven with an unsealed door or work on spring-loaded hinges, latches, wiring, or a tipping appliance.
Common questions
FAQ
Why will my KitchenAid oven door not close?
Start with an obstructed path: a rack, roll-out shelf, oversized pan, food, soil, or packing material. If that path is clear, inspect the latch and gasket visually, then consider hinge seating, leveling, frame alignment, or model-dependent soft-close behavior.
Can an oven rack keep a KitchenAid door from closing?
Yes. KitchenAid says racks and roll-out racks should be inserted completely, and bakeware or roasting pans that are too large can block the door. Remove or reseat only loose, accessible items when the oven is cool.
What should I do if the KitchenAid oven door was recently removed?
Do not keep operating it or handle the hinge springs by guesswork. KitchenAid says a removed range door needs its hinges reset before reinstalling; provide the model and the off-center or stopping behavior to qualified service unless the exact manual clearly supports a safe owner procedure.
Is a small nudge normal on a KitchenAid soft-close oven door?
Some models have soft-close or smooth-close hinges and may continue closing after a gentle nudge at resistance. The feature is model-dependent; a door that remains open, scrapes, binds, or sits off-center is not a reason to apply more force.
Can I use the KitchenAid oven if the door will not close?
No. Keep it off if the door cannot seal normally, especially with damaged glass, gasket, latch, hinge, or frame. An unsealed door can let heat escape and needs qualified appliance service when safe checks do not resolve it.
Read the exact guide
Official sources
- Oven Door is Not Closing - Checking the LatchKitchenAid Product Help · KitchenAid oven latch and door-closure troubleshooting
- Oven Door Won't Close - Wall OvenKitchenAid Product Help · KitchenAid wall-oven soft-close, rack, bakeware, and service guidance
- How to Determine if the Rack is Keeping the Oven Door OpenKitchenAid Product Help · KitchenAid oven and range rack, roll-out shelf, and bakeware closure checks
- Door Not Closing - RangeKitchenAid Product Help · KitchenAid range door obstruction, removed-door hinge, and leveling guidance
- Oven Not Heating Up: Possible Causes and FixesKitchenAid · KitchenAid oven door closure and professional service boundary
Community feedback
Share a repair observation
Share a plain-text repair observation. Accepted observations are published automatically; this page may take a moment to update.