
On this page
Start here
Quick answer
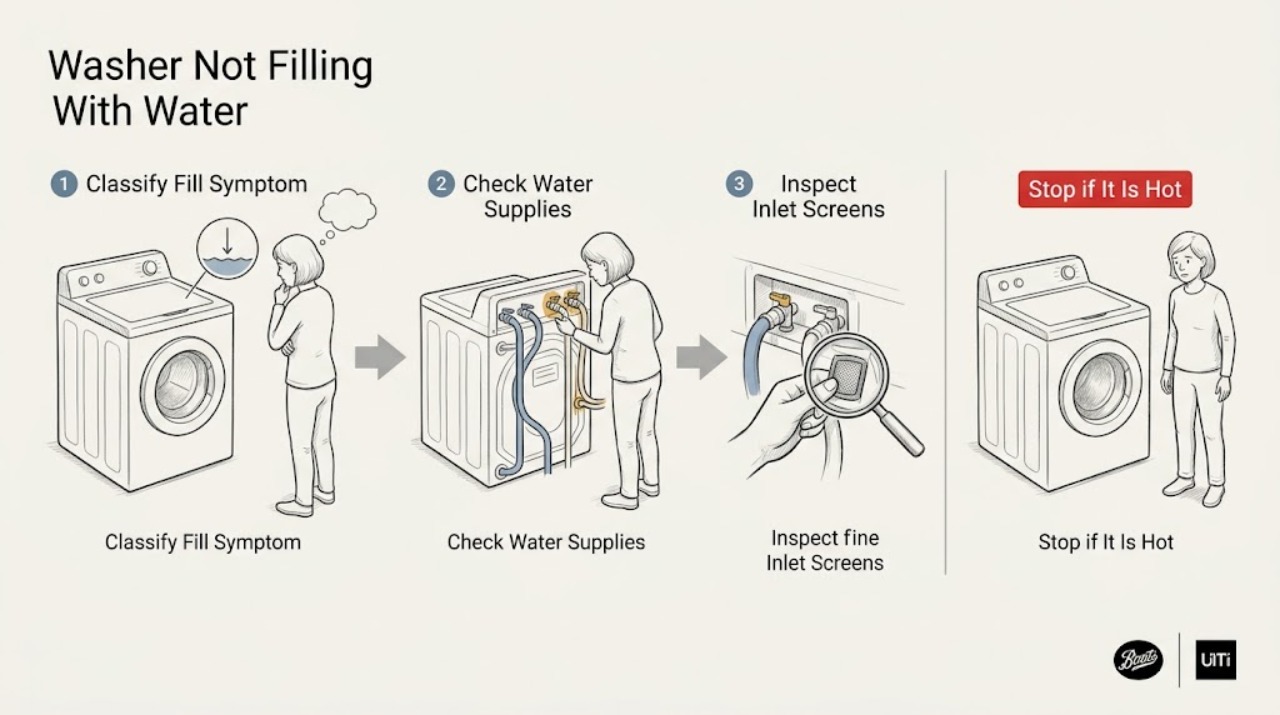
If a Maytag washer is not filling, first decide whether it is truly receiving no water or is pausing while it senses the load or uses a low-water cycle. Keep the lid or door closed as the exact model requires, verify that both hot and cold supply valves are open and both inlet hoses are connected and free of kinks, and check for a visible hose restriction. If the model's instructions permit it, turn off the water before inspecting the inlet screens without removing them. Also check that the drain hose is supported and not installed in a way that lets water siphon away as it enters. If both supplies and the controls are normal but the washer still has no incoming water, a hose screen, inlet valve, pressure, sensing, or control fault needs model-specific service; do not open the console or test live wiring.
Work through in order
Diagnostic checks
Use only checks that match the exact appliance or system and its official guide.
-
Check 1
From a dry, stable position, record the Maytag model number, top-load or front-load style, selected cycle, water-level setting if present, fill or sensing indicator, lid or door state, and whether any water enters during the normal start sequence.
Expected result: No water enters, water enters slowly, the washer pauses while sensing, the water level is lower than expected, or the cycle stops with a displayed message.
Next step: If the machine is sensing or pausing normally, allow the model's documented sequence to continue once and compare the result with the owner's guide. If no water enters after the expected start sequence, continue with supply and lid or door checks.
Stop if: Stop for smoke, burning odor, arcing, a damaged cord or outlet, an uncontrolled leak, or a door or lid that cannot be safely closed or released.
Why this matters
Why: No incoming water is different from a sensor-controlled low-water cycle or a normal pause. Bulky and efficient cycles can fill differently, and an exact display message must be interpreted with the exact model guide rather than a generic code list.
-
Check 2
Without moving the washer, verify from ordinary access that the household hot and cold valves are open, both Maytag inlet hoses are connected to the intended supply points, and neither hose is kinked, crushed, or sharply bent.
Expected result: Both valves are open and hoses are sound, one valve is closed, a hose is kinked, a connection is loose, or the household supply itself is absent at the nearby faucet.
Next step: Restore only an obviously closed valve or a safe hose position, then make one normal fill attempt while watching for a leak. If supply is absent or a connection is damaged, stop and arrange plumbing or appliance service.
Stop if: Do not disconnect a pressurized hose, move or tip the washer, force a seized valve, or continue when a hose, valve, wall fitting, or cord is damaged or leaking.
Why this matters
Why: A closed supply or restricted inlet hose can prevent or slow filling before any washer component is involved. A normal visual supply path makes an inlet screen, valve, pressure, sensor, or control issue more likely, but does not identify which one.
-
Check 3
If the exact Maytag instructions allow hose removal and the area can stay dry, turn off both water supplies, place hose ends in a container for residual water, and inspect the washer inlet screens from the rear without removing or disturbing the screens.
Expected result: The screens look clear, one has mineral film or debris, a hose has restricted flow when safely checked at a water source, or the hose connection cannot be accessed without moving the washer.
Next step: Clean only a visibly dirty screen with a soft brush and mild soap and water as Maytag describes, leave the screen in place, reconnect the hoses, open the supplies slowly, and inspect for leaks. Replace a restricted hose only with an exact model-compatible choice confirmed by the manual or service provider.
Stop if: Do not pry out an inlet screen, probe the valve, use force on a fitting, test live wiring, or continue if a hose cannot be safely contained or a connection leaks after restoration.
Why this matters
Why: Mineral buildup, debris, or a restricted hose can reduce incoming flow. Clear screens and hoses shift suspicion toward the inlet valve, pressure, sensing, or control circuit; inaccessible connections are a service boundary, not a reason to pull the appliance out alone.
-
Check 4
Close the top-load lid or front-load door as the exact model requires, check for clothing or debris blocking the latch, and confirm the control is not paused or locked; do not bypass or open the latch mechanism.
Expected result: The lid or door latches and the cycle begins, the washer pauses when it is opened, the control-lock or lid indicator remains on, or the latch never confirms closed.
Next step: Remove only an obvious item blocking the closure and follow the exact model's user-level unlock or start procedure once. If the latch does not confirm, the indicator returns, or the control is unresponsive, arrange appliance service.
Stop if: Do not bypass a lid or door lock, hold the latch closed by hand, open panels, jumper wiring, or repeatedly restart a cycle that stops at the same point.
Why this matters
Why: Maytag states that some models will not fill until the lid is closed and latched, while opening an unlocked lid can pause sensing. A latch or control state that remains abnormal can prevent filling even when water supplies are normal.
-
Check 5
From a safe adjacent position, inspect the visible drain hose and standpipe or tub connection for a hose that is taped or sealed into the drain, lacks the model's U-shaped support, is kinked, or is positioned so water can leave by siphoning as the washer fills.
Expected result: The drain hose is supported and loosely secured as directed, or it is sealed, unsupported, kinked, inserted incorrectly, or the washer appears to fill and drain at the same time.
Next step: Correct only an obvious external position allowed by the exact installation instructions; do not seal the drain opening or create a new standpipe arrangement. Run one supervised normal fill observation and stop if water spills or immediately disappears.
Stop if: Do not pull the appliance, cut or extend the drain hose, open wall plumbing, or continue testing with a loose hose, backed-up drain, flood, or unstable floor.
Why this matters
Why: An incorrectly installed drain hose can let water escape while it enters, making the washer appear not to fill or causing a low water level. A correctly installed drain path makes an incoming-water or control fault more likely.
-
Check 6
After the external checks, make one supervised normal-cycle observation and compare the result with the model manual, recording whether water enters, the time and sound of the fill, the indicators, and any leak or message.
Expected result: The washer fills after a supply, latch, or hose correction; it fills slowly; it never admits water although both supplies and controls appear normal; or it leaks, makes an unusual sound, or repeats a message.
Next step: Keep the model number, symptom timing, screen and hose findings, indicators, and test result for a qualified appliance technician. Do not select a valve or control part from the symptom alone.
Stop if: Stop testing for a leak, no incoming water after the normal sequence, repeated fault, smoke, burning odor, arcing, or any need to access live or sealed components.
Why this matters
Why: A corrected external condition can explain the symptom. Persistent no-fill or slow-fill with clear supplies and screens points toward the inlet valve, pressure, sensing, or control path; a leak or unusual electrical or mechanical symptom requires prompt service.
Use your observations
Decision map
Find the observation that best matches what you see, then follow the next safe action.
-
PATH 01Next step
What you see
The washer's fill or sensing indicator is active, the lid or door is correctly closed, some water enters, and the selected cycle is a low-water or bulky cycle that pauses while sensing.
Do this next
Allow one documented cycle sequence to complete and compare its behavior with the exact Maytag manual. Request service only if the cycle never advances, no water enters after the expected sequence, or a fault appears.
Why this path and its safety boundary
Why it matters: A low visible level or pause may be normal operation rather than a failed fill valve.
-
PATH 02Next step
What you see
One or both supply valves are closed, a hose is kinked, a hose connection is wrong or damaged, or an inlet screen or hose has visible debris or restricted flow.
Do this next
Restore only safe external conditions, clean a screen without removing it when the manual allows, reconnect slowly, and check for leaks. If flow remains restricted or a fitting is damaged, arrange appliance or plumbing service.
Why this path and its safety boundary
Why it matters: The incoming water path is more likely than an internal control failure.
-
PATH 03Next step
What you see
The supply path is normal but the lid or door does not confirm closed, a control-lock or lid indicator remains on, or the machine pauses when the lid is opened and does not resume when correctly closed.
Do this next
Use only the model's documented user reset or closure procedure. Do not bypass the latch; request service if the status remains abnormal.
Why this path and its safety boundary
Why it matters: A lid or door interlock or user-control state can prevent the fill command.
-
PATH 04Next step
What you see
Water can be heard entering but the tub level does not rise, and the drain hose is sealed, unsupported, kinked, or installed so water leaves immediately.
Do this next
Correct only the visible hose arrangement allowed by the exact installation guide, then supervise one fill. Stop for a spill, backed-up drain, or any need to alter plumbing.
Why this path and its safety boundary
Why it matters: Drain-hose installation or siphoning is more likely than a no-fill valve fault.
-
PATH 05Next step
What you see
Both supplies are open, hoses and screens are clear, the lid or door confirms closed, the drain hose is correctly installed, and the washer still never admits water or repeatedly reports a fill problem.
Do this next
Keep the washer off and arrange qualified Maytag appliance service with the model, indicators, timing, and completed checks. Do not open the console or measure live circuits.
Why this path and its safety boundary
Why it matters: An inlet valve, pressure-sensing, wiring, or control fault is more likely, but the symptom does not justify selecting a part.
Helpful context
Understand the symptom
First separate no water from a normal sensing pause
A Maytag washer may sense the load, pause between fills, or use less water on an efficient cycle. Maytag says a bulky cycle can use a series of fills while the washer senses the load, and a sensing light can remain active while the machine determines the needed level. Record the model, cycle, fill or sensing indicator, and whether any water enters before treating a low visible level as a failure.
Both inlet paths and the lid or door matter
Maytag's fill guidance repeatedly points to both hot and cold water supplies, connected hoses, and kink-free hose routing. A lid or door that is not closed or latched can also prevent operation on some models. These are external checks; do not move the appliance, open a control panel, or infer a failed valve from a sound alone.
A drain-hose installation can make filling look wrong
If incoming water immediately leaves through a poorly supported or overly inserted drain hose, the tub may never reach the expected level. Maytag advises using the model's hose form, keeping the hose secure but not sealed to the drain, and following the exact installation instructions. A hose that is installed correctly but the washer still receives no water points back toward the inlet or control path.
Safety boundary
Stop conditions
- Stop immediately for smoke, burning odor, arcing, a damaged cord or outlet, or water near electrical parts.
- Stop for a leaking hose or valve, uncontrolled water, an unstable appliance, a slippery floor, or a lid or door that cannot be safely closed or released.
- Do not bypass a lid or door lock, open the console, test live wiring, pry inlet screens out, or alter sealed plumbing.
- Stop after the normal start sequence remains no-fill or repeatedly faults once the safe external checks are complete; arrange model-specific appliance service.
When checks do not resolve it
Need a professional?
Arrange qualified appliance service when both water supplies, hoses, inlet screens, lid or door state, and drain-hose installation appear correct but the Maytag washer still does not fill or fills only intermittently. Service is also needed for a returning fault message, a failed latch, a leak, unusual electrical or mechanical sounds, or any check that would require opening the console, moving the appliance, or testing live components.
Common questions
FAQ
Why does my Maytag washer sound like it is waiting before filling?
Some Maytag cycles sense the load, pause, or add water in stages. A bulky cycle can use several fills, and an efficient cycle may show less water. If the expected sequence completes and no water enters, check both supplies, hoses, lid or door state, and the model-specific fill guidance.
Do both hot and cold hoses need to be connected on a Maytag washer?
Maytag's general fill guidance says both hot and cold supply lines should be connected and open for proper operation. Confirm the exact model instructions before changing an installation, especially if the washer is in a location with unusual plumbing.
Can a drain hose make a washer look like it is not filling?
Yes. If the drain hose is poorly supported, sealed into the drain, or positioned so water siphons away, incoming water may leave before the tub reaches its expected level. Check the visible installation against the exact Maytag instructions without altering household plumbing.
What should I do if my Maytag washer still will not fill after hose checks?
Stop repeated testing and arrange qualified appliance service when both supply valves are open, hoses and screens are clear, the lid or door confirms closed, and the washer still admits no water or reports the problem again. Do not open the console or test live wiring.
Read the exact guide
Official sources
- Not Filling or Long Fill - Washer - Product HelpMaytag · Maytag top-load washer support; model-specific controls and installation instructions govern a particular unit.
- Lid Not Latching - Washer - Product HelpMaytag · Maytag top-load washer lid support; exact model behavior determines whether filling requires a confirmed latch.
- Fill or Sensing Light On - Washer - Product HelpMaytag · Maytag top-load washer sensing guidance; indicator labels and user controls vary by model.
- Checking the Fill Hoses if the Washer is not FillingMaytag · Maytag washer fill-hose support; exact model and installation instructions control hose access.
- Not Filling or Filling Slowly - Front Load Washer - Product HelpMaytag · Maytag front-load washer support; hose colors, controls, access, and installation requirements vary by model.
Community feedback
Share a repair observation
Share a plain-text repair observation. Accepted observations are published automatically; this page may take a moment to update.