
On this page
Start here
Quick answer
When a GE washer will not fill, first identify whether it is completely dry, filling slowly, filling and immediately siphoning away, or showing a water-supply or lid message. From a dry position confirm the cycle is not paused, both household water valves are open, and the hot and cold hoses are connected to the correct marked ports. Then inspect only visible hose routing and inlet screens if the exact model instructions permit safe access. GE notes that low pressure, debris at inlet screens, a paused or locked-out control, a lid state, freezing, and model-specific water-level or fill controls can all change the symptom. Do not open the cabinet or test a live valve. If the washer leaks, the floor or electrical parts are wet, a hose is damaged, the tub fills without stopping, or the same no-fill condition returns after the documented checks, stop and arrange qualified appliance or plumbing service.
Before you begin
Safety first
- Keep the washer off for flooding, wet electrical areas, damaged hoses, uncontrolled filling, smoke, burning or electrical odor, arcing, shock, hot connections, or repeated breaker trips. Do not open the cabinet, bypass an interlock, move a wet washer, or test live wiring.
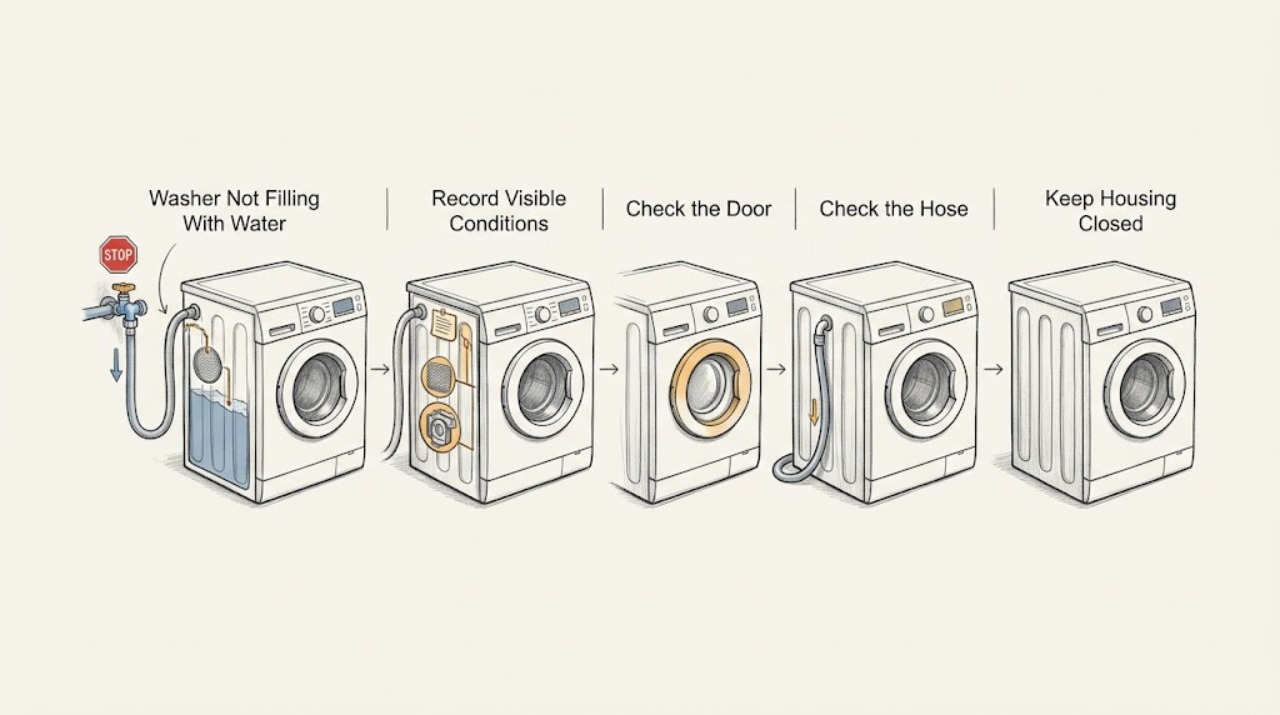
Work through in order
Diagnostic checks
Use only checks that match the exact appliance or system and its official guide.
-
Check 1
Stop the cycle and inspect from a dry, safe position. Record the exact model, front-load or top-load style, selected cycle, display text or lights, whether any water enters, whether the tub fills without stopping, and whether water or a leak is near the cord, outlet, controls, or floor.
Expected result: The floor or electrical parts are wet, water enters continuously, a hose is split, smoke or burning odor appears, the breaker trips, or the display shows a critical-water condition.
Next step: Stop using the washer. Keep clear and isolate power or water only from a dry, safe location; arrange qualified appliance/plumbing or emergency help as appropriate. Do not restart to test.
Why this matters
Why: This is a flooding, electrical, fire, or water-damage boundary rather than a routine fill adjustment.
-
Check 2
Use the exact model manual and GE's matching top-load or front-load guidance to check whether the cycle is paused, the timer knob is pushed in or not at the cycle start, a lid/door lock is active, or a water-supply message is in a documented lockout period. Do not bypass a lid or door interlock or repeatedly unplug to skip a lockout.
Expected result: A pause, timer position, lid/door state, or model lockout is visible; the controls are unresponsive during the documented period; or no control state explains the no-fill symptom.
Next step: Follow only the exact manual's state-clearing instruction and wait through its documented period. If the control remains unresponsive or the no-fill condition returns, keep the washer off and arrange service.
Why this matters
Why: The washer may be waiting for a user state or model timer rather than failing to open the valve. Repeated unplugging can restart some lockouts, while an unexplained state points to service.
-
Check 3
From a dry position, verify that both household water valves are open and that the hot and cold hoses are connected to the washer's marked ports. Inspect the visible hoses for kinks, crushing, damage, or a shutoff; do not loosen a pressurized connection or move the washer across a wet floor.
Expected result: A valve is closed, a hose is kinked or damaged, ports are reversed, only one temperature selection fills, or both valves and visible hoses look correct.
Next step: Open a closed valve or correct only a clearly visible routing issue if the floor is dry and the manual permits it. Arrange plumbing service for a wall-side supply problem and appliance service for a damaged hose, persistent one-sided fill, or normal-looking supply path.
Why this matters
Why: A closed supply, restricted hose, incorrect connection, or one blocked side can prevent or slow filling. Correct-looking external connections make pressure, inlet screens, valve, sensing, or control issues more likely.
-
Check 4
If the exact model instructions identify accessible inlet screens, first make the washer safe and dry, close the inlet faucets, and contain residual water before inspecting the screens. Look for sediment or scale without forcing a screen or opening an unknown panel; do not perform this check if the appliance or connections are wet or unsafe to reach.
Expected result: A screen is visibly blocked, a hose connection leaks when handled, both screens are clear, the model has no owner-accessible screen procedure, or water pressure is low at the washer.
Next step: Clean or replace a screen only exactly as the matching GE instructions allow, then check for leaks from a dry position. Use plumbing service for low household pressure or a supply leak, and appliance service when screens are clear, access is uncertain, or the symptom returns.
Why this matters
Why: Debris or low pressure can limit fill flow, but clear screens do not rule out an inlet valve, pressure sensor, wiring, or control fault. Model-specific access and water containment matter.
-
Check 5
Observe one model-authorized fill attempt from outside the washer without advancing a mechanical timer or opening panels. Note whether water flows normally, enters slowly, enters then immediately leaves through the drain, or never enters while a valve sound is absent or present.
Expected result: Water fills normally after an external correction, trickles, immediately siphons away, never enters with a valve hum, or never enters with silence.
Next step: Stop after one supervised attempt if the symptom remains, a leak appears, the washer fills without stopping, or abnormal heat/noise occurs. Give service the model, sound, temperature selection, and exact fill behavior.
Why this matters
Why: A corrected fill supports a supply or screen restriction. Immediate loss points to drain-hose installation or siphoning. A hum with no water suggests a restricted inlet path or valve; silence leaves control, interlock, power, or valve possibilities.
-
Check 6
Compare the observed water level with the exact model's documented fill behavior and load-sensing or temperature setting. Check whether the washer actually fills less by design, whether a water-supply or lid indicator is shown, and whether the drain hose is installed so water cannot siphon out during fill; do not change pressure settings or open the control.
Expected result: The washer uses a load-sensing fill, a documented supply or lid indicator appears, water enters but immediately drains, or the level remains abnormal with no visible installation explanation.
Next step: Use the exact owner's manual for the displayed message and drain-hose installation. If the model behavior is abnormal, the message returns, or the pressure/level system is suspected, stop user troubleshooting and arrange service.
Why this matters
Why: A lower sensed fill can be normal on some GE models, while an indicator, siphoning, or an abnormal level with proper supply points to a model-specific control, hose, pressure-sensing, or valve issue.
Use your observations
Decision map
Find the observation that best matches what you see, then follow the next safe action.
-
PATH 01Next step
What you see
No water enters, both household valves are closed or a hose is visibly kinked/damaged, and the controls otherwise respond.
Do this next
Open the valves or correct only a safe visible hose route. Arrange plumbing service for a wall-side supply issue and appliance service for a damaged hose or a no-fill condition that remains after the external correction.
Why this path and its safety boundary
Why it matters: The external water supply or hose path is more likely than an internal control fault.
-
PATH 02Next step
What you see
Water enters slowly or only on one temperature selection, and the supply valves are open but inlet screens are dirty or household pressure is low.
Do this next
Use only the exact GE screen-cleaning procedure from a dry, safe position. Use plumbing service for low pressure and appliance service when screens are clear or the symptom returns.
Why this path and its safety boundary
Why it matters: Restricted screens, inlet hoses, or inadequate supply pressure are more likely; one side of the water valve may be restricted.
-
PATH 03Next step
What you see
The washer shows a water-supply, lid, canceled, or lockout indication, or a mechanical timer is not at the documented cycle start.
Do this next
Wait through the exact documented lockout and clear only the matching state. Do not repeatedly unplug or bypass the lid/door. Arrange service if the indication persists or returns.
Why this path and its safety boundary
Why it matters: A model control state may be preventing fill, and GE states that messages and lockout behavior vary by model.
-
PATH 04Next step
What you see
Water enters and immediately drains away, or the washer fills without stopping.
Do this next
Keep the washer off, check only the visible drain-hose installation against the exact manual, and stop the water supply if safely reachable. Arrange appliance or plumbing service rather than adjusting an internal pressure switch or valve.
Why this path and its safety boundary
Why it matters: Drain-hose placement or siphoning can remove water during fill; an uncontrolled fill can involve water-level sensing or a valve/control fault.
-
PATH 05Next step
What you see
Both valves and visible hoses are correct, screens are clear or inaccessible, the control/lid state is normal, and no-fill persists; a valve hums without flow or stays silent.
Do this next
Stop testing and arrange qualified GE appliance service. Provide the exact model, temperature selection, display message, valve sound, supply observations, and the result of any manual-authorized screen check. Do not open panels or test live wiring.
Why this path and its safety boundary
Why it matters: An inlet valve, water-level or pressure sensor, interlock, control, wiring, or model-specific fault is more likely than a user-correctable supply issue.
Helpful context
Understand the symptom
Classify the no-fill symptom before changing anything
A washer that never admits water is not diagnosed the same way as one that trickles, fills and drains at the same time, or fills only on one temperature selection. Record the washer style, cycle, display message, and whether you hear a valve hum or see any water enter. GE publishes separate top-load and front-load no-fill guidance, so do not assume one control sequence or one pressure/level system applies to every GE washer.
Supply checks are external; valve and sensor checks are not
Both household water valves, the hose connections, and visible inlet screens are external checks only when they can be reached without wet electrical work or moving an unsafe appliance. A clear screen does not prove the inlet valve, pressure sensing, wiring, or control is good. Leave those internal checks to qualified service.
Do not mistake a normal model state for a failed fill
GE notes that some electronic models can enter a temporary lockout after a water-supply message, and some top-load fill systems use load sensing or timed flow rather than an old-style fixed water level. Wait only for the exact model guidance; do not repeatedly unplug, advance a timer, bypass a lid, or start high-water tests to force a result.
Safety boundary
Stop conditions
- Stop immediately for flooding, water near the cord, plug, outlet, controls, or other electrical parts; do not touch or unplug a wet appliance while standing in water.
- Stop for a burst or damaged hose, water that will not stop, smoke, burning or electrical odor, arcing, shock, a hot connection, or repeated breaker trips. Keep clear and arrange qualified or emergency help.
- Do not open the cabinet, adjust a pressure switch, test a live inlet valve, bypass a lid/door interlock, repeatedly advance a timer, or apply another GE model's code or reset sequence.
- Do not remove hoses, screens, or a filter unless the exact model instructions authorize the check and the floor, water temperature, containment, and power state are safe. Close the water supply only from a dry, safe position.
Only after diagnosis
Potential parts
- inlet hose or inlet screen
Consider this category only when a visible hose or screen is damaged or restricted and the exact GE instructions and service diagnosis identify it as the fill limitation.
Hose fittings and screens vary by GE model and installation. Confirm the exact model and diagnosis before selecting a part. - water inlet valve assembly
Consider this only when supply valves and visible hoses/screens are correct but a qualified diagnosis identifies a restricted or failed inlet valve, such as one temperature side not filling.
Inlet valves are model-specific and may differ by washer style and temperature configuration. Confirm exact fitment before any part decision. - water-level or pressure-sensing component
Consider this professional-repair category only when the washer's fill behavior or control diagnosis points to level/pressure sensing rather than a supply restriction.
Sensor names, wiring, and access vary by GE model. Do not replace based on a no-fill symptom alone. - lid/door interlock or control component
Consider this category only when the exact model continues to show an interlock or control state after the documented visible check.
Interlocks and controls are model-specific and require service documentation; do not bypass or choose a part by appearance.
When checks do not resolve it
Need a professional?
Arrange qualified GE appliance service when the washer still will not fill after the model-authorized control, supply, hose, and screen checks; a valve hums without flow; the valve is silent; the lid/door or control indication returns; the washer fills without stopping; a hose or inlet connection is damaged; or the problem involves sensing, wiring, the inlet valve, or an internal control. Use plumbing service for low household pressure, a wall-side supply problem, or a backed-up installation. Treat flooding, wet electrical parts, smoke, arcing, shock, or repeated breaker trips as immediate safety issues.
Safety scope: Keep the washer off for flooding, wet electrical areas, damaged hoses, uncontrolled filling, smoke, burning or electrical odor, arcing, shock, hot connections, or repeated breaker trips. Do not open the cabinet, bypass an interlock, move a wet washer, or test live wiring.
Common questions
FAQ
Why is my GE washer not filling with water?
Check the cycle or lid state, both household valves, visible hose routing, and model-accessible inlet screens first. Low pressure, screen debris, a paused or locked-out control, freezing, a failed inlet valve, or water-level sensing can produce the same symptom, so use the exact model manual before internal work.
Why is my GE washer filling very slowly?
GE points to low household pressure or restricted inlet-valve screens. From a dry, safe position check the open valves and visible hose path, then use only the exact model's screen procedure. If pressure is low or screens are clear and the issue persists, arrange plumbing or appliance service.
What does H2O SUPPLY or a flashing Fill light mean on a GE washer?
On applicable GE electronic models, it indicates a water-supply condition and may start a temporary control lockout. Wait through the model-documented period and check the household supply; do not repeatedly unplug to bypass it. Messages and timing vary by model.
Can a GE washer use less water and still be working normally?
Some newer GE top-load models use load sensing or a timed fill algorithm, so a lower water level than an older washer can be normal. Compare the behavior with the exact model manual; a truly absent, abnormal, or one-sided fill still needs the supply and screen checks.
Read the exact guide
Official sources
- Washer - Consumer Help IndicatorGE Appliances · GE Appliances electronic-control indicator guidance; messages and remedies vary by model.
- Top Load Washer - No FillGE Appliances · GE Appliances support page for top-load washers; controls and messages vary by model.
- Front Load Washer - Leaking WaterGE Appliances · GE Appliances front-load leak guidance used for general washer water-safety boundaries; exact model controls.
- Top Load Washer - Fill FunctionGE Appliances · GE Appliances top-load fill guidance; pressure specifications and fill behavior must be checked for the exact model.
- Washer - Slow Water FillGE Appliances · GE Appliances support page; hose removal and screen access must follow the exact model and safe conditions.
- Front Load Washer - No FillGE Appliances · GE Appliances support page for front-load washers; exact model instructions control.
Community feedback
Share a repair observation
Share a plain-text repair observation. Accepted observations are published automatically; this page may take a moment to update.