
On this page
Start here
Quick answer
Water from a Midea freezer can come from normal defrost water that is not reaching its drain or pan, melting frost caused by a door that was left open or does not seal, a tilted or poorly installed cabinet, or—on models with an ice maker or water connection—a fitting or fill-path leak. First trace the water to the inside floor or rear wall, door edge, underside, drain area, or water connection, and protect food and flooring. Check that the door closes fully, the gasket is clean and undamaged, the freezer is level, and packages or ice are not blocking closure or airflow. Follow the exact Midea manual before cleaning or defrosting; disconnect power as instructed, use only a model-approved manual-defrost method, and never chip ice, puncture tubing, or remove sealed-system panels. A puddle that returns, heavy frost, warming food, a damaged cord, water near electrical parts, or a leak that needs disassembly requires qualified appliance service.
Before you begin
Safety first
- This article supports tracing accessible water, moving loose packages, checking the gasket and level visually, identifying the model's defrost type, and following an exact manual-approved cleaning or defrost procedure. Do not work on wet electrical equipment, hidden drains, water valves, hinges, refrigerant tubing, sealed systems, or interior panels.
Work through in order
Diagnostic checks
Use only checks that match the exact appliance or system and its official guide.
-
Check 1
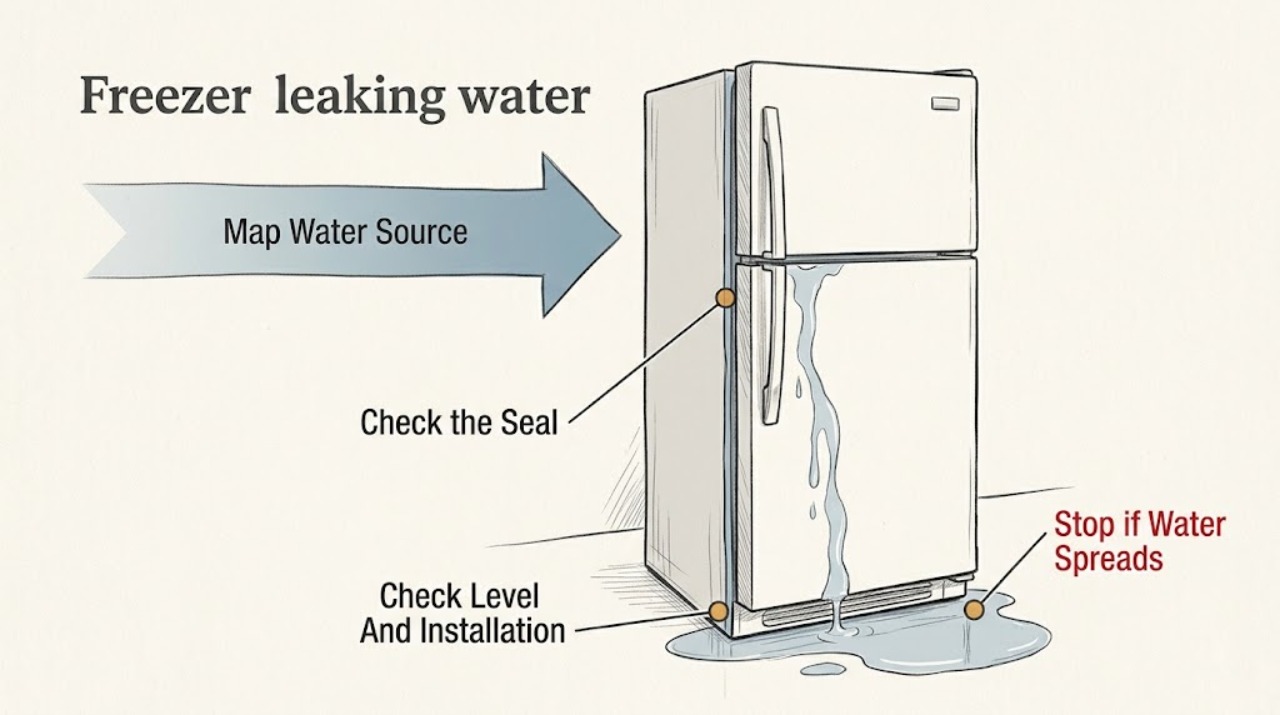
With the freezer closed and the area safe, dry the accessible floor and place an absorbent towel beneath the suspected edge. Trace the first wet point to the freezer interior floor or rear wall, door gasket or front edge, underside or drain area, or an external water connection; photograph the path before wiping it away.
Expected result: Water begins inside near frost or a rear drain, appears along the door edge, comes from under the cabinet, or starts at a hose, valve, or ice-maker connection; note whether the water returns after the compressor or defrost cycle.
Next step: Keep the freezer closed, protect food and flooring, and continue with the matching door, frost, drain, or connection check. If the source is hidden, recurring, or near electrical parts, stop and arrange service.
Stop if: Do not tilt a loaded freezer, pull it across a wet floor, or remove panels, covers, tubing, or plumbing connections to trace the water.
Why this matters
Why: An interior or door-edge trail makes frost, door sealing, or a defrost drain path more likely. An underside trail makes a drain pan, drain outlet, or cabinet-level issue more likely. A connection trail is relevant only to a water-connected model. The first wet point is more useful than the largest puddle.
-
Check 2
Inspect the closed door or lid from the outside for a continuous gasket contact, then check ordinary-access packages, baskets, shelves, drawers, and frost that could hold it open. Clean visible gasket residue with the model-approved method and close the door gently; do not pry or force it.
Expected result: A package or basket interferes, the gasket is dirty or torn, a corner has a visible gap, the door is not aligned, or the gasket contacts evenly after the obstruction is removed.
Next step: Leave the door closed as much as possible and monitor whether frost and water return. Request service for a torn gasket, persistent gap, misalignment, or water that continues after the door closes evenly.
Stop if: Do not glue, heat, stretch, cut, tape, or lubricate the gasket, and do not remove hinges or a door as a user adjustment.
Why this matters
Why: An obstruction, dirty or damaged gasket, or alignment problem can admit warm moist air and create frost that later melts as water. Even contact after the check makes a door-seal cause less likely, although a hidden hinge, drain, or defrost problem may remain.
-
Check 3
Look at the cabinet on a stable, dry floor and check whether the door or lid sits evenly and whether the freezer appears tilted. If the exact manual authorizes a normal leveling-foot adjustment, follow that instruction only with the freezer unloaded or safely supported as directed; do not lift or tip the appliance yourself.
Expected result: The cabinet is visibly out of level, the door gap changes from side to side, the freezer was recently moved, or the freezer sits level and the door remains evenly closed.
Next step: Use only model-approved leveling instructions and recheck the door without forcing it. If the leak persists, the cabinet is unstable, or leveling requires moving or tilting the freezer, arrange qualified service.
Stop if: Do not tilt, lift, or slide a loaded freezer, place objects under it, or adjust hinges and hardware without exact model instructions.
Why this matters
Why: An unlevel cabinet or installation change can prevent a seal and allow frost or defrost water to escape. A level cabinet with a persistent leak shifts attention toward the drain, pan, water path, or an internal defrost fault.
-
Check 4
Record where frost or ice is accumulating and identify from the model manual whether the Midea freezer is manual-defrost, self-defrost, or convertible. If a manual defrost is explicitly supported, remove food and disconnect power exactly as instructed; never use a knife, boiling water, heat gun, or other forced method.
Expected result: Frost is concentrated around the door, rear wall, drain area, vents, or floor; the model has a specified drain or manual-defrost procedure; or frost is heavy, recurring, or inaccessible.
Next step: Follow only the exact Midea manual procedure and keep food cold while the freezer is off. If water returns after a documented defrost, the drain is hidden, or frost blocks closure, stop and arrange service.
Stop if: Do not chip or pry ice, puncture tubing, remove an evaporator or interior cover, or energize the freezer while water can reach electrical parts.
Why this matters
Why: Door openings or a poor seal can create frost that later melts. On a manual-defrost model, meltwater may need the documented bottom drain or hand removal. Heavy or recurring frost on a self-defrost or inaccessible system can indicate a drain, defrost, seal, or cooling fault rather than a simple spill.
-
Check 5
Only if the Midea freezer or refrigerator-freezer has an ice maker or water connection, inspect the accessible supply tubing and fittings for a fresh droplet, kink, or displaced connection without disconnecting the line; otherwise treat a water trail as a defrost or condensation path.
Expected result: Water appears at a fitting, valve, or fill path, the line is damaged or kinked, no water connection exists, or the exterior connection is dry while water starts inside or under the cabinet.
Next step: If safe and the manual authorizes it, close the appliance's accessible water shutoff without disconnecting tubing and arrange service. Do not tighten hidden fittings, remove valves, or keep using an active water leak.
Stop if: Do not work on plumbing with wet electrical surroundings, pull on tubing, or open panels to reach a valve or fill assembly.
Why this matters
Why: A wet water connection is a separate leak branch and should not be confused with defrost water. A dry connection makes a supply leak less likely; an interior or underside trail keeps drain, pan, seal, level, or defrost causes in consideration.
-
Check 6
After the safe external checks, note whether the freezer remains cold, whether the leak returns, whether the compressor or fan behaves abnormally, and whether water reaches the cord, outlet, controls, or floor around electrical equipment; do not repeatedly unplug and restart a wet appliance.
Expected result: Food is warming, water returns or spreads, frost rapidly reforms, the freezer is unusually noisy or silent, a cord or outlet is wet or damaged, or cooling remains normal and the leak does not return.
Next step: Protect food and arrange qualified appliance service for a recurring leak, warming freezer, inaccessible frost, or any electrical concern. If the leak has stopped, keep the area dry and monitor for return without opening the door repeatedly.
Stop if: Stop normal operation for water near electrical parts, damaged insulation, smoke, sparking, a burning odor, or a freezer that cannot keep food safely frozen.
Why this matters
Why: Warming food, recurring water or frost, and abnormal operation make an internal drain, defrost, cooling, control, or sealed-system fault more likely. A wet electrical area is a shock hazard. A dry appliance with no returning leak after an approved defrost or obstruction correction can be monitored, but the original source should remain documented.
Use your observations
Decision map
Find the observation that best matches what you see, then follow the next safe action.
-
PATH 01Next step
What you see
Water starts at the door edge or freezer floor and there is a package obstruction, dirty gasket, visible gap, frost near the door, or a history of frequent or prolonged door opening.
Do this next
Remove only loose obstructions, clean the gasket as the manual directs, close the door, and monitor. If the gasket remains damaged or water returns, arrange service rather than reshaping the seal.
Why this path and its safety boundary
Why it matters: A sealing or moisture-to-frost path is more likely than a water-supply leak. Melted frost can run forward and appear to be a drain failure.
-
PATH 02Next step
What you see
Water appears at a documented drain, underneath the cabinet, or in a pan area, especially after frost or a defrost period, while the door closes evenly.
Do this next
Use the exact model manual to identify an accessible drain or approved manual-defrost procedure. If the drain is hidden, the pan is damaged, or the leak continues after the documented procedure, arrange qualified service.
Why this path and its safety boundary
Why it matters: A drain outlet, drain pan, manual-defrost path, or recurring defrost issue is more likely. The correct access differs between Midea chest, upright, and convertible models.
-
PATH 03Next step
What you see
The appliance has an ice maker or water connection and the first wet point is an accessible supply fitting, valve, or fill path rather than the freezer interior.
Do this next
If the manual identifies an accessible shutoff, close it without disconnecting tubing and arrange appliance service. Keep the appliance off if water reaches electrical parts; do not remove a valve or fitting as a test.
Why this path and its safety boundary
Why it matters: A water-supply or ice-maker branch is more likely than defrost meltwater. A freezer without a water connection cannot have this cause.
-
PATH 04Next step
What you see
The leak returns after an approved door, level, or defrost check, frost rapidly rebuilds, food is warming, or water reaches electrical equipment.
Do this next
Protect food, disconnect power only when the plug and area are dry and the manual directs it, and arrange qualified service. Use urgent safety help for smoke, sparking, burning odor, or an unsafe electrical condition.
Why this path and its safety boundary
Why it matters: An internal drain, defrost, cooling, door, cabinet, or electrical fault is more likely than a one-time spill. The freezer may no longer be protecting food or the home from water damage.
-
PATH 05Next step
What you see
The water was a one-time spill, the door now seals evenly, frost does not return, the freezer remains cold, and no water connection or electrical hazard is involved.
Do this next
Keep the freezer level, avoid overloading or blocking the door, keep the gasket clean, and monitor without repeated door openings. Arrange service if any water or frost returns.
Why this path and its safety boundary
Why it matters: A spill, transient manual-defrost meltwater event, or corrected obstruction is more likely than an active internal leak, but the source should still be recorded.
Helpful context
Understand the symptom
Trace the water before assuming the drain is clogged
A puddle at the front edge, water on the freezer floor, moisture around the door, and water under the cabinet do not identify the same fault. Defrost water can collect when a drain or pan cannot carry it away, while warm humid air can melt frost when the door seal is weak. A water-connected model also has a separate supply path. Dry the area, take a photo of the trail, and note whether water returns during or after a defrost period before moving anything.
Door sealing and level affect both frost and leaks
Midea's freezer troubleshooting guidance lists food packages, dirty gaskets, and an unlevel cabinet when a door does not close completely. That gap admits moisture, which can become frost and later melt into water. Check the contact pattern and clean the gasket only as the model manual directs. Do not force hinges, reshape the gasket with heat, or adjust hardware without model-specific instructions.
Manual-defrost and self-defrost models have different water paths
Some Midea chest freezers require manual defrost and may include a bottom drain; an upright or convertible model may route defrost water through a drain system to a pan. Do not assume a visible drain exists or that a hidden drain can be reached safely. Use the exact model manual to identify the freezer type, drain, defrost procedure, and access boundary.
Protect food and stop when water reaches electrical parts
Unplugging before cleaning or defrosting is a manual safety instruction, but a wet plug, damaged cord, water at an outlet, or water near electrical components is not a routine cleaning situation. Keep hands and floor dry, protect food, and arrange service. Never puncture refrigerant tubing, use a knife or forced heat on ice, or remove panels to chase a leak.
Safety boundary
Stop conditions
- Stop and disconnect only as the model manual directs when water reaches the cord, outlet, controls, or electrical components; do not handle a wet plug or outlet.
- Do not chip, pry, or heat ice, puncture refrigerant tubing, remove evaporator or cabinet panels, or access a hidden drain, pan, valve, or sealed system as a user test.
- Do not tilt, lift, or slide a loaded freezer, force the door, remove hinges, or alter leveling and plumbing hardware without exact model instructions and safe support.
- Protect food and stop normal operation for a recurring puddle, rapidly returning frost, warming freezer, damaged cord, smoke, sparking, burning odor, or water damage.
- Arrange qualified appliance service when an approved obstruction, gasket, level, or manual-defrost check does not stop the leak, when the drain or pan is inaccessible, or when a water-connected fitting leaks.
Only after diagnosis
Potential parts
- Midea freezer door or lid gasket
Consider this category only if the exact model's gasket is torn, distorted, or fails to seal evenly after loose obstructions and manual-approved cleaning are addressed.
Confirm the exact Midea model and manufacturer's fit information; do not heat, glue, stretch, cut, or substitute a gasket. - Midea freezer defrost drain or drain-pan component
Consider this category only when water originates at the drain or underside and qualified diagnosis confirms a blocked, damaged, or misrouted drain or pan.
Confirm the freezer type and exact Midea model before ordering; do not disassemble an inaccessible drain path or pan as a trial. - Midea freezer water inlet or ice-maker fitting
Consider this category only for a Midea model with a water connection when qualified inspection locates the leak at the inlet, valve, fill path, or ice-maker assembly.
Confirm the exact model and water-system configuration; do not assume a freezer without a water connection uses this part or disconnect a wet fitting yourself.
When checks do not resolve it
Need a professional?
Arrange qualified Midea appliance service when water returns after the accessible door, gasket, level, and model-approved defrost checks, when the leak is from an inaccessible drain or pan, when frost rapidly returns or the freezer warms, or when a water-connected fitting leaks. Protect food and use urgent safety help for smoke, sparking, burning odor, a wet electrical connection, or a damaged power cord.
Safety scope: This article supports tracing accessible water, moving loose packages, checking the gasket and level visually, identifying the model's defrost type, and following an exact manual-approved cleaning or defrost procedure. Do not work on wet electrical equipment, hidden drains, water valves, hinges, refrigerant tubing, sealed systems, or interior panels.
Common questions
FAQ
Why is my Midea freezer leaking water from the bottom?
Trace the first wet point rather than the largest puddle. A bottom leak can involve defrost water, a drain or pan, a poor door seal that melted frost, an unlevel cabinet, or a water connection on models equipped with one. Use the exact Midea manual to identify an accessible drain or defrost procedure. A recurring or hidden leak needs qualified service.
Can a bad Midea freezer door seal cause water?
Yes. A gap or dirty gasket can admit humid air, create frost, and allow meltwater to run toward the door or floor. Remove only loose obstructions, clean the gasket as the manual directs, and check that contact is even. Do not heat, glue, stretch, or force the seal; arrange service for damage or a persistent gap.
Do all Midea freezers have a defrost drain?
No. Midea says some chest freezers have a bottom drain and require manual defrosting; the drain and defrost design varies by model. Check the exact manual before looking for or trying to clear a drain. Do not remove interior panels or puncture tubing to reach a hidden water path.
Should I unplug a Midea freezer before cleaning or defrosting it?
Follow the exact model manual; Midea's freezer manual instructs unplugging before cleaning or defrosting. Keep hands and the floor dry, protect food, and do not handle a wet plug or outlet. Never use a knife, forced heat, or a method that could puncture refrigerant tubing.
When should I stop using a Midea freezer that is leaking?
Protect the food and arrange service when the leak returns, frost rapidly rebuilds, the freezer warms, the drain or pan is inaccessible, or water reaches electrical parts. Stop immediately for smoke, sparking, burning odor, a damaged cord, or a wet outlet; do not keep restarting a wet appliance.
Read the exact guide
Official sources
- Midea 7 cu. ft. Convertible Chest Freezer with Removable Storage BasketMidea · Midea product-specific support content; use only the applicable portions and the exact model manual for other freezer types.
- MRU14F2AWW User ManualMidea · MRU14F2AWW and related manual content; exact Midea model controls drain, defrost, and adjustment details.
- (Updated) MRU14F2AWW User ManualMidea · Updated MRU14F2AWW manual; not a universal instruction for every Midea freezer.
- All FreezersMidea · Midea US freezer support; exact drain, defrost, and closure details vary by model.
Community feedback
Share a repair observation
Share a plain-text repair observation. Accepted observations are published automatically; this page may take a moment to update.