
On this page
Start here
Quick answer
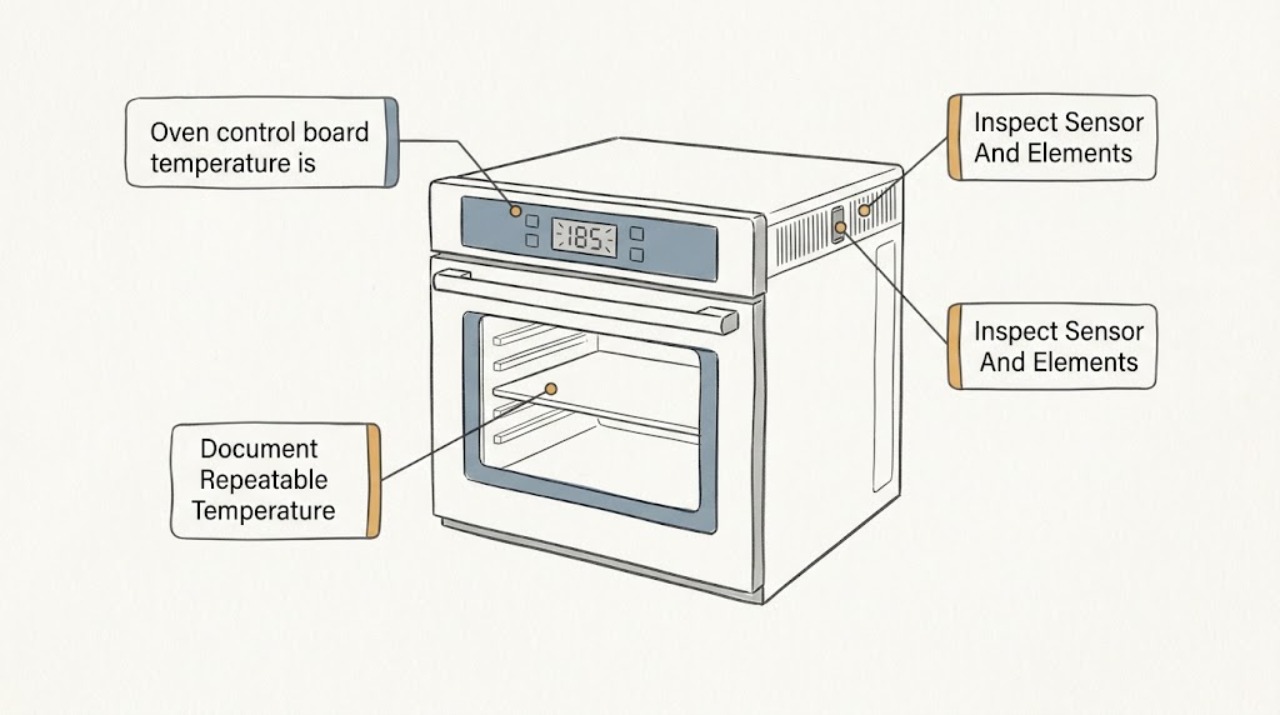
An oven that appears to hold the wrong temperature is not automatically a failed control board. Ovens cycle their heating elements on and off, and readings vary with preheat, rack position, door openings, cookware, convection settings, and thermometer placement. First document a repeatable temperature pattern after a full preheat, check the exposed temperature sensor and heating behavior only from safe access, and use the model-specific calibration procedure if the controls provide one. If calibration does not correct a repeatable error, the display is erratic, a sensor or element is damaged, an overheat fault appears, or the oven has a burning odor or electrical problem, stop using it and arrange qualified appliance service; a technician must distinguish the sensor, wiring, relays, and control board before a part is replaced.
Before you begin
Safety first
- This article supports ordinary-use observation, a cool-cavity visual check, and a model-documented user calibration only. A qualified technician must handle panel access, sensor or control-board testing, wiring, relays, heating components, gas ignition, and part replacement.
Work through in order
Diagnostic checks
Use only checks that match the exact appliance or system and its official guide.
-
Check 1
With the oven empty, use the normal bake mode and allow the oven to complete its indicated preheat; place an oven-rated thermometer as directed by its own instructions and record the set point, measured pattern, rack position, and door openings without repeatedly opening the door.
Expected result: Record whether the reading is consistently offset after preheat, swings around the set point, varies by rack or mode, or changes after the door is opened; note whether the display itself is stable.
Next step: Repeat the observation under the same conditions once if needed, then compare it with the model manual's calibration guidance before changing any setting.
Stop if: Stop using the oven for smoke, burning odor, uncontrolled heating, a persistent fault, sparks, damaged wiring, or a temperature that threatens nearby materials.
Why this matters
Why: A normal cycle or measurement difference is not proof of a control-board fault. A repeatable offset under the same conditions supports checking calibration, while an erratic display or changing behavior needs broader diagnosis.
-
Check 2
Confirm the oven is fully preheated, the door closes and seals normally, the selected bake or convection mode is the intended one, racks and bakeware follow the cooking guide, and the door remains closed during the observation.
Expected result: Note a torn or detached gasket, a mode or conversion setting that changes the target, overcrowded racks, blocked airflow, or a display that reaches the target while food results remain uneven.
Next step: Correct only ordinary-use conditions allowed by the manual, then repeat the temperature observation; do not compensate for a mechanical or mode problem by changing the board or calibration setting.
Stop if: Stop if the door, gasket, control panel, cavity, or wiring is damaged, the oven is overheating, or correction would require removing panels or disturbing gas or electrical connections.
Why this matters
Why: Heat loss, airflow, rack placement, cookware, and convection conversion can look like inaccurate temperature even when the control board is responding normally. A damaged seal or abnormal mode behavior needs service rather than a larger calibration offset.
-
Check 3
When the oven is completely cool and power remains undisturbed, visually inspect the accessible temperature sensor at the rear of the cavity and any exposed heating element for obvious displacement, breakage, blistering, or a heavy deposit; do not bend, disconnect, or touch components.
Expected result: The sensor may be straight and intact, visibly shifted or damaged, or impossible to assess without removing a panel; an element may appear intact, damaged, or fail to heat during a normal cycle.
Next step: Follow only a model manual instruction that explicitly permits a simple visual correction; otherwise photograph the condition and arrange qualified appliance service for sensor, wiring, element, relay, or board diagnosis.
Stop if: Do not remove panels, pull the sensor, probe connectors, test live voltage, open the control board, or inspect a gas burner or igniter beyond ordinary visual access.
Why this matters
Why: A shifted or damaged sensor can distort the temperature signal, and a damaged or inactive heating element can cause poor results. An intact appearance does not verify sensor resistance, wiring, relay operation, or the control board.
-
Check 4
If the repeatable mismatch remains after normal-use conditions are confirmed, locate the installed oven's owner manual and identify whether its control panel provides a temperature calibration or adjustment function; record the existing setting before making any permitted adjustment.
Expected result: The manual may document a calibration menu, a control-specific adjustment, no user calibration, or a warning that the setting does not affect every cooking mode.
Next step: Use only the exact manual procedure, make one measured change, and repeat the same observation; if the result is still inaccurate or becomes unstable, restore the documented setting if possible and arrange service.
Stop if: Do not enter an unknown service mode, change hidden parameters, guess an offset, or continue using calibration to compensate for overheating, a fault code, smoke, odor, or damaged components.
Why this matters
Why: A documented calibration adjustment can correct a consistent preference or offset, but it cannot repair a bad sensor, heating component, wiring fault, or control board. Calibration behavior is model-specific and may not apply to broil or self-clean modes.
-
Check 5
If the temperature remains inaccurate after a permitted calibration check, compile the model number, cooking mode, set point, repeatable readings, sensor and element observations, display behavior, and any fault message for a qualified appliance technician.
Expected result: The problem may be a consistent offset, an erratic display, slow or absent heating, runaway heating, a sensor or wiring symptom, or an issue that occurs only in one mode.
Next step: Stop using the oven when regulation is unsafe or the cause is uncertain, and arrange qualified service with the recorded evidence and the manual available.
Stop if: Do not remove the control panel, access the board, disconnect harnesses, measure energized circuits, or order a control board solely from a symptom description.
Why this matters
Why: These patterns help a technician separate calibration from sensor, heating, relay, wiring, or control-board failure. A board is a consequential diagnosis and cannot be confirmed by replacing it before the sensor and connected components are assessed.
Use your observations
Decision map
Find the observation that best matches what you see, then follow the next safe action.
-
PATH 01Safety boundary
What you see
The oven display is stable, the cavity reading rises and falls around the set point, and cooking results improve when preheat, rack, mode, and door-use conditions are consistent.
Do this next
Use the cooking guide and the same rack and mode conditions; do not replace parts based on one thermometer peak.
Why this path and its safety boundary
Why it matters: Normal cycling or measurement conditions are more likely than a failed control board.
Safety stop: Escalate if the oven develops runaway heat, a fault, smoke, odor, or an increasingly erratic display.
-
PATH 02Safety boundary
What you see
The same test produces a consistent offset after full preheat and normal-use conditions are confirmed, and the manual documents a calibration function.
Do this next
Follow the exact model procedure, record the original and new setting, and repeat the same test; request service if the offset remains or becomes unstable.
Why this path and its safety boundary
Why it matters: A calibration setting may account for the repeatable difference, but it does not prove the control board is faulty.
Safety stop: Do not guess a setting, alter hidden service parameters, or use calibration to mask unsafe overheating.
-
PATH 03Safety boundary
What you see
The accessible sensor is visibly shifted, damaged, or impossible to assess without panel access, and the temperature pattern is inaccurate.
Do this next
Follow only an explicit model instruction for a safe visual correction; otherwise arrange appliance service for sensor and wiring diagnosis.
Why this path and its safety boundary
Why it matters: The sensor position, sensor, harness, or connection is more likely than a calibration preference alone.
Safety stop: Do not pull, bend, disconnect, or electrically test the sensor as a homeowner step.
-
PATH 04Safety boundary
What you see
The oven preheats slowly, heats unevenly, shows a visibly damaged element, or fails to heat in one mode while the display appears normal.
Do this next
Stop relying on the oven for temperature-sensitive cooking and arrange qualified appliance diagnosis of the heating path.
Why this path and its safety boundary
Why it matters: A heating element, igniter, relay, supply, sensor, or wiring issue may be limiting heat; the control board is only one possible link.
Safety stop: Do not remove an element, inspect gas ignition, open panels, or test energized circuits without qualified service.
-
PATH 05Safety boundary
What you see
The display is erratic, controls behave inconsistently, a fault points to control communication or temperature sensing, or the oven remains inaccurate after sensor and calibration checks.
Do this next
Leave the oven off if regulation is unsafe and provide the technician with the model, readings, settings, and fault history for a component-level diagnosis.
Why this path and its safety boundary
Why it matters: Control, control-board, harness, relay, or sensor diagnosis is warranted, but the symptom does not identify which part has failed.
Safety stop: Do not replace the board by guesswork, open the console, disconnect a harness, or use a service test intended for technicians.
-
PATH 06Safety boundary
What you see
The oven overheats uncontrollably, emits smoke or a burning odor, sparks, shows damaged wiring or controls, or has a persistent over-temperature fault.
Do this next
Turn the oven off from a safe control if possible, keep clear, and arrange prompt qualified appliance or electrical service; use emergency procedures for active smoke or fire.
Why this path and its safety boundary
Why it matters: This is a stop condition involving possible heating, sensor, relay, control-board, wiring, or fire risk rather than an adjustment question.
Safety stop: Do not continue cooking, reset a persistent fault repeatedly, open the control area, or touch hot or damaged parts.
Helpful context
Understand the symptom
An oven temperature is an average, not a motionless number
GE explains that oven elements cycle on and off to maintain an average set temperature, so the cavity naturally rises and falls around the setting. Readings also change with where a thermometer sits, room conditions, and how often the door opens. Establish a repeatable pattern before treating the control board as the cause. A single high or low reading during preheat is not enough to identify a failed part.
Calibration is a model-specific adjustment, not a board replacement
GE says gas and electric ovens may provide a calibration adjustment, but the controls and steps depend on the model and the adjustment is retained in the control memory. Use the owner's manual for the installed oven and record the original setting before changing it. If there is no documented calibration option or the error is not consistent, stop changing settings and request service.
The sensor, heating system, and control board are a chain
The temperature sensor reports cavity conditions to the control, while the control operates heating components. A sensor that has shifted or is damaged, an element that does not heat, a gas ignition problem, damaged wiring, or a relay or control-board fault can all produce inaccurate cooking results. A service document may show technician tests for these parts; it is not permission to remove panels, measure live circuits, or replace a board by guesswork.
Stop for runaway heat or electrical warning signs
Do not continue cooking to compensate for an oven that overheats, fails to regulate, shows a persistent fault, smells burned, smokes, sparks, or has damaged wiring or controls. Turn the oven off from its controls if that can be done safely, keep clear, and arrange qualified appliance or electrical service. If there is active smoke or fire, leave the area and use emergency procedures.
Safety boundary
Stop conditions
- Do not remove oven panels, open the control board, disconnect harnesses, test live voltage, or work on gas components as a routine homeowner check.
- Do not condemn or replace the control board from one thermometer reading; sensor, calibration, heating, relay, wiring, and normal cycling must be distinguished.
- Do not guess calibration values, alter hidden service parameters, or use calibration to compensate for runaway heat, a fault, smoke, odor, sparks, or damaged parts.
- Stop using the oven for uncontrolled overheating, persistent fault messages, burning odor, smoke, sparks, damaged wiring, or a door or gasket condition that cannot contain heat.
- Arrange qualified appliance service when the repeatable error remains after the model-specific calibration check, the sensor or element is damaged, the display is erratic, or the cause is uncertain.
Only after diagnosis
Potential parts
- oven temperature sensor
Consider this only when a qualified diagnosis or explicit model guidance identifies the sensor as shifted, damaged, or electrically out of range.
Match the exact oven model, connector, mounting, and approved sensor specification; do not replace it from a visual resemblance alone. - oven control board
Consider this only after qualified testing separates a control-board or relay fault from the sensor, harness, heating system, and calibration.
Confirm the exact model revision, connectors, software or configuration requirements, and service instructions; do not open or swap a board as a first test. - oven heating element or igniter
Consider this only when the oven type and a qualified diagnosis identify a damaged or failed heating component.
Match the exact model, fuel type, electrical characteristics, mounting, and approved service procedure; do not work on live or gas-connected equipment.
When checks do not resolve it
Need a professional?
Arrange qualified appliance service when a repeatable temperature mismatch remains after normal-use checks and the model-specific calibration procedure, when the sensor or heating element is damaged or inaccessible, when the display or controls are erratic, or when a control-board, relay, wiring, or sensor fault is suspected. Stop using the oven and escalate promptly for runaway heat, a persistent over-temperature fault, burning odor, smoke, sparks, or damaged electrical parts.
Safety scope: This article supports ordinary-use observation, a cool-cavity visual check, and a model-documented user calibration only. A qualified technician must handle panel access, sensor or control-board testing, wiring, relays, heating components, gas ignition, and part replacement.
Common questions
FAQ
Does an inaccurate oven temperature always mean the control board is bad?
No. Normal cycling, thermometer placement, preheat, rack position, door openings, convection settings, calibration, the sensor, heating system, wiring, relays, and the control board can produce different symptoms. Establish a repeatable pattern and use the model manual before a board is considered.
Can I calibrate an oven that is too hot or too cold?
Some ovens provide a user calibration function, but the control steps and affected modes vary by model. Record the original setting and follow only the exact owner's manual procedure. Calibration is not a substitute for repairing a sensor, heating component, wiring, relay, or control board.
How can I tell if the oven temperature sensor is the problem?
With the oven completely cool, you may visually note whether the accessible sensor is shifted or damaged. That does not verify its electrical operation or wiring. Do not disconnect or measure it yourself unless the model instructions and your qualifications clearly permit it; otherwise arrange appliance service.
Why does my oven thermometer disagree with the display?
Ovens cycle above and below the set point, and readings change with thermometer placement, preheat, room conditions, and door openings. Repeat the observation under the same conditions before concluding that the display or control board is inaccurate.
When should I call for oven temperature repair?
Arrange qualified service when a repeatable mismatch remains after normal-use and model-specific calibration checks, when the sensor or element is damaged, when the display is erratic, or when control-board, wiring, relay, or gas issues are suspected. Stop using the oven for runaway heat, smoke, burning odor, sparks, or persistent over-temperature faults.
Read the exact guide
Official sources
- 6 Reasons Why Your Oven Is Not Baking ProperlyWhirlpool · Whirlpool general oven guidance; the installed model manual and qualified service control part testing and replacement.
- Tech Sheet - W11202265 - Rev AWhirlpool · Whirlpool service technician document for specified model families; it is evidence of diagnostic boundaries, not a homeowner repair procedure.
- Range & Wall Oven - Oven Temperature Is Not CorrectGE Appliances · GE Appliances general guidance for ranges and wall ovens; the installed model manual controls calibration and service decisions.
- Range & Wall Oven - How to Calibrate My OvenGE Appliances · GE Appliances calibration overview; the exact owner's manual controls the installed oven's permitted procedure and affected modes.
Community feedback
Share a repair observation
Share a plain-text repair observation. Accepted observations are published automatically; this page may take a moment to update.