
On this page
Start here
Quick answer
When an oven door closes normally but the temperature seems inaccurate, first distinguish normal cycling from a true fault. Let the oven fully preheat in the intended Bake or Convection mode, use the rack and cookware arrangement in the owner's guide, and avoid judging the cavity from a single thermometer reading or a single door opening. Compare the result with a repeatable food test or a high-quality thermometer placed consistently; check whether convection conversion, dark cookware, foil, crowding, or rack position explains the result. With the oven cool, inspect only the visible gasket and temperature sensor for obvious damage or displacement. If the oven cannot hold heat, the sensor or gasket is damaged, an element does not activate, a persistent error appears, or calibration cannot correct the repeatable difference, stop disassembling and arrange qualified appliance service. Do not open control panels, test live voltage, bypass the door switch, or replace a sensor or element from a generic appearance match.
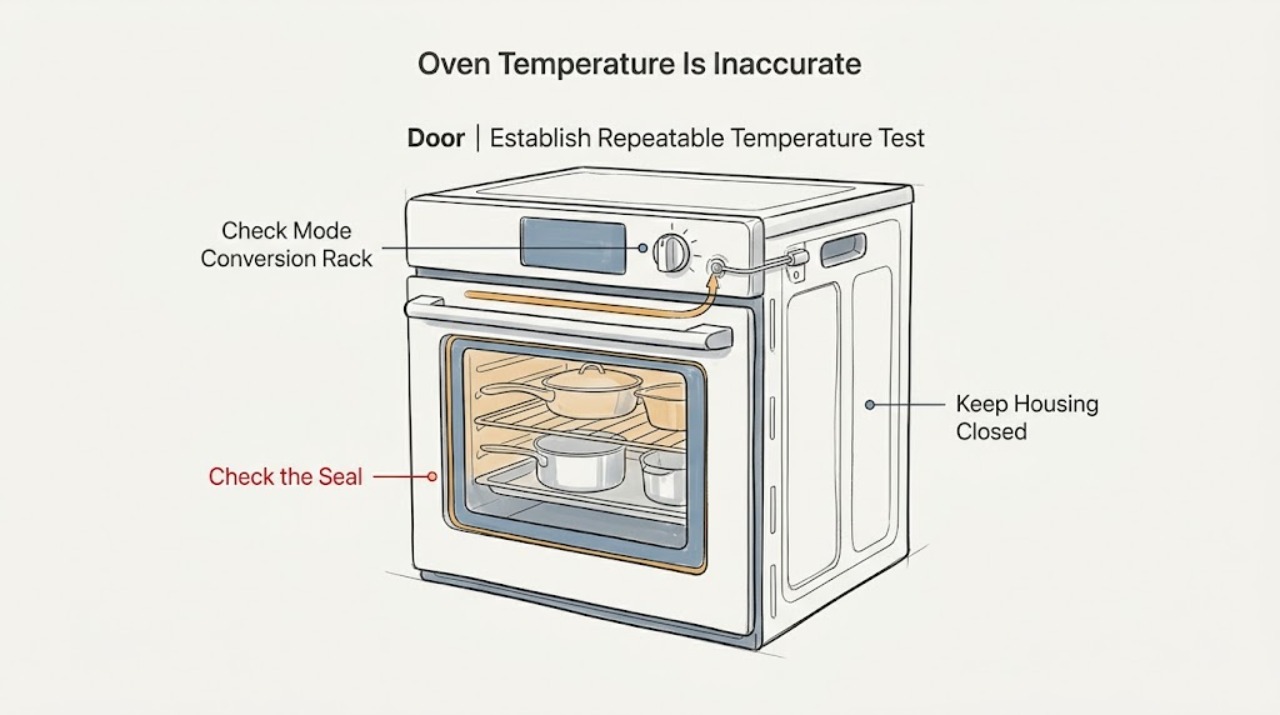
Work through in order
Diagnostic checks
Use only checks that match the exact appliance or system and its official guide.
-
Check 1
Choose one standard mode from the owner's guide, usually Bake rather than a specialty or convection mode, and let the oven complete its preheat indication before judging it. Keep the door shut, use the same rack position and cookware, and record the set temperature, preheat time, and cooking result. If using an oven thermometer as a secondary check, place it consistently and do not read it immediately after opening the door.
Expected result: The result is repeatably high or low, the reading changes widely between door openings, the oven was not fully preheated, or the food result is normal when the test is repeated with consistent setup.
Next step: Repeat the test once with the same setup. If the difference remains, compare Bake with Convection only after checking the model's conversion feature, then inspect the visible door seal and sensor with the oven cool.
Stop if: Do not place a thermometer against an element, leave the door open to take repeated readings, or use a test involving smoke, flammable material, or unattended heating.
Why this matters
Why: A repeatable difference is more useful than a single reading. Door openings, probe placement, incomplete preheat, and normal element cycling can make a healthy oven appear inaccurate. A stable result under controlled conditions points toward the setting or recipe rather than a repair; a repeatable error merits the next checks.
-
Check 2
Compare the selected mode and temperature with the recipe and the oven manual. If using convection, check whether the oven applies an automatic conversion or expects a manually reduced temperature. Remove foil or coverings that block the cavity floor or racks, avoid overcrowding, leave space around pans, and use the specified rack position and cookware for one controlled test.
Expected result: The oven is using convection conversion, the pan is dark or crowded, foil blocks airflow, the rack is too close to an element or wall, or the result remains inaccurate after the setup is corrected.
Next step: Use the corrected mode and rack/cookware arrangement for another full preheat and test. If the error persists, continue with the cool-oven inspection and service decision; do not compensate indefinitely by changing recipes without recording the offset.
Stop if: Do not cover the entire oven floor or rack with foil, place cookware against heating elements, or use cookware that the owner's guide does not permit.
Why this matters
Why: Mode conversion and heat circulation can change food results without a failed sensor or heater. Dark cookware can absorb more heat, and blocked or crowded airflow can create local hot or cool areas. If the same controlled setup still produces a repeatable offset, a calibration, sensor, heating, or control issue is more likely.
-
Check 3
After the oven has completely cooled and is not running, inspect the visible door gasket for tears, gaps, or sections pulled out of the channel. Confirm the door closes squarely and look at the visible temperature sensor for an obvious bend or displacement described in the model manual. Do not remove the gasket or sensor and do not reach behind the cavity wall.
Expected result: The door closes but the gasket is damaged or uneven, the sensor is visibly displaced, the door and visible sensor look normal, or the oven shows a door/latch message.
Next step: Use only a no-disassembly correction explicitly described in the model manual. For a torn gasket, displaced sensor, latch issue, or persistent temperature error, leave repair to qualified appliance service and provide the model and repeatable test results.
Stop if: Do not force the latch or hinges, remove the gasket or sensor, bypass a door switch, or run the oven with damaged glass, wiring, or a seal that cannot close safely.
Why this matters
Why: A closed door can still lose heat through a torn or displaced gasket, while a shifted sensor can provide incorrect feedback. A normal-looking exterior does not rule out sensor wiring, control, element, or calibration faults; a door/latch message may prevent expected heating or require model-specific service.
-
Check 4
From outside the normal cavity opening during one controlled preheat, note whether the expected electric element glows and cycles, or whether a gas oven follows its normal manufacturer-described heating sequence. Compare Bake with another permitted heating mode only if the manual supports that comparison. Keep the observation brief and do not open panels or reach inside a hot cavity.
Expected result: An element has a visible break or never activates, one mode behaves differently from another, both modes heat but the measured offset remains, or smoke, arcing, unusual odor, or abnormal flame appears.
Next step: Stop using the oven for damaged or abnormal heating activity and arrange qualified service. If both modes heat normally but the controlled error persists, provide the recorded results for model-specific calibration or sensor diagnosis rather than changing parts yourself.
Stop if: Do not operate after sparking, smoke, gas odor, or abnormal flame; do not bypass ignition or safety controls, test live circuits, or remove heating-element covers.
Why this matters
Why: A mode-specific cold element or abnormal ignition points toward that heating path. Normal visible cycling is expected and does not prove calibration accuracy; a persistent offset with normal activity raises sensor, control, calibration, or heat-loss questions. Smoke, arcing, gas odor, or abnormal flame is a safety boundary.
-
Check 5
If the same mode, rack, cookware, preheat routine, and measurement method show a repeatable temperature offset, check the owner's manual for the oven's user-accessible temperature calibration setting. Record the original setting before making any permitted adjustment and retest once; do not use calibration to compensate for a damaged gasket, failed element, error code, or unsafe behavior.
Expected result: The model supports calibration and one permitted adjustment removes the repeatable offset, calibration is unavailable, the offset remains, or the oven cannot hold temperature between cycles.
Next step: Keep the documented setting only if the model manual permits it and the oven then behaves safely and consistently. Otherwise restore the original setting if appropriate and arrange qualified appliance service with the test record.
Stop if: Do not enter technician test modes, alter hidden service parameters, repeatedly recalibrate to chase changing readings, or continue using an oven that overheats, underheats dangerously, smokes, or produces an error.
Why this matters
Why: Calibration can correct a consistent preference or small model-specific offset, but it cannot repair a sensor, heating element, relay, control, seal, or power fault. An oven that cannot hold temperature or repeatedly drifts after a documented adjustment needs service diagnosis.
Use your observations
Decision map
Find the observation that best matches what you see, then follow the next safe action.
-
PATH 01Next step
What you see
The oven reaches its preheat state, element cycling is normal, and the apparent temperature changes with thermometer placement or door openings rather than showing a repeatable cooking offset.
Do this next
Use the manual's rack, cookware, preheat, and mode guidance and judge performance with a repeatable food or secondary thermometer test. No part should be ordered from a single fluctuating reading.
Why this path and its safety boundary
Why it matters: Normal cycling and measurement conditions are more likely than a failed component.
-
PATH 02Next step
What you see
The error appears only with convection, dark or crowded cookware, foil, an unsuitable rack position, or an unconfirmed conversion setting, and improves when the setup follows the manual.
Do this next
Keep the corrected mode, rack, spacing, and cookware arrangement. If a controlled test still shows a stable offset, proceed to sensor, gasket, element, and calibration diagnosis.
Why this path and its safety boundary
Why it matters: Cooking method and heat circulation are more likely than an oven control fault.
-
PATH 03Next step
What you see
The door closes but the gasket is torn or uneven, the sensor is visibly displaced, or the oven loses heat with otherwise consistent settings.
Do this next
Use only a manual-approved no-disassembly correction; otherwise stop and arrange service for the gasket, latch, sensor, wiring, or calibration diagnosis.
Why this path and its safety boundary
Why it matters: Heat escaping at the seal or incorrect sensor feedback is more likely, though an internal control fault can coexist.
-
PATH 04Next step
What you see
A mode-specific element or igniter does not activate, both modes behave abnormally, or the cavity cannot hold temperature despite a controlled setup.
Do this next
Leave the oven off and arrange qualified appliance service for model-specific electrical, gas, heating, and control testing. Do not attempt live measurements or generic part replacement.
Why this path and its safety boundary
Why it matters: A heating element, igniter, relay, sensor, control, wiring, or power fault is more likely than a recipe or thermometer issue.
-
PATH 05Next step
What you see
The oven shows smoke, sparking, arcing, gas odor, abnormal flame, repeated breaker trips, damaged wiring, or an error that persists with the temperature complaint.
Do this next
Stop using the oven. Leave the area for a gas odor as appropriate and follow local emergency or utility guidance; arrange qualified electrical or appliance service and do not reproduce the event.
Why this path and its safety boundary
Why it matters: The symptom exceeds routine calibration or observation and may involve fire, shock, or gas risk.
Helpful context
Understand the symptom
A closed door does not guarantee temperature accuracy
A door that latches and appears closed rules out one obvious heat-loss symptom, but it does not prove that the gasket seals evenly or that the sensor and control are reading correctly. Ovens intentionally cycle the elements on and off around the selected temperature, so a brief high or low reading can be normal. Look for a repeatable cooking pattern rather than treating one thermometer snapshot as proof of failure.
Check the cooking method before replacing a part
Convection modes may use conversion settings that change the displayed target, and dark pans, crowded racks, foil, and poor pan placement can change how food cooks even when the control is working. A consistent test with the same mode, rack, cookware, and measurement position makes the result more useful. Only after those variables are controlled should sensor, element, gasket, or calibration service become the leading path.
Only after diagnosis
Potential parts
- oven temperature sensor
Only consider this category after a repeatable controlled offset and model-specific diagnosis indicate faulty temperature feedback rather than normal cycling, cookware, door sealing, calibration, or a heating element.
Sensor fit, connector, and calibration behavior vary by model. Confirm the exact model and use qualified service when access requires removing panels or handling wiring. - oven door gasket
Only consider this category when the cool-oven inspection confirms a torn, displaced, or ineffective gasket and the model manual identifies it as user-replaceable or serviceable.
Gasket shape, attachment, and installation differ by model; a closed door alone does not establish fit or need. - oven bake or broil heating element
Only consider this category when a controlled observation and qualified diagnosis confirm a damaged or non-activating electric element for the affected mode.
Element voltage, wattage, shape, terminals, and mounting are model-specific; confirm the model and isolate power according to the service procedure.
When checks do not resolve it
Need a professional?
Arrange qualified appliance service when a controlled, fully preheated test shows a repeatable temperature offset that is not explained by mode conversion, cookware, rack position, airflow, or a permitted calibration setting; the gasket, latch, or sensor is damaged; an element or igniter does not activate; the oven cannot hold temperature; or an error persists. Stop immediately for smoke, sparking, arcing, gas odor, abnormal flame, repeated breaker trips, damaged wiring, or uncontrolled overheating. Do not open panels, test live voltage, bypass safety switches, enter technician modes, or replace a sensor, element, or gasket from a generic match.
Common questions
FAQ
Why does my oven temperature seem inaccurate even though the door closes?
A closed door does not rule out normal element cycling, thermometer-placement effects, convection conversion, cookware or rack issues, a gasket leak, sensor displacement, or calibration. Repeat one controlled, fully preheated test before deciding that a part has failed.
Are temperature swings during an oven cycle normal?
Usually, yes. Ovens cycle their elements on and off to maintain an average set temperature, so a reading can rise and fall around the target. Judge a repeatable cooking or measurement pattern using the same mode, rack, cookware, and method rather than one snapshot.
Should I recalibrate an oven that is consistently too hot or too cool?
Only after confirming the offset with a controlled preheated test and checking the owner's manual for a user-accessible calibration setting. Calibration may address a consistent offset, but it will not repair a damaged gasket, failed sensor, inactive element, control fault, or unsafe overheating.
Can a damaged gasket cause inaccurate oven temperature when the door closes?
Yes. A door may latch while a torn or displaced gasket still lets heat escape. Inspect the visible gasket only with the oven cool; use a model-approved no-disassembly correction if one exists, and have a technician handle replacement or latch work that requires access or adjustment.
When should I stop using an oven with inaccurate temperature?
Stop for smoke, sparking, arcing, gas odor, abnormal flame, repeated breaker trips, damaged wiring, uncontrolled overheating, a persistent error, or an element that is visibly damaged. Leave repair and live electrical, gas, sensor, control, and heating-component work to qualified service.
Read the exact guide
Official sources
- Range & Wall Oven - Oven Temperature Is Not CorrectGE Appliances · Oven temperature cycling, preheat, measurement limits, cookware and rack setup, door gasket, temperature sensor, electric element, calibration, and service guidance
- Range & Wall Oven - Oven Heating Element FailureGE Appliances · Electric oven element failure, abnormal sparking or burning odor, breaker response, and not using the oven after element failure
- Why is my oven not heating up?Whirlpool · Oven power, heating element and igniter clues, door seal, sensor position, and professional repair boundary
- 6 Reasons Why Your Oven Is Not Baking ProperlyWhirlpool · Oven airflow, door use, calibration, rack and cookware spacing, heating-element activation, and temperature-sensor position
- Samsung Oven FAQsSamsung Canada · Oven door closure, mode and rack settings, temperature behavior, cooling, and service escalation
Community feedback
Share a repair observation
Share a plain-text repair observation. Accepted observations are published automatically; this page may take a moment to update.