
On this page
Start here
Quick answer
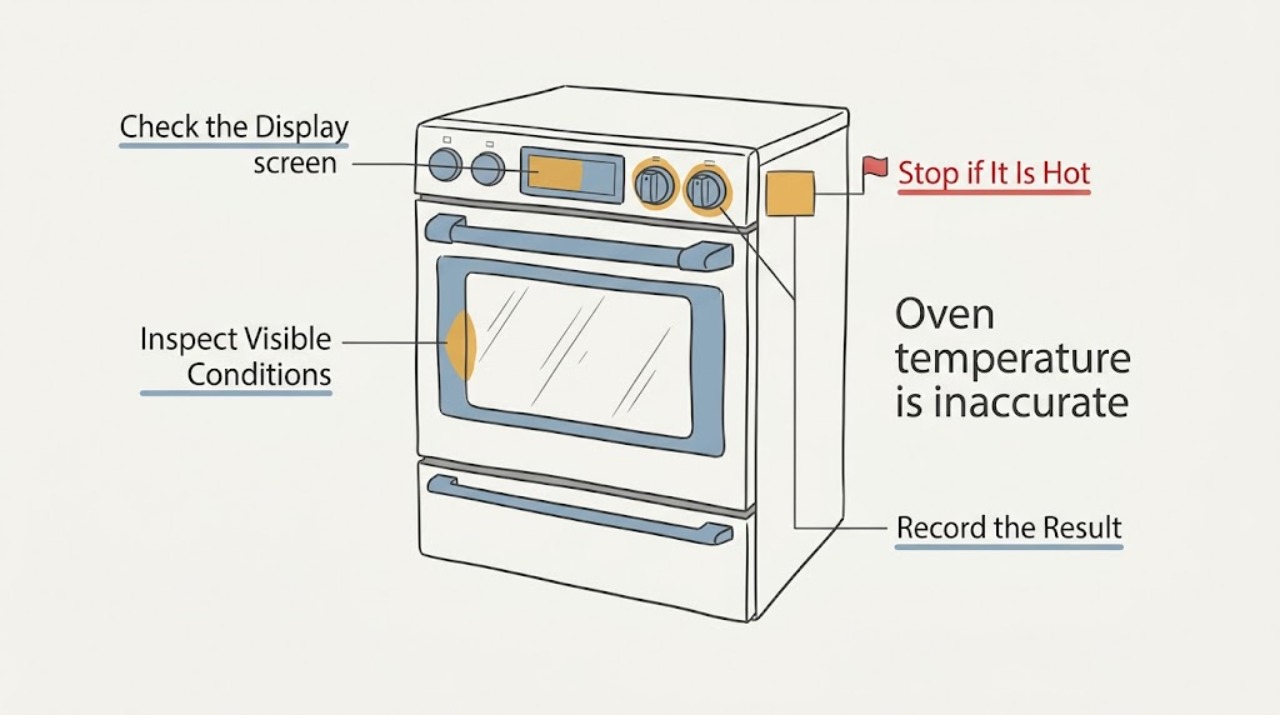
First separate a real heating fault from a misleading thermometer, cooking method, or setting. Keep the same recipe, rack position, cookware, mode, and door-opening habits, then compare the result over normal use. Check the display for an existing temperature offset, confirm that the oven reaches its preheat indication, and inspect the closed door and gasket from the outside. Do not remove the sensor or control panel, make live electrical or gas checks, or repeatedly reset the appliance. If food remains consistently too hot or too cool after the safe checks, request appliance service and provide the model information and observations.
Work through in order
Diagnostic checks
Use only checks that match the exact appliance or system and its official guide.
-
Check 1
Observe the cooking result using the same familiar recipe, rack position, cookware, mode, and stated setting on separate normal uses, without changing several variables at once.
Expected result: Record whether the food is consistently underdone, overdone, browned unevenly, or normal, and whether the symptom occurs in one mode or across modes.
Next step: Save the recipe, mode, rack, cookware, setting, and result as a short service note. Do not keep cooking merely to force a failure pattern.
Stop if: Stop using the oven and request service if food scorches unexpectedly, the cavity smokes during ordinary use, or a gas or burning-electrical odor appears.
Why this matters
Why: A repeatable hot or cool result across the same setup points toward calibration or an oven fault; a one-off result or mode-specific pattern may instead reflect cookware, rack position, convection settings, or recipe variation.
-
Check 2
Read the control display and settings menu from the user interface, noting the selected mode and whether a temperature adjustment or offset is already present; do not open the control area or change wiring.
Expected result: Record an unchanged setting, a nonzero offset, a mode such as convection, a lock/demo indication, or an error message, and save a photo of the display if it is safe to do so.
Next step: Use the model's owner documentation to identify what the displayed setting means; provide the exact display state to a technician instead of making an unsupported adjustment.
Stop if: Stop if the display shows an error, overheated condition, or an unexpected mode that cannot be cleared through ordinary controls; do not bypass a lock or safety setting.
Why this matters
Why: An existing offset or a mode-specific conversion can explain a consistent difference from the recipe. An unfamiliar error or a setting that cannot be explained by the manual needs model-specific service guidance rather than guesswork.
-
Check 3
Observe one normal preheat from outside the closed oven, with the cavity otherwise empty and the rack arrangement unchanged; note the time to the oven's own preheat indication rather than relying on an unverified thermometer.
Expected result: Record whether the oven reaches its indication, takes noticeably longer than its usual behavior, never indicates readiness, or displays a fault while heating.
Next step: Let the oven cool normally, keep the observation notes, and compare only with the manufacturer's model guidance; do not cycle power repeatedly or test internal components.
Stop if: Stop the cycle if smoke, an unusual odor, arcing, a gas smell, or abnormal heat appears, and obtain professional help.
Why this matters
Why: A repeatable failure to reach the preheat indication suggests a heating, power, control, or sensor issue that requires service. A normal indication with inconsistent food results shifts attention to settings, airflow, cookware, calibration, or a sensor diagnosis.
-
Check 4
Visually inspect the closed door, gasket, and visible frame from the room side without removing the gasket, touching hot surfaces, or forcing the door.
Expected result: Record a door that closes evenly versus a visible gap, folded or displaced gasket, damaged glass, heat escaping around one area, or a door that will not latch normally.
Next step: Keep the door closed during normal operation, avoid leaning on it, and include the visible door condition in the service request.
Stop if: Stop using the oven if the glass is cracked, the door will not close or latch, the gasket is loose in a way that affects closure, or hot air is escaping abnormally.
Why this matters
Why: A poor seal can change heat retention and cooking results, while damaged glass or an abnormal latch is a safety and service issue rather than a calibration opportunity.
-
Check 5
Observe the oven's visible vent area and the arrangement of pans during ordinary use without blocking, touching, or dismantling the vent or changing the appliance installation.
Expected result: Record whether cookware crowds the cavity, foil or a large pan blocks an air path, the selected mode uses a fan, or heat appears to escape from an unexpected location.
Next step: Follow only the rack, spacing, cookware, and ventilation guidance in the model manual; if the same controlled setup still gives a repeatable error, escalate for service diagnosis.
Stop if: Stop if the vent, surrounding cabinetry, or controls show scorching, melting, smoke, or an electrical odor.
Why this matters
Why: Restricted airflow, crowded cookware, and convection-versus-conventional mode differences can create uneven results without proving that the temperature sensor is bad.
Use your observations
Decision map
Find the observation that best matches what you see, then follow the next safe action.
-
PATH 01Next step
What you see
The same recipe and setup produce normal results, but a standalone thermometer disagrees.
Do this next
Treat the single thermometer reading as unconfirmed; observe the oven's own preheat behavior and cooking results, because cycling and thermometer response can make an instant comparison misleading.
-
PATH 02Next step
What you see
The result is consistently too hot or too cool with the same mode, cookware, rack, and recipe.
Do this next
Record the pattern and model settings, then request appliance service. A calibration option may exist on some models, but do not alter it without the model's instructions and do not use it to mask a sensor, door, heating, or control fault.
-
PATH 03Next step
What you see
The oven never reaches its normal preheat indication, shows an error, or behaves differently after a power event.
Do this next
Stop troubleshooting at the controls and arrange professional diagnosis; do not open the appliance, test voltage, or repeatedly reset it.
-
PATH 04Next step
What you see
There is smoke, gas odor, burning-electrical odor, arcing, damaged glass, or an abnormal door seal.
Do this next
Stop using the oven, leave the area if there is a gas or fire concern, and contact the appropriate emergency or appliance professional service.
Helpful context
Understand the symptom
Why an oven can seem inaccurate
An oven normally cycles its heating elements to maintain an average temperature, so an instant reading may move above or below the selected setting. A slow or unverified thermometer can add another source of error. Cooking mode, rack position, pan material, crowded cookware, and opening the door also change the result. A repeatable pattern with the same setup is more useful than one isolated reading.
Stay within observation-only checks
These checks use the controls, viewing window, existing records, and normal cooking observations only. Do not remove an oven panel, reach behind the cavity, expose wiring, disturb a temperature sensor, alter gas components, or continue using the oven if there is smoke, a gas odor, scorching, or an electrical burning smell.
Only after diagnosis
Potential parts
- oven temperature sensor
Consider this part only if a qualified diagnosis identifies the sensor as the cause after the display, mode, preheat, door, and cooking-result observations are recorded.
Confirm the complete oven model and the manufacturer's fit information; sensor appearance alone does not establish compatibility. - oven control board
This is relevant only after service diagnosis links the inaccurate temperature or error behavior to the control assembly rather than cookware, calibration, sensor, heating, or door conditions.
Use the exact model documentation and professional fitment confirmation; do not open or test the control area as a homeowner observation. - oven door gasket
Consider this category only when the visible door and gasket inspection shows a confirmed seal defect and the model documentation identifies the correct replacement path.
Confirm model, door style, and gasket fit before ordering; a gasket cannot correct a warped door, damaged glass, or a control or heating fault.
When checks do not resolve it
Need a professional?
Have this ready
- Provide the complete model information, cooking mode and setting, recipe and cookware, rack position, preheat behavior, display or offset state, thermometer details if used, door and gasket observations, and photographs of any visible damage or error.
Common questions
FAQ
Is an oven thermometer enough to prove the oven is inaccurate?
No. Ovens cycle above and below their selected setting, and a thermometer can respond slowly or inconsistently. Compare repeatable cooking results and the oven's own preheat behavior, then use a model-specific service diagnosis if the pattern persists.
Should I change the temperature calibration setting?
Only if the exact owner documentation supports it and the problem is a consistent, controlled offset. Do not use calibration to conceal an unexplained error, failed preheat, damaged door, smoke, gas odor, or a suspected sensor or control fault.
What if the oven is hot in one mode but not another?
Record the mode, rack, cookware, and result. Convection and conventional modes use airflow and heating patterns differently, so a mode-specific result needs the model manual or a technician rather than a universal temperature adjustment.
Read the exact guide
Official sources
- Samsung oven temperature issuesSamsung Support US · Use for Samsung models and as manufacturer context for why mode, cookware, airflow, preheat indication, and thermometer readings need careful interpretation; exact controls vary by model.
- Oven Temperature CalibrationWhirlpool · Use for the Whirlpool control guide's covered models; consult the exact model documentation rather than assuming another oven has the same menu or adjustment behavior.
Community feedback
Share a repair observation
Share a plain-text repair observation. Accepted observations are published automatically; this page may take a moment to update.