
On this page
Start here
Quick answer
Keep the oven off and do not use it until the door closes and latches normally. Once the oven is fully cool, observe the door gap, frame, gasket, visible latch, hinges, racks, and cavity for an obstruction or misalignment without forcing the door, removing hinge hardware, or using the appliance with the door ajar. A crooked door, bent latch, damaged gasket, loose glass, or one side sitting lower needs model-specific service rather than pressure or a guessed adjustment.
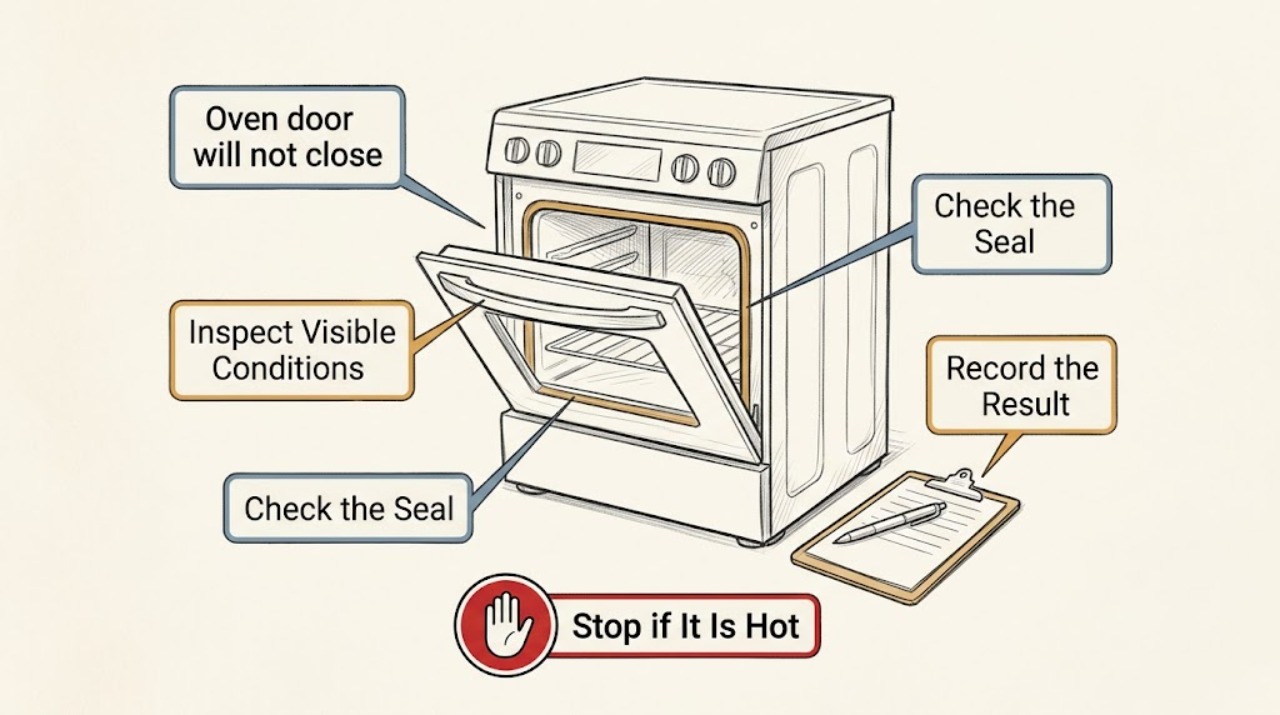
Work through in order
Diagnostic checks
Use only checks that match the exact appliance or system and its official guide.
-
Check 1
With the oven off and fully cool, stand in front of the open door and observe its movement and resting position without pushing it toward the frame or lifting it by the handle.
Expected result: Note whether the door is level, whether one side hangs lower, whether it stops before the frame, and whether resistance appears at the same point each time without repeating forceful attempts.
Next step: Photograph the gap and side profile from a safe position and arrange model-specific appliance service; do not try to realign the door yourself.
Stop if: Stop immediately if glass is loose or cracked, the door shifts unexpectedly, a hinge is visibly bent, or the oven is not fully cool.
Why this matters
Why: A crooked door or an uneven gap can indicate a hinge, seating, frame, or door problem; resistance at one point can also reflect a latch or obstruction.
-
Check 2
From the open, cool oven, look for an obviously displaced rack, bakeware edge, foil, crumb buildup, or other loose item protruding into the door path without reaching into a pinch point or forcing anything.
Expected result: A clear obstruction may be visible at the sill, frame, rack position, or door edge; if nothing obvious is present, the door still may have an internal alignment or latch fault.
Next step: Record the item and location for the technician. Do not force the rack, scrape the frame, or continue using the oven while the door remains open or misaligned.
Stop if: Stop if the item is hot, stuck, sharp, behind the gasket, near a hinge, or requires tools or force to reach.
Why this matters
Why: Only a plainly visible obstruction is a possible low-risk explanation. Absence of an obstruction does not justify pressure, repeated slamming, or disassembly.
-
Check 3
Inspect the visible gasket, door glass, frame, and contact surfaces from the cool open position without removing the gasket or cleaning with the door under tension.
Expected result: Look for a gasket folded out of its channel, a torn or displaced section, bent sheet metal, a loose pane, scorch marks, or debris that could change the door gap; do not press on damaged glass or metal.
Next step: Take close photos without touching the defect and give them to the appliance technician with the model identifier; do not substitute a generic gasket or adhesive.
Stop if: Stop if glass is cracked or loose, metal is sharp or hot, smoke or burning odor is present, or the door must be moved to see more.
Why this matters
Why: A damaged gasket, door, or frame can prevent a seal and may let heat escape. Scorching or smoke marks raise the urgency and require service.
-
Check 4
Look at the visible latch arm and hinge areas from the cool open position, without moving the latch, unlocking a hinge lock, removing hardware, or placing fingers in the closing path.
Expected result: The latch may appear bent, bowed, stuck in a lock position, or out of line; one hinge may look different from the other or the door may sit unevenly.
Next step: Photograph the latch and hinge area and request model-specific service, especially if the latch is not in its normal visible position or the hinges differ.
Stop if: Do not straighten, lubricate, pry, unlock, remove, or reseat a hinge or latch yourself.
Why this matters
Why: Whirlpool's official guidance identifies a latch arm that is bent or out of position as one possible reason a door cannot close, while a low or uneven door can indicate seating or hinge trouble. These observations do not authorize adjustment.
-
Check 5
Confirm from the controls and the cool door position that no bake, broil, self-clean, or other function is running and that the door is not being held open by an active cycle or warning condition.
Expected result: If the controls are off and the door still cannot close, the fault is mechanical or alignment-related until a technician confirms otherwise. If a cycle, lock indicator, heat, smoke, or odor remains, leave the appliance off and do not operate the latch.
Next step: Provide the display state, model, door photos, and the exact point of failure to a qualified appliance technician; keep the oven out of service.
Stop if: Stop all checks for heat, smoke, burning odor, sparks, damaged wiring, broken glass, or a door that moves unexpectedly.
Why this matters
Why: The door must close normally before any cooking use. A control display or latch state can vary by model, so do not initiate a cycle to test it.
Use your observations
Decision map
Find the observation that best matches what you see, then follow the next safe action.
-
PATH 01Safety boundary
What you see
The oven is hot, smoking, smells burned, sparks, has cracked or loose glass, or the door moves unexpectedly.
Do this next
Stop use, keep clear, and follow appropriate fire or emergency guidance. Arrange professional inspection after the immediate hazard is controlled.
Why this path and its safety boundary
Safety stop: Do not touch the door, latch, glass, controls, or internal parts to force a shut position.
-
PATH 02Safety boundary
What you see
A plainly visible loose item appears to block the door path while the oven is fully cool.
Do this next
Document its location and follow the exact model manual or ask a technician; do not force, scrape, or reach into a hinge or pinch area.
Why this path and its safety boundary
Safety stop: Stop if the item is hot, trapped, sharp, or not safely accessible without tools or pressure.
-
PATH 03Safety boundary
What you see
The door is crooked, one side is lower, the gasket is displaced, the frame is bent, or a hinge/latch looks different or damaged.
Do this next
Keep the appliance off and arrange medium-priority appliance service with clear photos and the model identifier. Do not attempt hinge or latch adjustment.
Why this path and its safety boundary
Safety stop: Do not use the oven with the door ajar, push harder to overcome resistance, or remove the door.
-
PATH 04Safety boundary
What you see
The door looks aligned but still will not close or latch after safe visual checks.
Do this next
Treat the cause as unresolved and request model-specific service; provide the point of resistance and whether it began after cleaning, moving, or door work.
Why this path and its safety boundary
Safety stop: Do not repeat closing attempts, start a cooking or self-clean cycle, or bypass a latch or door switch.
Helpful context
Understand the symptom
A door that will not close can be blocked by an accessible item, a latch that is out of position, a gasket or frame problem, a door that is not seated correctly, or a damaged hinge. Those possibilities look similar from the front and vary by model. Manufacturer support pages use the exact model manual for door information, so a visible symptom should guide the service handoff rather than become an improvised repair.
Do these checks only with the oven switched off and fully cool. Keep the door supported in its normal open position while observing it; do not lift it, push past resistance, release hinge hardware, or attempt a cooking or self-clean cycle. An oven that cannot close properly is not ready for use because heat and the door safety system may not behave as intended.
Only after diagnosis
Potential parts
- oven door hinge
Consider this category only if the model-specific diagnosis confirms a bent, broken, or improperly seated hinge is causing the uneven door or closing failure.
Confirm the complete oven model and hinge design before ordering; do not remove or reseat a hinge as a diagnostic experiment. - oven door gasket
Consider this category only when the exact model documentation or a technician confirms that a torn, displaced, or hardened gasket is preventing the door from sealing.
Match the exact model and gasket routing; a gasket is not a substitute for a bent door, frame, latch, or hinge repair. - oven door latch
Consider this category only after the visible latch position and model-specific diagnosis show a latch fault rather than an obstruction or door-alignment problem.
Verify the model and latch configuration before ordering; never bypass, pry, or adjust the latch to make the oven operate.
When checks do not resolve it
Need a professional?
Arrange appliance service when the cool oven door will not close or latch, the gap is uneven, the door sits low, the gasket or glass is damaged, or the latch or hinge looks abnormal. Escalate immediately for heat, smoke, burning odor, sparks, or broken glass.
Common questions
FAQ
Can I keep using the oven with the door slightly open?
No. Keep the oven off until the door closes and latches normally. An open or misaligned door can change heat containment and may indicate a hinge, latch, gasket, frame, or glass problem.
Should I push harder to close the oven door?
No. Force can worsen a bent hinge, latch, frame, gasket, or glass problem. Observe the cool door and arrange model-specific service instead.
What should I check when the oven door will not close?
When the oven is fully cool, observe the door gap and level, visible obstructions, gasket and glass, frame, latch, and hinge areas. Do not move hinge hardware or use a tool to make the door close.
When is this an urgent safety issue?
Treat heat, smoke, burning odor, sparks, cracked or loose glass, an unexpectedly moving door, or a fire as an immediate stop-use condition. Keep clear and follow appropriate emergency guidance before arranging repair.
Read the exact guide
Official sources
- Range & Wall Oven - Oven Gasket Not Sealing ProperlyGE Appliances · Supports observing gasket, hinge, scorching, and smoke symptoms without assuming they apply to every brand or model.
- Cooking Fire Safety PictographsU.S. Fire Administration · Supports the stop-use boundary for an oven fire and the instruction not to open an oven door during a fire; it does not diagnose a door fault.
- Oven Door is Not Closing - Checking the LatchWhirlpool Product Help · Supports a cool, visual check of the visible latch and the need for model-specific manuals; it does not authorize latch adjustment or use with an open door.
- Oven Door Not Aligned - RangeWhirlpool Product Help · Supports observing an uneven or improperly seated door and using the model manual or service path; this article does not instruct the reader to reseat the door.
Community feedback
Share a repair observation
Share a plain-text repair observation. Accepted observations are published automatically; this page may take a moment to update.