
On this page
Start here
Quick answer
Start with the visible controls, freezer temperature display, ice bin, door closure, and water-dispenser or filter symptoms. A newly installed refrigerator may need time to cool and begin an ice cycle. If the ice maker is on but the freezer is cold and no ice is produced, do not remove panels or perform live electrical tests; arrange qualified refrigerator service. Shut off the refrigerator's water supply before any hose or water-connection service.
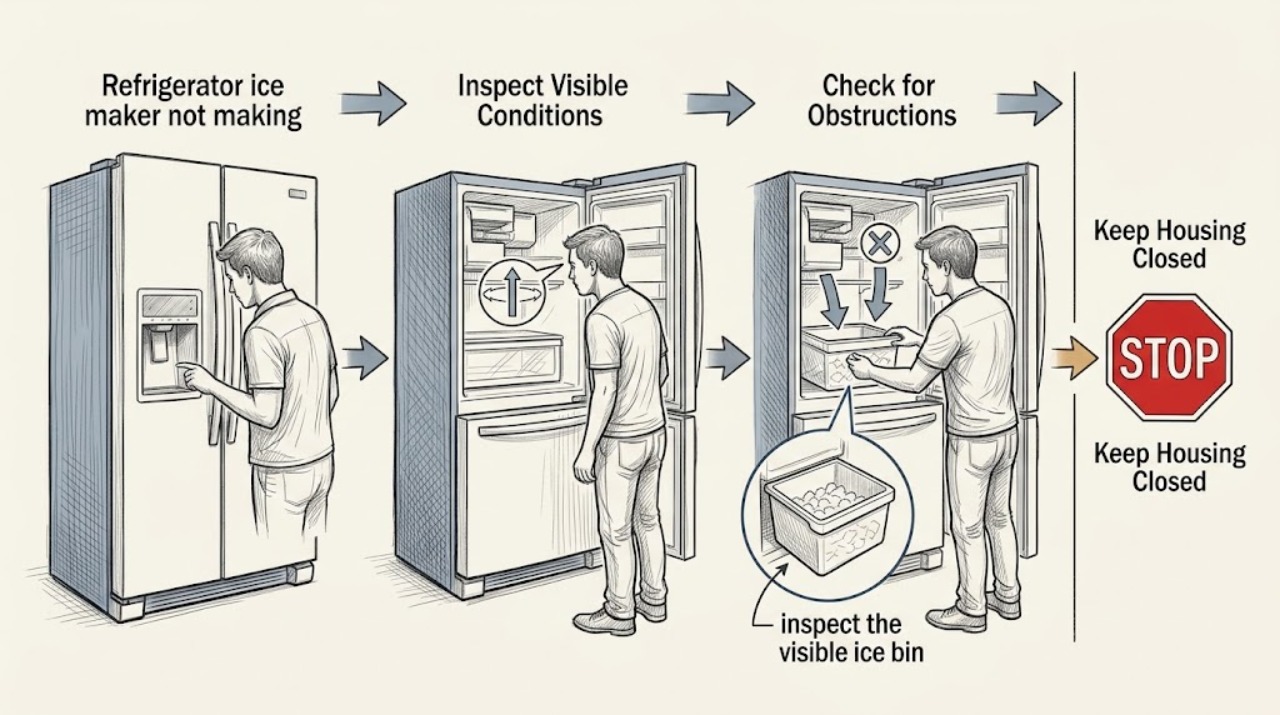
Work through in order
Diagnostic checks
Use only checks that match the exact appliance or system and its official guide.
-
Check 1
From normal access, look at the refrigerator control panel or the clearly visible ice-maker switch and confirm that ice production is enabled; note any displayed error message and whether the ice bin is full.
Expected result: The control may show ice off, a lock state, an error, or a full-bin condition; some models use a switch on the ice maker rather than the control panel.
Next step: Use the model's owner information to enable ice production or clear only an accessible overfilled bin, then continue with the temperature and water checks. Do not remove an ice-maker cover.
Stop if: Stop if the display shows a fault that requires service, the bin is frozen in place, or reaching the control would require disassembly.
Why this matters
Why: An off, locked, error, or full-bin state can pause production without proving that a part has failed.
-
Check 2
Read the freezer temperature shown on the control or use the refrigerator's normal user-facing temperature information, and observe whether the freezer door closes and its gasket appears to contact the cabinet all around.
Expected result: Record whether the freezer is warmer than the model's ice-production guidance, whether the door is ajar, or whether the gasket has a visible gap or obstruction.
Next step: Close the door, remove only an obvious packaging obstruction, and follow the model manual if a temperature adjustment is needed. Allow the manufacturer's stated recovery period before judging production again.
Stop if: Stop and arrange service if the freezer cannot maintain its specified temperature, the gasket or door is damaged, or frost and moisture suggest an internal airflow or sealed-system issue.
Why this matters
Why: A warm freezer or poor door seal can slow or prevent the freeze-and-harvest cycle; the exact acceptable setting is model-specific.
-
Check 3
With the door open only as long as needed, inspect the visible ice bin, chute, and any accessible end of the fill path for loose cubes or a plainly visible ice blockage; do not poke, pry, chip, or apply heat.
Expected result: Note whether cubes are packed around the outlet, whether the bin is empty, or whether the visible area is clear but no water has entered the mold.
Next step: Remove only loose cubes that lift out without force and replace the bin correctly. If a blockage is frozen in place or the fill path cannot be seen safely, leave it undisturbed and request service.
Stop if: Stop immediately if clearing it would require a tool, cover removal, sharp object, heat, force, or contact with wiring.
Why this matters
Why: A packed or visibly blocked outlet can prevent harvesting, while an empty mold with a clear visible path points toward a water, control, or internal mechanism question rather than a confirmed part failure.
-
Check 4
Use the refrigerator's normal water dispenser, if fitted, and observe its flow, while also noting the filter indicator and any visible kink or leak at the accessible supply line without moving the appliance.
Expected result: Water may flow normally, flow slowly, stop, or show a filter warning; the refrigerator may also have no dispenser even though the ice maker uses a water line.
Next step: Follow the model instructions for a user-accessible filter change only if the filter is due and the housing operates normally. Before touching any hose, valve, or water connection, shut off the refrigerator water supply; then use a qualified technician for a leak, kink that cannot be safely corrected, or uncertain connection.
Stop if: Stop for any leak, water near electrical equipment, a supply shutoff that will not close, or a hose that would require pulling the refrigerator out or disconnecting it.
Why this matters
Why: Slow or absent dispenser flow can indicate a restricted filter or supply problem, but it does not by itself identify the ice-maker valve or another internal part.
-
Check 5
Write down when ice production stopped and whether it followed installation, a power interruption, a filter change, a temperature change, or a door-ajar event; after correcting only a visible setting or bin issue, observe whether the model's stated ice-production interval passes.
Expected result: Production may resume after the manufacturer's initial or recovery interval, or remain absent even though the control is on, the freezer is cold, the bin is clear, and water service appears normal.
Next step: Arrange qualified appliance service and provide the model, control state, freezer reading, bin and visible blockage observations, dispenser/filter result, and the timing history. Do not run an undocumented test mode or live electrical measurement.
Stop if: Stop using the ice maker and seek service sooner for a water leak, repeated clicking or buzzing with no water, burning smell, damaged cord, abnormal heat, or any electrical concern.
Why this matters
Why: A recent installation or operating change can explain a delay; persistent no-ice after the visible checks makes an internal control, valve, fill path, or ice-maker mechanism fault more likely, but does not identify which part.
Use your observations
Decision map
Find the observation that best matches what you see, then follow the next safe action.
-
PATH 01Next step
What you see
Ice production is visibly off, locked, or paused by a full bin.
Do this next
Use the model's normal control procedure or clear only loose, accessible ice; then allow the model's stated recovery interval. If the state returns, request service.
-
PATH 02Next step
What you see
The freezer is warm, the door does not seal, or the symptom began after installation or a door-ajar event.
Do this next
Correct the visible obstruction or follow the model's temperature guidance, then reassess after the specified recovery period. Persistent temperature or seal problems need appliance service.
-
PATH 03Next step
What you see
The visible ice path is blocked or frozen and cannot be cleared without tools, heat, or cover removal.
Do this next
Leave it intact and arrange qualified service; probing or heating can damage the ice maker or create a water leak.
-
PATH 04Next step
What you see
The dispenser is slow or absent, the filter is flagged, or the visible supply line has a problem.
Do this next
Treat this as a possible water-flow issue, not a confirmed part diagnosis. Shut off water before any hose or connection service and use a technician for leaks, shutoff problems, or inaccessible connections.
-
PATH 05Next step
What you see
The control is on, the freezer is cold, the bin and visible path are clear, and no ice appears after the stated interval.
Do this next
Stop DIY troubleshooting and provide the recorded observations to a qualified appliance technician for internal diagnosis.
Helpful context
Understand the symptom
What the symptom usually tells you
An ice maker needs an enabled control, a sufficiently cold freezer, a clear harvest path, and water flow. The same no-ice symptom can come from a setting, a full or jammed bin, a door or temperature problem, a restricted filter or supply, or an internal ice-maker fault. The checks below are limited to visible, normal-access observations; the model manual controls the exact button names and settings.
Keep the check safe
Do not remove covers, probe the ice maker, chip ice with a sharp object, heat a frozen fill tube, or test wiring while energized. If a water hose or connection must be handled, close the refrigerator water shutoff first and stop if it will not close, leaks, or is hard to reach. Water near electrical equipment, a burning smell, or a damaged cord is a reason to stop using the appliance and obtain professional help.
Only after diagnosis
Potential parts
- refrigerator ice maker assembly
Consider this category only if a qualified diagnosis confirms the ice-maker mechanism or control is not completing its cycle after the visible control, temperature, blockage, and water checks.
Match the complete refrigerator model and revision; appearance alone does not establish fit. - refrigerator water inlet valve
Consider this category only if service confirms a valve or water-entry fault after separating it from low household flow, a restricted filter, and a blocked supply line.
Confirm the refrigerator model, valve configuration, connector style, and service diagnosis before ordering; do not perform a live electrical test. - ice maker fill tube
Consider this category only if a technician confirms that the fill tube is damaged or obstructed and the water supply and valve are otherwise suitable.
Match the exact model and tube routing; water must be shut off before any connection service.
When checks do not resolve it
Need a professional?
Arrange qualified refrigerator service when no ice persists after the visible checks, an ice blockage cannot be safely cleared, the freezer or door cannot maintain the model's conditions, or an internal control, valve, fill path, or ice-maker fault is suspected.
Have this ready
- Provide the refrigerator model, control or error state, freezer display reading, bin and visible blockage observations, dispenser and filter result, any visible leak, and when production stopped.
Common questions
FAQ
Why does a refrigerator stop making ice even though it is still cold?
The ice maker may be off or locked, the bin or visible harvest path may be blocked, water flow may be restricted, or the ice-maker mechanism may have a fault. Check only visible controls and conditions first; do not assume a specific part without a diagnosis.
Can a filter or water supply issue stop the ice maker?
Yes. A restricted filter, low flow, kinked line, or closed supply can reduce or stop water entry. Follow the model's filter instructions if the filter is user-accessible, and shut off water before any hose or connection service.
Should I run an ice-maker test or remove its cover?
Not as a general user step. Test modes and access procedures vary by model and may expose wiring, moving parts, or water. Use the owner information or have a qualified technician perform internal diagnosis; do not do live electrical testing.
When should I stop troubleshooting and request appliance service?
Request service when no ice persists after the visible checks and the model's recovery interval, or sooner for a leak, a frozen blockage that needs tools or heat, a damaged door or cord, burning smell, abnormal heat, or water near electrical equipment.
Read the exact guide
Official sources
- Refrigerator - Icemaker Not Producing IceGE Appliances · Manufacturer guidance for GE refrigerators; controls and temperature behavior depend on model.
- Not Making Ice - Side by Side RefrigeratorWhirlpool Product Help · Manufacturer guidance for Whirlpool side-by-side refrigerators; control layout and exact requirements vary by model.
- LG Refrigerator – Why is My Refrigerator Not Making Ice?LG USA Support · Manufacturer troubleshooting flow for LG refrigerators; model-specific controls and recovery intervals apply.
Community feedback
Share a repair observation
Share a plain-text repair observation. Accepted observations are published automatically; this page may take a moment to update.