
On this page
Start here
Quick answer
If a gas stove burner did not light, turn that control to OFF immediately and stop trying to ignite it. If you smell gas, do not operate electrical switches, flames, or other ignition sources; leave the area and follow the gas utility or emergency instructions. After the appliance is cool and power is isolated as the owner manual directs, a safe external check can distinguish one burner from an all-burner issue and can look for a wet, dirty, wrong, or mis-seated burner cap. Only remove or clean a burner cap or ports when the exact manual permits it, and do not enlarge ports or open the igniter, switch, or gas valve. If there is no click or spark, gas odor, continued unburned gas, a damaged igniter, or no improvement after the permitted check, stop and arrange qualified appliance service.
Before you begin
Safety first
- Turn the attempted burner OFF immediately and do not repeat ignition. If gas odor is present, do not operate electrical equipment or other ignition sources; leave and seek emergency or gas-utility guidance. Only inspect or clean a removable cap when the appliance is cool, power is isolated as directed, and the exact manual permits it; do not service igniters, switches, valves, wiring, or gas lines.
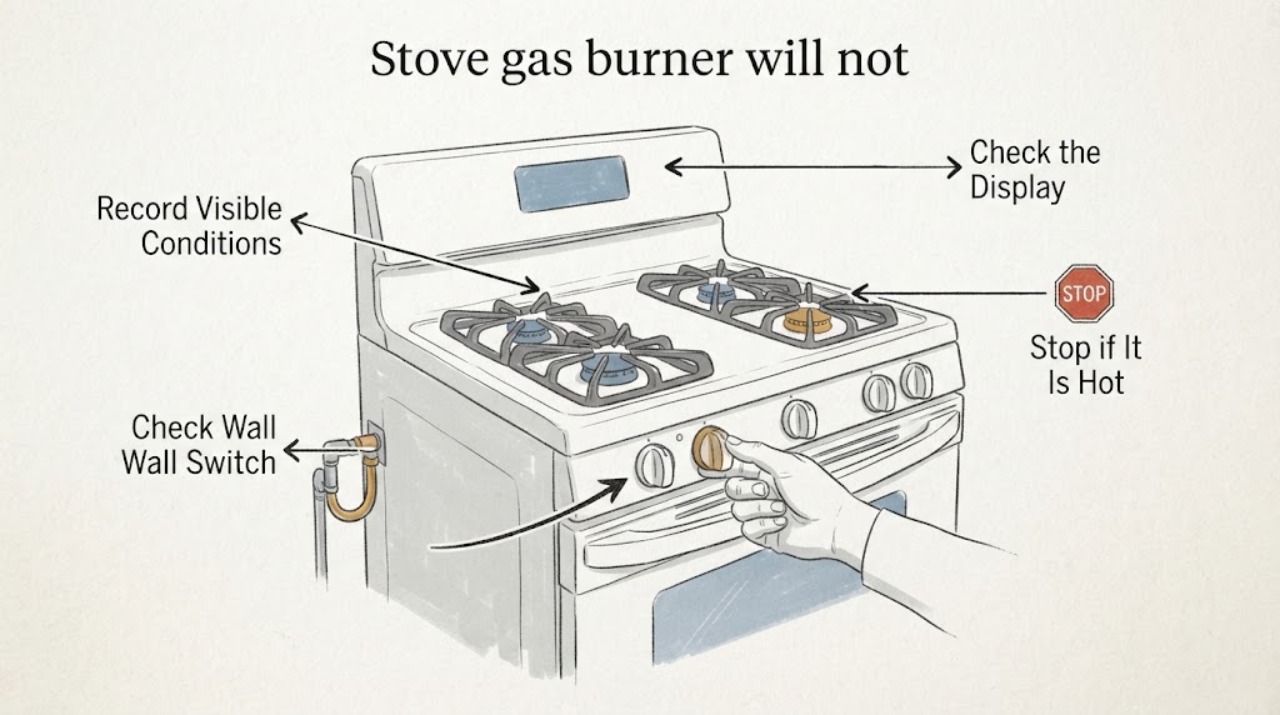
Work through in order
Diagnostic checks
Use only checks that match the exact appliance or system and its official guide.
-
Check 1
If the burner did not ignite, turn its control to OFF immediately if safely reachable, stop all ignition attempts, and from a safe position determine whether gas odor remains; do not operate electrical switches or appliances if gas is present.
Expected result: There may be no lingering odor, a persistent gas odor, an abnormal odor, or uncertainty about whether the control is fully OFF.
Next step: For odor, suspected unburned gas, or uncertain OFF status, leave the area and follow local gas utility or emergency instructions; otherwise keep the stove unused while documenting the symptom.
Stop if: Stop immediately for gas odor, hissing, flame outside the burner, smoke, heat where it should not be, or inability to place the control safely at OFF.
Why this matters
Why: Persistent or uncertain gas release is an immediate safety condition, not a routine cleaning issue. Electrical switching or another ignition source can worsen a gas emergency.
-
Check 2
Without repeating ignition, record the last safe attempt: which burner was selected, whether any click or spark was heard or seen, whether the burner briefly lit, and whether other burners had previously operated normally.
Expected result: Only one burner may fail, several burners may fail, clicking may be present without a flame, or there may be no click or spark at all.
Next step: Write down the pattern and model marking, then proceed only to a cool, power-isolated external inspection if the owner manual allows it; do not make another ignition attempt.
Stop if: Stop for any gas odor, continued unburned gas, a flame that goes out unexpectedly, or a need to operate the knob or appliance again to obtain the observation.
Why this matters
Why: One-burner failure makes a local cap, port, electrode, or control issue more plausible; multiple burners failing together raises a shared power or gas-supply question. Click versus no click changes whether ignition or gas delivery needs professional diagnosis.
-
Check 3
After the cooktop is fully cool and electrical power is isolated as the owner manual directs, inspect the failed burner’s visible cap, base, and electrode area; remove the cap only if the exact manual permits it and do not open the igniter or gas-control area.
Expected result: The cap may be wet, dirty, the wrong cap for the base, off-center, rocking, or covering ports; the visible electrode may be dirty or damaged, or the area may look normal.
Next step: Use only the exact manual’s cool-appliance cleaning and reseating method, then stop; if the manual does not permit the step or the electrode is damaged, arrange service.
Stop if: Stop for a cracked or damaged burner part, a cap that will not seat, a blocked port that would require enlarging or force, exposed wiring, gas odor, or any need to access the valve or igniter internally.
Why this matters
Why: A wet, blocked, wrong, or mis-seated cap can prevent proper ignition. A normal exterior with no click or a damaged electrode points to a repair issue rather than more cleaning.
-
Check 4
From a safe position with the stove still unused, compare the affected burner with the other burner locations and record whether the cap is centered and flush, the cap and base are matched, and the appliance has any external power indication; do not manipulate the gas supply or repeatedly turn controls.
Expected result: The affected cap may differ in size or seating, all caps may appear correctly placed, only one burner may fail, or multiple burners may fail with no click.
Next step: Provide the comparison and model information to a qualified appliance technician; do not reset, open, or bypass internal controls to force an ignition.
Stop if: Stop for gas odor, a tripped condition that would require unsafe access, a damaged control, a flame outside the burner, or any uncertainty about safely checking the appliance.
Why this matters
Why: A local cap or port mismatch supports the limited manual-permitted inspection path. A correct visible setup with multiple failures or no clicks suggests a shared power, ignition, or gas-supply fault requiring service.
-
Check 5
After one permitted cool-down, cleaning, and cap-reseat check, decide whether the burner has a documented, stable ignition without any gas odor; do not perform another test solely to confirm the result.
Expected result: The burner may remain unlit, may have no click or spark, may light briefly and go out, or may be operating normally with no odor after the permitted check.
Next step: Keep the stove out of use and schedule appliance service for failure, no click, damaged ignition parts, or recurring symptoms; provide the full observation record.
Stop if: Stop all use for gas odor, delayed ignition, flame outside the burner, smoke, abnormal heat, sparking, or a burner that cannot be controlled predictably.
Why this matters
Why: Failure after the limited check or any unstable ignition requires a professional diagnosis. A normal result does not justify bypassing the manual or continuing to use a damaged control.
Use your observations
Decision map
Find the observation that best matches what you see, then follow the next safe action.
-
PATH 01Next step
What you see
Gas odor remains after the unlit attempt or the OFF position is uncertain.
Do this next
Do not operate electrical switches, flames, or ignition sources; leave the area and follow local gas utility or emergency instructions.
-
PATH 02Next step
What you see
Only one burner fails and the visible cap is wet, dirty, wrong, off-center, or not flush.
Do this next
After full cooling and power isolation, use only the exact manual’s permitted cap cleaning and reseating method; do not enlarge ports or access the igniter internally.
-
PATH 03Next step
What you see
The burner did not click or spark during the prior safe attempt.
Do this next
Do not repeat ignition; arrange qualified appliance service after recording the burner, model, and power-status observations.
-
PATH 04Next step
What you see
The burner still fails, lights briefly then goes out, or shows delayed or unstable ignition after the one permitted check.
Do this next
Leave the stove out of use and call a qualified appliance technician; provide the symptom record and photos of the cool external burner parts.
Helpful context
Understand the symptom
Stop unlit gas first
An unlit burner can release gas, so turn the attempted burner control to OFF immediately if it is safe to do so and do not repeat the ignition attempt. If gas odor is present, do not operate lights, fans, switches, portable devices, or other electrical equipment in the area; leave and follow local gas utility or emergency guidance. Do not use a flame to find a leak.
Use the symptom pattern, not repeated testing
Record what happened during the one attempted start: whether there was clicking or a visible spark, whether only one burner failed, and whether gas odor remained after the control was turned OFF. A single-burner failure points toward that burner’s cap, ports, electrode, or related control; several burners failing together raises a power or gas-supply question. Do not keep turning the control to Lite to collect more evidence.
Inspect only when cool and isolated
When the cooktop is cool and electrical power has been isolated as directed by the owner manual, check the visible burner cap and base. If the manual permits removal, look for a wet or dirty cap, the wrong cap on the base, blocked openings, or a cap that is not centered and flush. Use only the manual’s cleaning method; do not poke, enlarge, bend, or alter a gas port, and do not open the igniter or gas-control area.
Escalate a failed ignition
If the burner still will not light after the single permitted cool-down, cleaning, and cap-reseat check, or if the igniter does not click or spark, leave the stove out of use and arrange qualified service. Give the technician the burner location, click or spark observation, gas-odor status, model information, and whether other burners were affected.
Only after diagnosis
Potential parts
- gas stove igniter
Consider this only when the prior safe observation shows no click or spark and qualified diagnosis identifies the igniter as the failed component.
Confirm the exact stove model, burner position, igniter design, and manufacturer fit; do not open or test ignition wiring yourself. - stove burner cap
This may apply when the visible cap is cracked, wrong for the base, warped, or cannot seat flush after the manual-permitted cool inspection.
Match the exact model, burner location, cap shape, and manufacturer documentation; a similar-looking cap may disrupt ignition and flame pattern. - stove ignition switch
This is relevant only when qualified diagnosis links a no-click or no-spark symptom to the ignition switch or control circuit rather than the cap or igniter.
Confirm the exact model, switch position, ignition system, and electrical fit through a qualified technician; no live testing or internal access.
When checks do not resolve it
Need a professional?
Call a qualified appliance technician when the burner does not click or spark, the gas odor persists, the burner will not light after the one permitted cool inspection, ignition is delayed or unstable, multiple burners fail, a cap or electrode is damaged, or the gas, igniter, switch, or valve area would need internal access. For a gas odor, leave the area and follow local gas utility or emergency guidance.
Safety scope: Turn the attempted burner OFF immediately and do not repeat ignition. If gas odor is present, do not operate electrical equipment or other ignition sources; leave and seek emergency or gas-utility guidance. Only inspect or clean a removable cap when the appliance is cool, power is isolated as directed, and the exact manual permits it; do not service igniters, switches, valves, wiring, or gas lines.
Have this ready
- Provide stove brand and full model marking, failed burner location, whether the last safe attempt clicked or sparked, whether one or multiple burners were affected, cap seating and moisture observations, gas-odor status after OFF, power-status observations, and photos of the cool external burner area.
Common questions
FAQ
What should I do first when a gas stove burner will not light?
Turn the burner control to OFF immediately and stop trying to ignite it. If you smell gas, do not operate electrical switches or other ignition sources; leave and follow local gas utility or emergency instructions.
Why does one gas burner fail while the others work?
A local cap, burner port, electrode, or control issue is possible, especially when other burners were operating normally. After cooling and power isolation, inspect only the visible cap and base using the exact manual’s permitted method; do not open the igniter or gas-control area.
Can I keep turning the knob to Lite to see whether it sparks?
No. Do not repeat ignition attempts after an unlit burner, because unburned gas can accumulate. Record whether the prior safe attempt clicked or sparked and arrange service if there is no click, no spark, gas odor, or continued failure.
Can a dirty or misplaced burner cap prevent ignition?
Yes, a wet, dirty, wrong, off-center, or poorly seated cap can interfere with ignition. Inspect or clean it only after the cooktop is cool, power is isolated as directed, and the exact owner manual permits the step; never enlarge or distort gas ports.
Read the exact guide
Official sources
- Gas Range & Cooktop - Burners Won't LightGE Appliances · Supports using click or spark as a branch, checking cool removable burner components when the manual permits, matching caps to bases, and arranging service when ignition still fails.
- Burner Not Lighting - Gas CooktopWhirlpool · Supports checking a cool, correctly matched and seated burner cap and avoiding port enlargement; exact cleaning steps remain model-dependent.
- Gas Range & Cooktop - Surface Burners Not Clicking, Not Trying to IgniteGE Appliances · Supports power isolation before maintenance, recording correct burner selection and cap placement, and service escalation when igniters do not click.
- None of the Burners are Lighting - Gas CooktopWhirlpool · Supports separating an all-burner failure from a local burner issue and treating continued power or gas-supply problems as service matters.
Community feedback
Share a repair observation
Share a plain-text repair observation. Accepted observations are published automatically; this page may take a moment to update.