
On this page
Start here
Quick answer
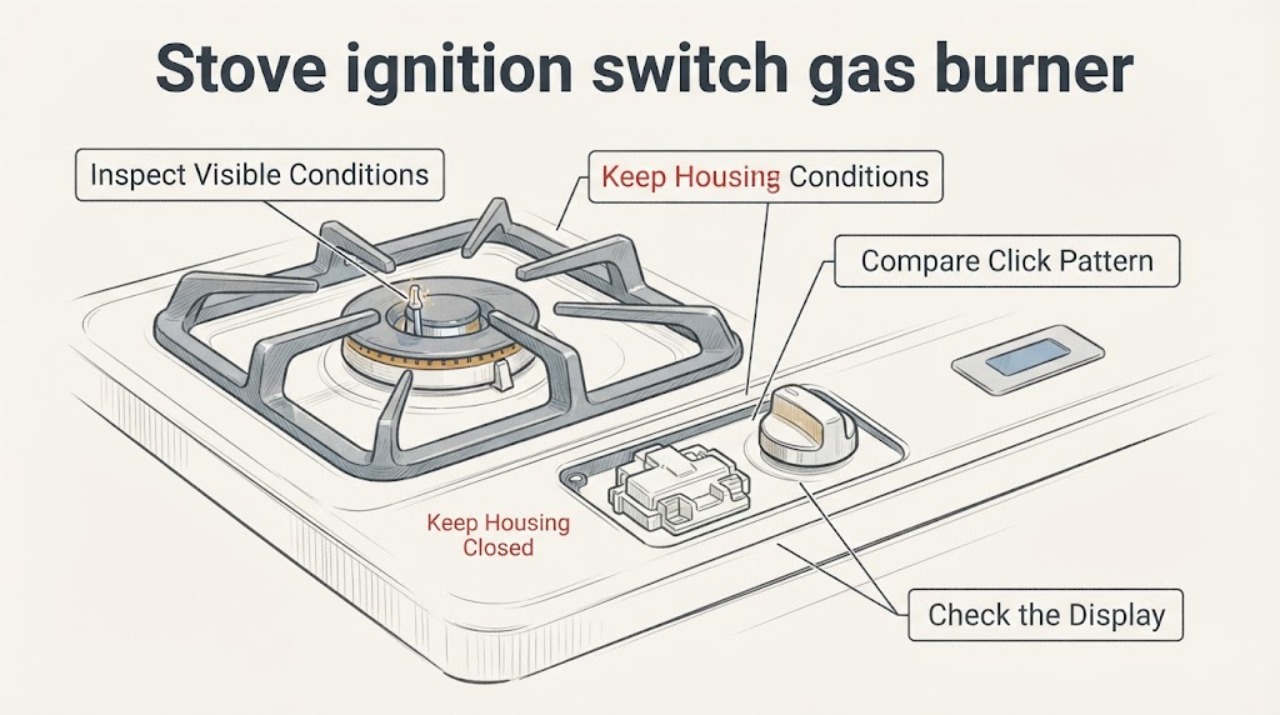
A gas stove burner that will not light may have no spark from the ignition switch, lost appliance power, a knob that is not reaching the Lite or Ignite position, a wet or dirty burner, a misplaced cap or head, blocked ports, a closed gas supply, or a failed ignition or gas-control part. Turn the knob back to OFF promptly; do not keep releasing gas while waiting for a spark. If gas odor remains, leave the area and use the appropriate gas-emergency procedure. With the appliance off, cool, and safely disconnected when the manual requires it, note whether one burner or all burners click, inspect the cap and visible ports, and confirm the correct burner and knob position. Do not open the control panel, adjust a gas valve, probe or enlarge ports, or replace an ignition switch without qualified appliance service.
Before you begin
Safety first
- This article supports ordinary-access observation and model-approved cleaning or cap reassembly only. Do not open panels, adjust gas controls, handle wiring, bypass ignition, probe ports, or attempt internal part replacement.
Work through in order
Diagnostic checks
Use only checks that match the exact appliance or system and its official guide.
-
Check 1
Turn the affected control to OFF as soon as the burner does not light, keep the area ventilated without operating electrical switches if gas odor is present, and observe only from a safe position.
Expected result: Record whether there is a gas smell, delayed ignition, a visible flame, continuing clicking, smoke, or no odor; note whether gas odor remains after the knob is OFF.
Next step: If gas odor remains, leave the area and follow the local gas-emergency procedure; otherwise keep the burner off and continue only after the appliance is cool and safe.
Stop if: Do not keep turning the knob, use a match or lighter to force ignition, relight repeatedly, or operate the burner when gas odor, smoke, or abnormal flame is present.
Why this matters
Why: Unburned gas or a delayed ignition can create a fire or explosion hazard. No odor with no click supports an ignition or power check, while clicking with no flame focuses attention on burner moisture, alignment, ports, gas supply, or a control fault.
-
Check 2
With all controls OFF, identify whether the affected burner produces a click or spark when its knob is moved normally to Lite, and compare the sound pattern with another burner without repeatedly releasing gas.
Expected result: Record no click, one burner clicking, all burners clicking, clicking that continues after the knob is returned OFF, or a spark that is visible but does not light the gas.
Next step: Turn the knob OFF and check appliance power and the correct Lite position. Arrange service when clicking is absent after safe basic checks or persists with all knobs OFF.
Stop if: Do not remove the control panel, touch an electrode, bypass an ignition switch, or keep a knob in Lite while no flame is present.
Why this matters
Why: No click on one burner points toward that control's switch, electrode, wiring, or local ignition path. No click on all burners points toward appliance power or shared ignition control. Continued clicking after OFF is an abnormal condition; a visible spark without ignition points toward gas flow, burner alignment, moisture, or ports.
-
Check 3
Confirm that the appliance has normal power, the correct burner is selected, and the knob reaches the model's Lite or Ignite position before attempting any further ignition; do not access wiring.
Expected result: Record whether the oven or other controls work, whether the breaker or fuse is tripped, whether the knob pointer aligns with Lite, and whether the knob feels loose, binds, or fails to reach its stop.
Next step: Restore only a clearly tripped breaker or disconnected plug when safe and permitted, then make one controlled observation; if power is normal but ignition remains absent, stop use and arrange service.
Stop if: Do not repeatedly reset a breaker, remove the knob to reach an adjustment, or continue trying to ignite a burner that is releasing gas without a reliable spark.
Why this matters
Why: Power loss can disable electric ignition even though gas supply is present. A misaligned or loose knob can fail to actuate the ignition switch, while normal knob movement with no click makes an internal switch or ignition circuit more likely.
-
Check 4
With the controls OFF, power disconnected as the manual requires, and the burner fully cool, inspect the removable burner cap and head for correct matching, flat seating, visible moisture, spill debris, and an unobstructed visible ignition area.
Expected result: Classify the assembly as correctly seated and dry, displaced, mismatched, wet after cleaning, visibly dirty, or damaged; note whether the igniter appears misaligned without touching it.
Next step: Clean, dry, and re-seat only the parts and method specified in the exact owner manual, then make one brief ignition attempt; arrange service if it still does not light.
Stop if: Do not probe, drill, enlarge, bend, or scrape the ports or electrode, use oven cleaner or bleach, or operate with a damaged or missing cap.
Why this matters
Why: A cap or head that is mismatched or not flat can prevent gas from reaching the spark correctly. Moisture or debris can block ignition ports. A correctly assembled, dry burner with a reliable spark but no flame makes gas supply or a deeper control issue more likely.
-
Check 5
After the safe assembly and power checks, determine whether the failure affects one burner or every surface burner, and whether the oven or other gas functions operate normally; do not use this comparison to keep a faulty burner open.
Expected result: Record one burner failing, several burners failing, no burners clicking, all burners clicking but not lighting, or the oven and surface burners both lacking gas or ignition.
Next step: Use the pattern to give the technician a focused history; check only a known accessible appliance gas shutoff or model-approved power connection, and arrange service if more than one burner fails or the cause is uncertain.
Stop if: Do not remove gas piping, adjust regulators, open the appliance, or keep trying burners when gas is present without dependable ignition.
Why this matters
Why: One-burner failure favors a local cap, head, electrode, switch, wiring, or gas-port issue. All-burner failure favors appliance power, shared ignition control, main gas supply, or a common shutoff; an oven that works while surface burners do not can indicate a surface ignition or control problem.
-
Check 6
Prepare a service record with the stove model, fuel type, affected burner, knob behavior, click or spark pattern, cap and head position, recent spill or cleaning, power status, gas-supply observations, and any gas odor or continuing click.
Expected result: Confirm whether the burner can be returned to OFF, whether any other burner works, whether the igniter clicks, and whether the safe manual-approved cleaning or reassembly changed the result.
Next step: Leave the appliance out of use when ignition is unreliable or gas odor is present, and provide the model-specific record to a qualified appliance or gas technician.
Stop if: Do not restore gas or power merely to reproduce an unsafe symptom, and do not use another burner if the appliance has gas odor, smoke, arcing, or repeated ignition activity with controls OFF.
Why this matters
Why: The record separates a local burner assembly problem from a shared ignition or gas-supply issue and helps a technician distinguish an ignition switch from an electrode, spark module, gas valve, or burner obstruction.
Use your observations
Decision map
Find the observation that best matches what you see, then follow the next safe action.
-
PATH 01Safety boundary
What you see
Only one burner produces no click or spark when its knob is placed in Lite, while power and another burner’s ignition work normally.
Do this next
Keep that burner OFF and arrange qualified appliance service for the local ignition path; provide the exact model and comparison result.
Why this path and its safety boundary
Why it matters: A local ignition switch, electrode, wiring path, knob interface, or burner-control fault is more likely than a whole-appliance power loss.
Safety stop: Do not open the console, touch the electrode, bypass the switch, or continue releasing gas to test it.
-
PATH 02Safety boundary
What you see
No surface burner clicks, but the stove's power or oven operation has not yet been checked.
Do this next
Confirm normal power and a known accessible connection without opening the appliance; if power is normal and no burners click, arrange service.
Why this path and its safety boundary
Why it matters: A tripped breaker, disconnected power, shared spark module, or broader appliance control issue is more likely than several simultaneous dirty burner ports.
Safety stop: Do not repeatedly reset the breaker or attempt manual ignition while the ignition system is unavailable unless the exact manual and local safety procedure expressly support it.
-
PATH 03Safety boundary
What you see
The selected burner clicks or sparks, but no flame appears and there is no continuing gas odor after the knob is returned OFF.
Do this next
With the appliance cool and controls OFF, follow the model manual for drying, visible cleaning, and correct cap or head placement; arrange service if the spark remains ineffective.
Why this path and its safety boundary
Why it matters: A wet or dirty burner, mismatched or displaced cap, blocked ports, closed gas supply, or local gas-flow fault is more likely than a no-power ignition-switch failure.
Safety stop: Do not repeatedly turn the knob to release gas, use an improvised igniter, probe or enlarge ports, or adjust the gas valve.
-
PATH 04Safety boundary
What you see
All surface burners fail, or all burners click but none light, while the oven or other gas function also behaves abnormally.
Do this next
Stop attempts, verify only a known accessible main supply or power condition, and arrange qualified appliance or gas service for the common fault.
Why this path and its safety boundary
Why it matters: A common power, main gas-supply, shutoff, shared ignition-control, or appliance-control issue is more likely than one cap or local ignition switch.
Safety stop: Do not remove supply piping, adjust regulators, repeatedly cycle controls, or use any burner while gas flow and ignition are uncertain.
-
PATH 05Safety boundary
What you see
The failure began after a spill or cleaning, and the burner is wet, the cap or head is misplaced, or the electrode area is visibly contaminated.
Do this next
Disconnect power as the manual directs, let the parts dry completely, clean and re-seat them using the model instructions, and stop for service if ignition does not return.
Why this path and its safety boundary
Why it matters: Moisture, debris, or incorrect assembly is more likely, but the burner must not be operated until dry and correctly assembled.
Safety stop: Do not use liquid or harsh chemicals around the ignition system, bend the electrode, or ignite a wet or damaged burner.
-
PATH 06Safety boundary
What you see
Gas odor remains after the knob is OFF, ignition is delayed, or a burner continues clicking or attempting ignition abnormally.
Do this next
Leave the area, avoid flames and electrical switches, follow the local gas-emergency procedure, and do not return until the appliance is declared safe.
Why this path and its safety boundary
Why it matters: Unburned gas or a control or ignition safety fault is present; this is not a cleaning or part-shopping situation.
Safety stop: Do not relight, troubleshoot, operate electrical switches in the odor area, or restore gas or power yourself.
Helpful context
Understand the symptom
Start with the gas-and-spark distinction
A gas burner needs gas at the burner and a correctly positioned spark or ignition source. If you hear no click when the knob is turned to Lite, the issue is more likely power, ignition switch, spark module, wiring, or an interlock. If it clicks but no flame appears, the burner may be wet, dirty, misassembled, blocked, or not receiving gas. If gas odor is present without ignition, stop immediately and do not keep trying the knob.
A single failed burner and an all-burner failure point to different checks
When only one burner fails, the cap, head, electrode, port, local ignition path, or that control can be the focused area. When all surface burners fail, appliance power, the main gas valve, the shared spark-control system, or a broader supply issue becomes more likely. GE notes that some sealed designs intentionally spark at multiple electrodes when one burner is selected, so hearing several clicks does not necessarily mean several gas valves are open.
Cleaning and assembly must follow the model manual
Spills and cleaning can leave moisture in the ignition port or flame ports, while a cap or burner head on the wrong base can prevent proper ignition. With controls OFF and the appliance cool, inspect and clean only the parts and method described by the owner manual, then let them dry fully and restore the matching cap and head. Do not scrape, drill, enlarge, or distort ports, and do not press an electrode unless the exact manual explicitly instructs it.
The ignition switch is behind a professional-repair boundary
The knob and the ignition switch are not the same part. A knob can turn without actuating the switch correctly, while a switch, spark module, electrode, wiring, gas valve, or control board can fail even when the knob feels normal. Internal access exposes electrical and gas hazards, so a technician should identify the failed path before a replacement part is selected.
Safety boundary
Stop conditions
- Turn the knob to OFF promptly when a burner does not light; shut off gas as directed by the appliance's manual or local emergency procedure when unlit gas may be present.
- For persistent gas odor, smoke, abnormal flame, or suspected gas leak, leave the area, avoid flames and electrical switches, and contact the appropriate emergency gas service.
- Do not open the control panel, adjust a gas valve or regulator, bypass the ignition switch, handle internal wiring, or replace an igniter or spark module without qualified service.
- Do not probe, drill, enlarge, bend, or distort burner ports or electrodes, use harsh chemicals, or operate a wet, damaged, or incorrectly assembled burner.
- Do not keep cycling a knob, repeatedly reset power, or use an improvised ignition method when gas flow or the ignition system is unreliable.
Only after diagnosis
Potential parts
- gas stove igniter
Consider this class only after model-specific diagnosis confirms that the spark electrode or igniter is defective and the switch, power, spark module, cap, ports, and gas supply have been assessed.
Match the exact stove model, electrode geometry, lead, connector, mounting, and ignition design; do not select an igniter from the symptom alone or install it without qualified service. - stove burner cap
Consider this class only when the exact model's inspection confirms a cracked, warped, missing, or irreparably damaged cap after correct placement and cleaning have been ruled out.
Match the burner location, diameter, underside alignment, material, and exact model fit; a cap from another burner or stove can prevent ignition and alter flame behavior. - stove ignition switch
Consider this class only if service diagnosis confirms that the knob-operated ignition switch is not closing or is otherwise defective after power, knob fit, electrode, and spark-control checks.
Match the exact model, switch configuration, connector, shaft interface, and ignition system; internal replacement requires gas and electrical safety controls and qualified service.
When checks do not resolve it
Need a professional?
Arrange high-priority qualified appliance or gas service when a burner has no click after power and Lite-position checks, clicking continues with controls OFF, gas odor remains, a spark appears without ignition, all burners fail, the cap and burner are correctly dry and assembled but the burner still will not light, or any check would require control-panel, gas-valve, wiring, electrode, or ignition-switch access. Keep the appliance out of use until the ignition and gas-control system is verified safe.
Safety scope: This article supports ordinary-access observation and model-approved cleaning or cap reassembly only. Do not open panels, adjust gas controls, handle wiring, bypass ignition, probe ports, or attempt internal part replacement.
Common questions
FAQ
Why does my gas stove burner click but not light?
The burner may be wet or dirty, the cap or head may be misplaced, ports may be obstructed, gas supply may be unavailable, or the spark may not be reaching the gas correctly. Turn the knob OFF, let the burner cool, follow the model manual for cleaning and reassembly, and arrange service if it still clicks without lighting.
What if the gas burner makes no clicking sound at all?
Check that the correct burner is selected, the knob reaches Lite, and the appliance has power. If one burner has no click while others work, a local ignition switch, electrode, wiring, or control fault is more likely. If none click with normal power, arrange service rather than opening the panel.
Can a dirty or wet burner cap prevent ignition?
Yes. Moisture or debris in the ignition or flame ports, or a cap or head that is not correctly matched and seated, can prevent a spark from lighting gas. Clean and dry only according to the exact owner manual; do not probe, enlarge, or distort ports.
Can I replace the gas stove ignition switch myself?
Do not. The ignition switch is behind the control and associated with electrical and gas hazards. A technician should first distinguish it from the knob interface, electrode, spark module, wiring, gas valve, burner assembly, and supply problem.
What should I do if I smell gas after the burner fails to light?
Turn the knob OFF if you can do so safely, leave the area, avoid flames and electrical switches, and follow the local gas-emergency procedure. Do not keep trying to ignite the burner or return until the appliance and gas supply are declared safe.
Read the exact guide
Official sources
- Gas Range & Cooktop - Common Causes for Slow Ignition, No Ignition or Clicking on Surface BurnersGE Appliances · GE gas surface-burner support guidance; follow the exact owner manual for cleaning and electrode access.
- Gas Range & Cooktop - Electric Ignition for Surface BurnersGE Appliances · GE support article; ignition architecture varies by model, but persistent clicking with controls OFF is an unsafe service boundary.
- Gas Range & Cooktop - Surface Burners Not Clicking, Not Trying to IgniteGE Appliances · GE gas range and cooktop support guidance; exact model instructions control burner access and operation.
- None of the Burners are LightingWhirlpool Product Help · Whirlpool product-help guidance for gas cooktops; follow the exact model manual and qualified service boundary.
- What should I do if some or all of my burners are not lighting?Frigidaire · Frigidaire gas-range and gas-cooktop support guidance; exact model manual controls burner disassembly and cleaning.
Community feedback
Share a repair observation
Share a plain-text repair observation. Accepted observations are published automatically; this page may take a moment to update.