
On this page
Start here
Quick answer
A top-load washer that will not start because it does not recognize the lid as closed may have an obstructed or misaligned lid striker, a damaged lid switch probe or magnet, debris at the lock, or a model-specific lid-lock or control fault. First note whether the washer has display lights or any response, close the lid firmly without slamming it, and inspect only the visible striker, probe or magnet, and lock opening. Use a soft, damp cloth for external buildup, and follow the exact model's reset instructions only after disconnecting power in the manner specified by its documentation. Do not bypass the lid switch, probe a live connector, remove panels, or reach into a moving washer. If the lid still is not recognized, the washer trips power, smells hot, or has no safe way to disconnect or isolate it, stop and arrange appliance service.
Before you begin
Safety first
- This article covers identifying the no-start pattern, inspecting visible lid alignment and actuators, wiping external buildup with power disconnected as directed, and following the exact model's documented reset. Do not bypass the lid safety device, probe live wiring, remove panels, or work near energized equipment and water.
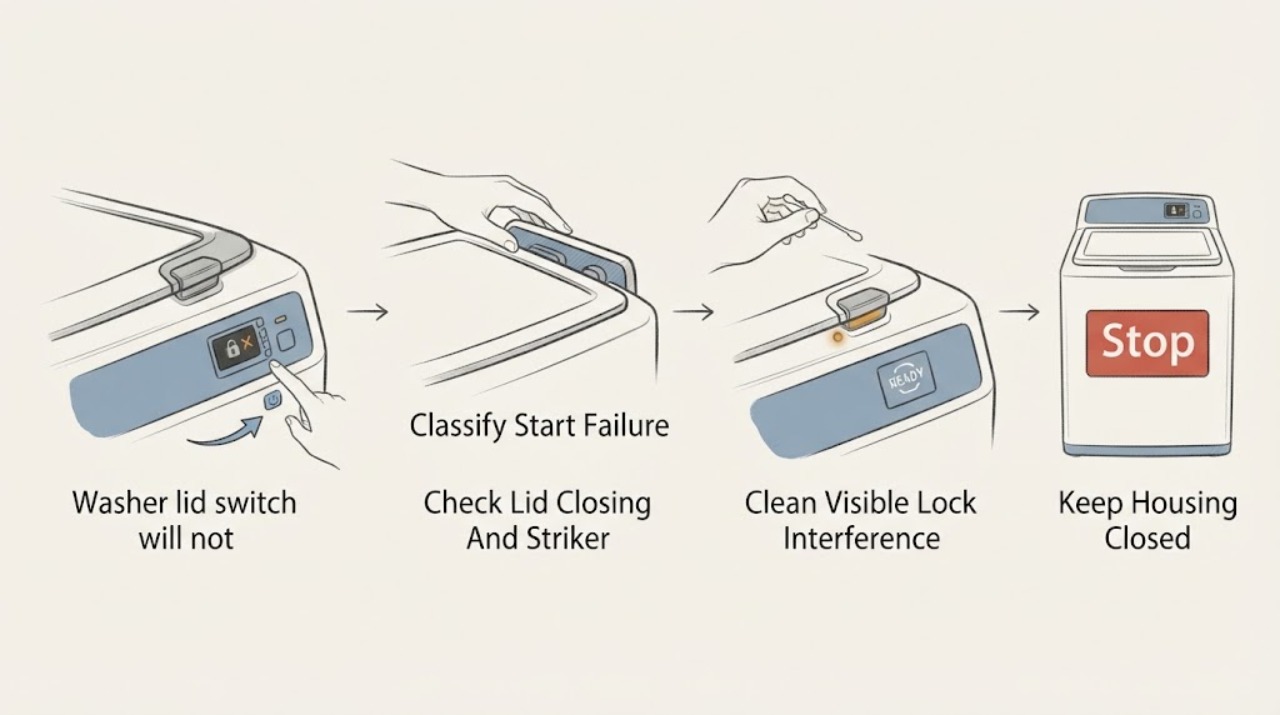
Work through in order
Diagnostic checks
Use only checks that match the exact appliance or system and its official guide.
-
Check 1
With the washer empty and the lid closed normally, select a familiar cycle and press Start once; note whether the display or indicator lights respond, whether the control accepts the selection, and whether the washer makes a lock click or other start-up sound.
Expected result: Record one of three patterns: no power or display, powered controls with no lid-recognition response, or a start attempt that locks or clicks and then stops.
Next step: Follow the matching branch below; if the display is dead, perform only safe external power checks and use service if power is present but the washer remains unresponsive.
Stop if: Do not open the control console, test live wiring, or reach into the washer to force a start.
Why this matters
Why: No display points first toward the outlet, plug, household protection, or appliance power path rather than the lid switch. A powered control with no lid response makes the lid striker, probe, magnet, lock, or related control path more likely. A click followed by no cycle may be a sensing or fault sequence that varies by model.
-
Check 2
Inspect the lid, hinge area, lid striker or latch tab, and washer top where the lid meets the cabinet; close the lid gently and confirm that it sits level and fully against the opening without clothing or packaging in the way.
Expected result: Look for a bent or loose striker, a missing probe or magnet, a lid that rocks or sits high, a bowed washer top, or an item preventing the lid from reaching the lock.
Next step: Remove only the visible obstruction, reseat a visibly loose external bumper if the model instructions permit it, and retry once; arrange service for a bent hinge, damaged striker, missing probe or magnet, or a lid that will not sit level.
Stop if: Do not bend the striker, tape the lid shut, hold down the switch, or bypass the lock to make the washer run.
Why this matters
Why: A lid that cannot reach the correct closed position can leave the switch or lock unactuated even when the lid looks shut. GE identifies lid bumpers, bumper tabs, the top cover, and the lid switch probe or magnet as model-dependent alignment points; Whirlpool likewise calls out lock-striker interference.
-
Check 3
With the washer disconnected from power according to the owner's instructions, inspect the visible lid-lock opening and striker for lint, detergent residue, packaging material, or a small garment edge; wipe external buildup with a soft, damp cloth and allow it to dry.
Expected result: Note whether the striker can enter the lock opening without rubbing and whether buildup was removed without damaging the plastic or finish.
Next step: Reconnect power only after the visible area is dry, close the lid normally, and make one start attempt; if the same lid indication or no-start condition remains, use the model-specific service path.
Stop if: Do not insert a screwdriver, wire, brush, or finger into the lock opening, spray liquid into it, or work inside the lock housing.
Why this matters
Why: Foreign material or wash-media buildup can prevent the lid lock from recognizing the closed position. Cleaning the accessible surface can remove an obstruction, but it cannot prove that the switch, lock actuator, harness, or control is healthy.
-
Check 4
Identify whether the washer uses a visible lid switch probe or a magnet on the lid, as described for the exact model, and compare it with the mating opening or switch area without removing parts.
Expected result: Record whether the probe or magnet is present, intact, firmly attached, and aligned with its mating area when the lid is closed; also note any cracked plastic, missing fastener, or loose mount.
Next step: If the actuator is missing, cracked, or misaligned, stop using the washer and have the exact model part and mounting checked; if it looks correct, continue only with the model's documented reset and service checks.
Stop if: Do not bridge the switch contacts, place a magnet over the opening, remove the lid switch, or test resistance unless a qualified technician is following the exact model procedure.
Why this matters
Why: GE explains that a missing or damaged probe or magnet can prevent the washer from recognizing a closed lid. A present actuator that is aligned does not rule out an internal switch or lock fault, especially if the washer gives no lock response.
-
Check 5
Find the washer's exact model instructions and perform only the documented control reset or lid-recognition sequence, using the specified power-disconnection method and timing; do not substitute a generic reset sequence.
Expected result: Note whether the panel returns to normal, whether the lid lock completes its expected start-up sequence, and whether the washer begins the selected cycle after the reset.
Next step: If the washer still will not start or the lid remains unrecognized, keep the machine out of service and arrange diagnosis rather than repeating resets or bypassing the safety circuit.
Stop if: Do not remove the cabinet, access a control board, reset an unknown breaker repeatedly, or continue if the washer trips power, smells hot, sparks, or becomes wet near electrical parts.
Why this matters
Why: A power interruption or paused cycle can leave electronic controls in a state that needs a model-specific reset. A successful reset changes the likely cause toward a temporary control state; no change after the documented procedure leaves a physical actuator, lock, switch, wiring, or control fault unresolved.
-
Check 6
After the visible checks and exact model reset, close the lid normally and make one supervised start attempt without touching the lock area; observe whether the washer accepts the cycle, locks as designed, and proceeds past its initial sensing step.
Expected result: Record a normal start, a repeated lid or lock indication, a click with immediate stop, no response despite power, or a new electrical, burning, vibration, or water symptom.
Next step: Close the lid, disconnect or isolate the washer only as the model permits, and give the technician the model, indicator behavior, actuator condition, reset result, and any unusual sound or smell.
Stop if: Stop immediately for smoke, sparks, burning odor, a tripped protective device, water near electrical equipment, exposed wiring, or a lid that cannot close securely.
Why this matters
Why: A normal start supports that the obstruction or temporary control state was corrected. A repeated lid indication or immediate stop points to an unresolved lid switch, striker, lock, control, or model-specific fault; a new electrical or mechanical symptom broadens the repair risk beyond a lid switch.
Use your observations
Decision map
Find the observation that best matches what you see, then follow the next safe action.
-
PATH 01Safety boundary
What you see
The washer has no display or indicator response when Start is pressed, and closing the lid produces no recognizable change.
Do this next
Perform only safe external checks allowed by the owner's manual, such as confirming the plug is seated and the outlet is available; arrange appliance service if the panel remains dead or power protection trips.
Why this path and its safety boundary
Why it matters: This pattern makes the household outlet, plug, protective device, appliance power path, or control problem more likely than a lid-switch-only fault; a lid switch cannot explain every completely dead panel.
Safety stop: Do not open the console, probe the outlet or wiring if electrical work is unfamiliar, repeatedly reset a tripping breaker, or continue after burning odor, smoke, or heat.
-
PATH 02Safety boundary
What you see
The controls light or respond, but the washer does not lock or start and shows a lid, lock, or open-lid indication with the lid apparently closed.
Do this next
Inspect the visible lid interface, remove only external obstructions, and use the exact model's service path; do not bypass the safety circuit if the external pieces look intact.
Why this path and its safety boundary
Why it matters: The lid striker, probe, magnet, hinge alignment, lock opening, actuator, or lid-switch circuit is more likely than a motor fault. Visible interference and actuator damage are the first low-risk distinctions.
Safety stop: Keep the washer out of service if the lid cannot close securely, a probe or magnet is missing, or the lock requires panel removal or electrical testing.
-
PATH 03Safety boundary
What you see
The washer clicks or briefly attempts to lock, then pauses or stops without starting the cycle.
Do this next
Check for striker alignment and buildup, then perform only the exact documented reset; if the behavior repeats, service should test the lid lock or switch and the related control path.
Why this path and its safety boundary
Why it matters: The actuator may be reaching the lock but the control is not receiving the expected closed-lid signal, or a model-specific sensing, control, or other fault is interrupting the sequence.
Safety stop: Do not repeatedly start the washer, hold the lid down by hand, or reach toward the lock while it is actuating.
-
PATH 04Safety boundary
What you see
The lid probe, magnet, striker, bumper, hinge, or mating opening is visibly missing, cracked, bent, loose, or misaligned.
Do this next
Stop using the washer, document the model and damaged part, and have the correct actuator or lid assembly inspected and fitted; do not improvise a bypass or adhesive repair.
Why this path and its safety boundary
Why it matters: A mechanical actuator or alignment fault can prevent the safety switch or lock from being engaged even when the control panel works.
Safety stop: Do not tape, wedge, magnetize, bridge, or otherwise defeat the lid-switch or lid-lock function.
-
PATH 05Safety boundary
What you see
The lid interface is visibly clear and aligned, but the washer still will not start after the exact model's reset or start sequence.
Do this next
Disconnect or isolate the washer as directed by its manual and arrange appliance service with the model, indicator behavior, actuator observations, and reset result.
Why this path and its safety boundary
Why it matters: An internal lid switch or lock, harness, control, motor, or another model-specific fault remains possible; the visible checks cannot safely distinguish these components.
Safety stop: Do not remove panels, test live circuits, replace a switch by guesswork, or leave a defeated lid safety device in service.
Helpful context
Understand the symptom
First separate a lid-recognition problem from a dead washer
“Will not start” can mean no lights at all, lights that respond but no motor activity, or a cycle that begins and immediately pauses. A lid switch is most relevant when the control responds but the washer does not proceed with the lid closed, or when a lid or lock indicator remains active. If the panel is completely dark, check the power path first; do not assume the lid switch is the cause.
The visible lid parts must meet the model's lock design
Top-load washers commonly use a lid probe or a magnet to actuate the switch, while newer models may also use a lid striker and electronic lock sequence. The probe, magnet, striker, hinge, and lock opening must be intact and aligned. Do not hold the switch down with a tool or defeat the lock to test the machine; the safety device is part of the washer's operating sequence.
Keep the check external unless the model manual says otherwise
Lint, detergent, packaging material, or clothing can interfere with the striker or lock. Wipe accessible buildup with a soft, damp cloth, then let the area dry. Any connector, panel, switch replacement, continuity test, or wiring repair requires the exact model procedure and appropriate electrical safety; it is a service boundary for most owners.
Safety boundary
Stop conditions
- Do not bypass, tape down, bridge, magnetize, or otherwise defeat the washer lid switch or lid lock; it is a safety interlock for the moving washer.
- Disconnect power using the owner's manual procedure before maintenance or cleaning, and never probe a connector, control board, or switch while energized.
- Stop and arrange appliance service for sparks, smoke, burning odor, a repeatedly tripping protective device, exposed wiring, water near electrical parts, a lid that cannot close securely, or a lock that requires internal access.
- If the visible actuator and external lock area are intact but the washer still will not start after the exact model reset, do not keep repeating resets or replace a switch by appearance; have the model-specific circuit diagnosed.
Only after diagnosis
Potential parts
- washer lid switch
Consider this part class only when the exact model diagnosis confirms that the switch does not recognize a correctly aligned closed lid and the external actuator is intact.
Match the complete washer model and switch design; do not choose a switch by appearance or bypass the safety circuit. - washer lid lock assembly
Consider this part class only when the model-specific diagnosis shows that the lock fails to engage or report a closed lid after the striker and lock opening are clear.
Confirm the exact model, connector, mounting arrangement, and manufacturer fit information before ordering. - washer lid striker or switch actuator
Consider this part class only when the visible probe, magnet, striker, bumper, or mating actuator is missing, cracked, bent, or misaligned and the exact model identifies it as replaceable.
Match the exact lid and washer model; do not substitute a magnet, tab, or improvised spacer to defeat the lid safety function. - washer lid switch harness or control component
Consider this class only after a qualified technician confirms that the actuator and lid switch or lock are correct but the signal still does not reach or pass through the model's control path.
Require model-specific electrical diagnosis and fit information; do not order or test control parts from symptoms alone.
When checks do not resolve it
Need a professional?
Arrange appliance service when the washer has no safe power response, the lid switch or lock is not recognized after the visible striker and actuator checks, the lid probe or magnet is missing or damaged, the lock clicks but the cycle stops, the exact model reset does not help, the washer trips power or smells hot, or internal electrical testing or panel removal would be required.
Safety scope: This article covers identifying the no-start pattern, inspecting visible lid alignment and actuators, wiping external buildup with power disconnected as directed, and following the exact model's documented reset. Do not bypass the lid safety device, probe live wiring, remove panels, or work near energized equipment and water.
Common questions
FAQ
Can a broken lid switch make a washer not start at all?
Yes, on many top-load designs the lid switch or lock is a safety input, but a dark control panel points first to the power path rather than proving a lid-switch fault. Check the visible lid interface and the washer's response pattern before assuming the switch is bad.
What should I check when the lid is closed but the washer says it is open?
Look for clothing, packaging, lint, or detergent around the lock; check that the lid striker, probe, or magnet is present and aligned and that the lid sits level. If the visible parts are intact, follow the exact model instructions and arrange service rather than bypassing the lock.
Why does my washer click but still not start?
A click can mean the washer is attempting its lid-lock or start-up sequence, but a repeated stop may mean the closed-lid signal is not confirmed or another model-specific fault interrupted the cycle. Check alignment and external buildup, then use only the documented reset before service.
Is it safe to bypass a washer lid switch to test it?
No. The lid switch or lock is a safety interlock for washer movement. Do not bridge contacts, hold the switch down, place an improvised magnet, or run the washer with panels or the lid safety device defeated; arrange model-specific appliance service instead.
Read the exact guide
Official sources
- Unitized Spacemaker Washer - Washer Will Not Start / Lid Not LockedGE Appliances · Only GE Unitized Spacemaker washer and dryer-center models covered by the page; use the exact model and serial applicability before applying its bumper details.
- Top Load Washer - Lid SwitchGE Appliances · General GE top-load washer lid-switch information; exact model instructions control the repair.
- Lid Light FlashingWhirlpool Product Help · Whirlpool top-load washer models covered by the Lid Light Flashing support page; exact model behavior and controls vary.
- Washer - Resetting the Electronic ControlsGE Appliances · GE washers covered by the reset guidance; the exact model determines the power-disconnection duration and control sequence.
Community feedback
Share a repair observation
Share a plain-text repair observation. Accepted observations are published automatically; this page may take a moment to update.