
On this page
Start here
Quick answer
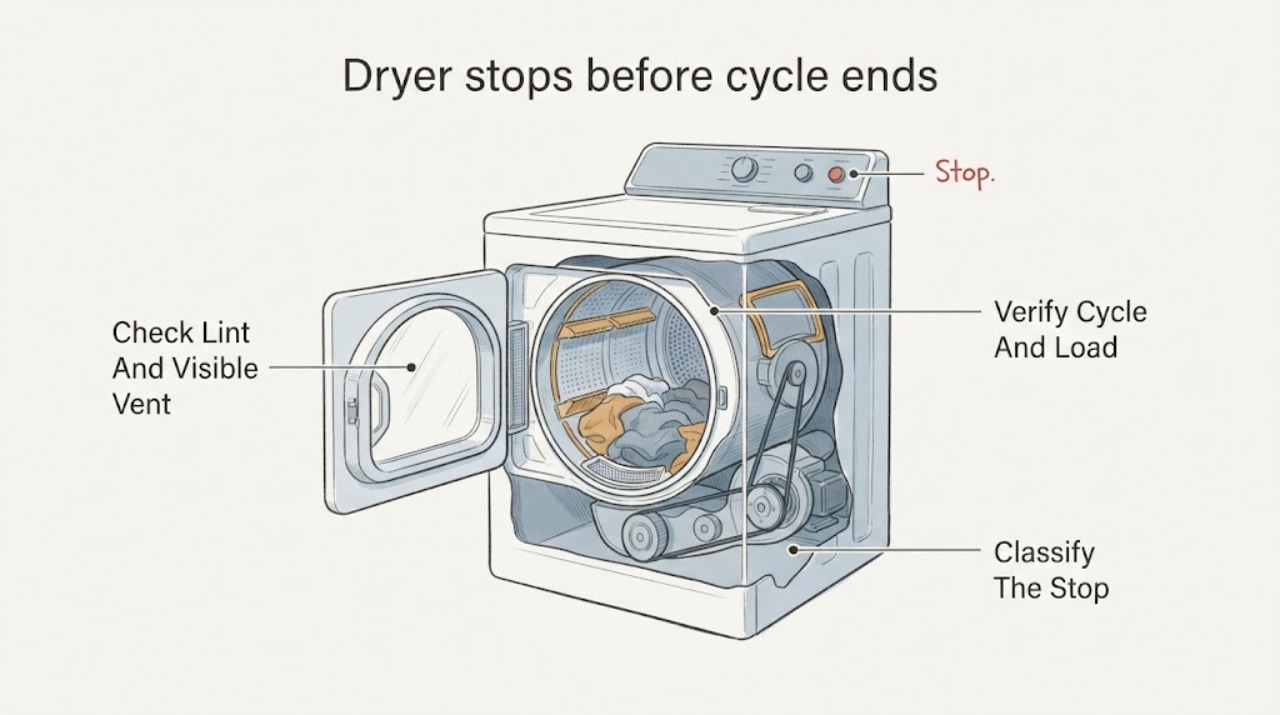
A Whirlpool dryer that stops early may be completing an automatic cycle because the load has reached the selected dryness, especially when the load is small or lightly damp. If clothes are still damp, first record the selected cycle and whether the drum stops hot, check the load and moisture-sensor contact, then clean the lint screen and inspect the visible vent path with the dryer off and cool. A recurring stop, an F-code, no heat, a burning smell, unusual noise, a hot connection, or a breaker that trips needs qualified appliance service rather than repeated restarts.
Before you begin
Safety first
- This article covers cycle and load observation, ordinary-access lint and visible vent checks with the dryer off and cool, visible sensor and levelness observations, and safe documentation. It does not authorize cabinet removal, live electrical testing, door-switch bypass, thermal-protection bypass, gas-system work, concealed-vent dismantling, or internal part replacement.
Work through in order
Diagnostic checks
Use only checks that match the exact appliance or system and its official guide.
-
Check 1
Let the dryer stop normally, then record whether the clothes are dry or damp, whether the display shows completion or a code, whether the drum feels normally warm or unusually hot, and whether the dryer can be started again after the door is closed. Do not continue testing if there is smoke, a burning smell, arcing, a hot connection, or a breaker that trips.
Expected result: The load is dry and the machine shows normal completion; the load is damp; an F-code or other code appears; or the stop occurs with unusual heat, smell, noise, power loss, or a door that will not latch.
Next step: Use the matching branch below. Keep the dryer off and arrange service for smoke, burning odor, arcing, a hot connection, repeated breaker trips, or a door that cannot latch securely.
Stop if: Stop immediately for smoke, burning smell, arcing, exposed or hot electrical parts, a gas odor, water near electrical connections, or a drum that will not stop moving.
Why this matters
Why: A dry load with normal completion is consistent with automatic sensing. Damp clothes indicate an incomplete-drying problem. A code or electrical, heat, door, or mechanical symptom raises the likelihood of a model-specific fault and changes the next step.
-
Check 2
Write down the cycle and dryness setting, then try the next ordinary load with similar fabrics and enough items to tumble freely; avoid judging an automatic cycle from one nearly dry item. Confirm that an air-only setting was not selected when heat was expected, and use the model instructions for the correct cycle names.
Expected result: The early stop occurs only with a single item, a very small load, mixed heavy and light fabrics, or an air-only or short timed cycle; a normally sized, similar-fabric load completes as expected; or every cycle stops while clothes remain damp.
Next step: If the symptom follows load or setting, use a suitable automatic cycle and reassess. If it follows the dryer with a representative load, continue with the lint, vent, sensor, and service checks.
Why this matters
Why: Load moisture and cycle choice can make an automatic dryer shut off or adjust time differently. If a representative load still stops damp across cycles, cycle selection alone is less likely and airflow, sensing, power, door, heating, or control diagnosis is needed.
-
Check 3
Turn the dryer off and let it cool. Clean the lint screen as directed by the model manual, then look only at the accessible vent hose, wall connection, and outside hood for lint, debris, a crushed or kinked section, or a hood flap that cannot open freely. Do not dismantle the cabinet or reach into an inaccessible vent run.
Expected result: The lint screen is coated with residue, the hose is kinked or crushed, the outside hood is obstructed, or airflow outside is weak; or the accessible path is clear and airflow appears normal.
Next step: Correct only the ordinary-access lint or visible obstruction described by the manual, then retest one representative load. If airflow remains weak or the problem persists, stop relying on repeated cycles and arrange vent or appliance service.
Why this matters
Why: A restricted exhaust path can leave loads warm but damp, increase heat or humidity in the laundry area, and contribute to poor drying or an early stop. A clear visible path does not rule out a restriction deeper in the wall or an internal fault.
-
Check 4
With the dryer off, inspect the visible moisture-sensor bars inside the drum for residue or obvious damage and check levelness from a cabinet edge or another surface specified by the model instructions. Use the model manual for any permitted cleaning method; do not remove sensor wiring or panels.
Expected result: The dryer is visibly out of level, the sensor bars are coated or damaged, the load is a single item that may not contact the bars, or an F3E5 moisture-sensor code is displayed; or the level and visible sensors appear normal.
Next step: Correct an ordinary-access level or load condition only according to the model guidance and retest with a representative load. For a returning code or a normal load that still stops damp, arrange qualified service for the sensor circuit and controls.
Why this matters
Why: Poor levelness or insufficient load contact can prevent reliable moisture readings, while F3E5 indicates that moisture-sensor data was not registered across consecutive loads. A normal visible check does not prove the sensor circuit or control is good.
-
Check 5
Observe whether the door remains fully latched, the display goes blank, the cycle resumes only after a power interruption, or the household breaker changes state. Check only visible controls and the electrical panel from a dry, safe position; do not remove covers, test live wiring, or repeatedly reset a tripping breaker.
Expected result: The door opens or unlatches during the event, the display loses power, a power-failure indication appears, the breaker trips once or repeatedly, or none of those patterns occurs.
Next step: Document the exact pattern and leave the dryer off for repeated trips, heat, smell, or damaged latch symptoms. If power and door behavior are normal, use the airflow and sensor results to decide whether service is needed.
Stop if: Do not bypass a door switch, open the cabinet, probe wiring, or keep resetting a breaker that trips again.
Why this matters
Why: A door or power interruption can stop a cycle without proving a moisture or vent fault. Repeated breaker trips, a loose or hot connection, or unexplained loss of power is an electrical or appliance fault that needs professional diagnosis.
-
Check 6
After the ordinary-access checks, make a short service record: model and serial information, cycle and dryness setting, load size and fabric mix, dampness at stop, time or stage of the stop, displayed code, heat and airflow observations, door behavior, and any smell, noise, or power symptom.
Expected result: The dryer repeats the early stop with a representative load, leaves clothes damp after the lint and visible vent checks, displays a code, fails to heat, or makes an unusual noise; or the problem no longer recurs.
Next step: Arrange qualified appliance service for a recurring or hazardous symptom and provide the record. If the dryer completes normally after the checks, monitor the next few suitable loads and stop using it if the warning pattern returns.
Why this matters
Why: A recurring symptom after basic checks is more consistent with a vent restriction beyond ordinary access, moisture-sensing, door, thermal, drive, heating, or control diagnosis than with a one-off load choice.
Use your observations
Decision map
Find the observation that best matches what you see, then follow the next safe action.
-
PATH 01Next step
What you see
The load is dry, the selected cycle is an automatic cycle, and the dryer ends with normal completion and no heat, power, door, or noise symptom.
Do this next
Use a suitable automatic cycle and load for future runs. If the same cycle begins ending with damp clothes, move to the airflow and sensor branches.
Why this path and its safety boundary
Why it matters: The early-looking stop is most consistent with the moisture sensor reaching the selected dryness rather than a failure to finish a timed interval.
-
PATH 02Next step
What you see
Clothes remain warm or damp, lint or residue is present, the outside hood opens poorly, or airflow feels weak after the cycle.
Do this next
With the dryer off and cool, address only ordinary-access lint or visible obstructions allowed by the model instructions. If the airflow remains weak or the issue recurs, arrange vent cleaning or appliance service rather than continuing long cycles.
Why this path and its safety boundary
Why it matters: The pattern makes exhaust restriction or poor ventilation more likely than normal automatic completion; the exact restriction may be deeper than the visible hose.
-
PATH 03Next step
What you see
The stop follows a single item or very small load, the dryer is out of level, sensor bars are coated, or F3E5 returns after the condition is corrected.
Do this next
Follow the model guidance for levelness, sensor care, and a suitable load. Do not bypass the sensing system; arrange service for a persistent code or damp early stop.
Why this path and its safety boundary
Why it matters: Insufficient or unreliable moisture-sensor contact is more likely. A returning F3E5 after a representative load and ordinary-access checks points beyond load technique to the sensor circuit or control.
-
PATH 04Next step
What you see
The door does not stay latched, the display loses power, a breaker trips, the dryer stops unusually hot, or a no-heat, smell, or unusual-noise symptom accompanies the stop.
Do this next
Keep the dryer off when the symptom is hazardous or repeats, and arrange qualified appliance or electrical diagnosis. Provide the exact event pattern and do not open the cabinet or bypass an interlock.
Why this path and its safety boundary
Why it matters: The event is not explained safely by cycle sensing alone. Door-interlock, supply, heating, thermal, drive, or control faults become more plausible, and repeated operation can add risk.
-
PATH 05Next step
What you see
A representative load still stops before completion with damp clothes after the cycle, lint, visible vent, load, sensor-contact, door, and power observations are normal.
Do this next
Stop troubleshooting at the cabinet boundary and schedule qualified service. Give the technician the model, cycle, stop point, dampness, airflow, temperature, code, and recurrence record.
Why this path and its safety boundary
Why it matters: The remaining causes are model-specific and may involve an inaccessible vent restriction, heating or thermal protection, drive system, door switch, sensor circuit, or electronic control; the public checks cannot distinguish them reliably.
Helpful context
Understand the symptom
First separate normal shutoff from a fault
Automatic Whirlpool cycles continuously use load moisture and drying conditions to adjust the remaining time and stop at the selected dryness. A small or already nearly dry load can therefore appear to end early without a failed component. The useful distinction is whether the clothes are dry and the display shows a normal completion, or whether they are damp, the dryer stops at a repeatable point, or a code or heat symptom appears.
Why airflow and sensing matter
The lint screen, vent hose, wall connection, and outside hood affect how quickly moist air leaves the drum. Whirlpool identifies restricted ventilation as a cause of poor drying and recommends checking for kinks, crushing, lint, debris, and weak outside airflow. Sensor behavior can also be misleading when a load is too small to touch the sensor bars consistently or when the dryer is not level.
Use the symptom pattern to choose the next step
A normal dry load that ends on an automatic cycle points toward cycle selection or normal sensing. Damp clothes with weak outside airflow point toward ventilation or lint. A moisture-sensor code, single-item load, or poor drum contact points toward sensing conditions. Stops accompanied by a door interruption, loss of power, no heat, smell, noise, or a repeating code move the problem into model-specific diagnosis.
What a technician needs to know
Before requesting service, note the model and serial information, selected cycle, load type and size, how damp the clothes are, the point at which the cycle stops, any displayed code, whether the drum is hot, and whether the behavior changes after the lint and visible vent checks. This record helps separate a normal sensor decision from a door, heating, drive, control, or airflow fault without opening the cabinet.
Safety boundary
Stop conditions
- Stop using the dryer for smoke, burning smell, arcing, a hot plug or outlet, water near electrical connections, gas odor, repeated breaker trips, a damaged door latch, or a drum that will not stop.
- Do not bypass the door switch, open the cabinet, probe live wiring, defeat thermal protection, or repeatedly restart a hazardous dryer.
- If the dryer remains damp-stopping after ordinary-access checks, stop at the cabinet and concealed-vent boundary and arrange qualified service.
Only after diagnosis
Potential parts
- moisture sensor bars or sensor harness
Consider only if a persistent moisture-sensor code or damp early stop remains after a suitable load, levelness, and ordinary-access sensor check.
Confirm the exact dryer model and manufacturer fit information before ordering any part. - door switch or door latch assembly
Consider only when the door does not remain securely latched or the cycle stops in a repeatable door-related pattern.
Do not bypass the interlock; verify model-specific compatibility with the manufacturer or technician. - thermal protection or heating assembly
Consider only after service diagnosis finds a no-heat, overheating, or thermal-shutdown fault rather than a normal sensor or airflow condition.
The correct component depends on the model, heat source, and diagnosed circuit; confirm fitment before ordering. - drive motor or electronic control
Consider only when qualified testing links the repeatable stop to motor, drive, wiring, or control behavior after airflow, door, heat, and sensor causes are assessed.
Use the exact model information and a technician's diagnosis to select a compatible component.
When checks do not resolve it
Need a professional?
Arrange qualified appliance service when the dryer repeatedly stops with damp clothes after suitable cycle, load, lint, visible vent, and sensor-contact checks; when an error code returns; when it does not heat; or when a door, power, unusual heat, smell, noise, or breaker symptom occurs. Use an electrician for a suspected household supply or outlet problem.
Safety scope: This article covers cycle and load observation, ordinary-access lint and visible vent checks with the dryer off and cool, visible sensor and levelness observations, and safe documentation. It does not authorize cabinet removal, live electrical testing, door-switch bypass, thermal-protection bypass, gas-system work, concealed-vent dismantling, or internal part replacement.
Common questions
FAQ
Why does my Whirlpool dryer stop before the timer reaches zero?
On an automatic cycle, the dryer can adjust its remaining time and stop when the load reaches the selected dryness. If the clothes are still damp, check the load and cycle, lint and visible vent path, and moisture-sensor conditions before treating it as an internal fault.
Can a very small load make a Whirlpool dryer stop early?
Yes. A single item or very small load may not contact the moisture sensors consistently, so compare with a suitable representative load and the model's automatic-cycle guidance. A recurring early stop with normal loads needs service diagnosis.
What should I check when the dryer stops but the clothes are damp?
Record the cycle and stop pattern, clean the lint screen, inspect the accessible hose and outside hood for restriction with the dryer off and cool, and observe door, power, heat, and sensor symptoms. Do not open the cabinet; arrange service if the pattern persists or a code, smell, unusual heat, noise, or breaker event appears.
When should I stop using the Whirlpool dryer?
Stop for smoke, burning smell, arcing, a hot connection, gas odor, repeated breaker trips, a damaged latch, water near electrical connections, or a drum that will not stop. Keep the cabinet closed and arrange qualified appliance or electrical help for the relevant hazard.
Read the exact guide
Official sources
- Dryer Stops Mid-CycleWhirlpool Product Help · Whirlpool dryer cycle selection, automatic moisture sensing, normal completion, and service escalation
- F3 E5 - Error Code - DryerWhirlpool Product Help · Whirlpool dryer F3E5 moisture-sensor troubleshooting, levelness, load contact, and service boundary
- Dryer is not Drying or Experiencing Long Dry TimesWhirlpool Product Help · Whirlpool dryer load, lint screen, vent airflow, cycle, power, door, and service checks
- Dry Time Keeps Going Up - DryerWhirlpool Product Help · Whirlpool dryer automatic-cycle time adjustment based on moisture, load, material, and drying rate
Community feedback
Share a repair observation
Share a plain-text repair observation. Accepted observations are published automatically; this page may take a moment to update.