
On this page
Start here
Quick answer
A Whirlpool freezer door or lid that will not seal is usually being held open by a package, shelf, basket, shipping material, frost, a dirty or damaged gasket, or an out-of-level or misaligned cabinet. First identify the exact gap and whether the door closes fully without being held, then move only loose obstructions and check the gasket from ordinary access. Clean the gasket as the Whirlpool model instructions allow and use a paper-resistance check around the perimeter; weak or absent tension at one area suggests a sealing problem. Frost, condensation, temperature fluctuation, or a compressor that runs longer can follow a gap, but a damaged gasket, bent hinge, incorrect installation, heavy frost, or a door that still will not close needs qualified service. Do not force the door, heat or glue the gasket, chip ice with a sharp tool, remove hinges or panels, or keep operating while food is warming or moisture is entering.
Before you begin
Safety first
- This article supports ordinary-access inspection, moving loose obstructions, cleaning the gasket as instructed, a gentle paper-resistance check, and reading the model manual. Do not lift a loaded freezer, remove doors or panels, force hardware, use heat or sharp tools on ice, or perform electrical, defrost, or sealed-system work.
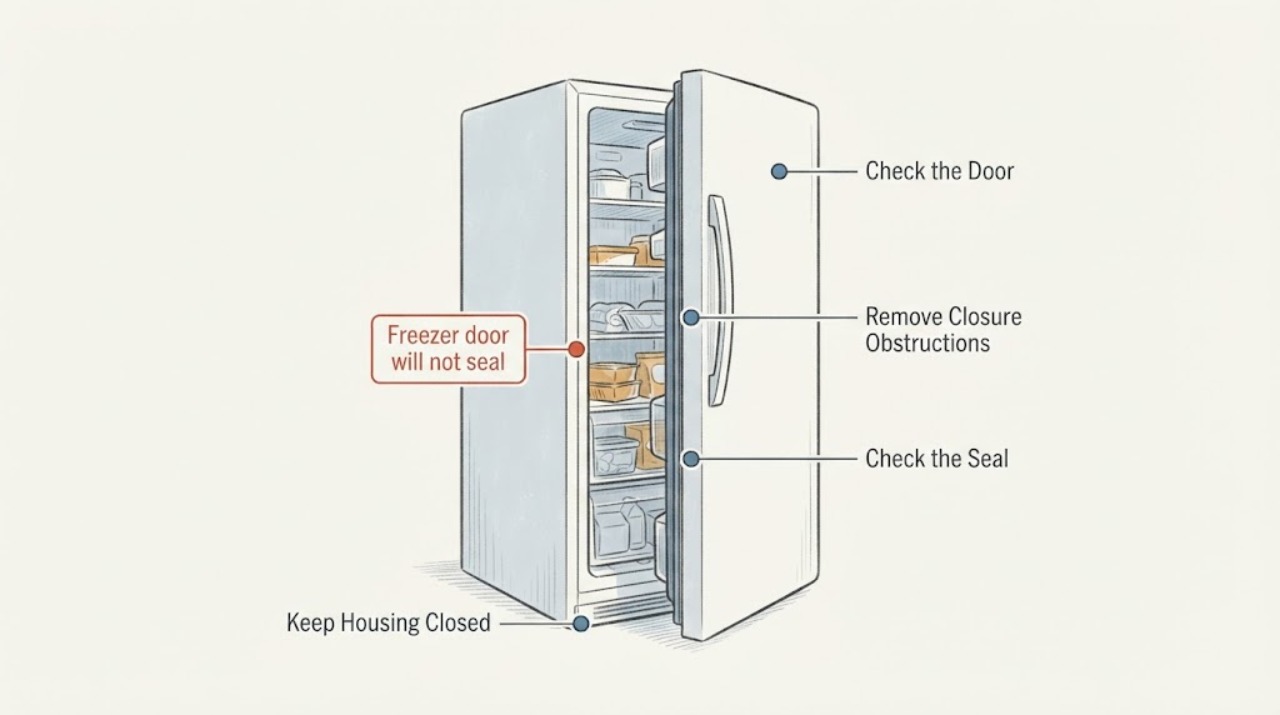
Work through in order
Diagnostic checks
Use only checks that match the exact appliance or system and its official guide.
-
Check 1
With the freezer closed, inspect the entire perimeter of the Whirlpool door or lid and note whether the gap is at the hinge side, handle side, top, bottom, or one corner. Identify whether the unit is an upright door, pull-out freezer drawer, or chest lid and photograph the gap from straight on and from the side.
Expected result: The door or lid closes on one edge but not another, springs back, remains visibly open, or appears flush all around but paper slips through; note any frost, condensation, or cabinet movement.
Next step: Keep the door closed as much as possible and continue with the obstruction and gasket checks without forcing the door. If the gap exposes food to warming air or water is accumulating, protect the food and arrange service sooner.
Stop if: Do not lean on the door, lift the lid, pull the cabinet, or remove hinges, covers, or trim to inspect the gap.
Why this matters
Why: A localized gap supports an obstruction, gasket fold or damage, hinge/alignment, or level issue. A visually flush door with poor paper tension still warrants a gasket and alignment check; a door that seals evenly makes the problem less likely to be the gasket itself.
-
Check 2
From ordinary access, check the door bins, food packages, shelves, baskets, drawers, and any remaining shipping or packing material. Push a mis-seated basket or shelf back only when it moves normally and rearrange loose food so nothing touches the gasket or prevents full closure.
Expected result: A package, basket, shelf, drawer, ice buildup, or packing material was holding the door open, or the door remains blocked after the storage area is correctly arranged.
Next step: Close the door gently and recheck the perimeter. If it seals after the obstruction is removed, monitor for returning frost or temperature change; if it still does not close, continue to the gasket and level checks.
Stop if: Do not force a shelf, drawer, or basket, remove fixed hardware, or pack food tightly enough to distort the door.
Why this matters
Why: An obstruction can create a gap without a failed gasket and can also cause frost and temperature changes. A clear, correctly seated interior makes the gasket, level, hinge, frost, or installation branches more likely.
-
Check 3
Inspect the rubber gasket for dirt, sticky residue, folds, brittleness, cracks, tears, or a section pulled away from its channel. Clean only the accessible seal using the exact Whirlpool care instructions, close the unobstructed door on a strip of paper at multiple points, and pull gently without forcing it.
Expected result: The gasket becomes clean and the paper has consistent slight resistance, or paper slides out easily at one or more points, the gasket is damaged, or the seal remains folded or pulled away.
Next step: If the gasket is damaged, cannot sit in its channel, or still fails after safe cleaning, keep the freezer closed and arrange model-specific service or a compatible gasket assessment. If it seals, monitor the prior gap and frost pattern.
Stop if: Do not heat, glue, cut, stretch, lubricate, tape, or substitute the gasket, and do not pull hard enough to deform the seal.
Why this matters
Why: Dirt can create resistance and prevent proper contact, while inconsistent or absent tension supports a gasket, door, or alignment problem. A good paper result after cleaning makes the visible gasket less likely to be the remaining cause, though frost or cabinet alignment can still matter.
-
Check 4
Look for a cabinet that visibly leans, a door that changed after installation or door removal, a chest lid that does not rest evenly, or a hinge side that sits differently from the opposite side. Compare the condition with the Whirlpool owner's manual and installation instructions rather than turning adjustment hardware by guesswork.
Expected result: The freezer is visibly out of level, the floor is uneven, the door or lid was recently reinstalled, the hinge or alignment is visibly bent, or the cabinet and door appear stable and level.
Next step: Use only the model-specific leveling or alignment procedure if it is explicitly intended for the user and can be done without lifting the appliance. Otherwise document the condition and arrange service, especially for a bent hinge or a heavy unit.
Stop if: Do not lift or tilt a loaded freezer, shim or adjust hinges without the model instructions, remove the door, or work on wiring or refrigerant lines.
Why this matters
Why: Whirlpool links level and correct installation with proper closure and sealing. A recent move or door work makes alignment more likely; a stable, level cabinet with no installation change shifts suspicion toward the gasket, frost, obstruction, or hidden hardware.
-
Check 5
Inspect for frost or ice along the gasket, door edge, freezer floor, rear wall, or vents and note condensation, temperature fluctuation, or a compressor that seems to run longer since the seal problem began. Do not chip, pry, or heat the frost.
Expected result: Frost is concentrated where the gap occurs, frost blocks the door or vents, moisture is widespread, or the freezer has no frost or cooling change despite the closure complaint.
Next step: Follow only the exact Whirlpool model's defrost and food-storage instructions. Request service for heavy or returning frost, a freezer that cannot maintain temperature, or a seal that fails after frost is safely addressed.
Stop if: Do not use a hair dryer, heat gun, boiling water, knife, scraper, or sharp tool on the gasket, liner, vents, or ice unless the exact manual explicitly permits a safe non-damaging method.
Why this matters
Why: A persistent gap can admit warm moist air, creating frost that then prevents the door from sealing; a heavy or returning frost pattern may also indicate a defrost or cooling fault. No frost or cooling change makes a purely mechanical latch or alignment issue more likely.
-
Check 6
Record the Whirlpool model, freezer type, location of the gap, paper-test results around the gasket, obstruction and level findings, frost location, door history, food temperature or alarm state, and whether the door stays closed without being held.
Expected result: The seal remains poor, food is warming, frost returns, the compressor runs abnormally long, a door or hinge is damaged, or the freezer seals normally after a documented loose obstruction is removed.
Next step: Keep the freezer closed and protect food while arranging qualified Whirlpool appliance service for a persistent gap, cooling change, damaged hardware, or recurring frost. Give the technician the complete record and photos.
Stop if: Do not keep operating with a visible gap, warming food, damaged door hardware, wet electrical parts, or a recurring frost and moisture pattern.
Why this matters
Why: A persistent seal or cooling problem needs model-specific diagnosis of the gasket, door, hinges, alignment, frost/defrost system, or temperature control. A one-time obstruction can explain the symptom only if the door now seals and cooling remains normal.
Use your observations
Decision map
Find the observation that best matches what you see, then follow the next safe action.
-
PATH 01Safety boundary
What you see
The door closes after a package, shelf, basket, drawer, or shipping material is moved into its correct position and the gasket contacts evenly.
Do this next
Monitor the gap, frost, and freezer temperature during normal use. Arrange service if the door reopens, the paper test becomes uneven, or cooling does not recover.
Why this path and its safety boundary
Why it matters: The immediate cause was an obstruction rather than a failed gasket, although frost or temperature change may have developed while the door was open.
Safety stop: Do not overfill the compartment or force a shelf, bin, drawer, or door into position.
-
PATH 02Safety boundary
What you see
The paper slides out easily at a section of the seal, or the gasket is dirty, torn, brittle, folded, or pulled from its channel after obstructions are removed.
Do this next
Clean only as the Whirlpool model instructions direct; request a compatible gasket or qualified door-seal service for damage or persistent poor contact.
Why this path and its safety boundary
Why it matters: The gasket cannot maintain uniform contact and may be admitting warm air, leading to frost, temperature fluctuation, and longer cooling operation.
Safety stop: Do not glue, heat, stretch, cut, lubricate, tape, or substitute the gasket.
-
PATH 03Safety boundary
What you see
The freezer leans, the gap is localized to a hinge or corner, the door changed after installation or removal, or the chest lid does not rest evenly.
Do this next
Use the exact Whirlpool installation instructions if they clearly authorize a safe user adjustment; otherwise arrange qualified service and provide the installation or move history.
Why this path and its safety boundary
Why it matters: Leveling, hinge alignment, installation, or a bent part may prevent the gasket from contacting even when the rubber itself looks intact.
Safety stop: Do not lift a loaded freezer, remove the door, force hinges, or adjust hardware without model-specific instructions.
-
PATH 04Safety boundary
What you see
Frost or ice holds the door open, forms around the gasket or vents, or returns after the door was left open or after a period of high humidity.
Do this next
Follow the model-specific safe defrost procedure, protect food and floors, and request service for heavy, recurring, or inaccessible frost.
Why this path and its safety boundary
Why it matters: Frost may be both a consequence of the gap and a new obstruction. If it returns after the door seals, a defrost, installation, or cooling issue may remain.
Safety stop: Do not chip or heat ice, remove covers, or keep the freezer running with frost preventing closure.
-
PATH 05Safety boundary
What you see
The door still will not seal after accessible obstruction, gasket, level, and frost checks, or the freezer is warming, spoiling food, or showing persistent moisture.
Do this next
Keep the door closed as much as possible, protect food, and arrange qualified Whirlpool appliance service with the gap, paper-test, frost, temperature, and installation record.
Why this path and its safety boundary
Why it matters: A damaged door, gasket, hinge, defrost or cooling component, or installation fault requires more than an external adjustment.
Safety stop: Do not keep forcing the door, tape it shut, remove hardware, or continue normal operation when food temperature is unsafe.
Helpful context
Understand the symptom
Find the gap before trying to reshape the seal
A freezer door that springs back, leaves a visible gap, or seals at one corner but not another can have different causes. A package, basket, shelf, shipping spacer, frost ridge, gasket fold, cabinet level, hinge, or door alignment can all change contact. Preserve the pattern with a photo before moving items or melting frost so a technician can see where the seal failed.
The gasket test is useful only after the door is unobstructed
Whirlpool describes placing paper between the seal and freezer, closing the door, and pulling the paper at multiple points. Slight resistance suggests contact; paper that slides out easily indicates a possible weak seal. The test does not prove the gasket is the only cause: a warped door, poor leveling, mis-seated basket, frost, or installation issue can produce the same result.
Seal problems are also cooling problems
Warm air entering through a gap can produce frost, condensation, temperature fluctuation, food spoilage, and longer compressor operation. Correct only the accessible obstruction or cleaning issue. If frost is heavy, the gasket is damaged, the door is misaligned, or the seal fails after the safe checks, arrange service rather than applying heat, adhesive, force, or an improvised replacement.
Safety boundary
Stop conditions
- Stop normal operation and protect food when the freezer has a persistent visible gap, warming food, heavy returning frost, or water damage.
- Do not heat, glue, cut, stretch, tape, or lubricate the gasket, or substitute a door seal without exact model compatibility guidance.
- Do not lift or tilt a loaded freezer, remove a door or hinge, open panels, disturb wiring, or work on refrigerant or defrost components as a user test.
- Do not chip or pry ice with a knife or sharp tool, use forced heat, or keep the freezer operating while frost prevents closure.
- Arrange qualified service for a torn or warped gasket, bent hardware, failed paper test after safe cleaning, recurring frost, a door that remains misaligned, or a cooling problem after the accessible checks.
Only after diagnosis
Potential parts
- Whirlpool freezer door or lid gasket
Consider this category only if the exact model's gasket is damaged or fails uniform paper resistance after cleaning and obstruction checks.
Confirm the exact Whirlpool model and manufacturer's fit information; do not heat, glue, stretch, or cut a seal to make it fit. - Whirlpool freezer hinge or door alignment component
Consider this category only if qualified inspection confirms a bent, loose, or misaligned hinge or door component is preventing gasket contact.
Confirm the exact model, door or lid style, hardware arrangement, and manufacturer's fit information; do not remove or force a hinge on a loaded appliance. - Whirlpool freezer defrost or temperature-control component
Consider this category only after recurring frost or temperature loss is confirmed and qualified diagnosis rules out the door, gasket, obstruction, and level.
Confirm the exact Whirlpool model and electrical or control specifications; do not bypass a defrost or temperature safety device.
When checks do not resolve it
Need a professional?
Arrange qualified Whirlpool appliance service when the freezer door or lid remains unsealed after loose obstructions, gasket cleaning, frost, level, and model-approved alignment checks, or when the gasket, hinge, door, cabinet, or cooling performance is damaged. Protect food and use urgent help for water damage near electrical parts or any electrical hazard.
Safety scope: This article supports ordinary-access inspection, moving loose obstructions, cleaning the gasket as instructed, a gentle paper-resistance check, and reading the model manual. Do not lift a loaded freezer, remove doors or panels, force hardware, use heat or sharp tools on ice, or perform electrical, defrost, or sealed-system work.
Common questions
FAQ
How can I tell if my Whirlpool freezer door is sealing?
First remove packages and shelves that block closure. Then place a strip of paper between the clean gasket and freezer at several points, close the door, and pull gently. Consistent slight resistance suggests contact; paper that slides out easily at one area supports a gasket, door, hinge, or alignment problem.
Can an overfilled Whirlpool freezer keep the door from sealing?
Yes. Food packages, bins, baskets, shelves, drawers, and shipping material can prevent full closure. Rearrange only loose items and make sure baskets or shelves are seated normally. If the door still gaps or the gasket is damaged, arrange service.
Why does a bad freezer seal cause frost?
A gap admits warm moist air, which can condense and freeze near the door, vents, or rear wall. The new frost can then become an obstruction and make the seal worse. Heavy or returning frost may also involve a defrost or cooling issue and needs model-specific service.
Should I heat or glue a Whirlpool freezer gasket?
No. Do not heat, glue, cut, stretch, tape, or lubricate the gasket as a general fix. Clean it only as the model instructions allow, then use the paper test. A damaged or persistently non-sealing gasket should be assessed for the exact model by qualified service.
When should I stop using a Whirlpool freezer with a door gap?
Protect the food and arrange service when the gap remains after accessible obstruction and gasket checks, the freezer cannot stay cold, frost or water keeps returning, the door or hinge is damaged, or the seal is exposed to a wet electrical area. Do not keep forcing the door or operate normally with a persistent gap.
Read the exact guide
Official sources
- Checking for Items Preventing Door or Lid ClosureWhirlpool Product Help · Whirlpool freezer installation-support guidance; model-specific manuals control exact adjustments.
- How to Help Eliminate Condensation and FrostWhirlpool Product Help · Whirlpool refrigeration frost guidance used to explain moisture from a poor freezer seal; model controls exact vent and defrost procedure.
- Door is Not Sealing - Forming Frost - Upright FreezerWhirlpool Product Help · Whirlpool upright-freezer guidance; exact door, gasket, and leveling details vary by model.
- Doors Not Sealing - RefrigeratorWhirlpool Product Help · Whirlpool refrigeration door-seal guidance used for the freezer-door symptom; exact freezer model and manual control.
- Doors Not Closing ProperlyWhirlpool Product Help · Whirlpool refrigerator and freezer-door closure guidance; exact door style and adjustments vary by model.
Community feedback
Share a repair observation
Share a plain-text repair observation. Accepted observations are published automatically; this page may take a moment to update.