
On this page
Start here
Quick answer
First separate a leak that appears only during shower use from one that continues while the shower is off. During ordinary brief use only if the bathroom is safe, observe from a dry position whether water escapes at the showerhead, door, rim, threshold, wall, or floor; then stop and observe whether moisture continues after the water is off. Do not extend the test, spray walls deliberately, remove the drain or trim, open a wall or ceiling, use chemicals or pressure methods, or handle any electrical item near water. If water reaches an electrical fitting, a ceiling below, an unsafe floor, or a rapidly spreading wall or floor area, stop using the shower and arrange urgent professional help; otherwise record the timing and location and request a qualified plumbing, shower-enclosure, or bathroom-remodeling assessment.
Before you begin
Safety first
- Keep checks brief and non-destructive. Do not open walls or ceilings, remove drains or trim, access concealed plumbing, use chemicals or pressure methods, handle electrical equipment near water, or continue a test after a hazard appears.
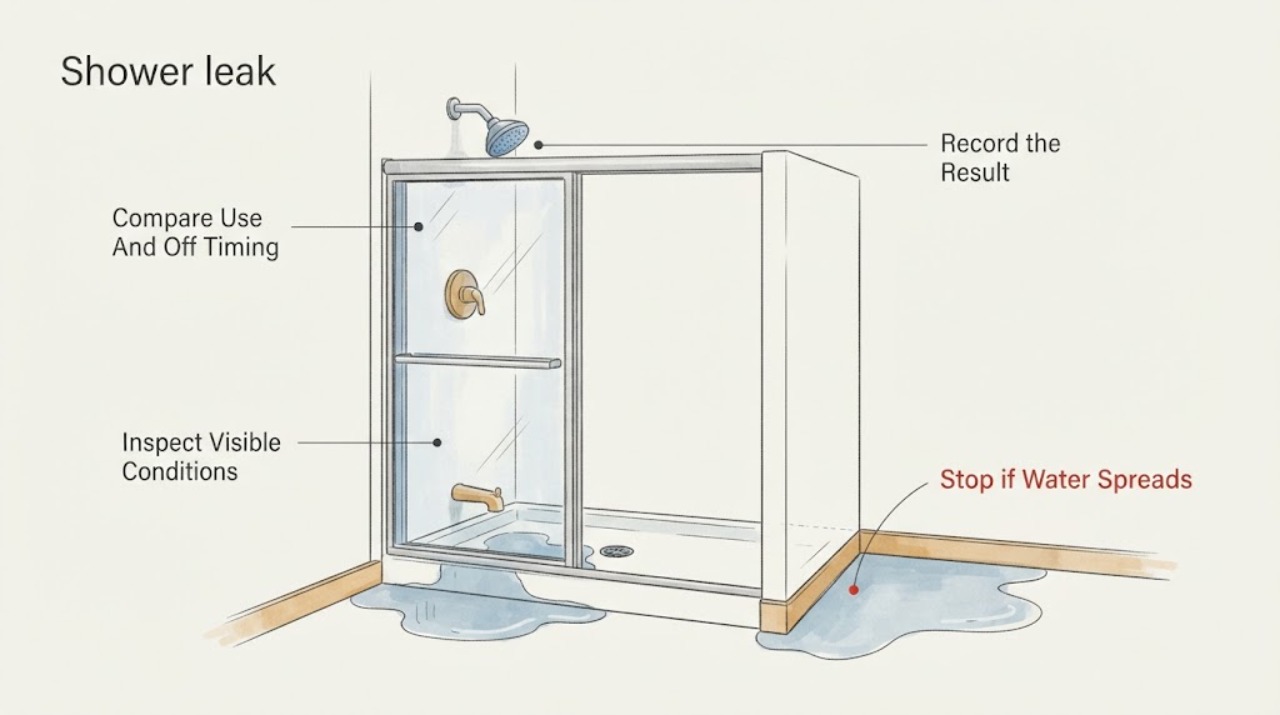
Work through in order
Diagnostic checks
Use only checks that match the exact appliance or system and its official guide.
-
Check 1
During ordinary brief shower use only when the room is safe, observe from a dry position whether water appears outside the enclosure; stop the water normally and observe whether the visible leak stops, slows, or continues without extending the test.
Expected result: Water appears only while the shower is running, continues briefly after shutoff, or remains present while the shower is idle.
Next step: Record the timing and arrange a qualified shower, plumbing, or bathroom-remodeling assessment; stop using the shower if water is reaching the wall, floor below, or an unsafe area.
Stop if: Stop immediately if water reaches an electrical fitting, creates a slip hazard, spreads quickly, or the observation would require a prolonged test.
Why this matters
Why: Use-only timing suggests a spray, enclosure, drain, or waterproofing path; continued moisture can indicate retained water, a supply or drain issue, or a concealed path. Timing alone does not identify the source.
-
Check 2
From outside the spray and without touching seals or trim, observe whether water escapes at the shower door edge, bottom seal, threshold, curtain edge, curb, rim, or enclosure corner during normal brief use.
Expected result: Water stays inside, escapes at one edge or corner, runs over the threshold, or appears below the enclosure without a visible path.
Next step: Photograph the location from a dry position and request professional enclosure and waterproofing evaluation; do not apply caulk or remove the seal as a test.
Stop if: Stop if the floor becomes slippery, a door or panel moves unexpectedly, glass is damaged, or observing requires reaching into the wet area.
Why this matters
Why: An edge or threshold pattern gives the professional an enclosure-routing clue, but seal appearance does not prove correct installation or rule out water traveling behind the wall or floor.
-
Check 3
After normal shower use has stopped, observe the drain area and nearby floor without removing the drain cover, inserting anything, using chemicals, or creating a pressure test; note whether water drains normally and where any residual moisture remains.
Expected result: Water clears normally, pools around the drain or threshold, drains slowly, or reappears after the shower is off.
Next step: Keep use brief or stop using the shower and provide the timing and location to a qualified plumbing or bathroom professional; request non-destructive evaluation first.
Stop if: Stop if water approaches an electrical device, enters a ceiling below, causes an unsafe floor, or investigation would require drain or plumbing access.
Why this matters
Why: Pooling or reappearing moisture is a useful drain, floor-slope, pan, or concealed-path clue, but it cannot establish whether the drain assembly or waterproofing has failed.
-
Check 4
From a dry location, look at the shower-side wall and floor edges, the room on the other side of the wall, and any ceiling or room below for staining, damp-looking finish, peeling, swelling, or recurring moisture; do not open surfaces or disturb suspected mold.
Expected result: No adjacent sign is visible, or a stain, damp finish, swelling, odor, or repeated change is present near the shower footprint.
Next step: Stop or limit shower use and request prompt professional evaluation of the shower waterproofing, plumbing, and affected building surfaces; report the exact adjacent location.
Stop if: Stop if the ceiling sags, a wall or floor is unstable, mold is extensive, water is near electrical equipment, or the area is unsafe to enter.
Why this matters
Why: An adjacent sign raises concern that water is entering a wall or floor assembly, while no visible sign does not rule out concealed damage.
-
Check 5
From a safe, dry position during normal brief use, observe the showerhead outlet, shower arm connection area, tub spout if present, and visible fixture-to-wall boundary for stray spray or drips; do not tighten, remove, seal, or pressurize a connection.
Expected result: The spray is contained, a visible outlet or connection drips, water strikes an unintended wall area, or the source cannot be seen.
Next step: Record the fixture and timing and request qualified assessment; keep the shower off when the leak is active or reaches the wall, floor, ceiling below, or electrical boundary.
Stop if: Stop if the fixture is loose, water sprays toward electricity, the floor becomes slippery, or further observation would require tools or disassembly.
Why this matters
Why: A visible fixture or spray clue may route the call toward plumbing or enclosure service, but a concealed leak can look similar after water travels along a surface.
Use your observations
Decision map
Find the observation that best matches what you see, then follow the next safe action.
-
PATH 01Safety boundary
What you see
Water appears only during brief shower use and stops after shutoff with no adjacent-space sign.
Do this next
Request enclosure, fixture, and visible drain assessment and provide the exact edge or fixture location; avoid caulking or changing the seal before evaluation.
Why this path and its safety boundary
Safety stop: Stop using the shower if the leak worsens, reaches the wall or floor assembly, or creates a slip or electrical hazard.
-
PATH 02Safety boundary
What you see
Water continues after shutoff, appears while the shower is idle, or reappears at the drain or floor.
Do this next
Treat it as a possible plumbing, drain, pan, or concealed moisture path and arrange prompt professional assessment; limit or stop shower use.
Why this path and its safety boundary
Safety stop: Do not remove the drain, open the wall, perform a pressure test, or use chemicals to trace or clear the issue.
-
PATH 03Safety boundary
What you see
Water escapes at a door, curtain, rim, curb, or threshold.
Do this next
Provide a safe photograph and request shower-enclosure and waterproofing evaluation; the visible boundary may not be the full leak path.
Why this path and its safety boundary
Safety stop: Do not remove seals, direct spray at joints, apply caulk, or continue a prolonged test.
-
PATH 04Safety boundary
What you see
A wall, floor, ceiling below, or adjacent room shows staining, dampness, swelling, odor, or recurring change.
Do this next
Stop or limit shower use and arrange prompt plumbing or bathroom-remodeling service with the adjacent-space details; request professional evaluation for concealed damage.
Why this path and its safety boundary
Safety stop: Do not open surfaces, disturb mold, or enter an unstable or electrically affected area.
-
PATH 05Safety boundary
What you see
Water reaches an electrical fitting, an unsafe floor, a sagging ceiling, or a rapidly spreading area.
Do this next
Leave the affected area, avoid touching water or electrical equipment, and request urgent emergency or qualified professional help.
Why this path and its safety boundary
Safety stop: No further shower testing is appropriate while an electrical, slip, collapse, or rapid-spread hazard is present.
Helpful context
Understand the symptom
Why timing matters
A leak that appears only when spray reaches a door, rim, wall joint, or drain area points to a different inspection path than water that continues while the shower is off. Timing is a routing clue, not proof of a failed part. The same visible wet spot can be fed by a concealed connection, a pan or waterproofing problem, or water traveling through a wall or floor assembly.
Keep the observation short and non-destructive
Use normal brief shower operation only when the room, floor, and electrical boundary are safe. Observe from outside the spray and stop if water moves toward an electrical device or creates a slip hazard. Do not create a prolonged test, direct a spray at joints, disassemble the drain or plumbing, remove wall finishes, or apply chemicals or pressure.
What to tell the professional
Share whether the leak occurs during use, after shutoff, or while the shower is idle; the first visible location; the condition of the door, rim, drain, wall, floor, and adjacent space; and whether a ceiling or electrical area is affected. Photos from a dry, safe position and a short timeline are more useful than destructive access.
Only after diagnosis
Potential parts
- shower-door-seal
Consider only if a professional confirms that a compatible door or threshold seal is the cause and the enclosure is otherwise sound.
Confirm the door type, track or threshold profile, seal orientation, and exact fit; do not use a seal to conceal a waterproofing or wall leak. - silicone-caulk
Consider only after the water source and substrate are assessed and a professional confirms that sealing is appropriate for the specific joint.
Confirm compatibility with the enclosure, tile, substrate, and existing sealant; do not caulk over wet, moldy, loose, or concealed-damage conditions. - drain-hair-catcher
Consider only if a professional confirms that surface hair at the drain is contributing to a visible, accessible slowdown and the catcher will not interfere with the drain assembly.
Confirm drain opening size, overflow behavior, and cleaning requirements; it cannot repair a leaking drain connection, pan, or waterproofing layer.
When checks do not resolve it
Need a professional?
Arrange qualified plumbing, shower-enclosure, or bathroom-remodeling service for any recurring shower leak. Use urgent help when water reaches an electrical fitting, ceiling below, unstable surface, or adjacent space, or continues while the shower is off.
Safety scope: Keep checks brief and non-destructive. Do not open walls or ceilings, remove drains or trim, access concealed plumbing, use chemicals or pressure methods, handle electrical equipment near water, or continue a test after a hazard appears.
Common questions
FAQ
How can I tell whether a shower leak happens only during use?
During normal brief use when safe, observe from a dry position, then stop and note whether moisture stops, slows, or continues. Do not prolong the test or direct spray at joints.
Should I recaulk the shower immediately?
No. First identify whether the water is from a fixture, door or threshold, drain, pan, or concealed path. Caulk over wet or damaged conditions can hide the problem.
What if the ceiling below the shower is stained?
Stop or limit shower use and arrange prompt professional evaluation. Do not open the ceiling; leave if it sags, water reaches electrical equipment, or the area is unsafe.
Can I remove the drain cover to investigate?
Not in this observation workflow. Do not disassemble the drain or use chemicals or pressure methods. Record the timing and visible pooling, then request qualified plumbing assessment.
Read the exact guide
Official sources
- A Brief Guide to Mold, Moisture and Your HomeU.S. Environmental Protection Agency · Supports acting promptly on leaks, avoiding disturbance of hidden mold, and routing concealed water damage to qualified professionals.
- WaterSense Labeled Homes Technical Sheet: Free of Water LeaksU.S. Environmental Protection Agency WaterSense · Supports brief visual observation of showerhead, tub-spout, drain-area, and visible fixture leak clues without destructive access.
- Remodeling Your Home and Indoor Air QualityU.S. Environmental Protection Agency · Supports fixing bathroom leaks, addressing condensation, and preventing water from penetrating wall and floor cavities.
Community feedback
Share a repair observation
Share a plain-text repair observation. Accepted observations are published automatically; this page may take a moment to update.