
On this page
Start here
Quick answer
For a shower accessibility upgrade with a high threshold, first document the step-over entry, approach and turning or transfer space, grip and seat needs, door or enclosure clearance, visible drain and floor transitions, and any existing structure or utility limits. A lower threshold may affect drain slope, waterproofing, adjacent-room water protection, wall backing, and the floor assembly, so do not demolish, cut, re-pipe, install waterproofing, or alter structure as a test. Ask a qualified bathroom-remodeling professional to compare a low-threshold, transfer, or roll-in plan; use any temporary non-slip measure only if it does not obstruct the exit or create a trip hazard.
Before you begin
Safety first
- This article covers observation and planning only. Qualified professionals must handle demolition, waterproofing, drain or supply changes, structural work, wall or floor access, electrical or plumbing work, and permanent installation.
Work through in order
Diagnostic checks
Use only checks that match the exact appliance or system and its official guide.
-
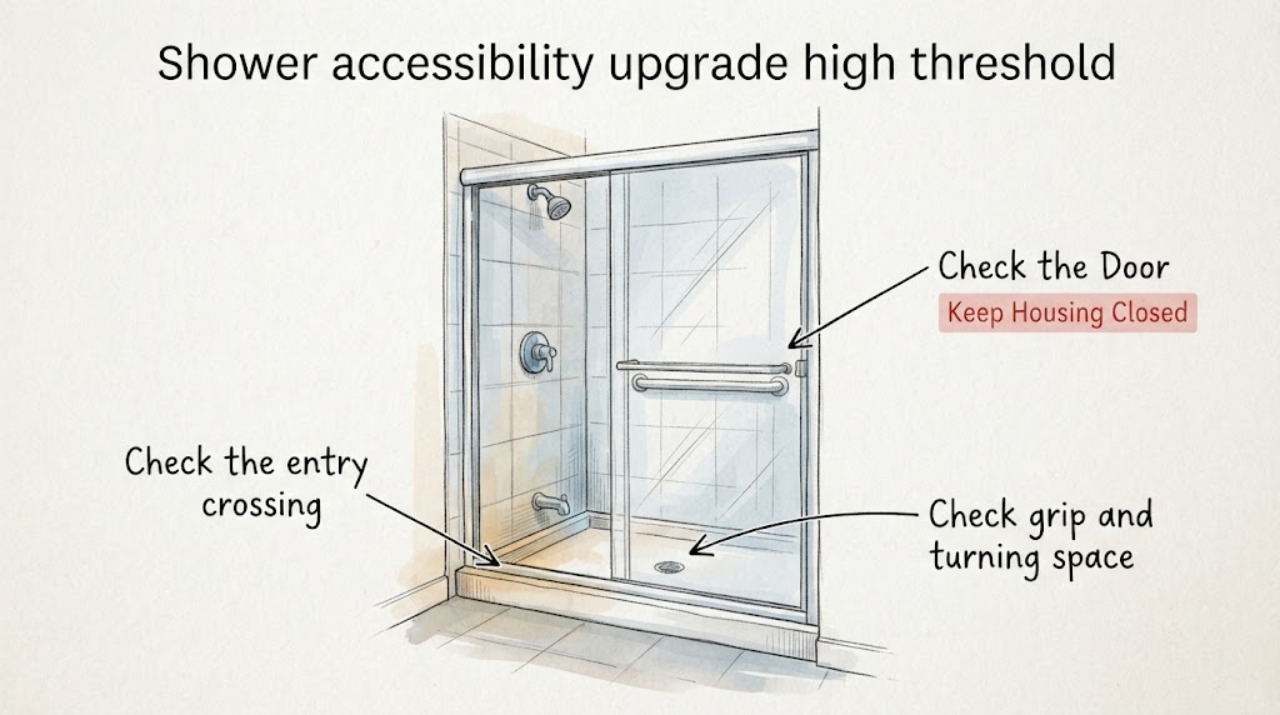
Check the entry crossing
From a dry, stable position, document how much the existing shower threshold must be stepped over, whether the edge is visible and slippery, and whether a mobility aid, caregiver, or person with limited balance can approach without twisting or losing support.
Expected result: The entry may have a single high curb, a narrow or uneven transition, a slippery edge, a door track, or enough clearance for a safer lower-barrier concept without proving that construction is feasible.
Next step: Photograph the entry, note the approximate threshold, doorway, floor transitions, and user constraints, and keep the shower use unchanged until a professional reviews the route.
Stop if: Stop for a fall risk, loose threshold, wet or unstable floor, blocked exit, or any need to step into the shower to measure or test it.
Why this matters
Why: A high threshold is an access-route problem, not just a tile or door detail; the needed entry method and user abilities determine whether a low-threshold, transfer, or roll-in concept is appropriate.
-
Check grip and turning space
Map the clear approach, turning or transfer space, support points, control reach, and possible seat location without pulling on a grab bar, sitting on an unverified seat, or moving fixtures.
Expected result: The clear space may be blocked by a vanity, toilet, curb, door, or fixture; support may be absent, poorly located, or attached to a wall whose structure is unknown.
Next step: Record the available floor area, door swing, fixed obstacles, current grab bars, seat, controls, and the user's intended transfer or standing method for the design professional.
Stop if: Do not test load-bearing capacity, climb over the curb, drill for a grab bar, remove a fixture, or continue if the user cannot maintain a secure stance.
Why this matters
Why: A shower can have a lower entry and still be unsafe if a person cannot approach, turn, transfer, reach controls, or obtain a load-rated support point.
-
Check the door and opening
Observe the door, curtain, enclosure, and hardware from outside the wet area for entry width, swing or track interference, reachable handles, and obstruction of a transfer or seat; do not remove the enclosure or change its swing.
Expected result: The enclosure may be a hinged door, sliding panel, curtain, fixed glass, or track that narrows the route or collides with a seat, person, or mobility aid.
Next step: Photograph the open and closed positions if safe, note whether the door swings into the approach or shower, and identify the desired caregiver or mobility-aid access.
Stop if: Stop for cracked glass, a loose panel, a jammed door, sharp edges, blocked egress, or any need to lift, unfasten, or cut the enclosure.
Why this matters
Why: The enclosure can make a threshold appear higher by narrowing the opening or blocking controls and transfer space, so a door concept must be planned with the entry route rather than selected alone.
-
Check drainage and water boundaries
Observe water flow and the visible floor transition from a dry position: where the drain sits, whether water ponds at the threshold, whether the bathroom floor is lower or higher, and whether there are stains below or beside the shower; do not lift flooring or expose the waterproof layer.
Expected result: The floor may drain without visible ponding, hold water at the curb, leak to a ceiling or adjacent room, or conceal the drain slope and waterproof layer entirely.
Next step: Photograph ponding, leakage, damaged finishes, and the visible drain and floor transitions, and ask the professional to verify drainage and waterproofing feasibility before selecting an upgrade concept.
Stop if: Stop for active leakage, soft flooring, mold-like growth, a ceiling stain below, exposed electrical equipment, or any request to remove tile, membrane, trim, or flooring.
Why this matters
Why: Lowering a threshold changes water containment and may depend on drain slope, floor elevations, membrane continuity, and adjacent-room protection that cannot be confirmed by surface appearance.
-
Check existing structure limits
Collect non-invasive information about the existing structure and utilities: floor framing or slab clues, wall backing, plumbing and electrical locations if documented, adjacent-room levels, and prior remodel records; do not open the wall or floor to find them.
Expected result: The floor may be a slab or framed assembly, the wall may or may not have backing, and drain, supply, electrical, or heating routes may be unknown or constrained.
Next step: Provide plans, photos, permit records, fixture model information, and any known floor or wall restrictions to a qualified remodeling professional for a feasibility review.
Stop if: Do not cut, drill, demolish, re-pipe, alter structure, disturb waterproofing, or perform electrical or plumbing work as part of this observation.
Why this matters
Why: A high threshold may reflect a structural floor limit, drain route, waterproofing assembly, or utility conflict, so the feasible solution depends on existing construction rather than an assumed standard detail.
-
Prepare the accessibility plan
Prepare an accessibility design handoff that states the threshold and entry measurements, turning or transfer needs, support and seat needs, door preference, drainage and water observations, structure limits, and whether the goal is low-threshold or roll-in access.
Expected result: The plan may favor a lower curb, transfer-oriented layout, roll-in concept, alternate door, added support, or a temporary non-slip measure while a professional evaluates the existing room.
Next step: Arrange a qualified bathroom-remodeling accessibility evaluation and ask for alternatives, feasibility limits, permits or code review, and a written scope before any construction decision.
Stop if: End observation before demolition, waterproofing, drain relocation, structural work, wall cutting, or any installation that carries a person or changes the building assembly.
Why this matters
Why: The upgrade must coordinate safe access, support, enclosure, drainage, waterproofing, and structure; a product chosen in isolation cannot establish a code-compliant or user-safe design.
Use your observations
Decision map
Find the observation that best matches what you see, then follow the next safe action.
-
PATH 01Safety boundary
What you see
The entry crossing is the main barrier, the approach and turning space are usable, no active water or structural issue is visible, and the existing floor and enclosure constraints are documented.
Do this next
Ask a qualified professional to compare lower-threshold, door, support, and seat concepts for this room; do not alter the threshold or waterproofing as a user project.
Why this path and its safety boundary
Safety stop: Do not assume a surface ramp or replacement door preserves drainage, waterproofing, clearance, or structural safety.
-
PATH 02Safety boundary
What you see
The user needs a transfer seat or mobility-aid access and the existing clear floor, door, controls, or turning space is insufficient or obstructed.
Do this next
Request an accessibility-focused layout assessment comparing transfer and roll-in concepts, including approach space, grab-bar support, seat position, controls, and enclosure clearance.
Why this path and its safety boundary
Safety stop: Do not mount a grab bar or seat into an unverified wall, and do not remove fixtures to create clearance.
-
PATH 03Safety boundary
What you see
The threshold contains water, ponding occurs, the drain slope or floor elevation is unknown, or the waterproof layer may be interrupted by a lower-entry concept.
Do this next
Have a qualified remodeler assess water containment, drain capacity, floor transitions, and waterproofing continuity before choosing an accessible layout.
Why this path and its safety boundary
Safety stop: Do not provide or attempt demolition, membrane installation, drain relocation, caulking, or other waterproofing steps.
-
PATH 04Safety boundary
What you see
The hinged or sliding enclosure narrows the entry, blocks transfer or turning space, conflicts with a seat, or prevents reachable controls.
Do this next
Ask the professional to compare enclosure and opening concepts that preserve the user's approach and water containment; keep the existing enclosure intact until reviewed.
Why this path and its safety boundary
Safety stop: Do not lift glass, reverse the door, remove tracks, or cut the enclosure as a trial.
-
PATH 05Safety boundary
What you see
The floor framing or slab, wall backing, plumbing route, electrical route, adjacent-room level, or prior construction is unknown or appears restrictive.
Do this next
Request a site feasibility review by the appropriate qualified remodeling professionals, with structural, plumbing, electrical, and local-code input as needed.
Why this path and its safety boundary
Safety stop: Do not cut the floor or wall, re-pipe, modify structure, or disturb the waterproofing assembly to discover what is behind it.
-
PATH 06Safety boundary
What you see
A full upgrade cannot yet be planned, but the current entry is slippery or difficult and the shower is otherwise stable and dry.
Do this next
Ask a professional about a temporary non-slip and support plan that does not obstruct the exit or create a trip hazard, while scheduling the accessibility evaluation.
Why this path and its safety boundary
Safety stop: Do not treat a loose mat, suction accessory, or unverified seat as a substitute for structural support or a low-threshold design.
-
PATH 07Safety boundary
What you see
The threshold, glass, floor, wall, support, or enclosure is loose, cracked, unstable, leaking, or creating an immediate fall or electrical hazard.
Do this next
Stop using the shower, keep people clear, and obtain prompt qualified repair and accessibility assessment before attempting an upgrade plan.
Why this path and its safety boundary
Safety stop: Do not brace, tape, drill, dismantle, or improvise a structural or waterproofing repair.
Helpful context
Understand the symptom
Start by documenting the step-over height, entry width, approach, grip, turning or transfer space, and the user's mobility or caregiver needs. A high curb is only one part of the access route.
Check the door or enclosure, visible drain and floor transitions, ponding, adjacent-room water evidence, and available construction records. The drain slope and waterproof layer cannot be approved from surface appearance alone.
A lower-threshold or roll-in concept needs coordinated review of support, seat, clearances, door operation, drainage, waterproofing, structure, plumbing, and code. Do not demolish, re-pipe, cut structure, or install waterproofing as part of this guide.
Prepare a clear design handoff
Give the professional photos, approximate dimensions, transfer method, support needs, door preference, moisture history, plans, prior remodel records, and the difference between a temporary safety measure and a permanent accessible upgrade.
Safety boundary
Stop conditions
- Do not demolish, cut, drill, re-pipe, alter structure, disturb waterproofing, relocate a drain, or change electrical or plumbing systems as part of observation.
- Do not test a grab bar or shower seat by loading it, climb over a high threshold, lift glass, reverse a door, or use a loose mat or suction accessory as structural support.
- Stop for a loose or cracked threshold or enclosure, unstable floor or wall, active leak, soft material, blocked exit, exposed electricity, or an immediate fall hazard.
- Use qualified accessibility, bathroom-remodeling, structural, plumbing, or electrical professionals when the entry, support, drainage, waterproofing, structure, or code feasibility is uncertain.
Only after diagnosis
Potential parts
- shower-grab-bar
Consider this category only after an accessibility professional confirms placement and a qualified installer confirms adequate structural support.
Confirm wall construction, backing, load requirements, placement, user reach, clearances, and local requirements; a grab bar is not safe when mounted into an unverified substrate. - shower-seat
Consider this category only after the layout and support method are professionally assessed; a seat does not correct a high threshold or poor drainage.
Confirm seat dimensions, load rating, transfer position, clear floor space, wall or floor support, moisture environment, and user needs before selection. - non-slip-shower-mat
Consider this category only as a temporary supplemental measure after the shower is stable and dry; it is not a substitute for an accessible entry or structural support.
Confirm size, edge profile, drainage, exit clearance, and slip resistance; it must not curl, slide, block the drain, or create a new trip hazard.
When checks do not resolve it
Need a professional?
Request professional assessment before changing a high threshold, and call promptly for loose or cracked glass, unstable flooring, active leaks, failed supports, blocked egress, or an immediate fall hazard.
Safety scope: This article covers observation and planning only. Qualified professionals must handle demolition, waterproofing, drain or supply changes, structural work, wall or floor access, electrical or plumbing work, and permanent installation.
Common questions
FAQ
What should I check first when a shower threshold is too high?
Document the step-over height, entry width, approach and turning space, current supports, door operation, and the user's transfer or mobility-aid needs from a safe position.
Can I simply lower the shower threshold?
Not necessarily. Lowering an entry may affect drain slope, floor elevations, waterproofing continuity, wall backing, plumbing, structure, and adjacent-room water protection. A qualified professional must assess feasibility.
Should I plan a low-threshold or roll-in shower?
Compare a lower-threshold or roll-in concept with a transfer-oriented layout based on the user's entry, turning, transfer, support, and caregiver needs. The door and water containment must be considered with the layout.
What should I tell the bathroom-remodeling professional?
Provide photos, approximate dimensions, door and enclosure type, drain and ponding observations, support and seat needs, user mobility requirements, floor or wall records, and any known structural or utility limits.
When should I stop planning or using the shower?
Stop for a loose or cracked threshold, unstable floor, broken glass, active leak, inaccessible exit, or any need to cut, demolish, re-pipe, alter structure, or disturb waterproofing.
Read the exact guide
Official sources
- Chapter 6: Bathing RoomsU.S. Access Board · Official accessibility guidance used for planning observations about shower thresholds, clearances, turning or transfer space, grab bars, seats, controls, enclosures, and floor slope; local code, existing construction, and user needs control the final design.
Community feedback
Share a repair observation
Share a plain-text repair observation. Accepted observations are published automatically; this page may take a moment to update.