
On this page
Start here
Quick answer
Treat a shower threshold accessibility upgrade as a complete access and water-management project, not simply a curb-removal job. First document whether the user needs a transfer shower or a roll-in path, then measure the existing threshold, entry, clear floor space, drain, slope, enclosure, controls, and available wall support from a safe, dry position. A low or flush transition can make entry easier, but changing it can affect the shower pan, waterproofing, floor reinforcement, drain layout, and where water goes. Have a qualified accessible-bathroom remodeler evaluate the assembly before any demolition, wall cutting, drain work, or waterproofing removal.
Work through in order
Diagnostic checks
Use only checks that match the exact appliance or system and its official guide.
-
Check 1
Describe the user's actual entry method and observe the current approach without entering an unstable or wet shower: stepping over the threshold, transferring to a seat, using a shower chair, or rolling a mobility aid through the opening.
Expected result: Record whether the person can approach, cross the lip, turn, transfer, and reach the controls without loss of balance, assistance that is not reliably available, or contact with the enclosure.
Next step: Give this use case to the remodeler and ask for the proposed entry path, transfer position, seat option, controls, and grab-bar plan to be shown together.
Stop if: Stop using the shower and arrange professional help if crossing the threshold causes a near-fall, requires an unsafe lift, or the person cannot control the mobility aid on the wet floor.
Why this matters
Why: A wheeled or no-transfer need points toward a roll-in/flush-access study; a reliable transfer need may allow a transfer-shower layout with a properly supported seat. A low threshold alone does not select the safe design.
-
Check 2
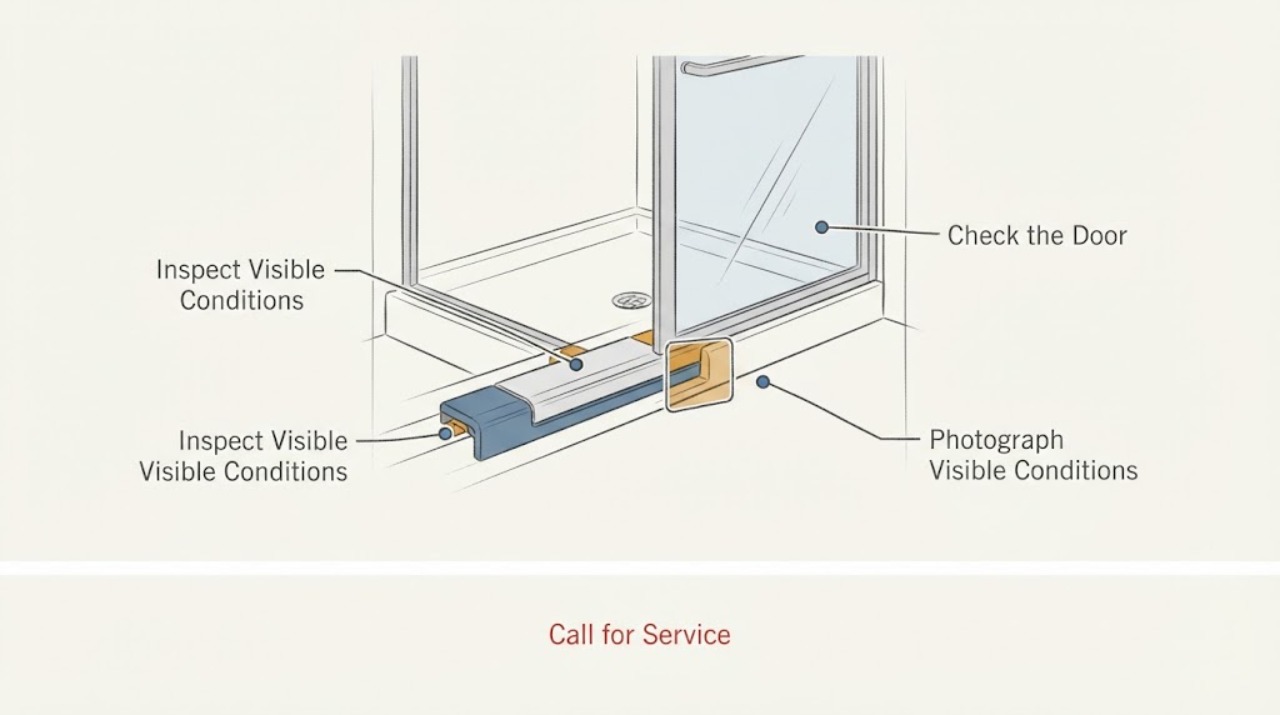
From a dry, stable position, photograph and measure the threshold profile and opening geometry without removing trim or tile.
Expected result: Note the lip height and whether it is vertical, rounded, or beveled; record clear entry width, approach space, door swing or curtain track, and any frame that narrows the path.
Next step: Send measurements and photos for a site-specific threshold, entry, and enclosure proposal; do not assume a surface ramp or trim change will preserve waterproofing or clearance.
Stop if: Do not pry up the threshold, cut the enclosure, or start demolition to expose a hidden edge.
Why this matters
Why: A tall, sharp, uneven, or narrowing threshold is a likely access barrier, but an apparently easy lip can still fail if the opening or approach is blocked. The observed geometry should be compared with the applicable design reference and local requirements by the professional.
-
Check 3
Inspect visible water-management conditions from outside the shower: drain location, apparent floor pitch, puddling or escape, door/curtain bottom, bathroom-floor finish, and the distance to the bathroom doorway.
Expected result: Record whether water stays within the shower, flows toward the drain, collects at the entry, or reaches the surrounding floor; note if the drain or slope is not visible rather than guessing.
Next step: Ask the remodeler to explain the drain, slope, membrane, edge, and floor-finish details in the quote, including how the bathroom floor will be protected from escaping water.
Stop if: Do not flood-test, pull flooring, remove waterproofing, or move a drain as a home diagnostic.
Why this matters
Why: Escape or ponding means the threshold change must be designed with the pan, membrane, drain, and surrounding floor. A flush transition may be appropriate only when the complete water-containment strategy works for the user and room.
-
Check 4
Inventory the support and reach features without drilling: existing grab bars, seat, hand-held spray, controls, shelves, enclosure panels, and the visible wall or ceiling construction.
Expected result: Note whether the user can reach the controls and spray from the intended standing or seated position, whether the enclosure blocks a transfer, and whether there is documented backing for a grab bar or seat.
Next step: Request a layout showing support locations, seat clearance, control reach, spray hose, and enclosure operation for the selected transfer or roll-in scenario.
Stop if: Do not drill into a wet-area wall or rely on suction or friction-mounted supports for weight-bearing transfers.
Why this matters
Why: A threshold can be easy to cross yet unsafe to use without stable support or reachable controls. Unknown backing means a grab bar or seat cannot be selected safely from appearance alone; the remodeler may need to plan reinforcement while preserving waterproofing.
-
Check 5
Collect the construction constraints for the quote: slab or framed floor, shower-pan or membrane records, drain and supply locations if known, adjacent rooms, wall type, and any prior leak or repair history.
Expected result: Separate confirmed facts from unknowns and flag any floor reinforcement, structural wall, hidden plumbing, finished-room, or waterproofing concern.
Next step: Ask for an on-site assessment that explains what will be opened, how the structure and plumbing will be protected, how waterproofing will be rebuilt, and how the finished entry will be tested.
Stop if: Do not cut structural walls, re-pipe plumbing, recess the floor, or remove waterproofing yourself.
Why this matters
Why: An unknown or constrained assembly can make a curb removal, drain relocation, or recessed floor unsafe or impractical. The work then belongs in a scoped professional remodel rather than a manual repair sequence.
Use your observations
Decision map
Find the observation that best matches what you see, then follow the next safe action.
-
PATH 01Safety boundary
What you see
The current lip is low or beveled, but the user still catches a foot, caster, or transfer path on it.
Do this next
Have the remodeler evaluate a safer transition and the entire approach before changing the threshold.
Why this path and its safety boundary
Why it matters: The barrier may be the transition shape, entry clearance, enclosure, approach floor, or a mismatch between the user's device and the path, not height alone.
Safety stop: Stop if the crossing is unstable or causes a near-fall.
-
PATH 02Safety boundary
What you see
The user needs to roll in without transferring.
Do this next
Request a complete roll-in layout and waterproofing/drainage detail from an accessible-bathroom professional.
Why this path and its safety boundary
Why it matters: A roll-in/flush-access concept must be checked for entry width, maneuvering clearance, drain and slope, water containment, controls, and enclosure interference.
Safety stop: Do not improvise a ramp over the curb if it narrows the path, moves under a wheel, or sends water into the room.
-
PATH 03Safety boundary
What you see
The user can transfer safely and needs a stable seated bathing position.
Do this next
Ask for wall backing, seat loading/support details, reachable controls, and transfer clearance to be included in the scope.
Why this path and its safety boundary
Why it matters: A transfer-shower concept may be suitable, but the seat, grab bars, controls, enclosure, and transfer clearance must be coordinated with the threshold.
Safety stop: Do not install a weight-bearing seat or grab bar without verified support and wet-area detailing.
-
PATH 04Safety boundary
What you see
Water escapes at the entry or the bathroom floor already ponds.
Do this next
Make water containment a design requirement and have the professional explain the drain and waterproofing assembly.
Why this path and its safety boundary
Why it matters: Lowering the threshold before solving drainage, slope, pan, membrane, and surrounding-floor protection could increase slip or moisture damage risk.
Safety stop: Keep the area dry and stop use if water reaches electrical fixtures, an adjacent room, or a deteriorated floor.
-
PATH 05Safety boundary
What you see
The wall backing, floor build-up, drain path, or waterproofing is unknown.
Do this next
Schedule an on-site assessment and request a written scope for opening, reinforcement, plumbing protection, waterproofing, and finish restoration.
Why this path and its safety boundary
Why it matters: The apparent threshold change may involve concealed structural, plumbing, or membrane work that cannot be assessed safely from the surface.
Safety stop: Do not probe, drill, cut, or remove finishes to find the unknown condition.
-
PATH 06Safety boundary
What you see
The required geometry conflicts with a structural wall, slab, concealed plumbing, or an occupied adjacent room.
Do this next
Pause the project and obtain a qualified remodeler's design and any required local review before work begins.
Why this path and its safety boundary
Why it matters: This is a professional remodeling constraint, not a threshold-trim adjustment.
Safety stop: Do not cut structural walls, perform manual plumbing re-piping, or disturb the waterproofing assembly.
Helpful context
Understand the symptom
Why the threshold cannot be evaluated by height alone
The right arrangement depends on how the person enters: a wheeled mobility aid may need a roll-in path, while an ambulatory user may transfer to a seat. Entry width, approach clearance, door or curtain movement, controls, spray hose, seat, and grab-bar locations can make a nominally low threshold difficult to use. The U.S. Access Board describes roll-in access, clearances, enclosure interference, and control placement as a coordinated design problem. Use those references as a design check; they do not by themselves determine the code result for a private home.
Water containment is part of accessibility
A nearly flush shower entry gives water less height to contain. Drain position, floor slope, pan or membrane detailing, bathroom-floor finish, and a compressible or otherwise designed sill may all matter. If water already escapes, puddles, or reaches a doorway, lowering the threshold without redesigning drainage and waterproofing can trade one hazard for another. Do not perform a flood test, remove tile, or disturb the waterproofing to investigate this article's checks.
Plan the upgrade around documented existing conditions
Before requesting a quote, gather the threshold height and profile, opening width, shower and bathroom dimensions, drain location, visible slope, enclosure type, control and spray locations, wall construction or blocking records, and any accessible-bathroom requirements that apply to the property. Unknown backing, a slab or floor system, hidden plumbing, or an adjacent finished room is a reason for an on-site assessment rather than a do-it-yourself alteration.
Only after diagnosis
Potential parts
- shower-grab-bar
Consider this only if the chosen transfer or roll-in layout identifies a needed support location and a professional confirms adequate wall backing and wet-area installation details.
Verify the wall construction, reinforcement, mounting method, clearances, and manufacturer instructions for the specific bathroom before ordering or installing. - shower-seat
Consider this only when the user's transfer plan calls for a seat or the selected roll-in design benefits from a folding transfer option, and the professional confirms support and clearance.
Confirm wall backing, seat dimensions and loading, waterproofing interfaces, control reach, and enclosure clearance for the actual shower construction. - non-slip-shower-mat
Consider this only if the floor and drainage manufacturer allow it and it does not impede a wheeled path, create a raised edge, trap moisture, or cover the drain.
Confirm the floor finish, drain flow, cleaning requirements, and mobility-device clearance; a mat is not a substitute for a safe threshold or correctly rebuilt floor.
When checks do not resolve it
Need a professional?
Call a qualified accessible-bathroom remodeler for any threshold modification, curbless or roll-in conversion, transfer-shower redesign, waterproofing or shower-pan work, drain or floor changes, wall reinforcement, or when the current shower cannot be used safely. Urgency is normal unless there is an active leak, exposed electrical hazard, structural movement, or an immediate fall risk.
Have this ready
- Provide the user's entry method and assistance needs, threshold photos and measurements, opening and approach dimensions, drain and puddling observations, enclosure and control locations, seat/grab-bar needs, wall or floor records, leak history, and clearly marked unknowns.
Common questions
FAQ
Is lowering the shower threshold enough to make the shower accessible?
No. Entry width, approach clearance, transfer or roll-in needs, floor slope, drain capacity and location, waterproofing, enclosure movement, controls, and stable supports must work together. A lower lip can still leave an unsafe transfer or cause water to escape.
What threshold height should an accessible shower have?
The ADA references opened for this article specify different requirements by shower type and facility, including a low maximum threshold for roll-in designs and a beveled, rounded, or vertical transition for transfer designs, with a limited existing-facility exception. Those standards do not automatically decide the requirements for a private home, so have the remodeler confirm the applicable local code and the actual user need.
Can I put a small ramp over the existing shower curb?
Only after a professional confirms that the transition will remain stable, preserve usable entry width and maneuvering space, avoid a raised or slipping edge, and keep water contained. A loose or improvised ramp can obstruct a caster or transfer and may direct water into the bathroom.
Will a grab bar or shower seat solve a threshold problem?
Not by itself. Grab bars and seats address support or transfer, while the threshold and floor address entry and water movement. Their locations, wall backing, seat clearance, control reach, and enclosure must be designed with the selected access path.
Read the exact guide
Official sources
- 2010 ADA Standards for Accessible DesignU.S. Department of Justice · Use as a technical reference for covered facilities; it is not an automatic legal determination or residential building-code ruling for every private home.
- Chapter 6: Bathing RoomsU.S. Access Board · General accessibility design guidance; confirm the project's jurisdiction, property type, and local requirements with the qualified professional.
- Design Details for Accessible Disaster Relief HousingU.S. Department of Housing and Urban Development · A residential design reference, not a substitute for local code, existing-building constraints, or a site-specific waterproofing and structural assessment.
Community feedback
Share a repair observation
Share a plain-text repair observation. Accepted observations are published automatically; this page may take a moment to update.