
On this page
Start here
Quick answer
For a shower accessibility upgrade driven by a mobility need, first map how the actual user enters, transfers, reaches, grips, sits, controls water, and exits from a dry, stable position. Measure the clear entry width, threshold or curb height, clear floor and turning or transfer space, seat and grab-point locations, and control or hand-shower reach; note door or screen swing and caregiver clearance. A roll-in layout, transfer seat, grab bars, or a smaller accessory can fit different patterns, but none should be ordered from a keyword alone. Do not make anyone test a wet or unstable setup, load-test an unverified bar, drill, remove glass, alter plumbing, or do demolition. Give the measurements and user actions to an occupational therapist or accessibility professional and a qualified remodeler to plan the safest path.
Before you begin
Safety first
- Observation and planning only: do not force a transfer, load-test an unknown support, climb, drill, remove glass, cut, alter plumbing or drainage, start demolition, or make anyone use a wet or unstable setup.
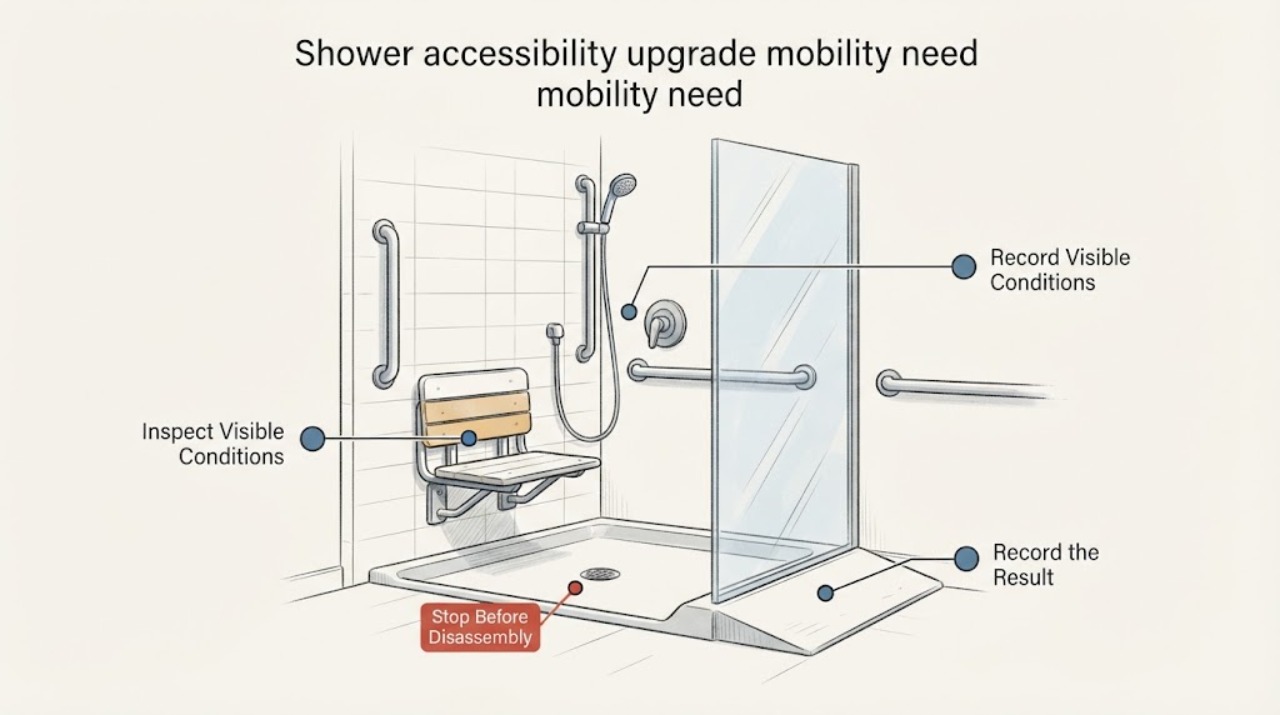
Work through in order
Diagnostic checks
Use only checks that match the exact appliance or system and its official guide.
-
Check 1
From the dry floor outside the shower, measure or record the clear entry, threshold or curb, door or screen swing, and unobstructed floor area in front of the opening. Do not ask a mobility-limited person to test the wet entry.
Expected result: Note the actual widths and threshold height, whether a walker, wheelchair, or helper can approach and turn, and whether the door or screen removes transfer space.
Next step: Sketch the approach and photograph the dry entry for an accessibility professional; keep use supervised or use an alternate shower if the entry is unstable.
Stop if: Stop before entering if the floor is wet or slippery, the threshold cannot be crossed safely, or the check would require moving glass or fixtures.
Why this matters
Why: A narrow entry, raised or irregular threshold, or blocked approach can make a transfer plan unsafe even when the shower fixture works; compare the measurements with the person's mobility aid and applicable local accessibility guidance.
-
Check 2
With water off and the area dry, observe the user's normal approach and transfer plan from outside: walking, walker, wheelchair, or caregiver-assisted, and whether they turn, pivot, or sit before crossing the opening. Do not force a transfer or practice on an unapproved surface.
Expected result: Record where the user's feet or mobility aid would land, which hand reaches first, whether a helper needs side clearance, and whether the door, screen, or curb interrupts that sequence.
Next step: Have the user or caregiver describe the easiest and hardest step, then give that sequence and the measurements to an occupational therapist or qualified accessibility remodeler.
Stop if: Stop if balance, pain, fatigue, or anxiety makes the observation unsafe, or if someone would need to bear weight on an unverified fixture.
Why this matters
Why: The needed route determines whether a roll-in layout, a transfer seat, additional clearance, or professional redesign is appropriate; a generic grab-bar position may not match this movement.
-
Check 3
From a stable dry position, identify existing grab bars, shelves, seat or bench, hand shower, and controls, and record their locations relative to the entry and intended seat. Do not pull on, lean heavily against, drill into, or remove any feature.
Expected result: Note whether a bar or seat moves, flexes, has unknown backing, is unreachable from the intended transfer position, or is blocked by the enclosure; note control reach from standing and seated positions without turning water on.
Next step: Treat questionable supports as unavailable and ask a qualified professional to confirm wall reinforcement, mounting, seat support, and accessible control placement before use.
Stop if: Stop immediately if a support shifts, the wall cracks, fasteners pull out, or reaching requires an unstable stance.
Why this matters
Why: Appearance does not establish structural support. A bar or seat that is loose, poorly placed, or not backed for the intended load can turn a mobility need into a fall hazard.
-
Check 4
Map the wet path from the entry to the seat and controls without flooding the shower: note the floor surface, visible slope or pooling, drain position, hand-shower hose or holder, control location, and door or screen edges.
Expected result: Record where a seated user or caregiver would need to reach, whether the hand shower can be used without crossing the wet path, and whether water or a door swing would leave no dry transfer space.
Next step: Share the map with a remodeler and accessibility professional; use only an already safe supervised setup while they assess it.
Stop if: Do not wet-test, remove enclosure parts, alter drainage, or enter a slippery area to verify a theory.
Why this matters
Why: A mobility-friendly plan must work during wet use, not only when the room is dry; slippery transitions, pooling, inaccessible controls, or enclosure interference may call for drainage, enclosure, or layout changes rather than a mat alone.
-
Check 5
Prepare a user-specific upgrade brief with the measurements, approach and transfer sequence, grip and sitting needs, assistance level, seat and grab-point preferences, threshold and door constraints, control reach, and photos.
Expected result: Confirm that the brief states what the user can do independently, what requires a helper, what must be reachable while seated, and which conditions make showering unsafe today.
Next step: Ask an occupational therapist or qualified accessibility remodeler to compare the brief with applicable standards and local code, then plan any structural, waterproofing, drainage, or enclosure work.
Stop if: Do not start demolition, cutting, drilling, plumbing changes, or installation based only on a product listing or generic dimension.
Why this matters
Why: This separates an accessory review from a structural or plumbing remodel and prevents choosing a part before its placement and support are known.
Use your observations
Decision map
Find the observation that best matches what you see, then follow the next safe action.
-
PATH 01Next step
What you see
The dry entry, approach, transfer space, and supports are usable for the person, and the remaining change is reach or convenience.
Do this next
Keep the existing safe setup; consider a conditional shower seat, grab bar, hand shower, or non-slip surface only after fit, wall support, placement, and local requirements are confirmed.
-
PATH 02Next step
What you see
The threshold, clear entry, turning or transfer area, or door or screen blocks the intended mobility aid or caregiver.
Do this next
Pause the upgrade and obtain an accessibility remodel plan; do not remove the curb, glass, or floor yourself.
-
PATH 03Next step
What you see
The person needs a seated transfer or caregiver assistance, or cannot reliably stand in the wet area.
Do this next
Plan seat position, back and side support, grab points, control and hand-shower reach, and caregiver clearance with an occupational therapist and qualified remodeler; keep showering supervised or use an alternate.
-
PATH 04Next step
What you see
An existing grab bar or seat shifts, flexes, has unknown backing, or is outside reach from the transfer position.
Do this next
Treat it as non-supporting, prevent loading, and arrange a professional structural and mounting assessment before use.
-
PATH 05Next step
What you see
The wet path is slippery, pools, or leaves no dry transfer or exit space; water reaches the door or surround.
Do this next
Stop using the shower until a qualified professional assesses drainage, slope, enclosure, and waterproofing; isolate the area to reduce fall and water-damage risk.
-
PATH 06Next step
What you see
Measurements or user needs are uncertain, changing, or differ between standing and seated use.
Do this next
Record both use cases and get an occupational therapist or accessibility designer plus a qualified remodeler to produce a staged plan; do not choose a one-size-fits-all upgrade.
Helpful context
Understand the symptom
Mobility need changes the design question
An accessibility upgrade is not one universal fixture choice. The useful distinction is how this person approaches, transfers, grips, sits, controls water, and exits, and whether a helper or mobility aid needs clear space. Those observations decide whether the next step is a conditional accessory review, a transfer-shower plan, or a roll-in remodel.
Measure the path before selecting hardware
Take measurements from a dry, stable position: the opening and threshold, clear floor and turning or transfer area, door or screen swing, seat location, grab-point locations, and controls or hand-shower reach. Compare them with the user's actual aid and movement and with applicable accessibility standards or local code; do not treat a generic product dimension as a safe plan.
Support and wet-use checks
A bar or seat that looks secure may not have the reinforcement or placement needed for a transfer. Pooling, a slippery transition, unreachable controls, or an enclosure that blocks the seat can defeat an otherwise promising layout. Do not load-test unknown hardware or make a mobility-limited person practice an unsafe shower.
Plan the work with the right professionals
Give the measurements, photos, assistance needs, and standing and seated reach notes to an occupational therapist, accessibility designer, or qualified bathroom remodeler. They can distinguish a compatible accessory from structural backing, waterproofing, drainage, enclosure, or plumbing work and can check the applicable standards and local requirements before any change.
Only after diagnosis
Potential parts
- shower-grab-bar
Consider this only if the transfer observation identifies a needed grip point and a professional confirms appropriate wall reinforcement, location, and load support; a suction or decorative bar is not a substitute.
Confirm the wall construction, mounting method, dimensions, placement, and applicable requirements with a qualified professional before purchase or installation. - shower-seat
Consider this only if seated showering or a transfer is part of the user's plan and the wall, seat size, transfer clearance, and control reach are professionally confirmed.
Confirm seat support, dimensions, transfer clearance, mounting, and manufacturer requirements for the specific shower before purchase or installation. - non-slip-shower-mat
Consider this only if a compatible dry, stable surface remains after drainage review; a mat cannot correct a raised threshold, pooling, or a blocked transfer route.
Confirm the surface, drain flow, mat stability, and cleaning requirements for the specific shower; do not use it to mask an underlying fall hazard.
When checks do not resolve it
Need a professional?
Call a qualified accessibility professional promptly for an unstable or slippery entry, a support that shifts, a blocked transfer route, suspected water or structural damage, or any change beyond safe observation; involve an occupational therapist when user movement or transfer is uncertain.
Safety scope: Observation and planning only: do not force a transfer, load-test an unknown support, climb, drill, remove glass, cut, alter plumbing or drainage, start demolition, or make anyone use a wet or unstable setup.
Have this ready
- Provide dry-entry measurements, photos, approach and transfer sequence, mobility aid, grip and sitting needs, assistance level, standing and seated reach, door or screen constraints, wet-path observations, and any support movement or water pooling.
Common questions
FAQ
What should I measure before upgrading a shower for mobility?
Record the clear entry and threshold, approach and turning or transfer space, door or screen swing, seat and grab-point locations, and control or hand-shower reach from the positions the user will actually use. A professional should compare these measurements with the mobility aid, applicable standards, and local requirements.
How do I tell whether a transfer or roll-in layout fits?
Observe whether the person can approach with a mobility aid, turn, and transfer to a supported seat, or needs to remain in a wheeled aid. The entry, clear floor, transfer position, seat, grab points, and controls must work as one sequence; an occupational therapist or accessibility remodeler should confirm the layout.
Can I trust an existing shower grab bar or seat?
Not from appearance alone. If it moves, flexes, has unknown wall backing, or cannot be reached from the intended transfer position, treat it as unavailable and have a qualified professional assess mounting and support before anyone loads it.
Will a mat or add-on seat solve a mobility problem?
Only for a compatible, already stable setup and only after the user's transfer, reach, and support needs are known. A mat cannot correct a raised threshold, pooling, blocked clearance, or unsafe enclosure, and an add-on seat cannot replace properly supported transfer planning.
When should an occupational therapist or accessibility remodeler be involved?
Involve them before choosing hardware when the user needs a transfer, caregiver assistance, a wheelchair or walker, a seat, new grab points, a lower threshold, changed drainage, or altered enclosure. Get prompt help for a slippery or unstable setup or any support that shifts.
Read the exact guide
Official sources
- Chapter 6: Bathing RoomsU.S. Access Board · Provides official guidance for comparing a proposed shower layout with accessibility provisions; confirm the applicable building context, local code, and user-specific plan.
- 2010 ADA Standards for Accessible DesignU.S. Department of Justice · Supports planning measurements and feature placement for accessible showers; residential use, local code, and the specific user's needs require separate confirmation.
Community feedback
Share a repair observation
Share a plain-text repair observation. Accepted observations are published automatically; this page may take a moment to update.