
On this page
Start here
Quick answer
A settled expansion joint should be evaluated as a slab, base, drainage, and joint-movement problem rather than patched from the surface. From the ground, observe whether the change follows the joint, whether adjacent slabs sit at different heights, whether water or soil moves through the joint, and whether the condition is expanding or creating a trip or vehicle hazard. Do not lift the slab, cut or grind concrete, excavate, inject material, demolish, or attempt structural repair. Keep traffic away from a hazardous area and arrange concrete or site-drainage professional assessment, especially when settlement is progressing, the driveway is undermined, water is washing soil out, or the joint affects a garage threshold or public walkway.
Before you begin
Safety first
- This is a ground-level observation guide. Do not lift or demolish the slab, cut or grind concrete, excavate, probe, inject, drill, pressure-test, or attempt structural repair.
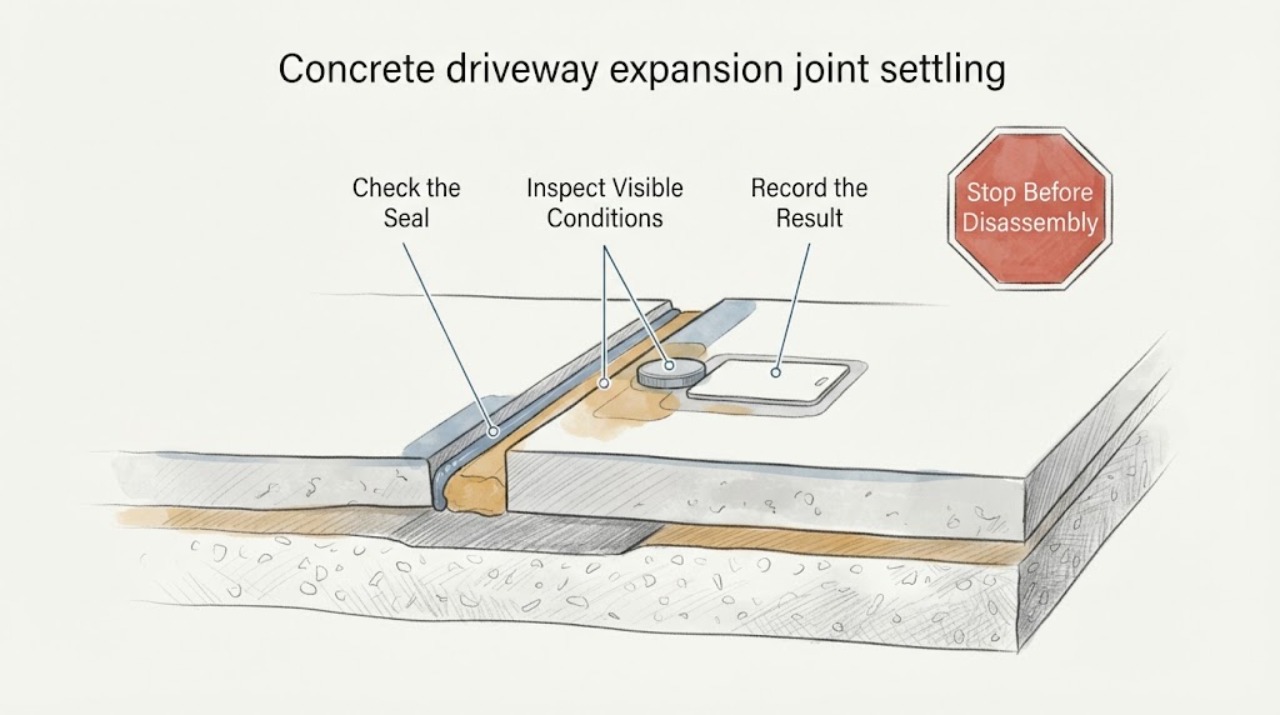
Work through in order
Diagnostic checks
Use only checks that match the exact appliance or system and its official guide.
-
Check 1
From a level, safe standing position, visually trace the full expansion joint across the driveway and compare the two adjacent slab surfaces without touching, probing, cutting, or placing a load on them.
Expected result: Note whether the joint remains continuous, whether one slab appears lower, and whether the change is limited to the joint or extends into nearby cracks and edges.
Next step: Photograph the joint from both directions and ask a concrete professional to assess the slab relationship and support conditions.
Stop if: Stop if the surface is unstable, a piece is loose, the joint edge crumbles under ordinary foot traffic, or the inspection would require entering vehicle traffic.
Why this matters
Why: A change aligned with the joint supports a joint or adjacent-slab evaluation, while distress away from the joint may indicate a wider concrete or base problem.
-
Check 2
Observe the joint and its approach from the driveway edge for a visible step, rocking-looking slab edge, trip point, vehicle scraping risk, or interference with the garage threshold, without walking over a hazardous section.
Expected result: Record whether the issue affects pedestrians, tires, doors, drainage toward the garage, or only appearance, and whether the affected path can be safely bypassed.
Next step: Mark or isolate the unsafe area without drilling, fastening, or placing an obstruction in a travel path, and request professional assessment.
Stop if: Stop and keep people and vehicles away if there is a fall hazard, abrupt vehicle impact risk, exposed void, or instability at the garage threshold.
Why this matters
Why: A functional hazard raises the urgency even if cracking is limited; a stable appearance-only change still needs evaluation when settlement is progressing.
-
Check 3
After ordinary rainfall, view the joint, driveway edges, downspouts, and adjacent soil from a safe location without directing water onto the slab or entering standing water.
Expected result: Note ponding, runoff crossing the joint, soil washout, a visible void, muddy discharge, or water collecting near the settled section or foundation.
Next step: Photograph the runoff pattern and arrange concrete and drainage evaluation; keep downspout discharge and vehicle traffic away from the affected area where safely possible.
Stop if: Stop for active washout, sinkhole-like voids, rapidly moving water, flooding, or an undermined edge that could collapse.
Why this matters
Why: Water movement or eroded soil can reduce support or enlarge a void, so a surface patch would not address the underlying drainage or base condition.
-
Check 4
Look across both slabs and the joint for spalling, broken corners, pumping residue, open or displaced joint filler, new parallel cracks, or repeated edge damage without scraping or removing joint material.
Expected result: Note whether distress is concentrated at the joint, appears on both slabs, or is accompanied by dirt or water emerging from the joint.
Next step: Provide close and wide photographs to the professional and do not fill, seal, grind, or cut the joint while the cause is unknown.
Stop if: Stop if concrete fragments are loose, sharp, unstable, or could be thrown or displaced by vehicle traffic.
Why this matters
Why: Joint-centered spalling, pumping, or parallel cracking can indicate loss of support or movement that needs a professional pavement/concrete diagnosis.
-
Check 5
Review safe records and normal use history for when the settlement began, including heavy rain, utility or drainage work, landscaping changes, freeze-thaw weather, nearby construction, or a change in vehicle loading.
Expected result: Note whether the condition is stable, seasonal, recurring after rain, or visibly worsening in dated photographs.
Next step: Give the timeline and photographs to the concrete or site professional and request an assessment of the joint, slabs, base, and drainage together.
Stop if: Stop if the history includes a sudden collapse, a new void, utility damage, or movement toward a foundation, retaining wall, or public path.
Why this matters
Why: Timing can connect settlement with drainage, subgrade, loading, or environmental changes, but it cannot establish the structural cause without professional inspection.
Use your observations
Decision map
Find the observation that best matches what you see, then follow the next safe action.
-
PATH 01Next step
What you see
The joint is visibly settled but stable, dry, and not affecting walking, vehicles, drainage, or the garage threshold.
Do this next
Document the condition and arrange a concrete professional evaluation before it progresses; do not apply a cosmetic joint patch as a diagnosis.
-
PATH 02Next step
What you see
There is a step, trip hazard, vehicle impact risk, exposed void, or settlement at a garage or walkway threshold.
Do this next
Isolate the area and arrange prompt concrete/site assessment; use another safe route and keep vehicles off the affected section.
-
PATH 03Next step
What you see
Rain runoff, soil washout, ponding, muddy discharge, or drainage changes accompany the joint settlement.
Do this next
Request coordinated concrete and drainage evaluation and keep additional water and traffic away from the area; do not excavate or inject material yourself.
-
PATH 04Next step
What you see
Settlement is rapidly worsening, the slab is unstable, cracks are spreading, or the condition approaches a foundation, utility, or retaining structure.
Do this next
Keep everyone clear and obtain urgent professional assessment; do not lift, cut, demolish, or structurally repair the slab.
Helpful context
Understand the symptom
An expansion or isolation joint is intended to separate adjacent concrete sections and accommodate movement. A step at the joint can reflect settlement, loss of support, drainage or erosion, joint distress, slab movement, or an unrelated crack. A visual inspection can describe the pattern but cannot determine the repair method.
The most useful record is the relationship between the joint and the change: whether both slabs move, one slab has dropped, the joint is opening or spalling, and whether water or soil follows the line. Photograph the same view over time without creating a deliberate load or water test.
Settlement near vehicle paths, garage entries, steps, or drainage routes can become a safety issue before structural damage is obvious. Keep people, vehicles, and runoff away from an unsafe edge and let a qualified professional determine whether leveling, replacement, drainage work, or a broader site solution is appropriate.
When checks do not resolve it
Need a professional?
Arrange concrete or site-drainage professional assessment for any persistent settlement at an expansion joint. Escalate promptly for a trip or vehicle hazard, exposed void, active washout, rapid movement, garage-threshold impact, foundation proximity, or utility concern.
Safety scope: This is a ground-level observation guide. Do not lift or demolish the slab, cut or grind concrete, excavate, probe, inject, drill, pressure-test, or attempt structural repair.
Common questions
FAQ
Does settlement at an expansion joint mean the whole driveway must be replaced?
Not necessarily. The cause may involve a joint, support, drainage, erosion, slab movement, or a local section. A concrete professional should evaluate the pattern and surrounding conditions before selecting a repair scope.
Can I fill the joint to stop the settlement?
Do not fill or seal the joint as a first response. Joint material cannot correct a settled slab, lost support, drainage issue, or active washout, and it can hide useful evidence.
What if water washes soil out near the joint?
Keep people and vehicles away and arrange concrete and drainage assessment. Do not excavate, inject, or direct more water at the area; active washout can undermine the slab.
What should I photograph for a quote?
Take safe wide views from both driveway directions, close views of the joint and adjacent cracks, the garage or walkway relationship, drainage and soil clues, and dated comparisons if available.
Read the exact guide
Official sources
- Design and Evaluation of Jointed Plain Concrete Pavement With Fiber Reinforced Polymer DowelsFederal Highway Administration · FHWA explains that joints accommodate movement and that loss of load transfer can lead to differential settlement and uneven slab discontinuity; this supports professional evaluation rather than a surface-only fix.
- Difference between a contraction joint, isolation joint, expansion joint, construction joint, and a cold jointAmerican Concrete Institute · ACI defines an expansion joint as a separation that permits movement and describes an isolation joint as a separation between adjacent sections; this helps distinguish a joint symptom from a generic crack.
- Long-Term Pavement Performance Automated Faulting Measurement: Chapter 1 - IntroductionFederal Highway Administration · FHWA defines joint faulting as an elevation difference and identifies slab settlement, pumping, curling, warping, and inadequate support as possible contributors; it also connects faulting with roughness and driver safety.
Community feedback
Share a repair observation
Share a plain-text repair observation. Accepted observations are published automatically; this page may take a moment to update.