
On this page
Start here
Quick answer
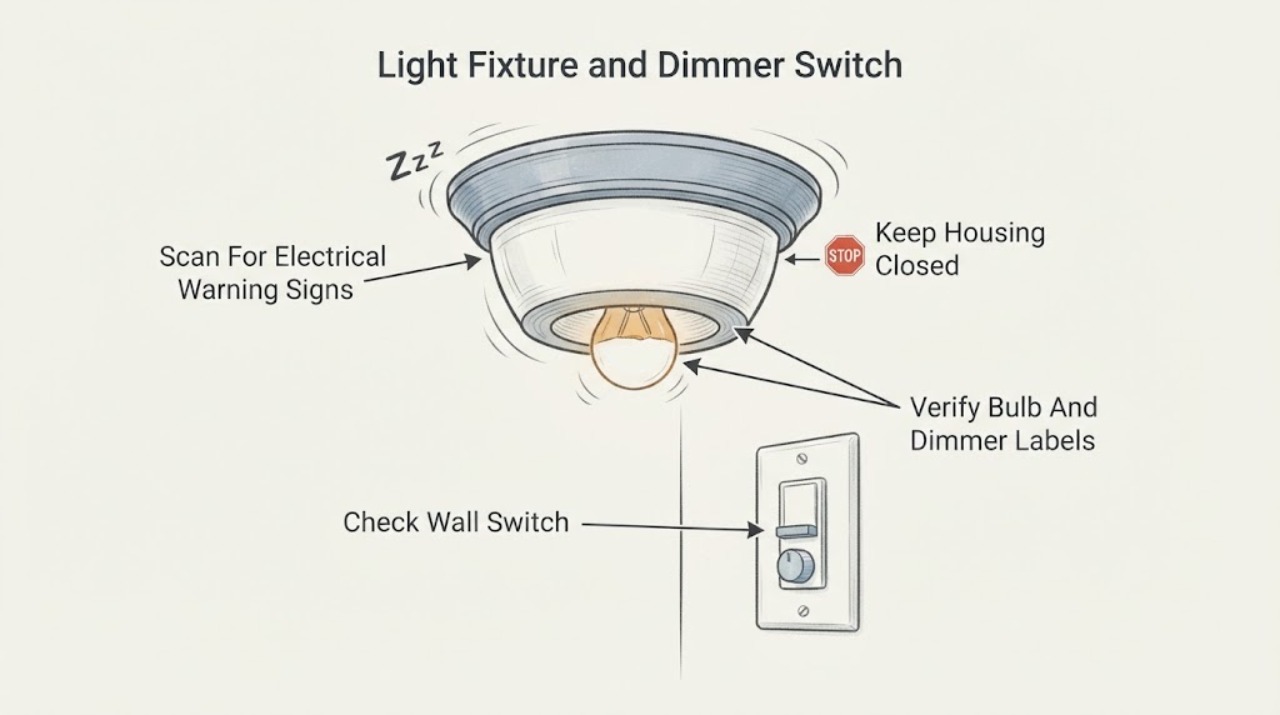
A buzzing Hampton Bay light fixture on a dimmer can be caused by an incompatible LED bulb and dimmer, a lamp or LED driver that vibrates under dimmed power, a loose fixture part, or an electrical fault at the switch or wiring. First stop if the switch plate or fixture is hot, discolored, sparking, crackling, smells burned, or makes the breaker trip; from a safe position turn the light off and arrange qualified electrical service. If there are no hazard signs, note whether the sound comes from the wall switch or fixture and whether it occurs only at the low end of dimming, at every level, or with the light off. Check the bulb and dimmer labels for a dimmable bulb and a dimmer rated for that load, without opening the box or changing wiring. A compatible bulb may stop a low-level buzz, but a switch that buzzes, heats, flickers, or remains noisy across the range should not be used until an electrician inspects the circuit and the fixture.
Before you begin
Safety first
- This article supports floor-level listening, label checks, and a cool-bulb or visible-hardware check only. Do not open the electrical box or fixture, probe live wiring, work overhead, bypass controls, or continue using a hot, sparking, flickering, or discolored circuit.
Work through in order
Diagnostic checks
Use only checks that match the exact appliance or system and its official guide.
-
Check 1
From a safe floor position, listen and look for a hot or discolored wall plate, smoke, sparks, crackling, burning odor, flicker, a loose switch, or a breaker that trips when the light is used; do not touch the switch plate or fixture to test temperature.
Expected result: Record whether the buzz is accompanied by heat, discoloration, odor, flicker, arcing, smoke, loose operation, or protection trips, or whether it is only an audible sound with normal light output.
Next step: For any hazard sign, stop using the light, leave the area if smoke or arcing is present, and have a qualified electrician inspect it. Otherwise turn the light off and continue only with non-contact observations.
Stop if: Do not reset a tripped breaker repeatedly, touch a warm or sparking switch, or remain under a fixture that is smoking, shedding hot material, or visibly loose.
Why this matters
Why: Buzzing plus heat, discoloration, flicker, odor, sparks, or a trip can indicate an unsafe switch, overload, connection, or fixture fault. An isolated quiet hum without other symptoms still requires source identification but may permit only a brief label and control check.
-
Check 2
From the floor, operate the installed dimmer only as normally intended and note whether the sound is at the wall switch, the fixture, or the bulb, and whether it changes at full brightness, the low end, intermediate levels, or with the light off.
Expected result: Record whether the fan or other fixture functions normally if present, whether buzzing follows the dimming level, whether it stops at full brightness, whether it remains with the lamp off, and whether the lamp flickers or drops out.
Next step: Stop using the light if buzzing persists outside a narrow dimming range, changes unpredictably, or is accompanied by flicker or heat. Photograph the control and fixture labels from a safe position for compatibility review or service.
Stop if: Do not hold the dimmer at a noisy setting, remove the wall plate, or use a dimmer on a ceiling-fan motor unless the exact product instructions explicitly support that configuration.
Why this matters
Why: A noise limited to a dimming range is consistent with a load-and-dimmer or lamp-driver interaction; a sound at the switch, a sound with the lamp off, or noise across the entire range points more toward the control or wiring. A fixture-only rattle can be mechanical, but flicker, heat, or odor keeps the electrical fault boundary active.
-
Check 3
With the light off and cool, read the bulb package or marking, fixture socket label, and dimmer model from ordinary safe access; compare them with the Hampton Bay fixture instructions without opening the electrical box.
Expected result: Record whether the bulb is explicitly dimmable, whether the dimmer is rated for LED or the installed lamp type, whether the socket wattage and bulb rating align, and whether the model or load information is missing.
Next step: Use only the exact product manuals and compatibility information to select a replacement bulb or have a qualified professional select the correct control; do not substitute a bulb or dimmer by shape alone.
Stop if: Do not exceed the fixture or socket rating, use a non-dimmable bulb on a dimmer, mix incompatible controls, or change wiring to force compatibility.
Why this matters
Why: A non-dimmable bulb, an older or otherwise incompatible dimmer, an exceeded socket rating, or unknown load information can explain buzz, hum, flicker, or a narrow dimming range. Matching labels reduce one likely cause but do not clear a hot, buzzing switch or damaged fixture.
-
Check 4
Only when no warning sign is present and the light is cool, use one known-good bulb that exactly matches the socket and dimmer requirements, or use the manufacturer's approved compatibility guidance; do not change the switch or wiring.
Expected result: Record whether the buzz stops, is reduced only at a particular dimming level, remains unchanged, or is replaced by flicker, delayed start, heat, odor, or a protection trip.
Next step: Leave the light off and request qualified service when the approved load does not restore quiet operation or any abnormal symptom appears. Keep the original bulb and packaging available for diagnosis.
Stop if: Do not try a higher-wattage bulb, use an unknown bulb as a test, repeatedly cycle power, or continue using the fixture when it flickers, heats, smells, or trips protection.
Why this matters
Why: A change with a correctly rated bulb supports a bulb-and-dimmer or lamp-driver compatibility issue, but it does not prove the wiring is sound. No change, new flicker, heat, odor, or a trip points toward the dimmer, fixture, driver, socket, or circuit and needs service.
-
Check 5
When the fixture is cool and power is isolated by the exact product instructions, inspect from a secure ordinary-access position for a visibly loose shade, globe, trim, bulb, or mounting part; do not reach into a socket or open the canopy.
Expected result: Record whether the sound is a physical rattle that changes when the light or fan moves, whether the shade or trim is visibly loose, or whether the fixture is quiet mechanically but electrically buzzing.
Next step: Follow only the manual's safe, accessible hardware-care instruction if the part is plainly loose; otherwise photograph it and request service for the fixture, socket, or mounting assembly.
Stop if: Do not climb onto an unstable surface, support a hanging fixture, remove glass, tighten energized parts, or work above shoulder height without qualified equipment and training.
Why this matters
Why: A loose non-electrical part can vibrate, while a sound from a socket, driver, or switch is not cleared by tightening exterior hardware. A ceiling fan fixture also transmits motor vibration, so the light control and fan control must remain within their specified roles.
-
Check 6
Record the Hampton Bay fixture model, dimmer model, bulb type, control arrangement, and symptom timing from visible labels or paperwork; do not remove the wall plate, canopy, or fixture to find information.
Expected result: Classify the result as buzz only at low dimming, buzz at all levels, buzz from the switch, buzz from the fixture or bulb, fixture rattle, flicker or drop-out, or buzz with heat, odor, sparks, or trips.
Next step: Provide the record and photos to a qualified electrician or lighting technician and keep the noisy circuit off when the source is uncertain or any warning sign is present.
Stop if: Do not open the electrical box, probe live wires, splice conductors, replace the dimmer without the circuit's wiring and load being verified, or bypass a control.
Why this matters
Why: The pattern distinguishes a possible bulb-and-dimmer mismatch from a mechanical rattle or an electrical control, connection, driver, or fixture fault. Model and load details are needed before selecting a dimmer, driver, socket, or fixture replacement.
Use your observations
Decision map
Find the observation that best matches what you see, then follow the next safe action.
-
PATH 01Safety boundary
What you see
The buzz is heard mainly at low dimming levels, the switch is cool and quiet mechanically, and the bulb or fixture is LED.
Do this next
Confirm a dimmable LED and a dimmer rated for that load, then use exact manufacturer compatibility guidance or qualified service. Keep the light off if the noise persists or any heat or flicker appears.
Why this path and its safety boundary
Why it matters: A bulb-and-dimmer compatibility or low-end operating-range issue is plausible; Leviton identifies buzzing, humming, flicker, and limited range as compatibility symptoms.
Safety stop: Do not replace the dimmer by guesswork, use a non-dimmable bulb, or alter the circuit to force a lower dimming level.
-
PATH 02Safety boundary
What you see
The buzzing comes from the wall dimmer, remains across the dimming range or with the lamp off, or the switch is warm, discolored, loose, sparking, or accompanied by odor or flicker.
Do this next
Stop using the circuit and arrange qualified electrical inspection; leave protection devices alone unless emergency guidance requires otherwise.
Why this path and its safety boundary
Why it matters: A switch, connection, overload, or wiring fault is more likely than a quiet lamp-load interaction; unusual electrical buzzing and heat are warning signs.
Safety stop: Do not touch a hot or sparking switch, remove its cover, reset a repeatedly tripping breaker, or continue testing at different dimming levels.
-
PATH 03Safety boundary
What you see
The sound comes from the Hampton Bay fixture or bulb, changes with fan or fixture movement, and the wall dimmer is cool, quiet, and free of warning signs.
Do this next
With power safely isolated and the fixture cool, perform only a visible ordinary-access check and follow the exact manual for any simple hardware care; request service if the source is not obvious.
Why this path and its safety boundary
Why it matters: A loose shade, trim, socket, bulb, or fixture part may be vibrating, although a lamp or driver can also produce electrical noise under dimming.
Safety stop: Do not reach into the socket, remove glass or the canopy, or hold the fixture while it is energized.
-
PATH 04Safety boundary
What you see
The bulb is labeled dimmable, the dimmer is rated for the lamp type, and the buzz remains or is accompanied by flicker, drop-out, delay, heat, or odor.
Do this next
Leave the circuit off and have a qualified electrician or lighting technician inspect the control, fixture, connections, and load under the exact model instructions.
Why this path and its safety boundary
Why it matters: Label compatibility does not eliminate a failing dimmer, driver, socket, fixture connection, or branch-circuit issue; the result is outside a simple bulb swap.
Safety stop: Do not keep changing bulbs, adjust hidden wiring, or continue operation because the labels appear to match.
-
PATH 05Safety boundary
What you see
The fixture has an integrated LED driver, an unknown dimmer or load, or a control and fixture combination that cannot be identified without disassembly.
Do this next
Identify visible model information and request qualified service or manufacturer guidance for the exact fixture and control combination.
Why this path and its safety boundary
Why it matters: The correct dimmer, driver, control method, and replacement parts cannot be inferred from the fixture appearance; opening the assembly risks shock or damage.
Safety stop: Do not install a generic dimmer, bypass an LED driver, convert an integrated fixture, or open the electrical enclosure as a first check.
Helpful context
Understand the symptom
First locate the sound
A hum or buzz may come from the wall dimmer, the bulb or LED driver, the fixture body, or a loose shade or mounting part. Listen from the floor with the light at a normal setting; do not put an ear or hand near the switch or climb to the fixture while it is energized. A sound that follows the dimming level often points toward a load-and-dimmer interaction, while a sound from the switch plate or a noise that continues when the lamp is off needs electrical attention.
LED compatibility is more specific than physical fit
A bulb can screw into a socket and still be unsuitable for a dimmer. The bulb must be marked as dimmable, and the dimmer must be rated for that bulb or fixture type and load. Leviton notes that compatibility problems can produce buzzing or humming as well as flicker and poor dimming range. Check the Hampton Bay fixture label, bulb package, dimmer model, and their manuals; do not assume that replacing only the switch or only the bulb makes an unknown pairing safe.
A fixture rattle is different from electrical buzzing
A loose glass shade, finial, trim piece, or mounting screw can vibrate when the lamp or fan is operating, but do not tighten overhead parts while power is on or while standing on an unsafe ladder. If the light is cool and power is safely isolated according to the product instructions, a floor-level visual check can show whether a shade is visibly loose. Any buzzing accompanied by heat, discoloration, flicker, odor, or sparks is an electrical service issue, not a hardware adjustment.
Safety boundary
Stop conditions
- Stop using the dimmer and fixture for heat, discoloration, sparks, crackling, smoke, burning odor, flicker, a loose switch, or a breaker or protection device that trips.
- Do not touch or open the electrical box, dimmer, fixture canopy, socket, driver, or branch wiring; overhead wiring and energized testing belong to a qualified electrician.
- Do not use a non-dimmable bulb with a dimmer, exceed the socket or fixture rating, force a bulb, or choose a dimmer without confirming the lamp and load requirements.
- Do not bypass a ceiling-fan or light control, use a dimmer on a motor circuit unless the exact design allows it, or modify an integrated LED fixture as a bulb repair.
- Do not keep cycling power or changing bulbs when the source is unknown; request qualified inspection for persistent buzzing, intermittent operation, or any warning sign.
Only after diagnosis
Potential parts
- dimmable replacement bulb or LED lamp
Consider only when the original bulb is failed or the sound changes with a correctly labeled, compatible dimmable bulb and the socket rating supports it.
Confirm the socket base, bulb type, wattage, dimming capability, fixture rating, and dimmer compatibility; physical fit alone is not sufficient. - compatible dimmer switch
Consider only when service or manufacturer compatibility guidance identifies a bulb-and-dimmer mismatch and the circuit wiring and load are verified.
A qualified electrician must confirm the circuit, control arrangement, lamp type, load, and exact dimmer requirements before replacement. - lamp socket, LED driver, or light fixture assembly
Consider only after diagnosis finds a heat-damaged socket, failed driver, loose fixture assembly, or integrated-light fault beyond a correct bulb and compatible dimmer.
Match the exact Hampton Bay model and light architecture; do not substitute a generic socket, driver, or integrated fixture.
When checks do not resolve it
Need a professional?
Arrange qualified electrical or lighting service when the dimmer itself buzzes, feels warm, is discolored or loose, sparks, flickers, trips protection, or remains noisy with the lamp off; when an approved bulb does not resolve fixture buzzing; when the fixture has an integrated LED driver; or when diagnosis requires opening a box, canopy, socket, or wiring. Provide the Hampton Bay fixture model, dimmer model, bulb type and rating, control arrangement, sound location, dimming level, photos, and any heat, odor, flicker, or trip history. Keep the circuit off when the source is uncertain.
Safety scope: This article supports floor-level listening, label checks, and a cool-bulb or visible-hardware check only. Do not open the electrical box or fixture, probe live wiring, work overhead, bypass controls, or continue using a hot, sparking, flickering, or discolored circuit.
Common questions
FAQ
Why does my Hampton Bay light fixture buzz when controlled by a dimmer?
The bulb or LED driver may be incompatible with the dimmer, especially at a particular dimming level, or the noise may come from the dimmer, socket, fixture hardware, or wiring. Identify where and when the sound occurs, then check only the labels and a compatible bulb; stop for heat, flicker, odor, sparks, or a tripping breaker.
Can an LED bulb cause buzzing on a dimmer?
Yes. A bulb can fit the socket while still being unsuitable for that dimmer or load. Use only a bulb marked dimmable and a dimmer rated for the fixture and lamp type. If the sound persists with a verified compatible bulb, request qualified service rather than trying higher wattage or unknown bulbs.
Is a buzzing dimmer switch dangerous?
Buzzing is a warning sign when it comes from the switch, continues with the lamp off, or is accompanied by warmth, discoloration, sparks, flicker, or burning odor. Turn the circuit off from a safe position if possible and arrange qualified electrical inspection; do not open or touch the switch.
Can I replace the Hampton Bay dimmer switch myself?
Do not treat a buzzing dimmer as a simple swap. The circuit wiring, load, bulb or fixture type, control arrangement, and local requirements must be verified, and the wall box remains an electrical work area. Have a qualified electrician select and install a compatible control.
What if the buzz comes from the light fixture instead of the switch?
A bulb, LED driver, socket, shade, trim, or mounting part may be vibrating. With power isolated and the fixture cool, perform only a visible ordinary-access check and confirm the bulb and dimmer labels. Stop and request service for socket damage, heat, flicker, odor, integrated LED parts, or noise that persists across the range.
Read the exact guide
Official sources
- CPSC Guide to Home Wiring HazardsU.S. Consumer Product Safety Commission · CPSC home-wiring hazard guide; it provides general safety context and does not replace local code or product instructions.
- Electrical Safety DosElectrical Safety Foundation International · ESFI consumer electrical-safety guidance for warning signs in home electrical systems.
- When Should I Replace a Switch?Leviton Manufacturing Co., Inc. · Leviton product-support safety guidance for switches; it supports the general electrical stop boundary for a buzzing dimmer.
- NEMA DimmingLeviton Manufacturing Co., Inc. · Leviton compatibility guidance for residential dimmers and LED loads; the exact Hampton Bay fixture and dimmer instructions control.
Community feedback
Share a repair observation
Share a plain-text repair observation. Accepted observations are published automatically; this page may take a moment to update.