
On this page
Start here
Quick answer
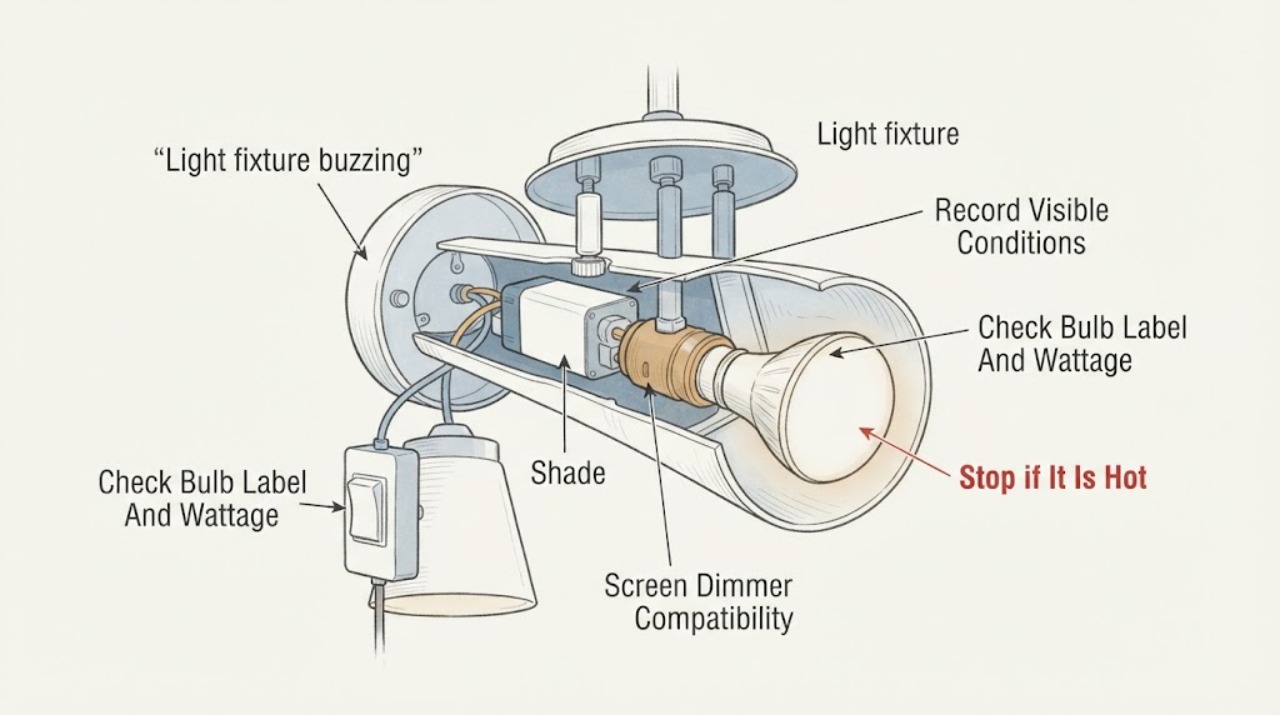
A buzzing Kichler light fixture may be reacting to an incompatible bulb and dimmer, a vibrating shade or mounting piece, a failing lamp or LED driver, or an electrical connection or switch problem. First determine whether the sound is from the lamp, fixture, dimmer, or nearby wiring and whether it changes with brightness. With power off and the fixture cool, check only the bulb type and wattage against the fixture label and inspect accessible shade or mounting pieces for obvious movement. Kichler says LED drivers respond differently to dimmer types and directs owners to the product documentation; ENERGY STAR likewise says a dimmable LED and dimmer must be a compatible pair. Stop using the light and arrange a licensed electrician for buzzing with flicker, heat, discoloration, burning odor, sparks, a loose switch, or a breaker that trips.
Work through in order
Diagnostic checks
Use only checks that match the exact appliance or system and its official guide.
-
Check 1
From a safe position, listen to the Kichler fixture, lamp area, dimmer or switch, and nearby ceiling or wall during one normal on cycle. Note whether the sound starts only at a low dim level, changes with the dimmer slider, remains at full output, or continues after the light is switched off.
Expected result: Record a dimmer-linked hum, a constant buzz, a rattle that changes when the shade or fixture vibrates, sound from the wall control, or sound that persists when the lamp is off.
Next step: Leave the light off while you document the pattern and move to the label and visual checks only if there is no heat, odor, flicker, discoloration, spark, or breaker trip.
Stop if: Stop immediately for smoke, burning odor, sparks, a hot switch or fixture, discoloration, shock, water at the fixture, or a breaker that trips again.
Why this matters
Why: A sound that tracks dim level makes the bulb-driver-dimmer combination more likely. A rattle that tracks vibration makes a shade, bulb, canopy, or mounting part more likely. Sound from a switch or when the fixture is off makes the branch wiring or control more concerning than the lamp itself.
-
Check 2
After switching the light off, turning off the circuit at the breaker, allowing the fixture to cool, and following the Kichler instructions for the exact model, read the fixture label and inspect the accessible bulb for the lamp base, bulb type, dimmable marking, and maximum wattage. Do not reach into a socket or touch an integrated LED module.
Expected result: Record a bulb within the marked wattage and application, a non-dimmable bulb on a dimmer, a bulb above the marked maximum, a bulb that is loose or damaged, or an integrated LED fixture with no replaceable bulb.
Next step: Replace a lamp only with one that matches the Kichler label and fixture instructions, and only after the circuit is de-energized. Do not keep using an overheated, damaged, loose, or wrong lamp while waiting for service.
Stop if: Do not exceed the marked wattage, force a lamp into a socket, touch exposed contacts, remove an integrated LED module, or continue if the socket or insulation is scorched.
Why this matters
Why: A non-dimmable lamp, excessive wattage, poor fit, or a damaged lamp can create noise or heat and is a stronger first suspect than the wall wiring. An integrated LED fixture or a correctly specified lamp shifts attention toward the driver, control compatibility, mechanical vibration, or wiring.
-
Check 3
If the buzz changes with a dimmer, record the dimmer brand and model if safely visible, the fixture model if visible from ordinary access, whether the light source is a replaceable LED or integrated LED, and the brightness range where the sound appears. Compare those details with the Kichler product instructions and dimmer compatibility information without opening the control or changing wiring.
Expected result: Record a documented compatible pairing, no compatibility information, a non-dimmable source on a dimmer, noise only near the low end, or noise at every dim level.
Next step: Use the light only at a safe setting if the documentation confirms compatibility and there are no warning signs; otherwise leave it off and have a licensed electrician or qualified lighting technician verify the fixture and control pair. Do not change a dimmer as a trial while energized.
Stop if: Do not bypass the dimmer, install a different control without compatibility confirmation, remove the wall plate, or alter line, load, neutral, or ground conductors.
Why this matters
Why: Noise only with a control setting and missing or mismatched compatibility makes the driver-control pairing the leading suspect. Noise at every level, or a documented compatible pairing with continued noise, makes a failing driver, lamp, loose mechanical part, or electrical fault more likely.
-
Check 4
With the circuit de-energized and the fixture cool, look from a stable floor or properly positioned ladder at the shade, decorative ring, bulb, canopy, and visible mounting hardware. Check for a part that is visibly loose, rubbing, cracked, or vibrating; do not remove the canopy or expose wiring.
Expected result: Record no movement, a loose shade or ring, a bulb that does not seat correctly, a cracked glass piece, a fixture that moves at the ceiling or wall, or access that requires removing a cover or climbing unsafely.
Next step: Only snug an externally accessible decorative fastener if the model instructions clearly identify it and the circuit remains off; otherwise leave the fixture untouched and request licensed service. Keep cracked glass or an unstable fixture out of use.
Stop if: Do not remove a canopy, support a hanging fixture by its wires, handle broken glass, work from an insecure ladder, or tighten anything that requires access to electrical connections.
Why this matters
Why: A rattle that stops when an accessible shade or ring is secure can be mechanical. A cracked shade, unstable mounting, rubbing part, or movement at the box can create falling, cut, or electrical hazards and needs a controlled repair. No visible movement shifts suspicion back to the lamp, driver, dimmer, or wiring.
-
Check 5
With the light off, observe the switch plate and fixture from a safe position for flicker before shutdown, discoloration, warmth, odor, moisture, sparks, or a breaker trip. Note whether other lights on the same area dim or flicker when this fixture operates.
Expected result: Record a quiet, cool fixture with steady light, or any combination of buzz with flicker, hot or discolored switch, burning odor, arcing, shock, water, damaged insulation, or repeated breaker operation.
Next step: Leave the circuit off for any warning sign and arrange a licensed electrician. Tell the electrician whether the sound follows brightness, whether the fixture is integrated LED, the lamp and dimmer details, and what changed before the symptom.
Stop if: Do not reset a repeatedly tripping breaker, touch a hot or discolored switch, test live voltage, open a junction box, or keep using the circuit after smoke, odor, sparks, shock, or water exposure.
Why this matters
Why: Buzzing combined with heat, flicker, discoloration, odor, arcing, or breaker action is an electrical warning, not a bulb-tuning problem. A fixture that is cool and steady but still noisy can remain a driver, dimmer compatibility, lamp, or mechanical issue; a quiet fixture does not authorize opening the wiring.
Use your observations
Decision map
Find the observation that best matches what you see, then follow the next safe action.
-
PATH 01Next step
What you see
The Kichler light buzzes only while dimmed or the sound changes with slider position, and the lamp or integrated LED has no heat, odor, flicker, or visible damage.
Do this next
Confirm the exact fixture and control instructions. If the pairing is undocumented or mismatched, leave the light off and have a qualified electrician select and install a compatible control; do not bypass or rewire it.
Why this path and its safety boundary
Why it matters: The LED driver and dimmer pairing is more likely than a loose mounting part. Kichler and ENERGY STAR both require the light source and dimmer to be checked as a compatible combination.
-
PATH 02Next step
What you see
The sound is a vibration or rattle that follows the fixture body, shade, or bulb, while the dimmer does not change it and the switch and wiring show no warning signs.
Do this next
Keep power off and follow only the exact Kichler model instructions for an accessible decorative fastener. Escalate to licensed service if a cover, canopy, junction box, broken glass, or structural support is involved.
Why this path and its safety boundary
Why it matters: A loose shade, ring, bulb fit, decorative part, or mounting point is more likely than an LED control problem. A cracked shade or fixture movement can still make the light unsafe.
-
PATH 03Next step
What you see
The lamp is correctly rated and seated, the dimmer pairing is documented, the sound occurs at all brightness levels, and no loose external part is visible; or the fixture has an integrated LED source.
Do this next
Leave the fixture off and request qualified lighting or electrical diagnosis. Provide the model information, lamp type, dimmer details, when the buzz began, and whether output or flicker changed.
Why this path and its safety boundary
Why it matters: A failing lamp, LED driver, or internal fixture connection becomes more likely. The outside checks cannot distinguish those parts safely.
-
PATH 04Next step
What you see
Buzzing occurs at the switch or fixture with flicker, warmth, discoloration, burning odor, sparks, shock, moisture, damaged insulation, or repeated breaker trips.
Do this next
Leave the circuit off and arrange a licensed electrician. If there is smoke, active arcing, or a strong burning odor, leave the area and follow local emergency guidance.
Why this path and its safety boundary
Why it matters: An electrical connection, control, branch-circuit, or fixture fault is possible and the condition has crossed the safe homeowner observation boundary.
-
PATH 05Next step
What you see
The fixture remains cool with steady light, no odor or flicker is present, the bulb and dimmer appear suitable, and no accessible mechanical part is loose, but the buzz persists.
Do this next
Stop repeated trial-and-error part swaps and request qualified inspection, especially for an integrated LED Kichler fixture. Keep the model and symptom record for the technician.
Why this path and its safety boundary
Why it matters: The remaining causes include an internal driver or socket issue, a concealed connection, or a control interaction that cannot be confirmed from outside. The lack of a visible warning does not prove the fixture is sound.
Helpful context
Understand the symptom
The sound location changes the next check
A hum that follows dimming is different from a rattle that follows vibration. Listen from the floor without touching the fixture: note whether the sound comes from the lamp or integrated light area, a dimmer or switch, a glass shade, or the ceiling or wall box. A dimmer-linked hum makes the control and LED driver pairing more relevant. A mechanical rattle makes a shade, bulb, canopy, or mounting part more likely. A buzz with flicker, heat, odor, or discoloration must be treated as an electrical warning rather than a nuisance sound.
Kichler fixtures do not share one universal dimmer setup
Kichler notes that the LED driver determines how an LED module reacts to the dimmer, and that a module working with one dimmer is not proof it will work with another. The fixture model, light source, and control instructions matter. Do not infer compatibility from the fact that a bulb is labeled dimmable; use the exact Kichler product documentation and the dimmer documentation before replacing either part.
Keep the home checks de-energized and external
Kichler instructs users to turn power off at its source before cleaning or lighting maintenance, and its installation guidance says to use the fixture instructions and obtain licensed help when uncomfortable. That means a homeowner can record symptoms, read the fixture label, and inspect an accessible shade or bulb after proper de-energization, but should not open the canopy, switch box, LED driver enclosure, or junction box to hunt for the noise.
Only after diagnosis
Potential parts
- dimmable LED lamp
Consider only when the fixture uses a replaceable lamp and the existing lamp is non-dimmable, damaged, incorrectly rated, or not listed as suitable by the fixture documentation.
Match the socket, voltage, enclosure or damp-location rating, wattage limit, dimmable marking, and the exact Kichler fixture instructions. - compatible LED dimmer
Consider only when the buzz follows dimmer position and the Kichler documentation or a qualified evaluation identifies a control mismatch.
Confirm the exact LED driver, load range, wiring arrangement, and control compatibility before a licensed electrician installs a dimmer. - LED driver
Consider only after a qualified diagnosis identifies the internal driver as the source of a persistent buzz in an integrated LED fixture.
Use the fixture model documentation and electrical ratings; do not substitute a driver based only on physical size or connector appearance.
When checks do not resolve it
Need a professional?
Call a licensed electrician for buzzing with flicker, a hot or discolored switch or fixture, burning odor, sparks, shock, damaged insulation, moisture, or repeated breaker trips; leave the circuit off. Arrange qualified lighting service for a persistent buzz after the bulb, documented dimmer compatibility, and external mechanical checks, or for an integrated LED fixture. Do not open the canopy, switch box, junction box, socket wiring, or LED driver enclosure.
Have this ready
- Give the electrician the Kichler model if visible, fixture type, replaceable or integrated LED source, bulb marking and wattage, dimmer brand and model if visible, where the sound is loudest, when it occurs, any flicker or heat, and breaker history.
Common questions
FAQ
Why does my Kichler light fixture buzz only when dimmed?
The LED driver and dimmer may not be a compatible pair, or the combination may be noisy at one part of the dimming range. Kichler says LED modules respond differently to dimmer types. Check the exact fixture and dimmer documentation; do not bypass or rewire the control.
Can a loose bulb or shade make a Kichler fixture buzz?
Yes, a loose bulb, shade, ring, canopy, or other accessible part can vibrate and sound like an electrical hum. Turn power off at the breaker, let the fixture cool, and inspect only from safe access. A cracked shade or movement at the mounting point needs qualified service.
Is buzzing from a light switch dangerous?
Treat buzzing from a switch, or buzzing paired with flicker, heat, discoloration, burning odor, sparks, shock, or repeated breaker trips, as an electrical warning. Leave the circuit off and contact a licensed electrician rather than opening the switch box.
Should I replace the Kichler fixture if it buzzes?
Not based on sound alone. First identify whether the issue is a lamp, dimmer match, shade vibration, or internal driver. If those safe checks do not isolate the cause, have a qualified electrician diagnose the fixture before selecting a replacement.
Read the exact guide
Official sources
- Installation and Care FAQsKichler Lighting · Kichler installation and care FAQ used to set the boundary around model-specific work and professional help.
- Electrical Safety DosElectrical Safety Foundation International · ESFI consumer safety guidance used for buzzing, flicker, warmth, discoloration, odor, and electrical-service boundaries.
- Lighting Cleaning and Maintenance EssentialsKichler Lighting · Kichler general lighting-care guidance used for safe external inspection and bulb-label checks; it is not a repair manual.
- Light Fixtures (Downlights)ENERGY STAR · ENERGY STAR lighting guidance used for the general LED/dimmer compatibility branch, not as a Kichler model approval.
- Using Dimmers With LED LightingKichler Lighting · Kichler lighting guidance used for the dimmer-linked buzzing branch; exact compatibility remains model-specific.
Community feedback
Share a repair observation
Share a plain-text repair observation. Accepted observations are published automatically; this page may take a moment to update.