
On this page
Start here
Quick answer
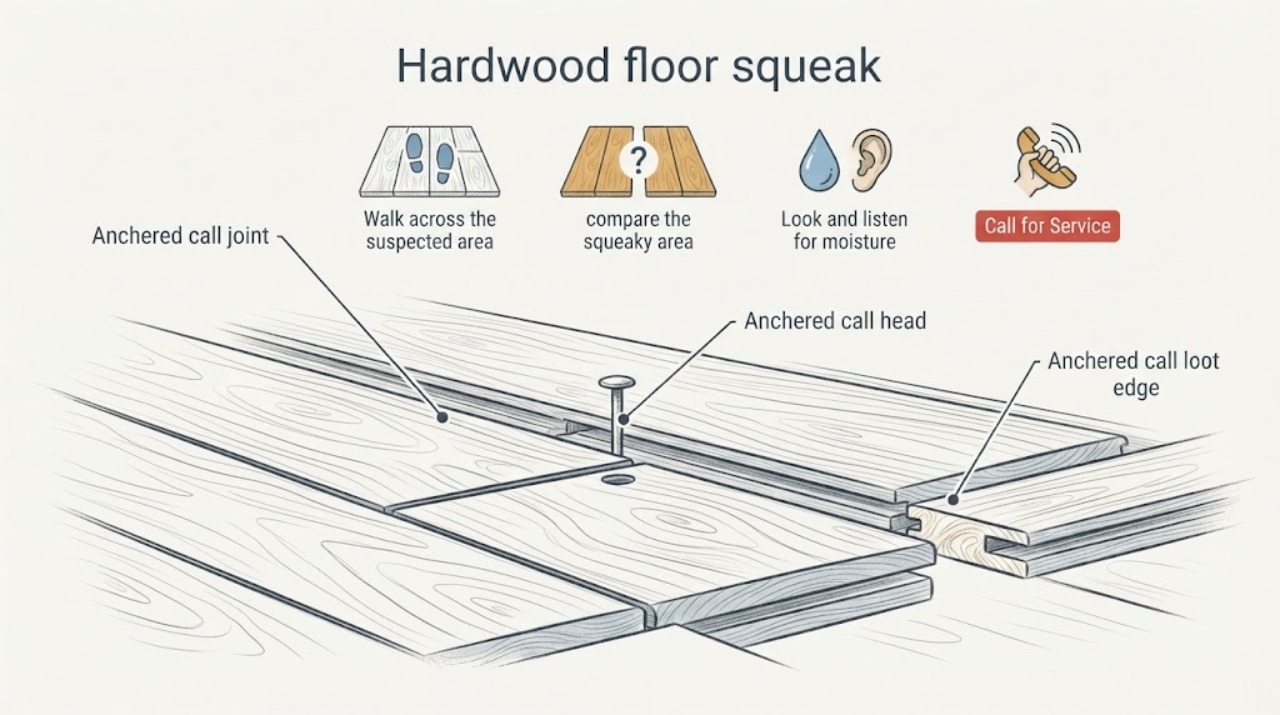
Map the squeak before attempting any repair: walk the area normally and listen for the exact board, seam, threshold, stair, or room where the sound occurs; note whether the floor feels firm, moves, looks swollen or cupped, or shows moisture evidence. A squeak often reflects relative movement between the floor or subfloor and a fastener, but moisture, loose transitions, or a hidden subfloor or structural condition can look similar. Do not drill, nail, remove flooring, pull up a subfloor, or enter an unsafe crawlspace or structural area. If the floor is soft, visibly distorted, wet, newly spreading, or associated with a leak, stop and arrange a qualified flooring or building professional assessment.
Work through in order
Diagnostic checks
Use only checks that match the exact appliance or system and its official guide.
-
Check 1
Walk across the suspected area at a normal pace while a second person listens from a safe position, and mark the smallest repeatable location without stomping or forcing the floor.
Expected result: Record whether the sound is a single squeak, a creak across several boards, a click at a threshold, a stair sound, or a noise that cannot be repeated; note whether it occurs on the step down, the step up, or both.
Next step: Create a simple room sketch or photo with the sound location and give it to the flooring professional; do not drill or nail the marked spot.
Stop if: Stop walking the area if the floor shifts, feels soft, drops, cracks, or becomes unsafe underfoot.
Why this matters
Why: A repeatable localized sound can help a flooring professional target the finished-floor and subfloor interface; a broad or changing sound needs a wider assessment rather than a guessed fastener repair.
-
Check 2
From the finished floor, compare the squeaky area with an adjacent quiet area using normal footsteps and a visual check; do not pry, lift, or strike the boards.
Expected result: Note a firm surface, visible gap, raised or cupped board, cracked finish, lifted edge, uneven transition, or a soft or springy feeling under ordinary weight.
Next step: Photograph the contrast and report any distortion or softness as a priority to a qualified flooring or building professional; keep traffic light over a suspect soft spot.
Stop if: Stop and keep people away if the floor is visibly failing, unstable, wet, or soft enough to suggest a void or substrate problem.
Why this matters
Why: A firm and visually intact localized squeak is different from a soft, distorted, or damaged floor that may involve moisture, the subfloor, or a structural condition.
-
Check 3
Look and listen for moisture clues around the squeak from the finished side and nearby accessible rooms, without probing the wood or opening the floor.
Expected result: Record a recent spill or leak, damp odor, staining, swollen or cupped boards, finish changes, condensation, or a squeak that appeared after a seasonal humidity or plumbing event.
Next step: Document the event and arrange professional moisture assessment; do not cover, seal, drill, nail, or remove boards to hide or expose the condition.
Stop if: Stop if water is active, the floor is wet or slippery, mold-like growth is suspected, or the moisture source could involve plumbing or structural damage.
Why this matters
Why: Moisture can change wood dimensions and floor performance; a moisture-linked squeak may require finding and stopping the moisture source before any cosmetic or fastener repair.
-
Check 4
Compare the sound's location with room boundaries, door thresholds, stairs, perimeter walls, heating registers, and visible transitions while staying on safe finished flooring.
Expected result: Note whether the squeak follows a seam or transition, is concentrated at a stair or landing, occurs near a wall or register, or spans a line between rooms; do not remove trim or registers.
Next step: Add the location to the sketch and tell the flooring professional what is above and below it if known; leave access and assembly inspection to the professional.
Stop if: Stop if the location requires moving heavy fixtures, opening trim, removing a register, or entering a crawlspace, attic, or other restricted area.
Why this matters
Why: A location at a transition or stair may need a different inspection from a squeak in an open field of floor; the location helps scope the service visit but does not select a repair part.
-
Check 5
Track whether the squeak changes with ordinary seasonal conditions or remains constant, using the same safe walking route and notes rather than changing the floor assembly.
Expected result: Record whether it is new after a leak, louder in humid or dry conditions, limited to one area, or progressively spreading; do not treat a temporary quiet period as proof that the assembly is sound.
Next step: Give the timeline and conditions to a qualified flooring professional and request an assessment that accounts for the floor type and substrate.
Stop if: Stop monitoring and call sooner if softness, visible distortion, active moisture, or a new crack or level change appears.
Why this matters
Why: A seasonal pattern can support a wood-moisture movement hypothesis, while a progressive or persistent change warrants inspection for substrate, fastening, or hidden moisture conditions.
Use your observations
Decision map
Find the observation that best matches what you see, then follow the next safe action.
-
PATH 01Next step
What you see
The floor is soft, unstable, visibly distorted, dropping, or associated with active water or a leak.
Do this next
Keep traffic off the area, stop investigating, and arrange prompt flooring and, if needed, plumbing or building-professional assessment; do not expose the subfloor yourself.
-
PATH 02Next step
What you see
The squeak is dry, firm, localized, repeatable, and has no visible moisture or level change.
Do this next
Request a flooring professional to scope the exact location and floor construction; a targeted repair may be possible, but no specific kit or fastener is guaranteed before inspection.
-
PATH 03Next step
What you see
The squeak began after a spill, leak, humidity change, or visible cupping, swelling, or finish change.
Do this next
Prioritize finding and stopping the moisture source and have the flooring system assessed before any repair or replacement decision.
-
PATH 04Next step
What you see
The sound is concentrated at a stair, transition, wall edge, or broad line and cannot be localized to one board.
Do this next
Give the professional the marked path and nearby construction details; do not remove trim or flooring to search for the cause.
-
PATH 05Next step
What you see
The sound is not repeatable or changes with traffic and conditions.
Do this next
Keep a short location and condition log, avoid forceful testing, and schedule service if it persists, spreads, or is accompanied by softness or moisture.
Helpful context
Understand the symptom
What a squeak can mean
A walking squeak is commonly produced by relative movement in the floor assembly, but the sound alone does not identify which layer is moving. Seasonal humidity can make wood swell, shrink, cup, gap, or split, and a moisture-related change can make a previously quiet floor noisy. Location, repeatability, floor feel, and moisture evidence are more useful than a guess based only on sound.
Map it from the finished surface
Use ordinary walking and listening from the finished floor, ideally with another person marking the location from a safe position. Compare a quiet neighboring area and note whether the sound occurs on a single step, along a line, at a doorway, near a stair, or across a wider patch. Do not try to force the floor to move or access the assembly just to improve the diagnosis.
When a squeak needs more than a floor repair
A dry, firm, localized squeak can be scoped by a flooring professional without assuming a particular part or fastener will solve it. A soft spot, swelling, persistent dampness, leak history, or change in level raises a different moisture or substrate question. The professional may need non-invasive moisture readings and a controlled inspection; the homeowner should not drill, nail, remove boards, or expose the subfloor to investigate.
Only after diagnosis
Potential parts
- floor-squeak-repair-kit
Only consider a repair kit after a qualified flooring professional confirms the floor construction, exact source of movement, and a compatible non-structural repair method.
Floor type, finish, subfloor, access, warranty, and repair method vary; a kit is not a substitute for diagnosing moisture, substrate, or structural conditions. - moisture-meter
Only consider a non-invasive meter for documenting accessible finished flooring or for professional assessment after a moisture clue is observed; readings do not identify the leak source by themselves.
Meter readings depend on species, construction, instrument, and calibration; have a flooring professional interpret them and do not use a pin or probe to investigate the floor.
When checks do not resolve it
Need a professional?
Arrange qualified flooring service for a persistent or spreading squeak, a squeak with moisture or distortion, a soft area, a stair or transition issue, or any condition where the floor assembly must be accessed.
Have this ready
- Provide the room sketch, repeatable sound location, walking direction that triggers it, photos of gaps or distortion, moisture or leak history, seasonal pattern, floor type if known, and information about the space below.
Common questions
FAQ
Does a squeaky hardwood floor always need nails or screws?
No. Squeaks can involve relative movement, moisture-related wood changes, transitions, subfloor conditions, or other construction details. Mark and document the sound, then have the floor construction and cause assessed before selecting a repair.
Can I drill or nail through the floor to stop the squeak?
Do not guess at a fastener repair. Drilling or nailing can damage the finish, utilities, flooring, or a hidden condition and may not address moisture or substrate movement. Use observation-only checks and arrange professional service.
Why does the squeak change with humidity or seasons?
Wood gains and loses moisture with its environment, which can change dimensions and the way the floor assembly moves. A seasonal pattern is useful evidence, but persistent or damaging symptoms still need professional assessment.
Read the exact guide
Official sources
- Evaluation of Test Method for Assessing the Propensity for a Subfloor Fastener to Cause Floor SqueaksHome Innovation Research Labs · The research report describes relative movement between subfloor material and fasteners as a prominent cause of squeaks, supporting location and movement observation without prescribing homeowner structural work.
- Problem PreventionNational Wood Flooring Association · NWFA explains that wood reacts to environmental moisture, can swell or shrink, and that large or persistent floor changes warrant professional help.
- National Wood Flooring Association Technical Publication: Installation GuidelinesNational Wood Flooring Association · The technical publication describes moisture testing as part of flooring quality control and notes that hidden subfloor conditions can affect the flooring system; it is professional guidance, not a homeowner repair procedure.
Community feedback
Share a repair observation
Share a plain-text repair observation. Accepted observations are published automatically; this page may take a moment to update.